Welcome to the official Janome.com Blog Page!

  • 10/20/2021

    Add some seasonal charm to your season by adding some lovely pillows to your home decor with a fantastic pattern by Janome Maker Fran Gulick from Cotton+Joy!  Today's project is the first of 4 lovely patterns she has designed just for you! 


    Hola! I am Fran Gulick, a Chilean quilter living in Spokane, WA, and a Janome Maker. Quick projects like table toppers and pillows are my favorite way to take care of the holiday sewing itch without spending a ton of money and without the time commitment of larger projects like a full quilt. They are always fun and fast to make, and can make great gifts too!


    That’s why I am so excited to share with you four pillow projects you can swap when a new season/holiday arrives throughout the year. Whether you are a quilter with experience or a beginner, you will love these quick and fun projects! 


    First up is the Scrappy Fall pillow! This is the pillow that inspired all of the projects. A couple of years ago I made a fall quilt using my Solstice Lights pattern and it’s one of my favorite quilts to use. I’ve been staring at the leftover scraps in my scrap bins ever since and I finally decided to use some of them to make a pillow cover. Download your free PDF Scrappy Fall Pillow Pattern HERE! 


    So I gathered up my scraps and grabbed a matching fat quarter from my stash for the background and got to sewing. I wish I had taken more pictures of the process but this is one of those projects that comes together so quickly, I didn’t even have time to, haha. I did the math, cut, pieced, quilted, and bound this beaut in one afternoon!


    For quilting, I decided to go with a classic grid quilting with black thread. I used my Hera marker to mark my lines about 3” apart and then got to quilting on my Janome 9450


    This is my first time adding binding to a pillow cover, and I have to say I am a big fan! I love how it adds a little something to this otherwise pretty minimalist pillow cover.


    I hope you enjoyed this project and don’t forget to come back for future seasonal/holiday pillow projects!


  • 10/18/2021

    There is nothing that says fall like pumpkins! Janome Artisan Mitzi Redd has created a delightful quilt pattern that includes a collection of colorful pumpkins made with precuts for a fast finish! 

    So how about a little bit of pumpkin spice for all who are nice? A few weeks ago I thought it would be really fun to work up a fall-themed quilt since I actually don’t have one around the house. Now that I’m also working a full-time job in the banking industry again my quilting time has unfortunately become very cramped, so I knew it would have to be something that would not only be quick, and easy but also fast to finish. Thankfully I was able to wrap up those ideas into one very fun-themed pumpkin quilt. The great thing about this design is that you can take the same pumpkin block shown in the quilt and use it as a stand-alone piece for a pillow, use multiple ones for a table runner, or use your imagination and turn it into anything and everything you might like.


    The pumpkin blocks are unfinished at a 16 1/2″ x 16 1/2″ square that you will then trim down to a 16″ square before putting it into the quilt, which makes them a great size to use for all your decorating wants and needs. Just let your imagination run free with thoughts of pumpkin spice filling the space.

    For the quilt shown, I went into my fabric stash and pulled out a 1 1/2″ honey bun roll from Moda Fabrics. The fabric used is Cider by Basic Grey for Moda Fabrics.  I absolutely love using precut fabrics. It can really save you time on your cutting and piecing when they are all ready to go for you. While the quilt only calls for 5 pumpkin blocks, one 40 strip honey bun roll will actually give you 9 pumpkins. Be aware though, the measurements for the quilt are only provided for making 5 pumpkins.

    While the design may look tough, it’s a very easy quilt to make. The key is making sure your 45-degree angles are cut correctly, so do you take your time. The directions do show a visual to help you make the cuts but don’t fret in case you make a mistake and have to recut, you have no idea how many times I did before it made sense and I could figure out how to explain it to someone else. As always, in case there is confusion, just let me know and I’ll gladly help walk you through it.

    Now, let's talk about the dramatic parts of the quilt that you see in the picture, the plain tan blocks with the intricate quilt designs. I would love to take ownership of all that beautiful work but it wouldn’t be honest of me to do so. The designs used are purchased designs from the website Embroidery Library called Autumn Kaleidoscope Quilting


    Since I quilt using the Janome Horizon Quilt Maker Memory Craft 15000, it was very easy to set up the design, slightly resize it to fit my blocks, and stitch away. The hoop I used for my MC15000 was the ASQ22 embroidery hoop. This hoop comes with a hard plastic grid for placing the quilt in the hoop, and heavy-duty magnets to hold it all in place. Now, I could have saved even more time using the Janome AcuSetter and my Ipad, but I chose to do it by manually placing the quilt in the hoop and working it through the placement on the screen. I chose to do it this route because my Ipad battery was dead and by the time it was charged I was cranking right through all the designs and just decided to stick with how I had started. As you can see from the photos, June also enjoyed me taking my time on the quilt as she “held it down” every time I tried to step away.


    After completing the main blocks, I then moved on to finishing the areas around the pumpkins and the borders. For the area around the pumpkins, I chose just a meandering free-motion stitch. The pumpkins and borders were then stitched with straight lines to just fill in the areas. I used an echo-style ruler stitching for the inside of the pumpkins and then moved to cross-hatch lines for the borders. I did choose to use the Janome Ruler Work foot for both the free motion meandering stitching as well as the ruler work areas instead of switching out feet for different techniques. These types of stitching also helped to keep the pace moving quickly as I worked to get the quilt completed before the first of October.

    Once all the quilting was completed, it was easy and quick to trim the quilt and bind. I chose to bind the quilt in the same blue shade as the borders to keep the consistency but you can certainly pick if you want your binding to blend or pop off the quilt. For binding, I used 6 strips of fabric measuring 2 1/2″ by the width of fabric and chose to machine stitch it all the way versus any hand binding (again to save time).

    Overall the techniques of combing quilting and embroidery work into the quilt helped to not only speed up the process but also add a new element of beauty to the design. For those who don’t have access to a longarm machine, it can sometimes be discouraging to see some of the gorgeous quilts completed with the automation system. I encourage you to look at your own embroidery machine and put it to work doing the quilting work for you. No embroidery machine? No problem there either, there are plenty of beautiful stencils out there you can trace, or maybe you are one of the amazing people who can draw (I can’t draw a stick figure) and can take the chalk and draw out your own design to stitch out. Don’t be afraid to put your machine to work and let it work for you. You may just be surprised to discover just how little of your machine you’re actually using. Embroidery, decorative stitches, quilting techniques, are all there at your fingertips.

    Notes:

    The fabric used for the quilt shown is by Basic Grey for Moda Fabrics in the Grunge and Cider fabric lines.

    Piecing, quilting, and embroidery are all completed on my Janome Horizon Quilt Maker Memory Craft 15000. See your local Janome dealer for details about the MC15000 and all the other machines in the Janome family of sewing, quilting, embroidery, and sergers.

    Enjoy the pattern, Pumpkin Spice, and Everything Nice!

  • 10/11/2021

    Does your winter wardrobe include a cozy robe? This robe created by Janome Maker Vivien Lee from Fresh Fripperyis the must sew project of the season to keep you toasty warm during the cold winter months! It is a fabric hug! What could be better than a fabric hug? 


    Tutorial for Cozy Halloween Robe Made with Cuddle Minky Fabric As someone who loves both fall and Halloween it is the perfect time of year for me to make a cozy robe made of super soft Cuddle minky fabric using my Janome Skyline S9. The print I chose is called "Eye of Newt" by Shannon Fabrics. A lot of robes are only a single layer but I wanted to have mine lined with plush fabric for extra warmth and luxury. I used "Luxe Cuddle Glacier" (a textured black minky fabric) for my lining.


    img_1img_2              


    Note: I am a member of the Janome Maker program and this skirt is sewn on a Janome Skyline S9. (This post is sponsored by Janome but all content and opinions are mine). All the fabric was gifted by Shannon Fabrics.

    img_3


    Please read through all instructions before starting projects. Please note that there are numbers without instruction, it is a technical issue and not misssing steps. 

    WHAT YOU WILL NEED (exact amounts depend on your measurements and the width of your fabric):

    • 4 or more yards of 58-60 inch wide fashion fabric (minky or fleece fabric)
    • 2 or more yards of 58-60 inch wide lining (more minky for extra softness, or a non-minky fabric if you want a lighter robe)
    • thread, elastic, pins, scissors, chalk, etc.

    PATTERN: Any wrap robe pattern with a shawl collar can be used as a base. I adapted Butterick 6837 view A with modifications in order to turn it into a lined robe. I used this pattern because I already had it on hand from making PJ bottoms for my family, but if you use this pattern you may want to make these same changes:

    • Keep in mind this pattern runs large and you should size down unless you have broad shoulders or a large torso.
    • I added a lining, which the pattern does not include instructions for, so my construction methods are adapted for that.
    • I shortened the robe to make it knee-length instead of calf-length.
    • The belt loops and pockets are very large and the recommended placement on the pattern is too low.
    • Since this robe is lined, it is not necessary to cut separate collar pattern pieces because the robe fronts already have the under collar attached, and you will cut out collar facings.

    CUT OUT THESE PIECES OF FABRIC: Robe (out of your fashion fabric): 2 fronts, 1 back, 2 collar facings, 2 sleeves, 2 sleeve cuffs, 2 sleeve facings, 2 pockets, 2 belt loops, and 1 belt Lining (out of your solid fabric): 2 fronts, 1 back, 2 sleeves FABRIC PREP: Wash and dry your fabric before cutting and sewing. (Cuddle minky can be machine-washed on gentle in cold water, and then dried on low heat). Serge all sides of the pockets. The rest of the pieces do not need to be serged because raw seams will be hidden by the lining or turned inside (like the belt). CONSTRUCTION OF THE ROBE FASHION LAYER:

    1. Make the belt loops by cutting out two rectangles that are 5 inches by 3 inches. You will make a tube by folding the right sides together lengthwise, stitching it down, and then turning right side out. (Alternatively, you could make one long 10-inch tube and then cut it in half). Set aside.img_4
    2. Sew the 2 fronts to the back at the shoulder seams. Do not sew the side seams yet.
    3. Sew one sleeve cuff to the bottom of each sleeve
    4. Sew the top of each sleeve to the shoulder where the front/back meets.
    5. img_5
    6. Pin the side front to the side back (right sides together). Pin belt loops at waist level, sandwiching them between the front and back, with the unfinished ends inside the robe.img_6
    7. Sew the sleeve seam and side seam shut as one long continuous seam, catching the belt loops as well. (The reason why you don't assemble the sleeves and top separately and then try to sew them together is so you don't need to carefully set the assembled sleeve into the armhole opening and try to make it fit).img_7
    8. To make the pockets fold all the edges of your pocket piece inwards, with the top part having a deeper fold. Pin the pocket to your robe fronts at the desired location (checking that they are at a comfortable level for your hands). Top-stitch the sides and bottom to sew the pocket into place.
    9. img_8                         img_9
    10. Stitch the two shawl collar facings at the center back seam. Then put the curved facing edge along the curved front edge and stitch together.img_10img_11
    11. To make the belt you will need to cut out a very long rectangle (78 inches x 5 inches) with diamond pointed ends. Fold the right sides together lengthwise and stitch all along the edges, leaving a 4-inch area unstitched towards the center of the belt. You will use this opening to pull the right sides out.
    12. After the belt is right side out, fold the raw edges in and pin the opening shut. Topstitch the opening closed, and continue to topstitch the entire perimeter of the belt. This will make the belt lie flat since the fabric is puffy. (See below for a comparison).img_12

    CONSTRUCTION OF THE LINING: The construction of the lining is very similar to that of the fashion fabric but you do not have pockets, belt loops, or the belt. You also need to note the directionality of the sleeve facing.

    1. Sew the 2 fronts to the back at the shoulder seams. Do not sew the side seams yet.
    2. Sew the sleeve facing to the bottom of the sleeve lining. If you have a print, sew the sleeve facing with the print upside down since it will be flipped up when the cuff is rolled.img_13
    3. Sew the top of each sleeve to the shoulder where the front/back meets.
    4. Sew the sleeve seam and side seam shut as one long continuous seam (as seen in step 6 of the robe construction).

    ASSEMBLY:

    1. Put the lining inside the robe fashion layer, wrong sides together. (Put the lining sleeve into the robe sleeve).
    2. Pin the curved edge of the lining front to the robe front, then sew them together. (Remember that the robe front is already attached to the collar facing, forming a sandwich consisting of collar facing, robe front, and lining. The right sides of the printed collar facing and fronts are together, while the wrong sides of the front and lining are together).img_14
    3. Flip the collar facing inside the robe, covering part of the lining. To finish the collar facing: Topstitch the outer edge of the collar facing about a half-inch from the edge. Fold the raw edge of the other side under and slip stitch closed to the lining (indicated by the pins).
    4. img_15img_16
    5. To finish the sleeve cuffs: Line up the bottom edges of the sleeve cuffs and sleeve facings and fold the raw edges of both inward. Top stitch the edge closed, then flip the finished cuff up to show off the sleeve facing.img_17
    6. Hem the bottom of the robe: Fold the bottom of the robe inside, covering the raw edge of the lining, then fold the robe fabric inward again to hide the raw edge. You may want to cut some excess lining before hemming to reduce bulk. Sew down the edges to finish the robe. img_18
    7. Put the belt through the belt loops and you have a finished robe!img_19

    Thank you again Janome and Shanon Fabrics for making this project possible! I hope everyone has a beautiful fall season!img_2

  • 10/6/2021

    Trying new things on your Janome machine is a great way to feed your creative spirit! Whether it is a new technique, tool, or even if it is just going outside of what you usually do, it can be exhilarating! Janome Maker Meredith from Olivia Jane Handcrafted is trying out the embroidery feature on her Janome Skyline S9 + Janome Artistic Digitizer Software! 


    I've been sewing on my Skyline S9 for a few years now. At first, I was rather intimidated by the embroidery features of the machine, but once I decided to dive in, I realized how much versatility that the machine has when paired with Janome's Artistic Digitizer software. The Janome Artistic Digitizer software is extremely powerful, and my favorite part is that I can take artwork I love and digitize it for embroidery. One of the first projects I did when learning the software was a collection of framed embroidery made from images of some of my favorite fabrics. Today I'm going to show you how you too can create a beautifully textured embroidery based on a favorite fabric. I have framed mine, but you can feature it on a shirt, a pillow, bag, or whatever you like! 
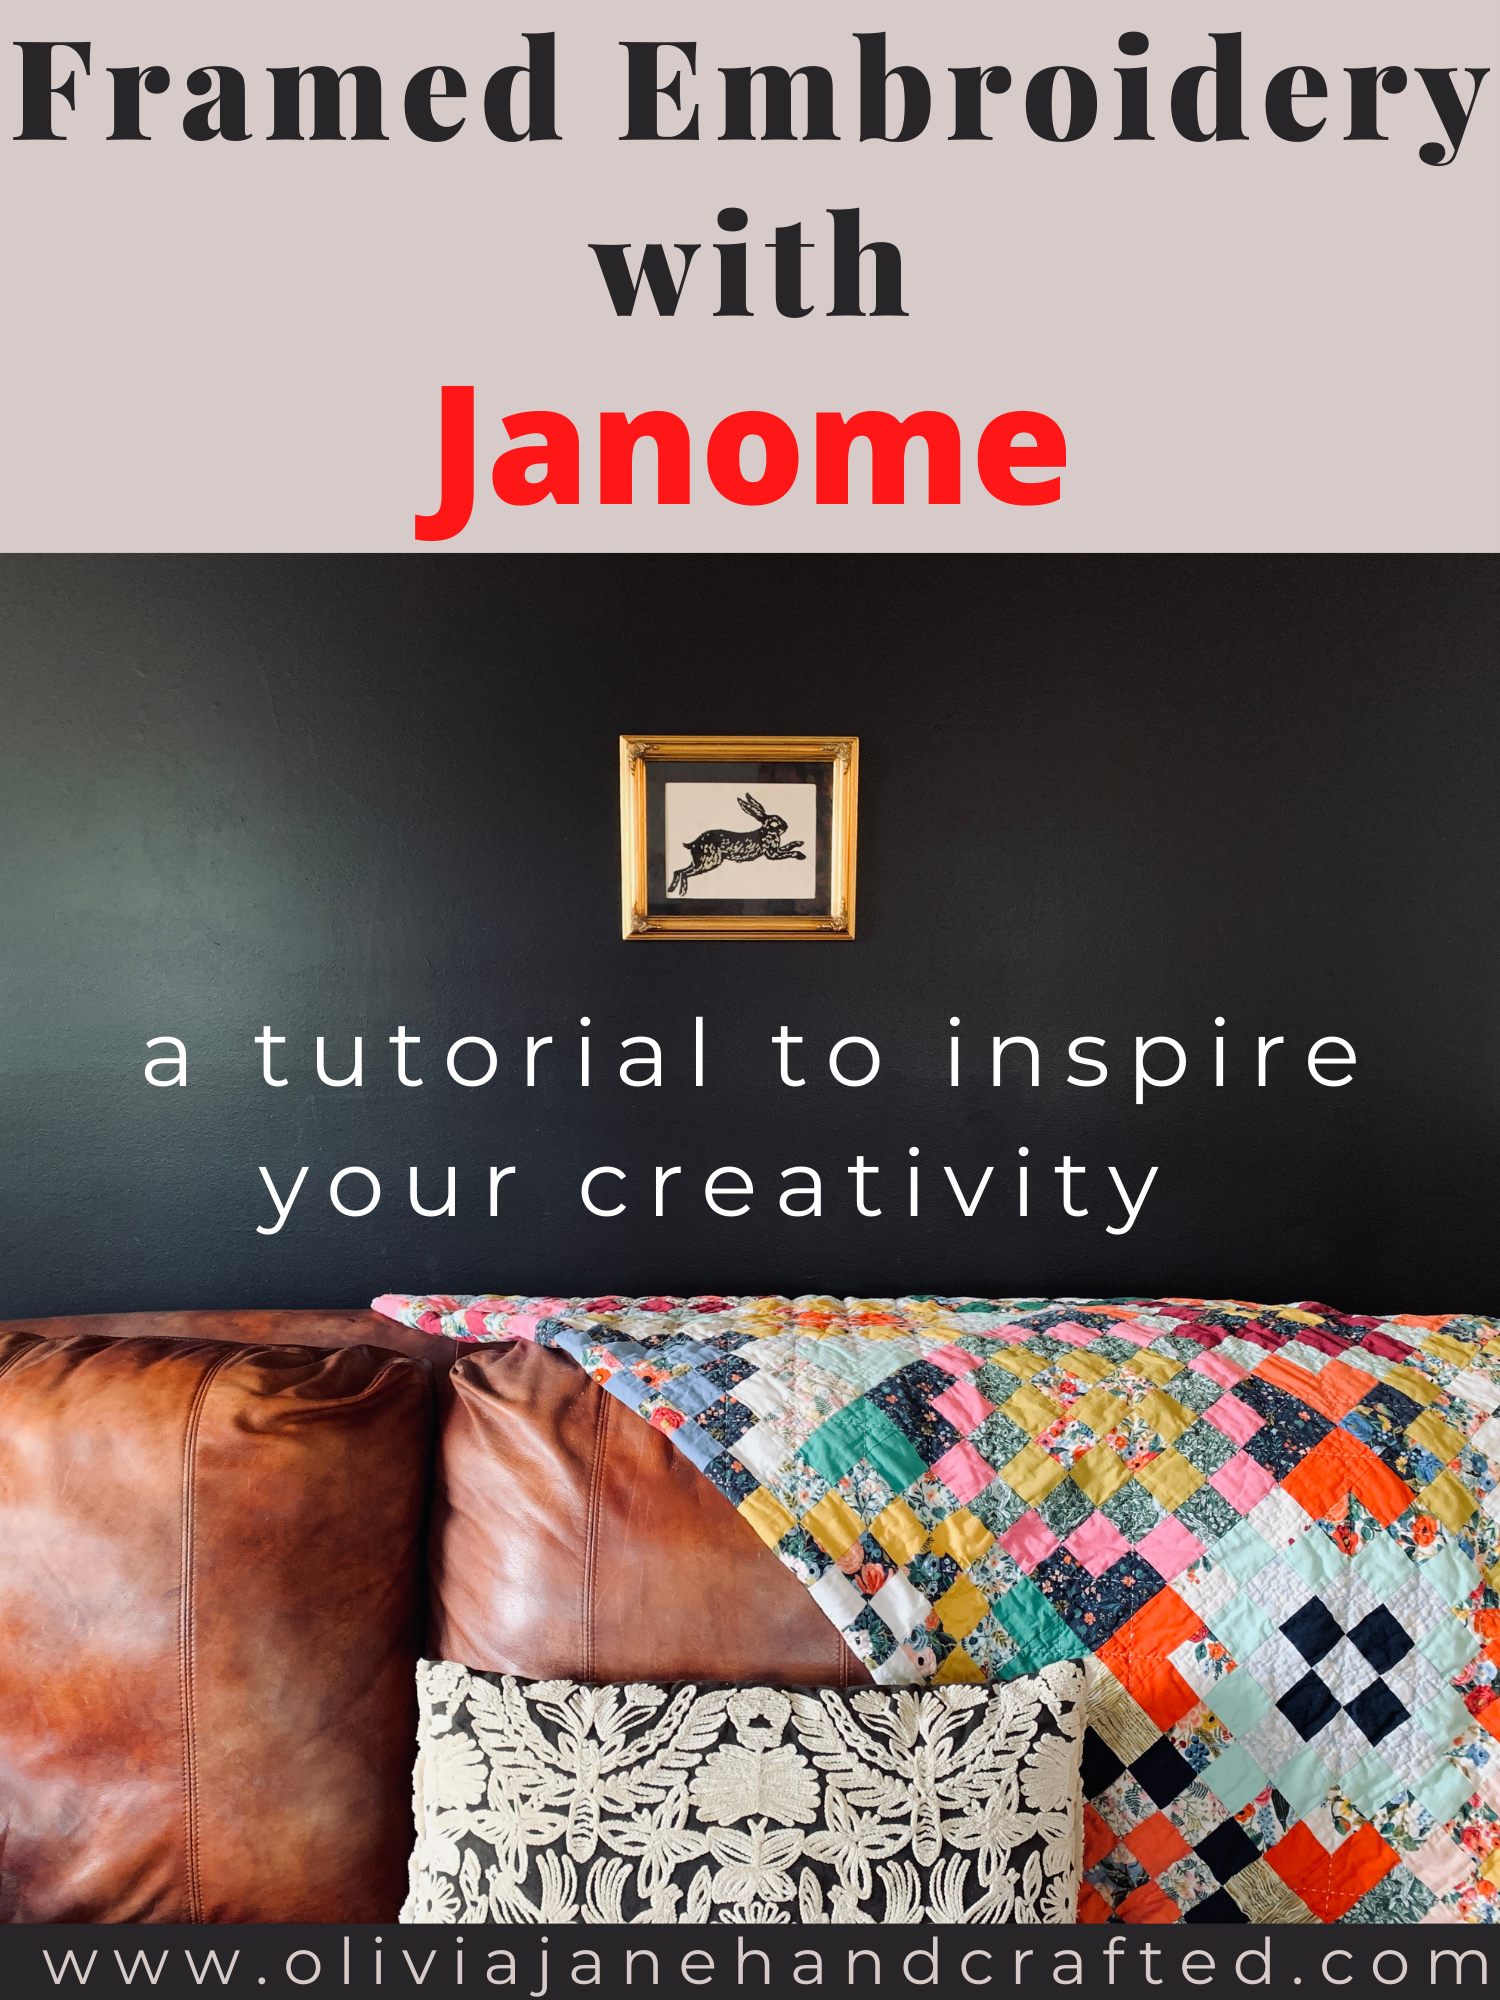


    framed embroidery tutorial


    important note: Because this is a project-based off on the artwork (fabric) of someone else, please keep in mind that without express written permission, it would be entirely unethical and illegal to sell or distribute work you make that is created using the art of another person. So do this only for your own personal enjoyment and do give credit when posting. This tutorial is for private use only. I am using a digital image of a very favorite fabric, Fable by Anna Bond of Rifle Paper Co. Prior to uploading the image to Janome Artistic Digitizer, I cleaned up the surrounding motifs in PixlrX, which is just a free online editing program that makes it easy to remove other parts of an image. Once I had gotten the image down to only the rabbit I wanted to stitch, I opened the Janome Artistic Digitizer Software and opened a new project for the RE20 hoop, which is the largest hoop available for the Skyline S9.
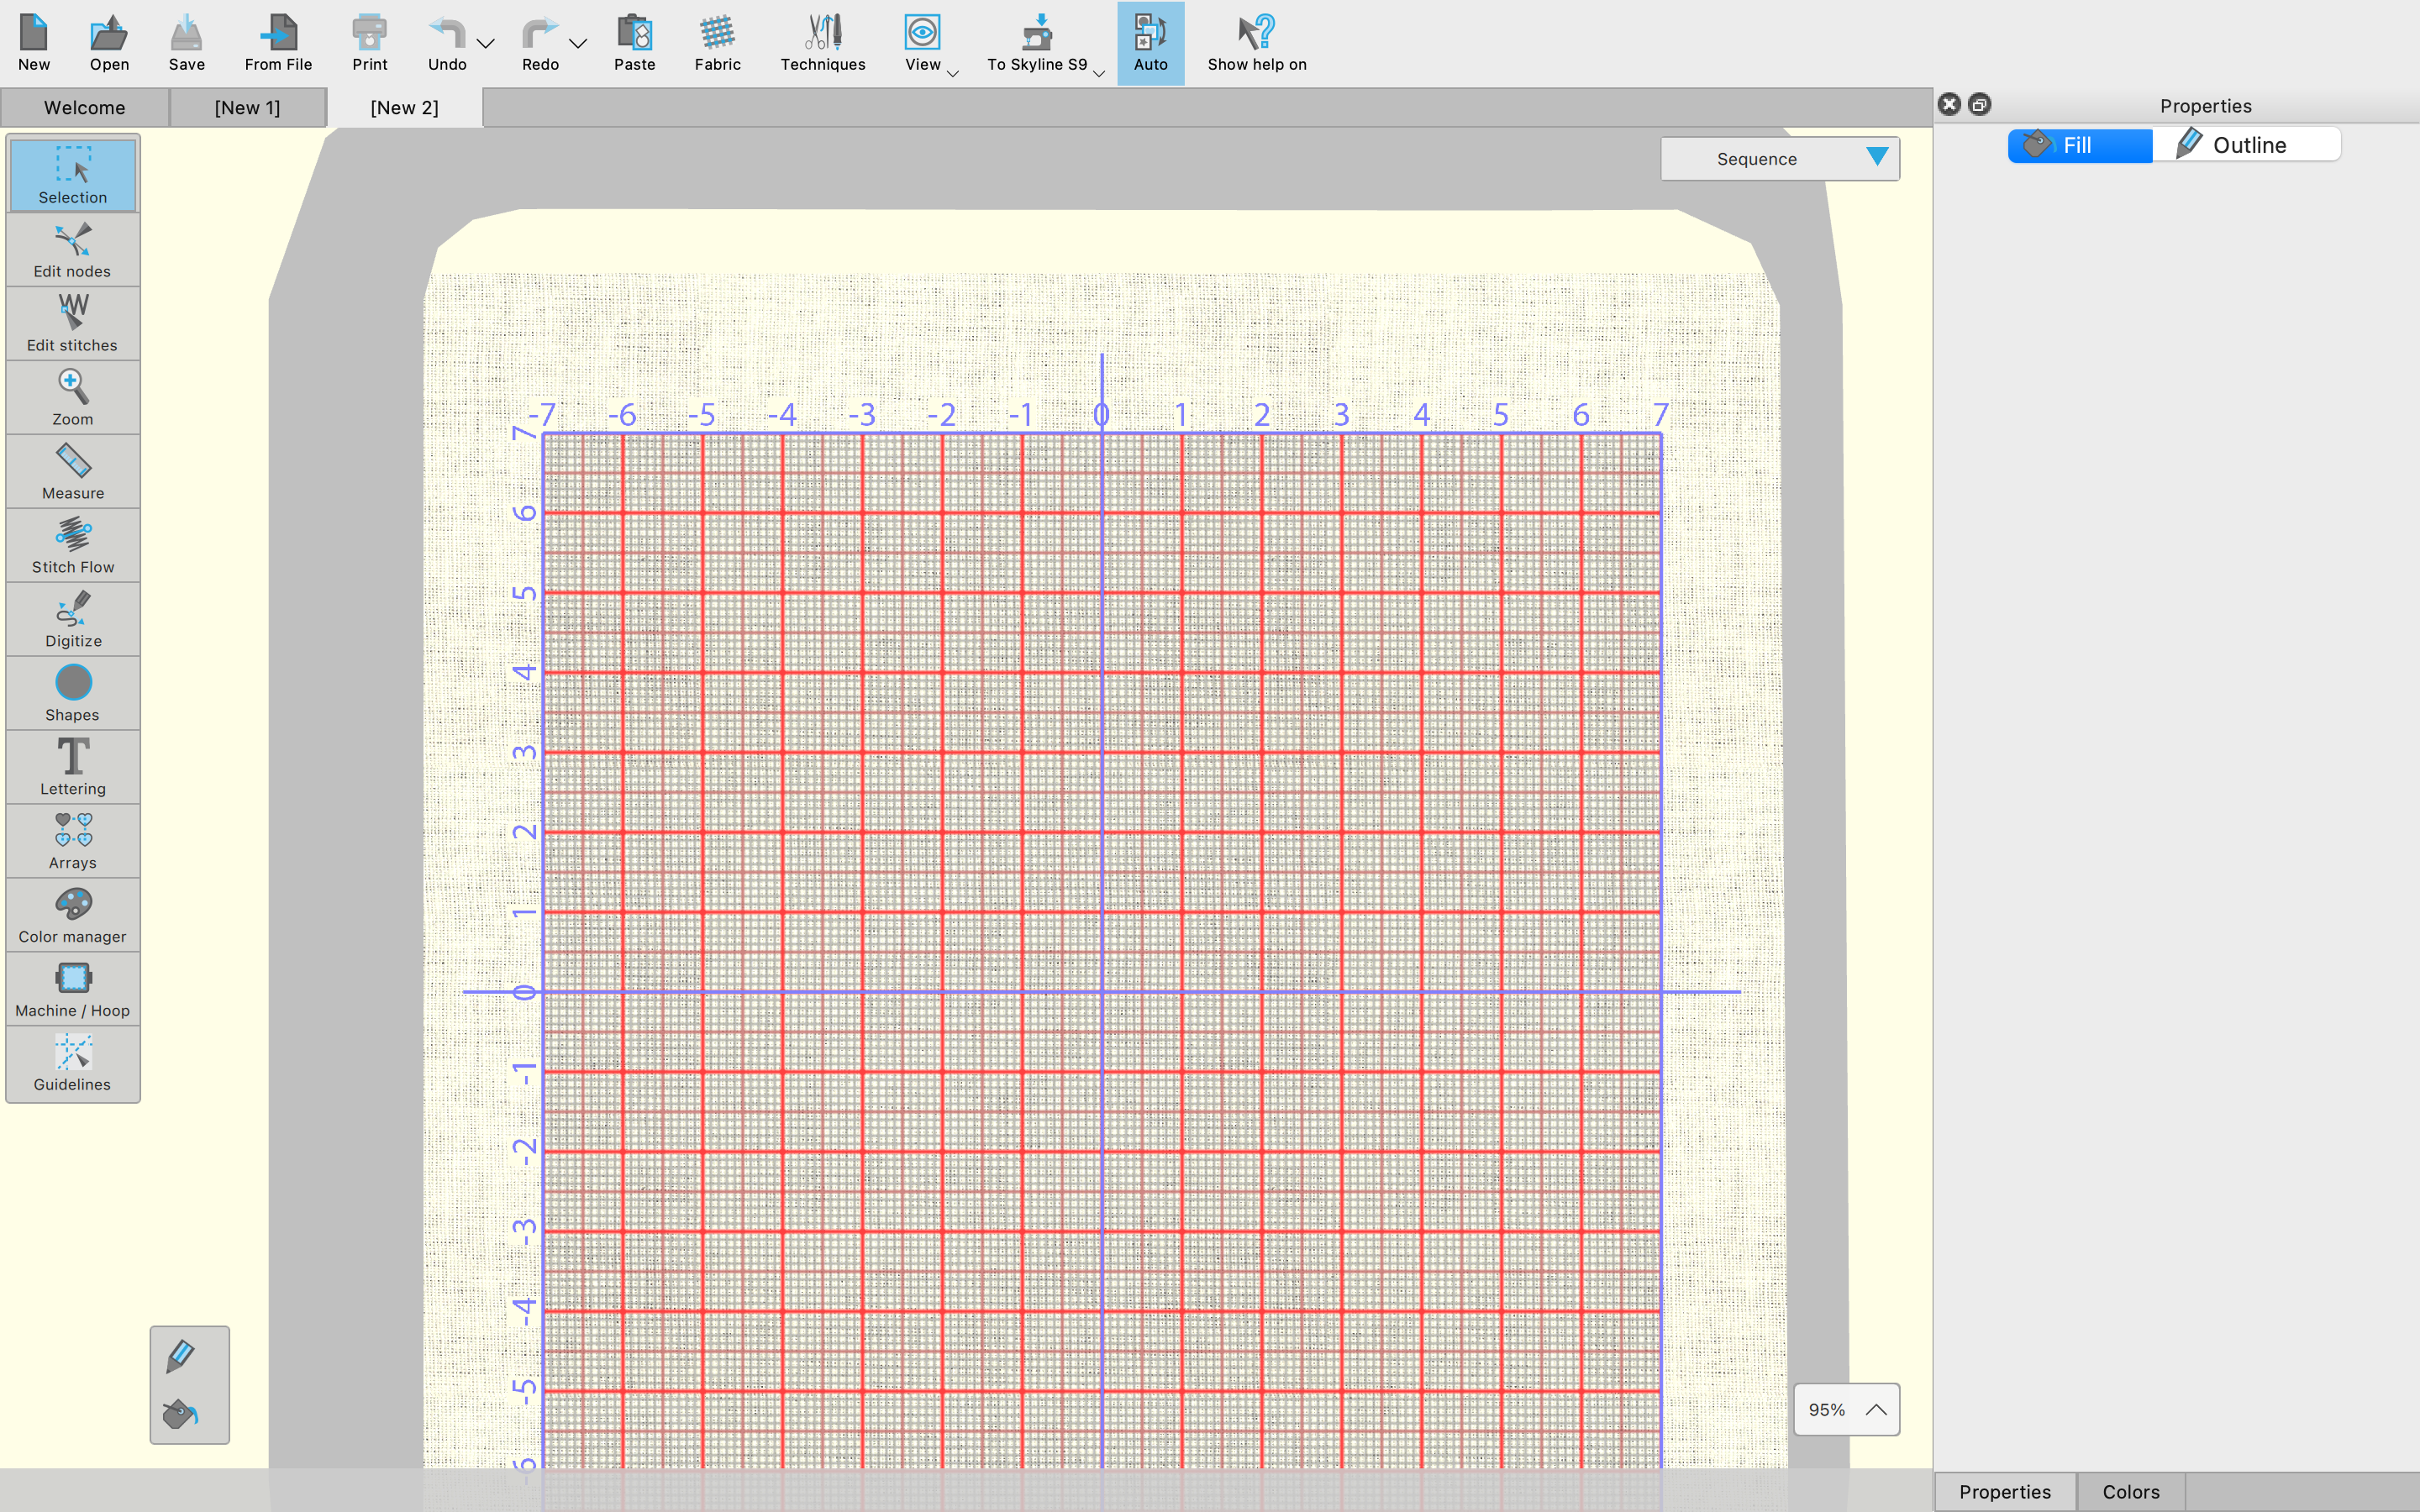
     

    new artistic project


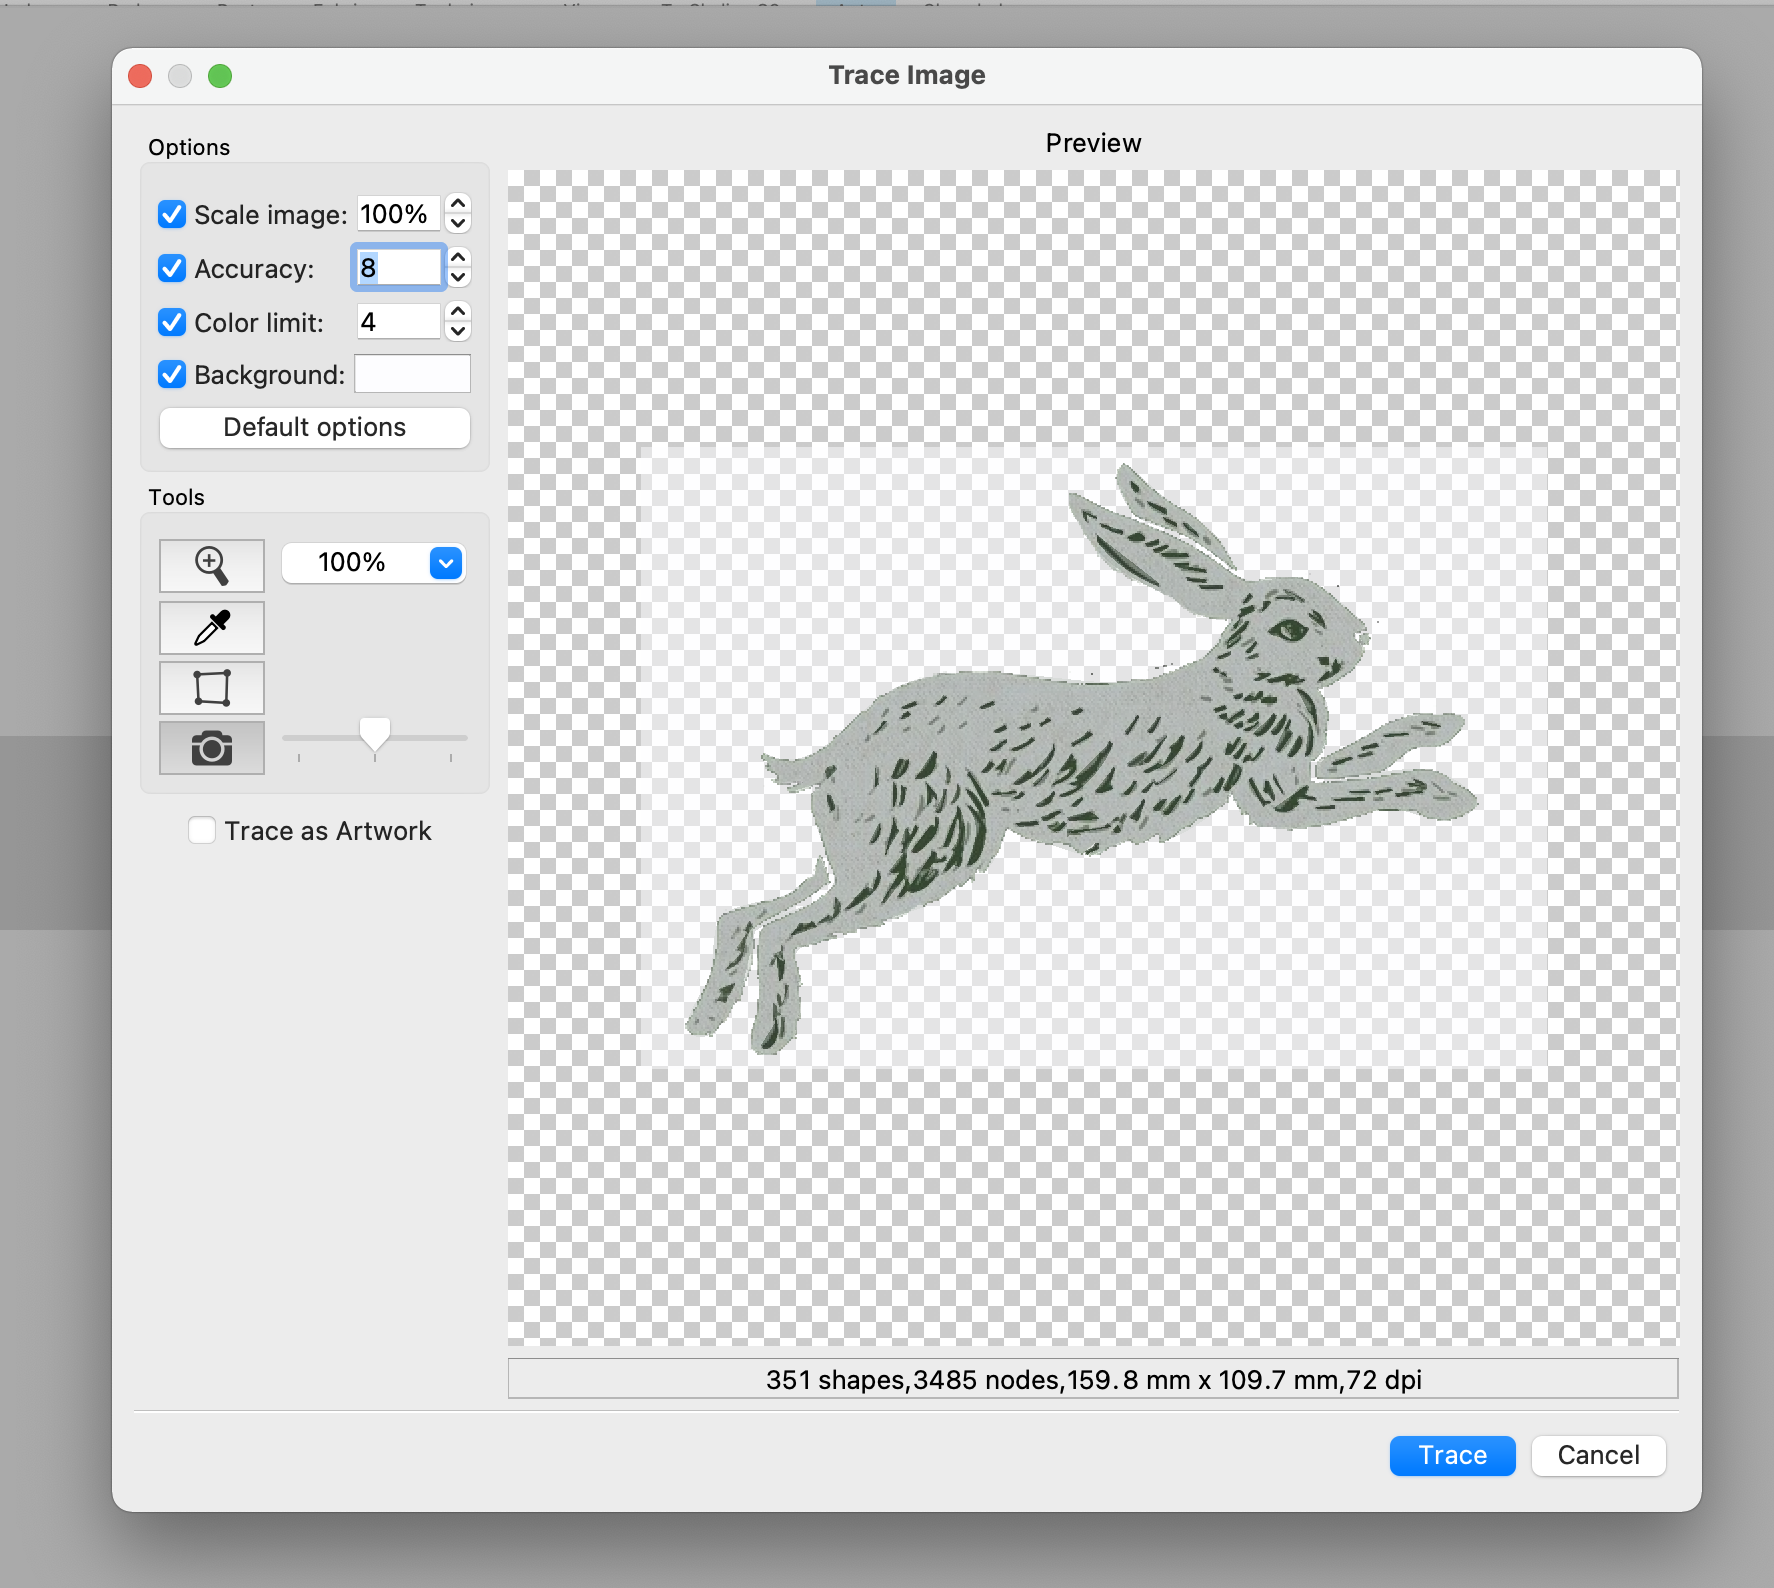
    I selected the image, which I had saved as a PNG, and then made the following selections:
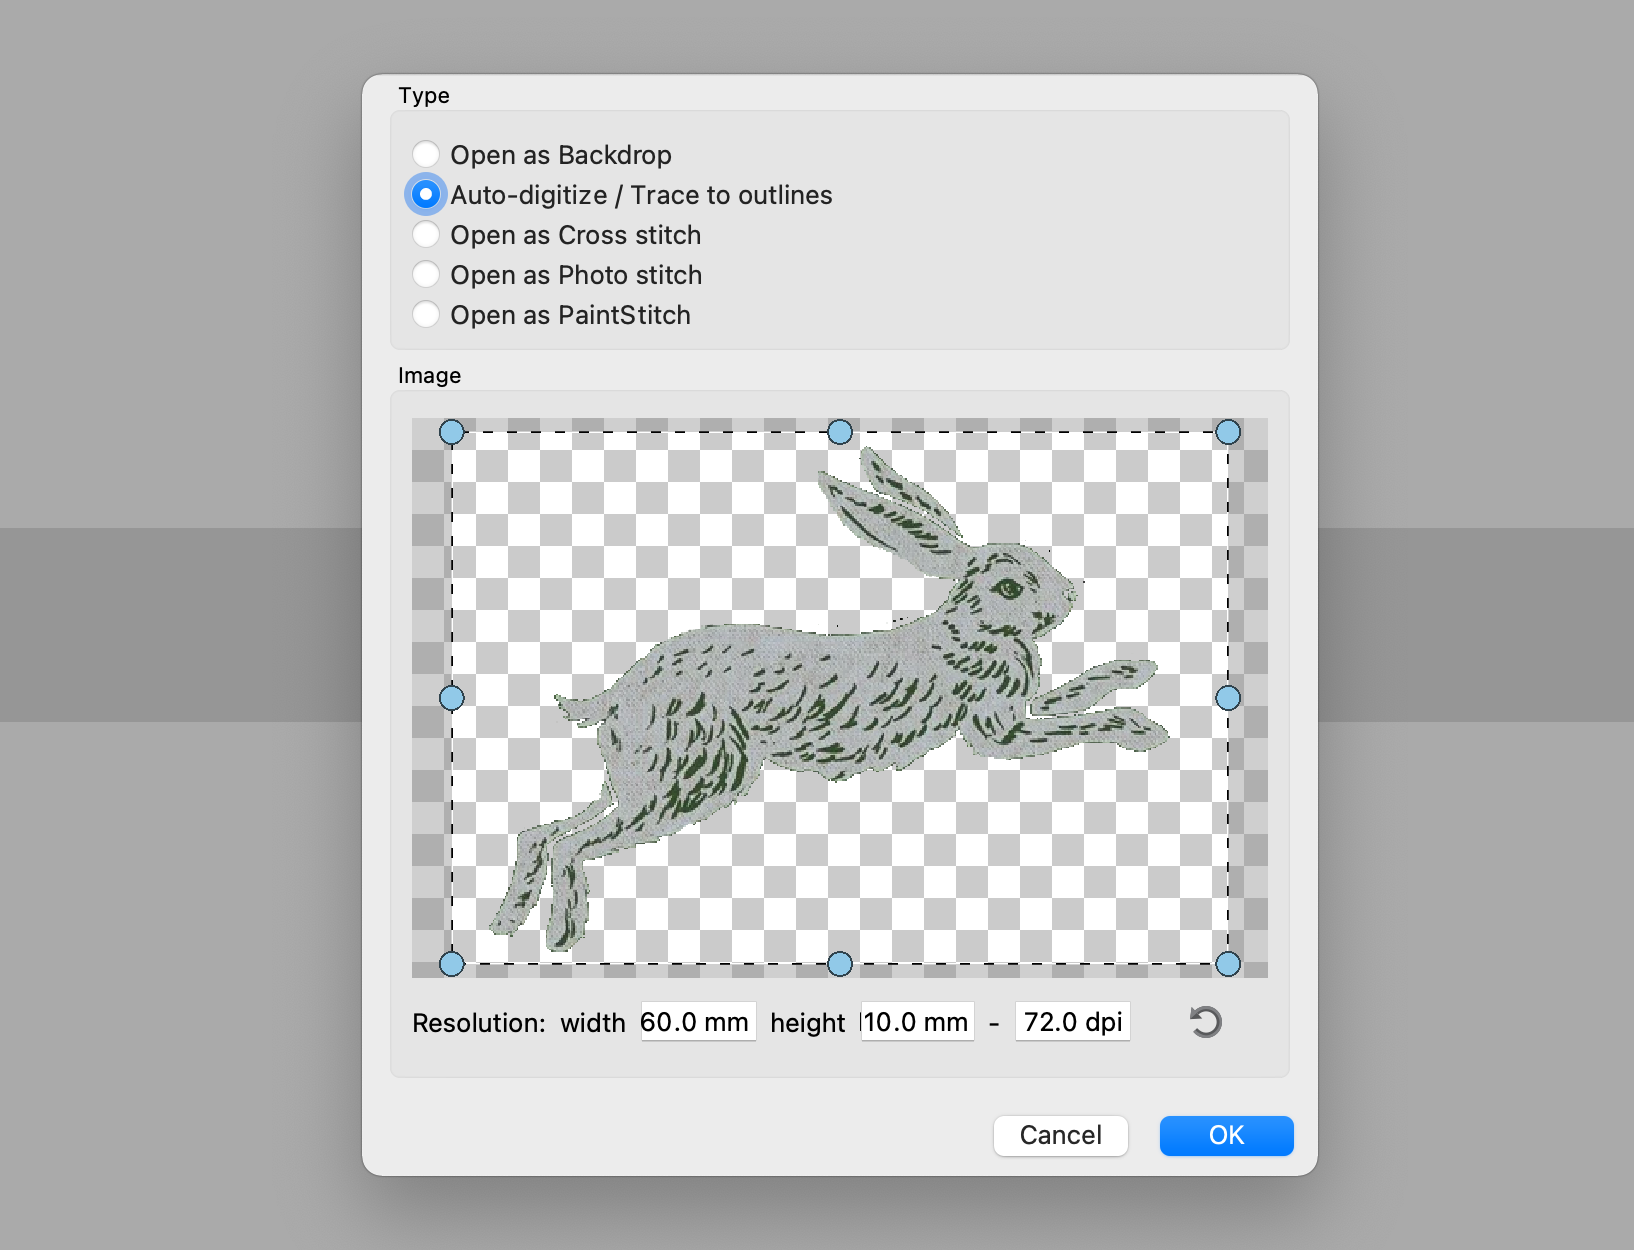
    open image


    image selection


    If you do not want to stitch the background, you must be sure to select the background button and then click the background with the dropper that will appear so that it disappears as seen above. I limited the number of colors to four initially, then brought it down to two once opened the image.
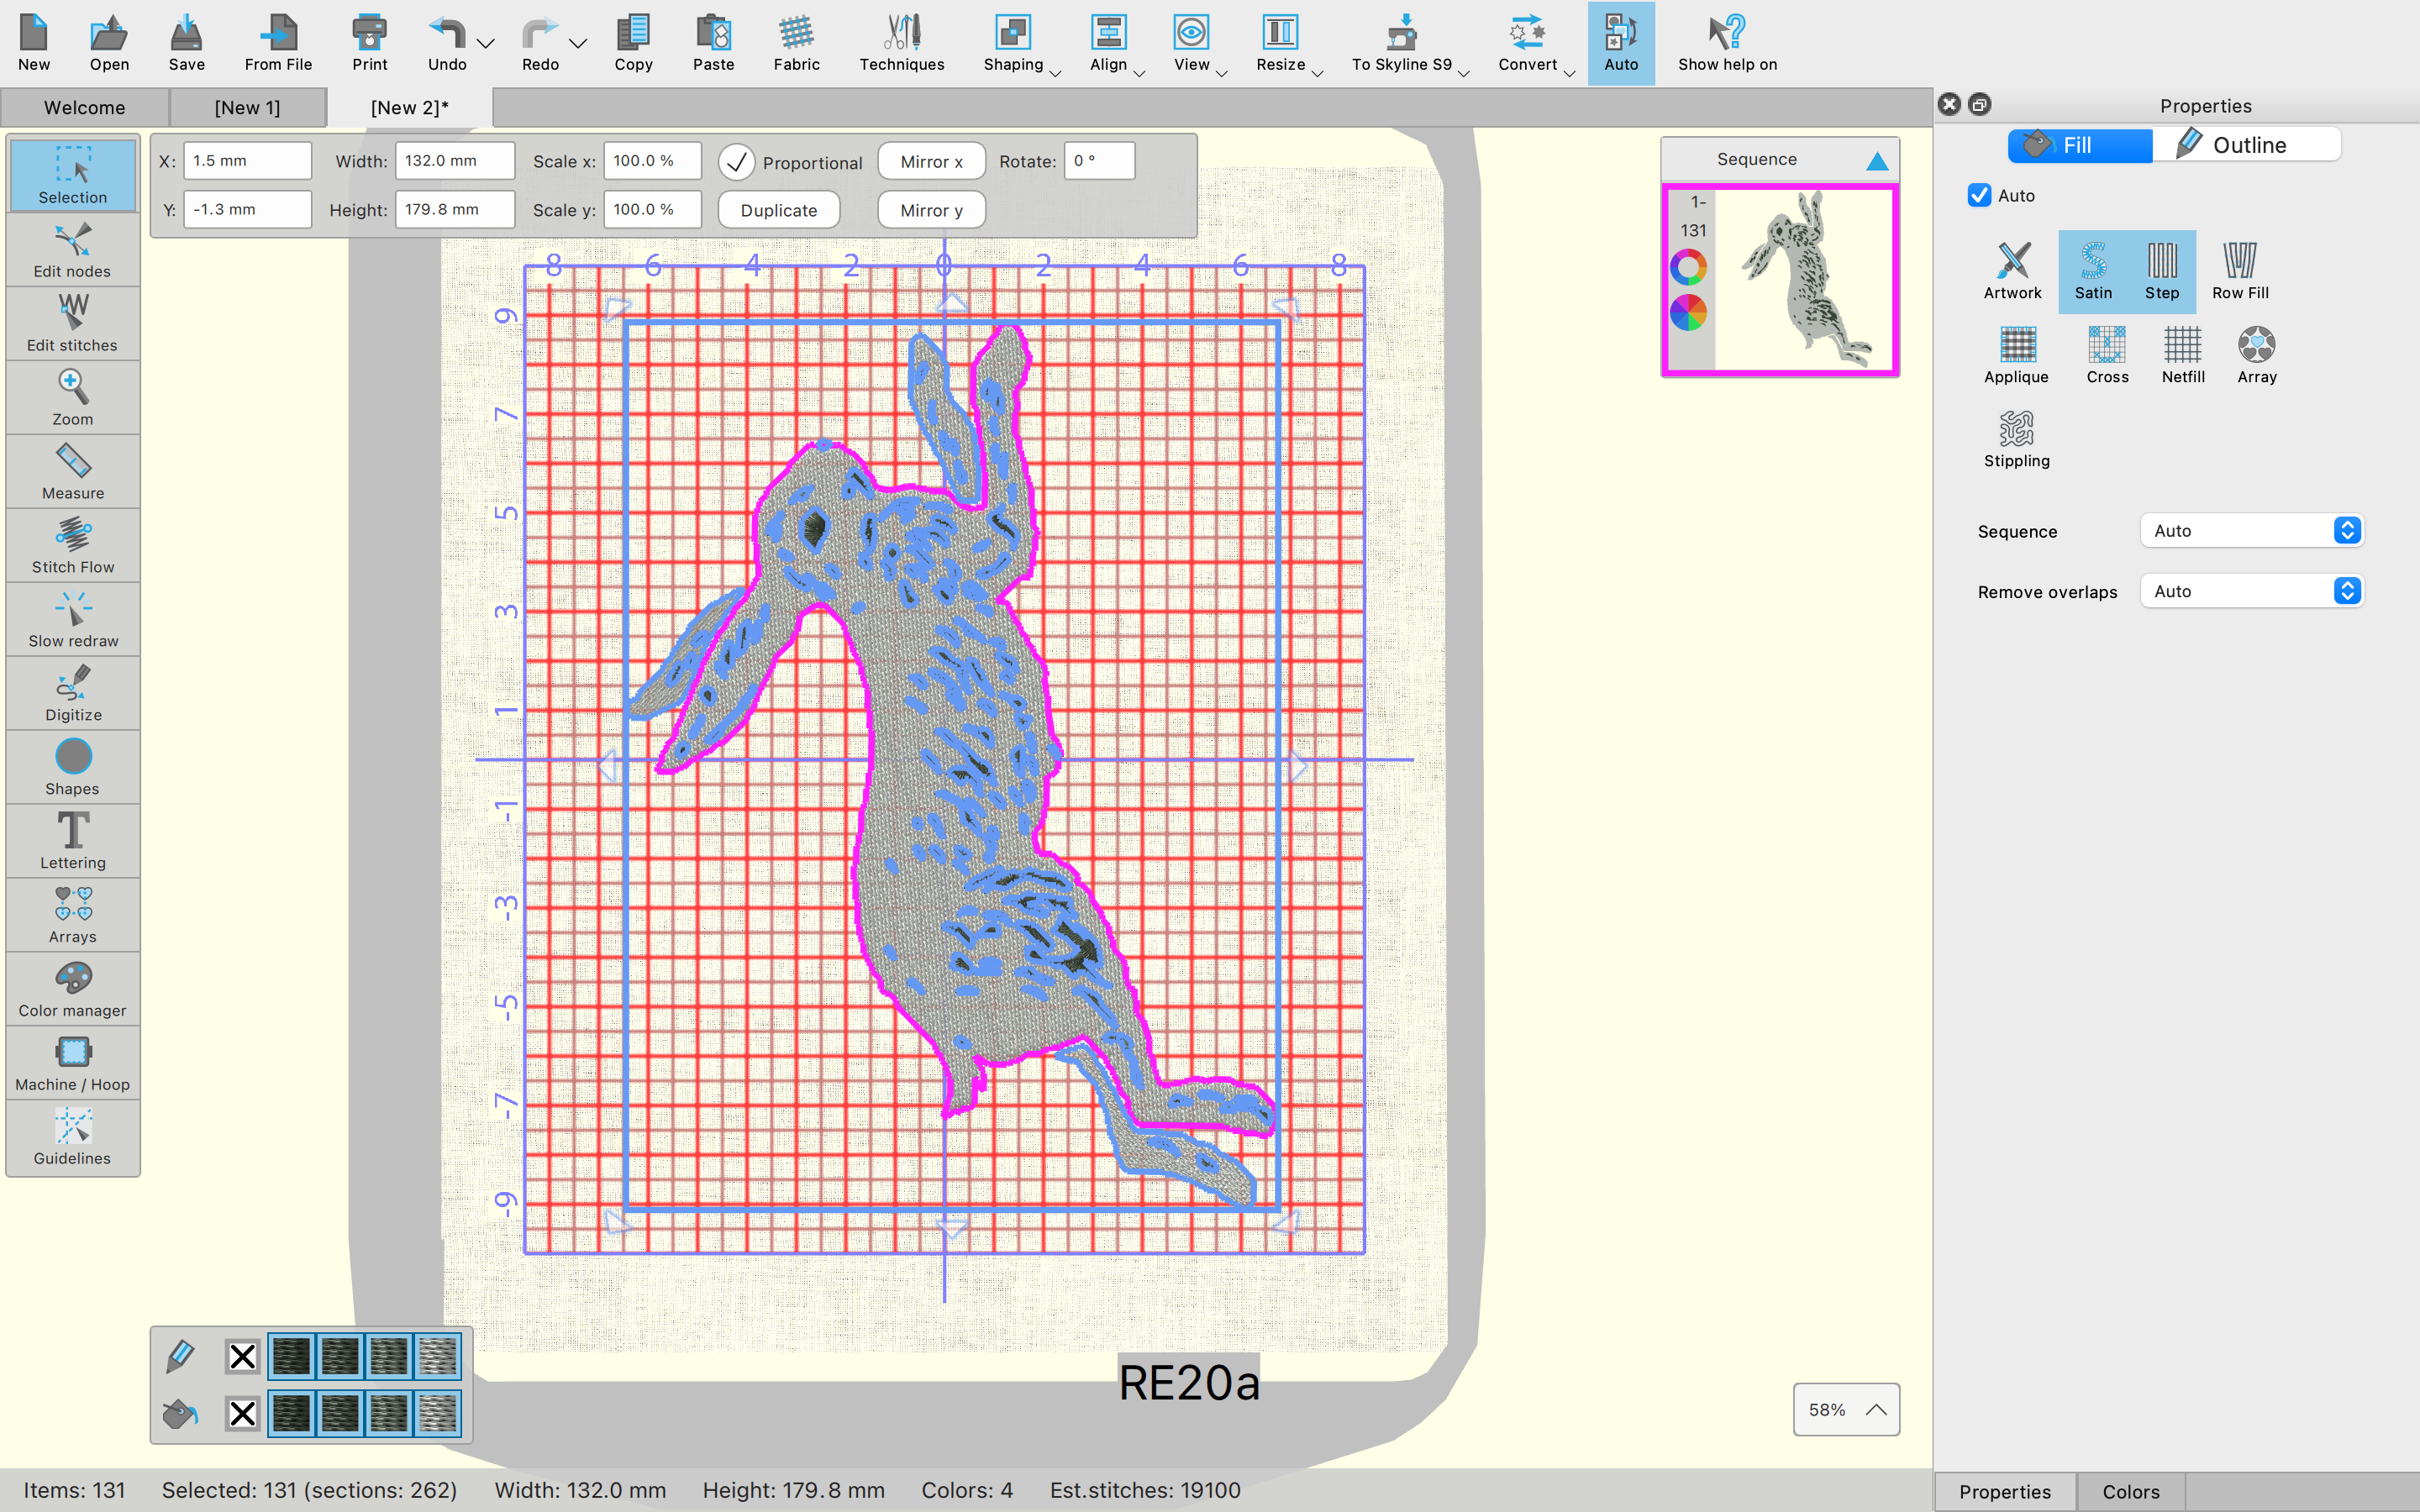


    image placement


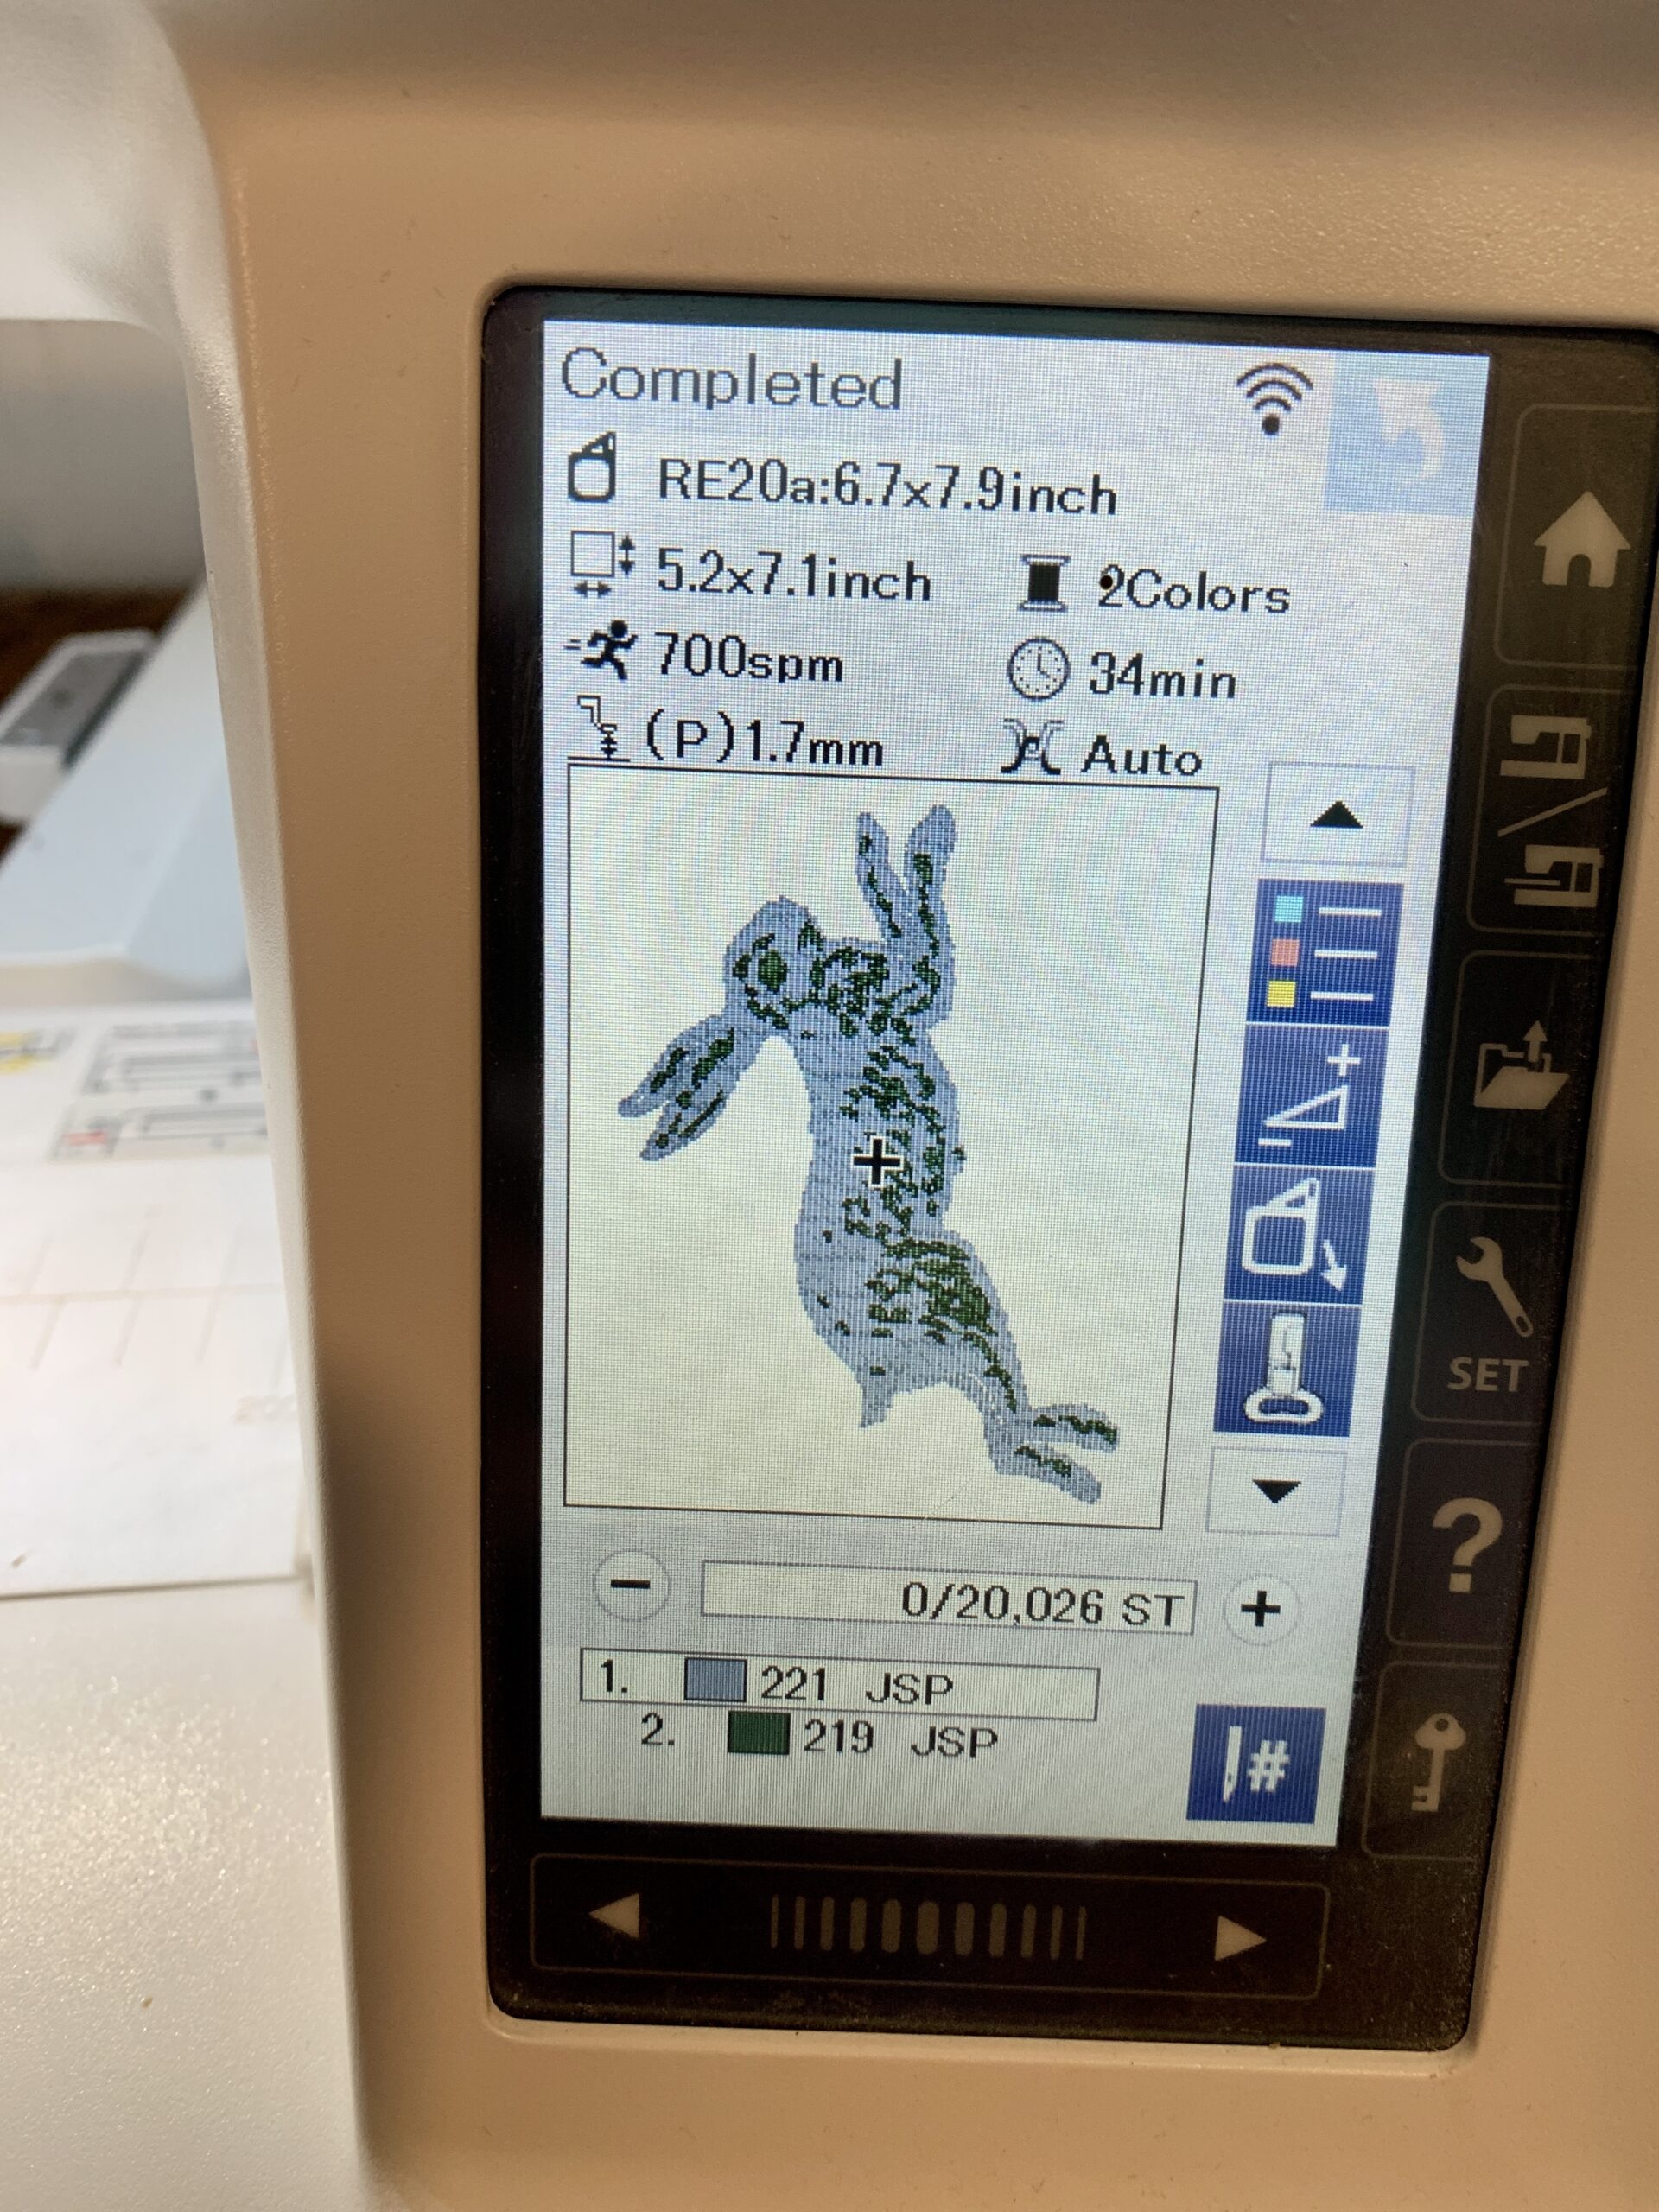
    I rotated and centered the image in the hoop, and when I opened the color manager, and easily changed the color selection from four to two. It just removed the variation in the darker colors. I knew I was just going to be stitching in black and white, so there was no need to deal with thread changes on the machine when I had no intention of changing the colors so many times. By the way, you can totally change the colors to exactly what you will be using to stitch with, but I find that just changing the number of colors is fine, because I can just use whatever colors I want once I go to stitch it out on the machine. Now the important thing to do is to go to the toolbar, click Auto and then Optimize. I did a simple optimization that rearranges the sequence for the most efficient color order. Anytime you are doing your own thing for embroidery, you need to optimize, otherwise, you could easily have a hundred color changes which would take forever.
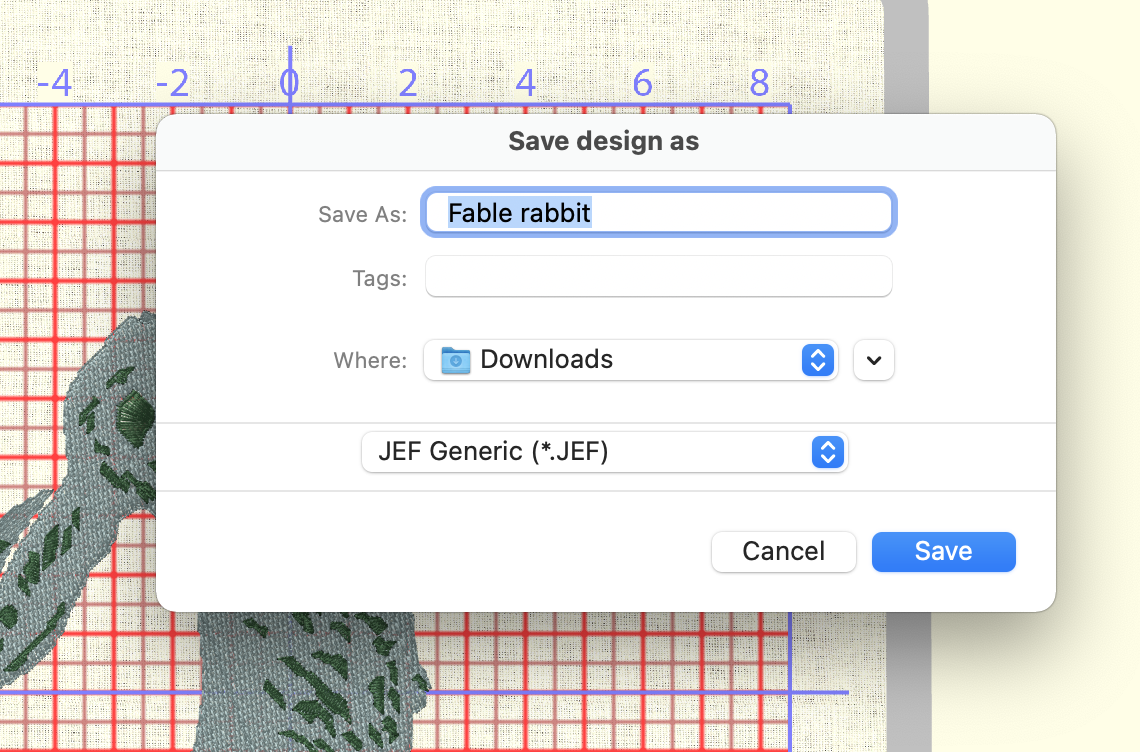


    export


    If your embroidery mockup looks good, then you are ready to save it as a .JEF file then export it. I exported to a USB drive, but the Skyline S9 has wifi capability and can be exported that way, or by plugging in directly to your device. Make sure that your machine is set up for embroidery per the manual instructions, and prepare your fabric and hoop for embroidery. I am using a cotton muslin backed with interfacing and then hooped up with embroidery stabilization paper. Again, I'm using the RE20a hoop. Open your embroidery file on your machine, and start stitching. I love to just sit back and watch the embroidery come to life!
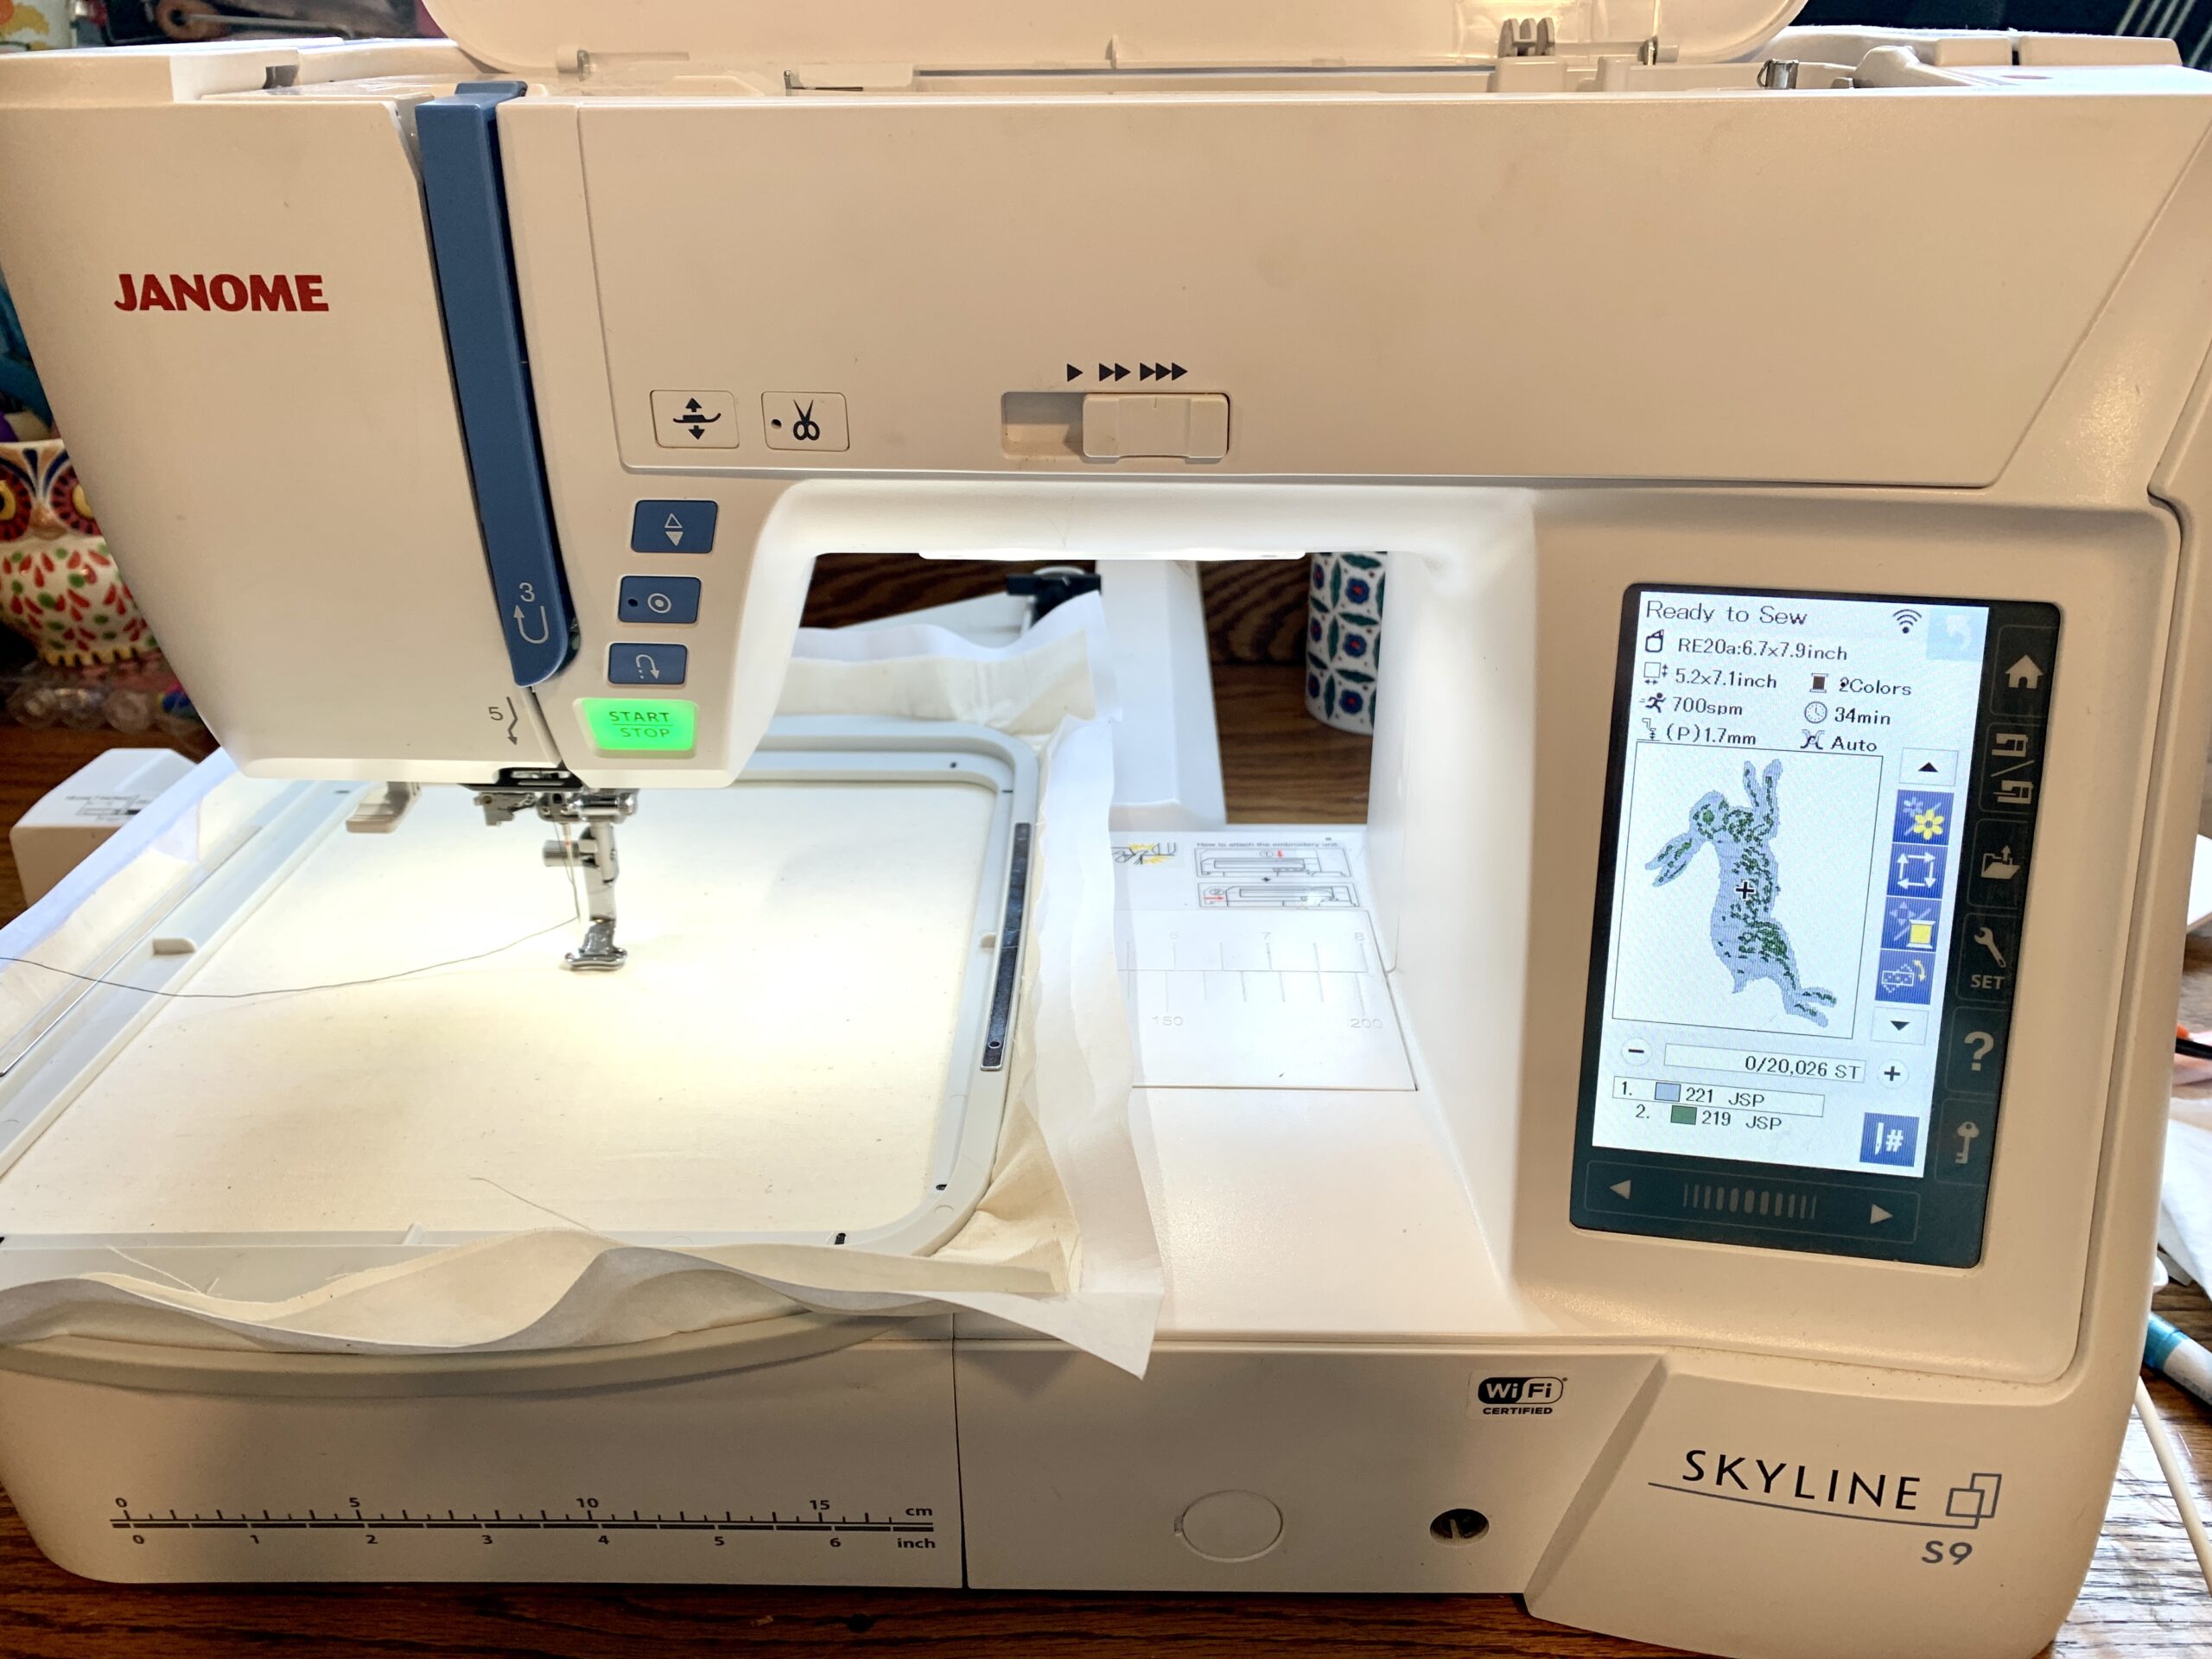


    begin embroidery


    First, my Skyline S9 outlined my rabbit, then began to fill it in. Finally, the texture was added.
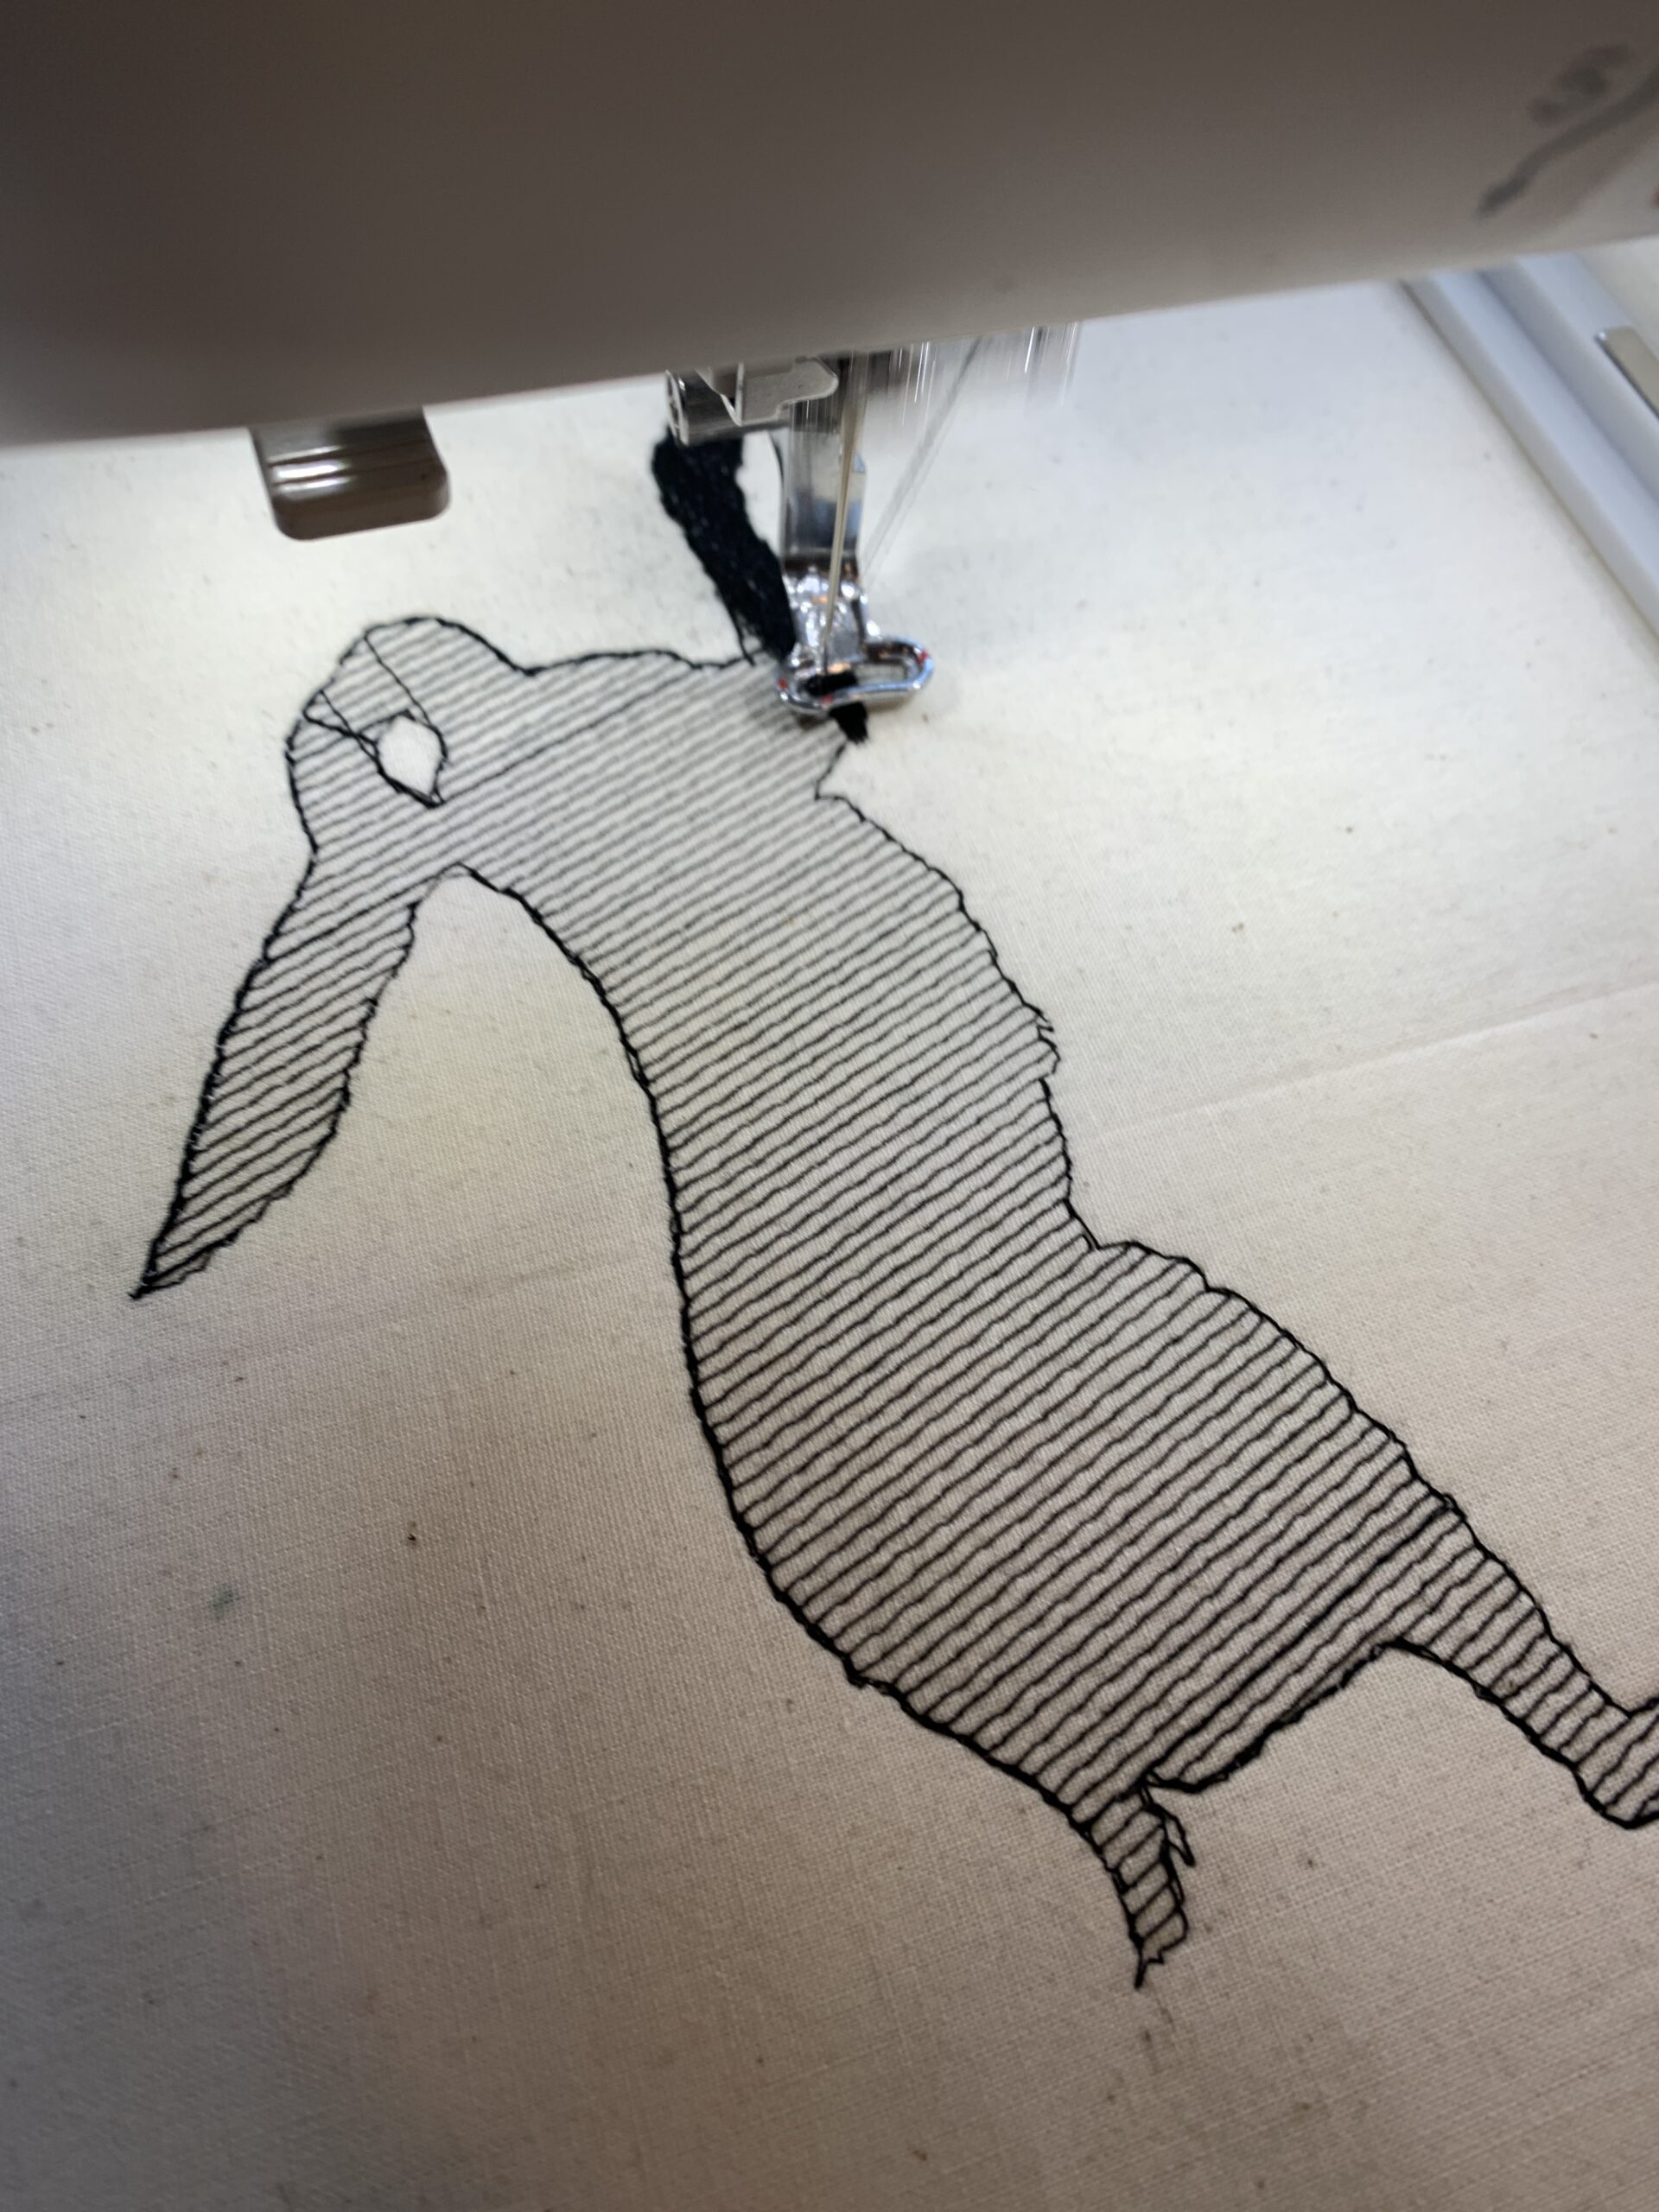
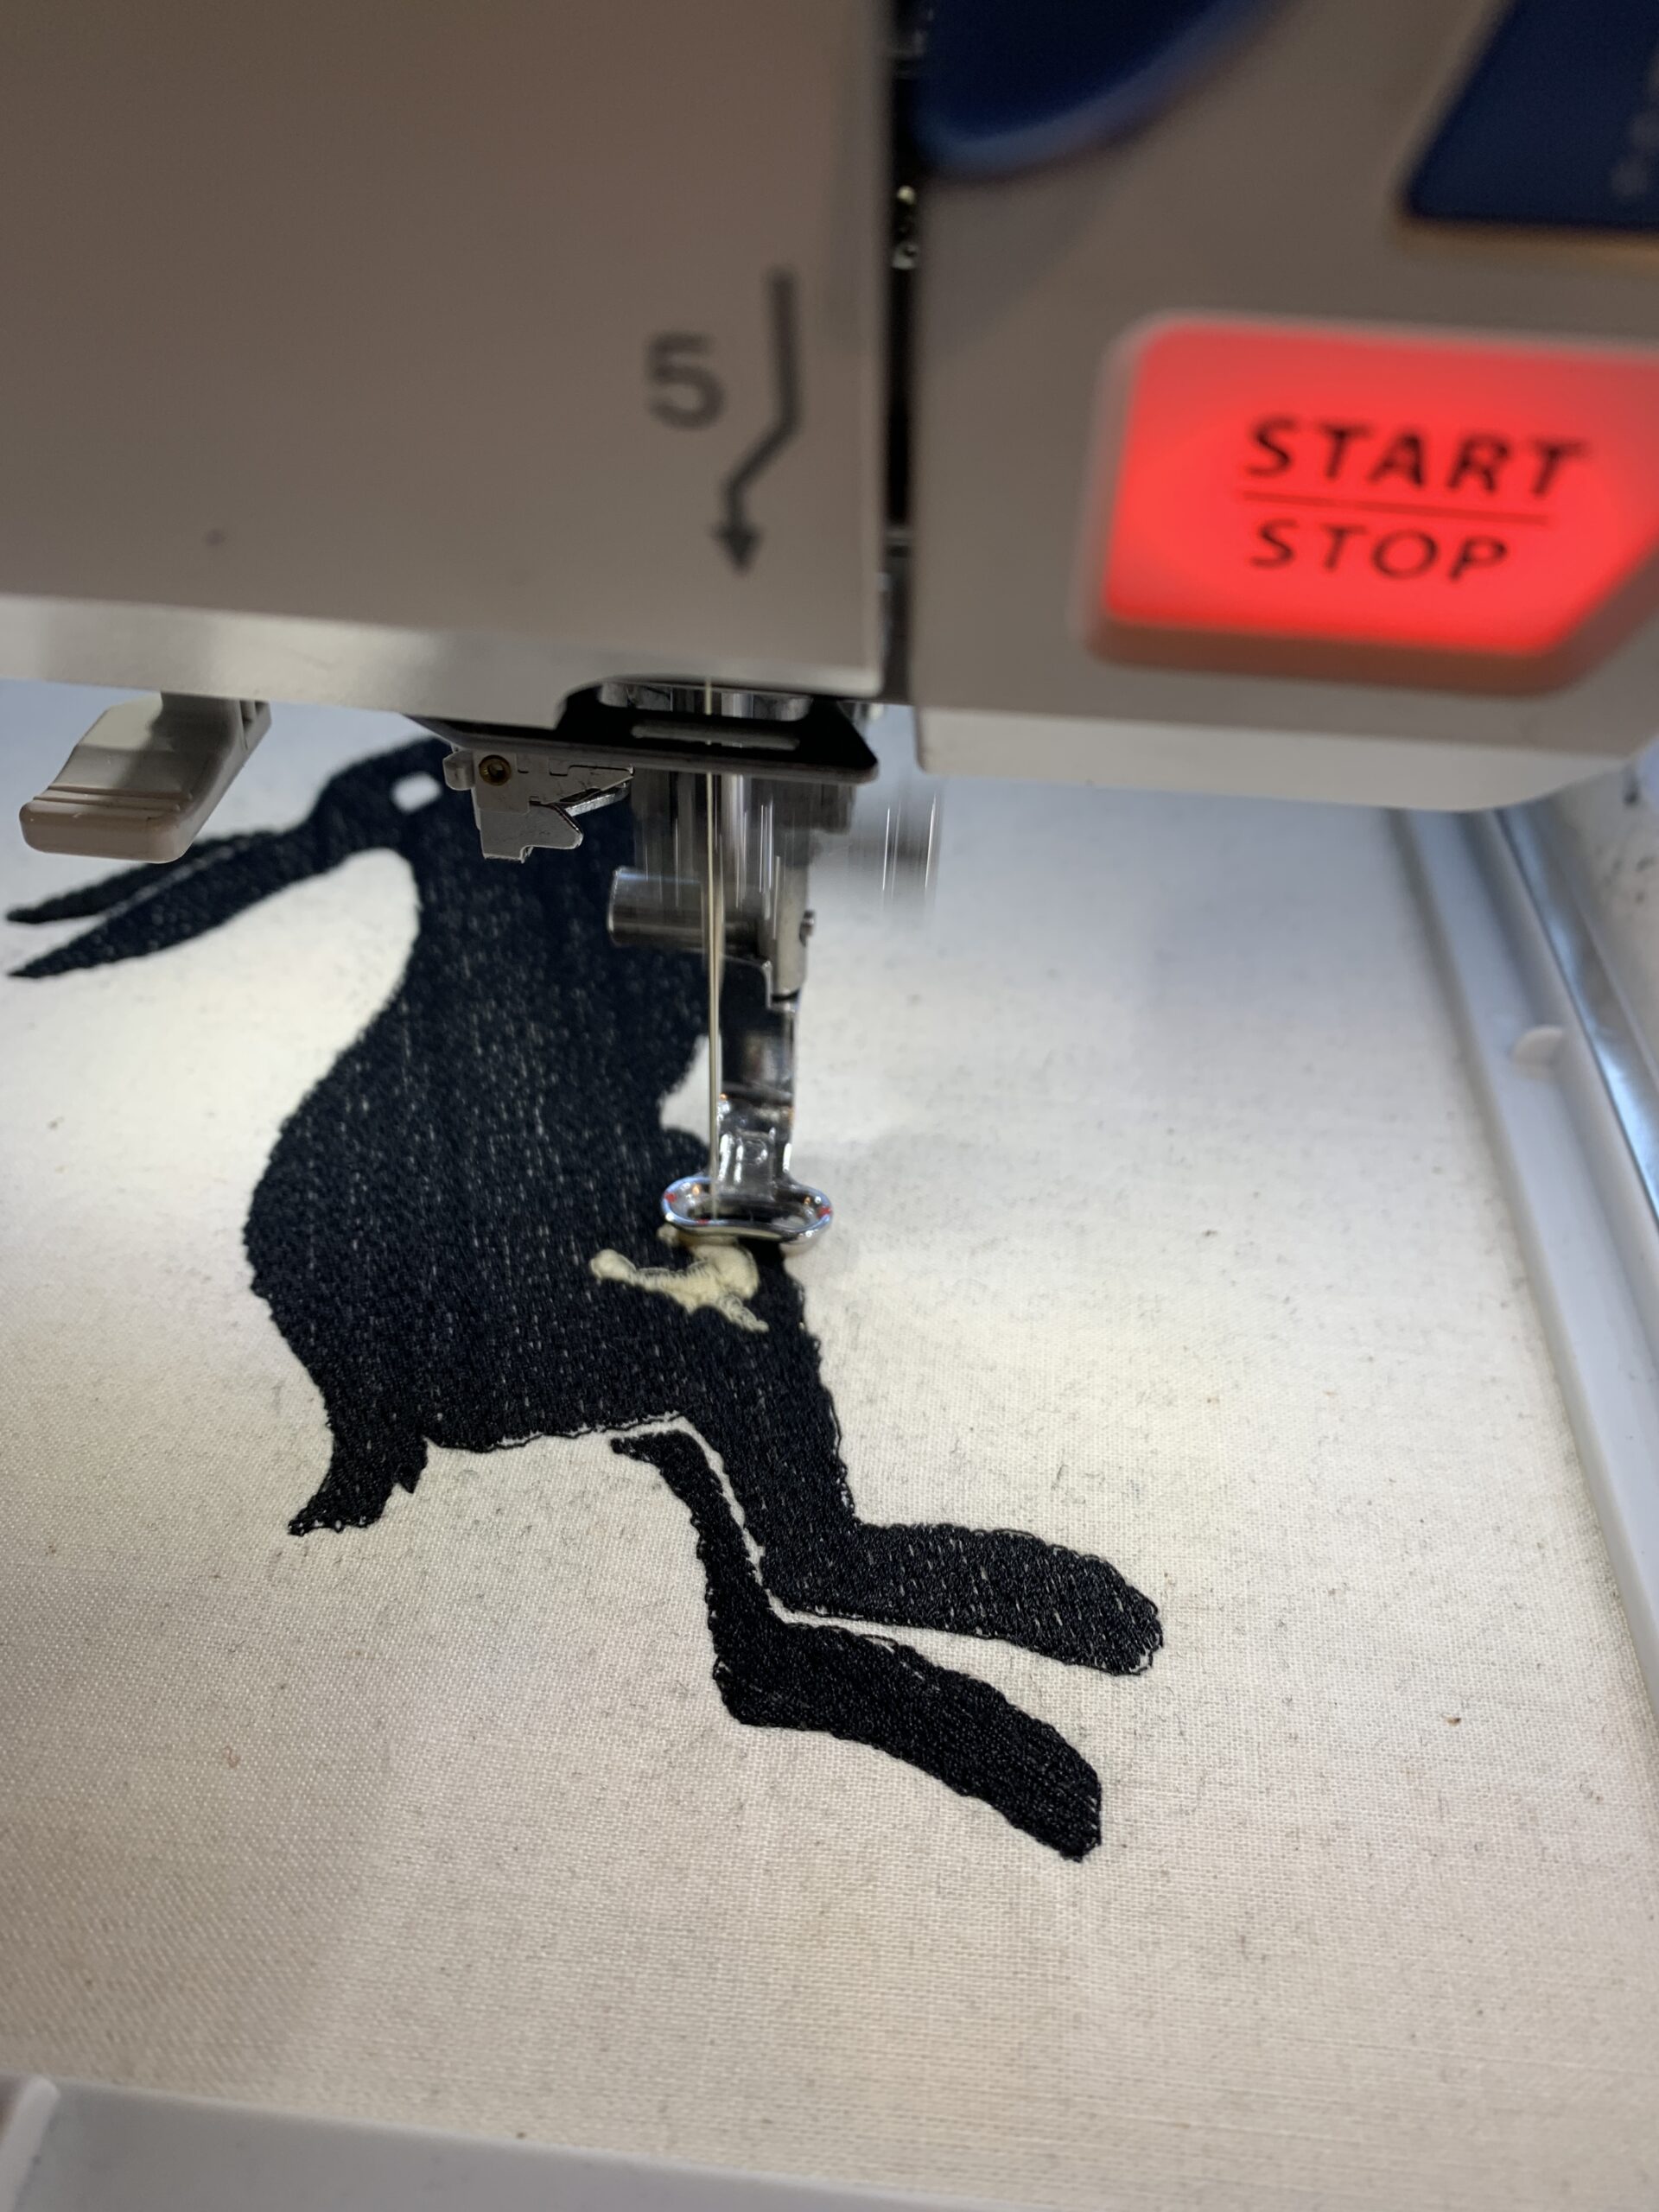
     

    embroidery 1embroidery 2


    Once the stitching was complete, about half an hour later, I removed the hoop and trimmed my fabric down to the needed size.
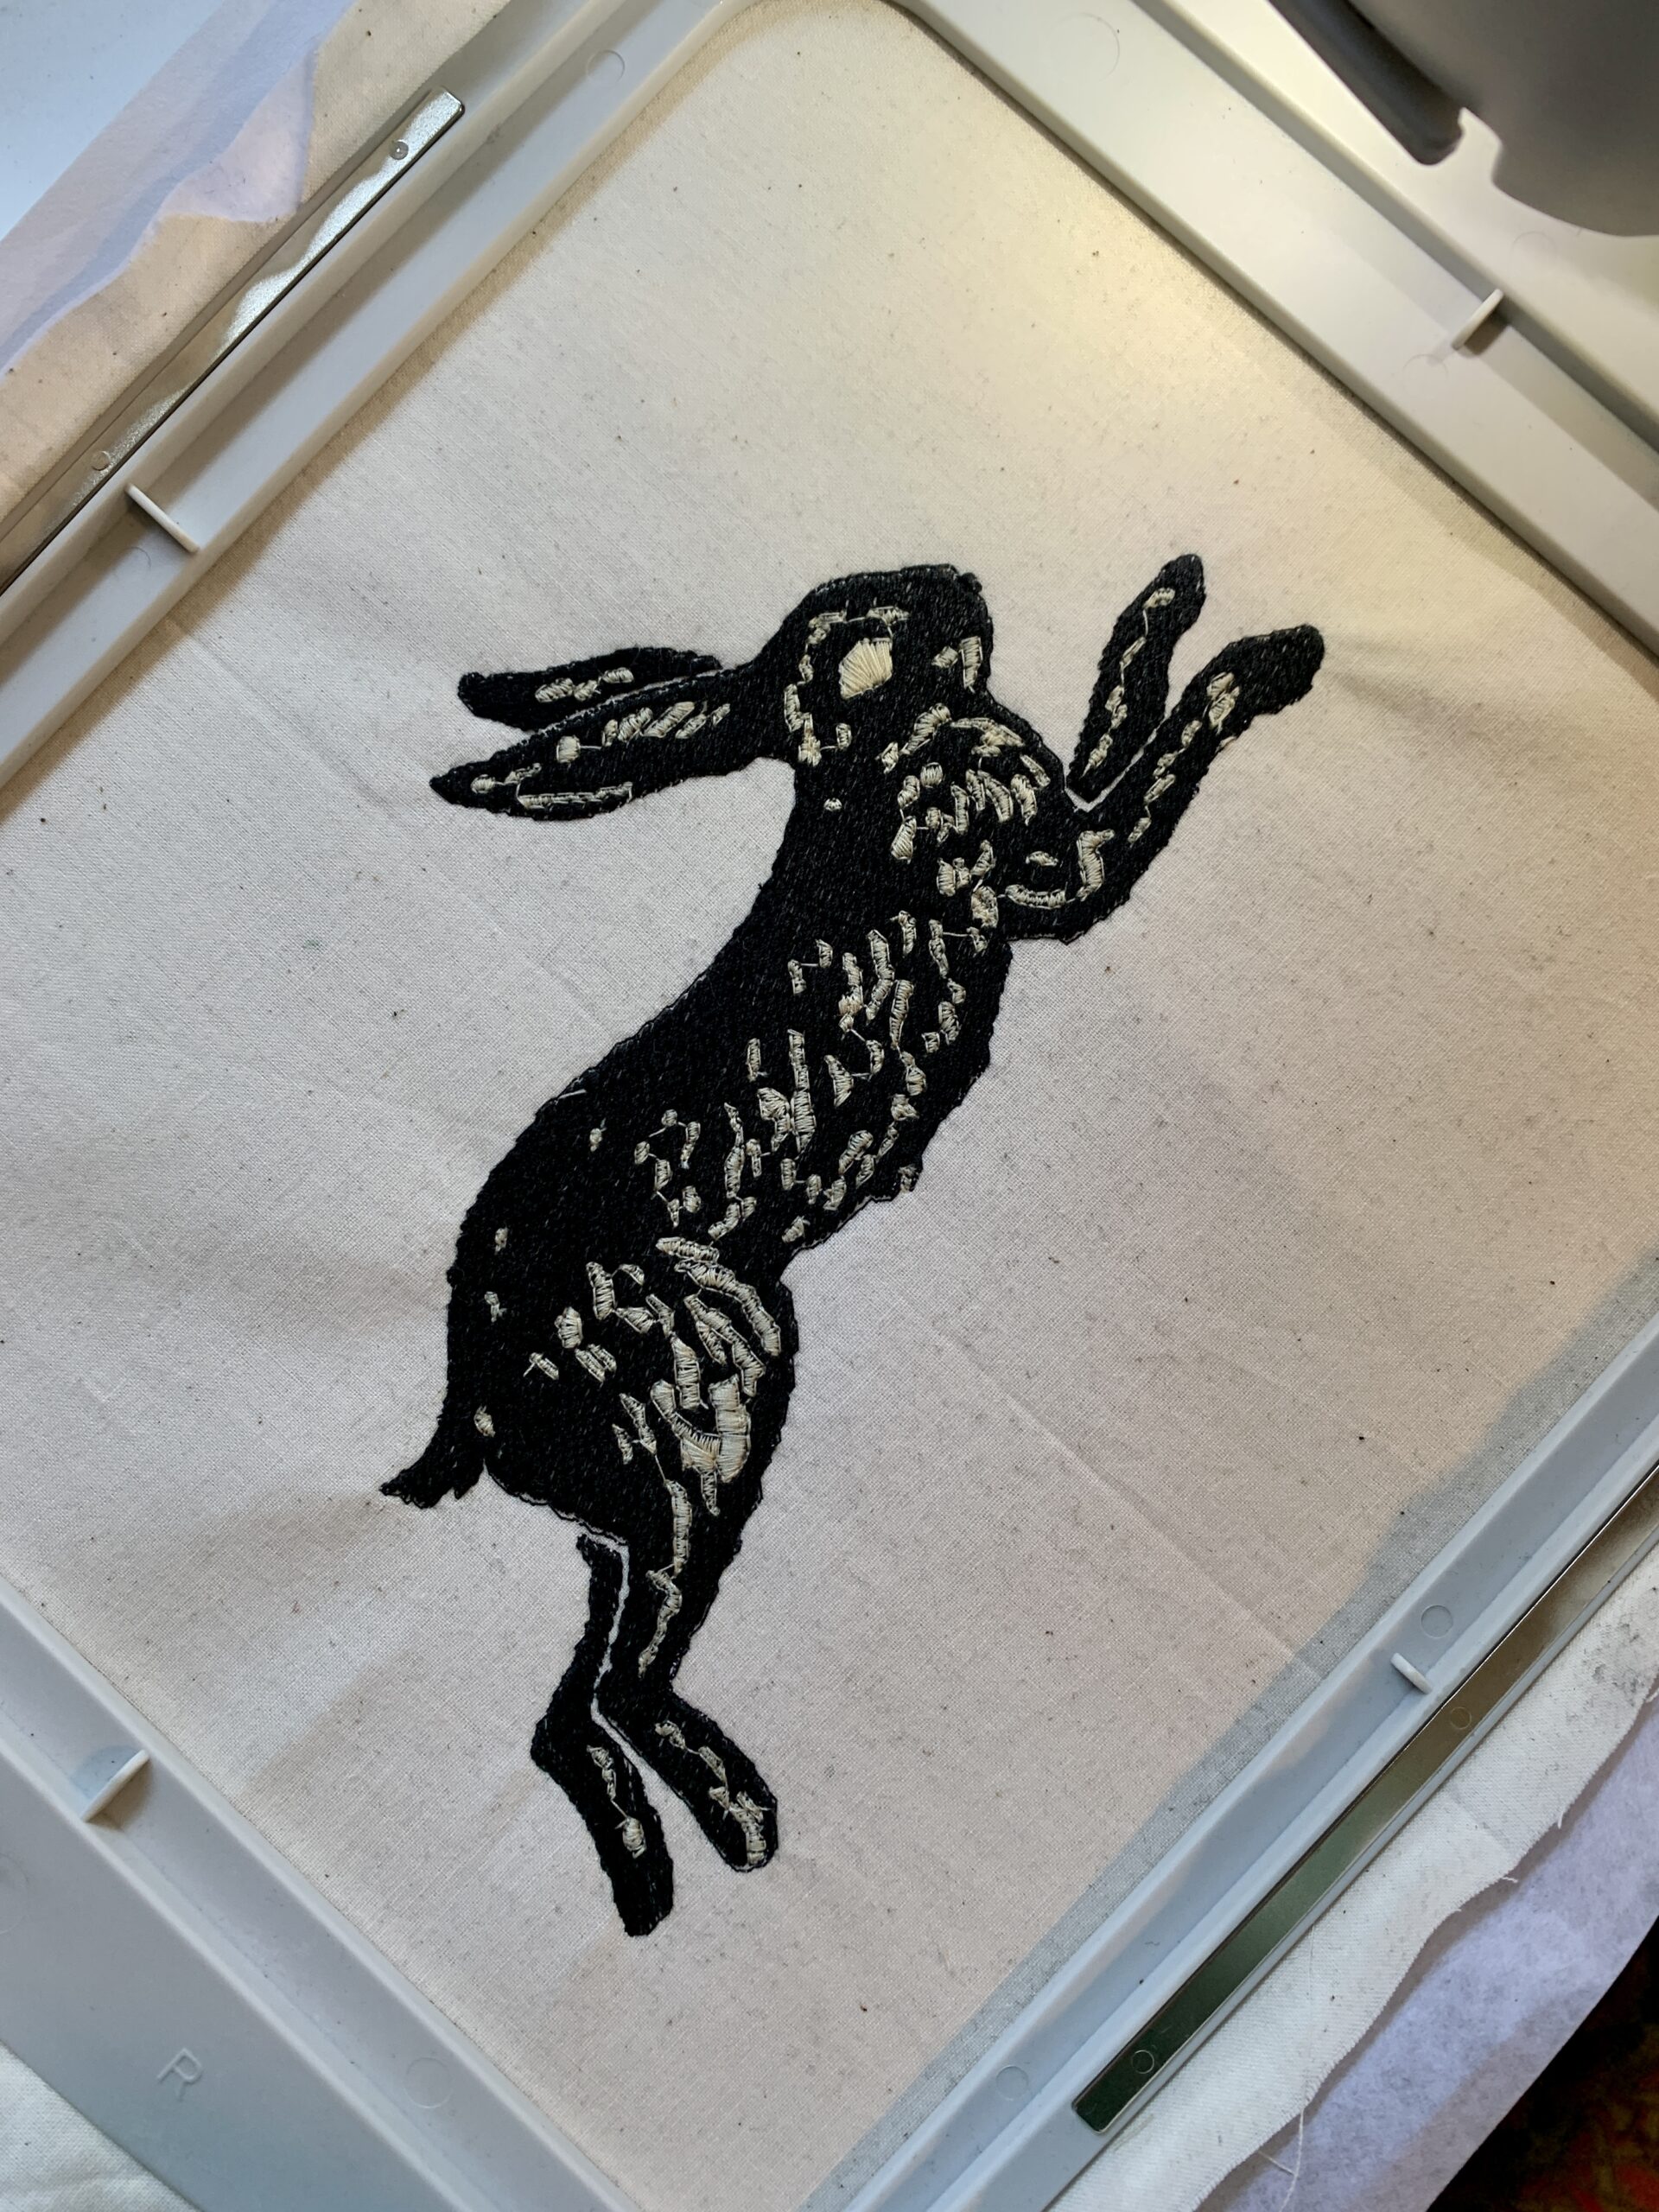
    completed embroidery       completed embroidery 2


    I picked up this fantastic custom gold leaf frame from my local AmVets (a thrift store benefitting veterans) for only $1.98. I took it apart, removed the angel picture that it was holding and after painting the current cream color matte black with some acrylic paint, I remounted the frame.
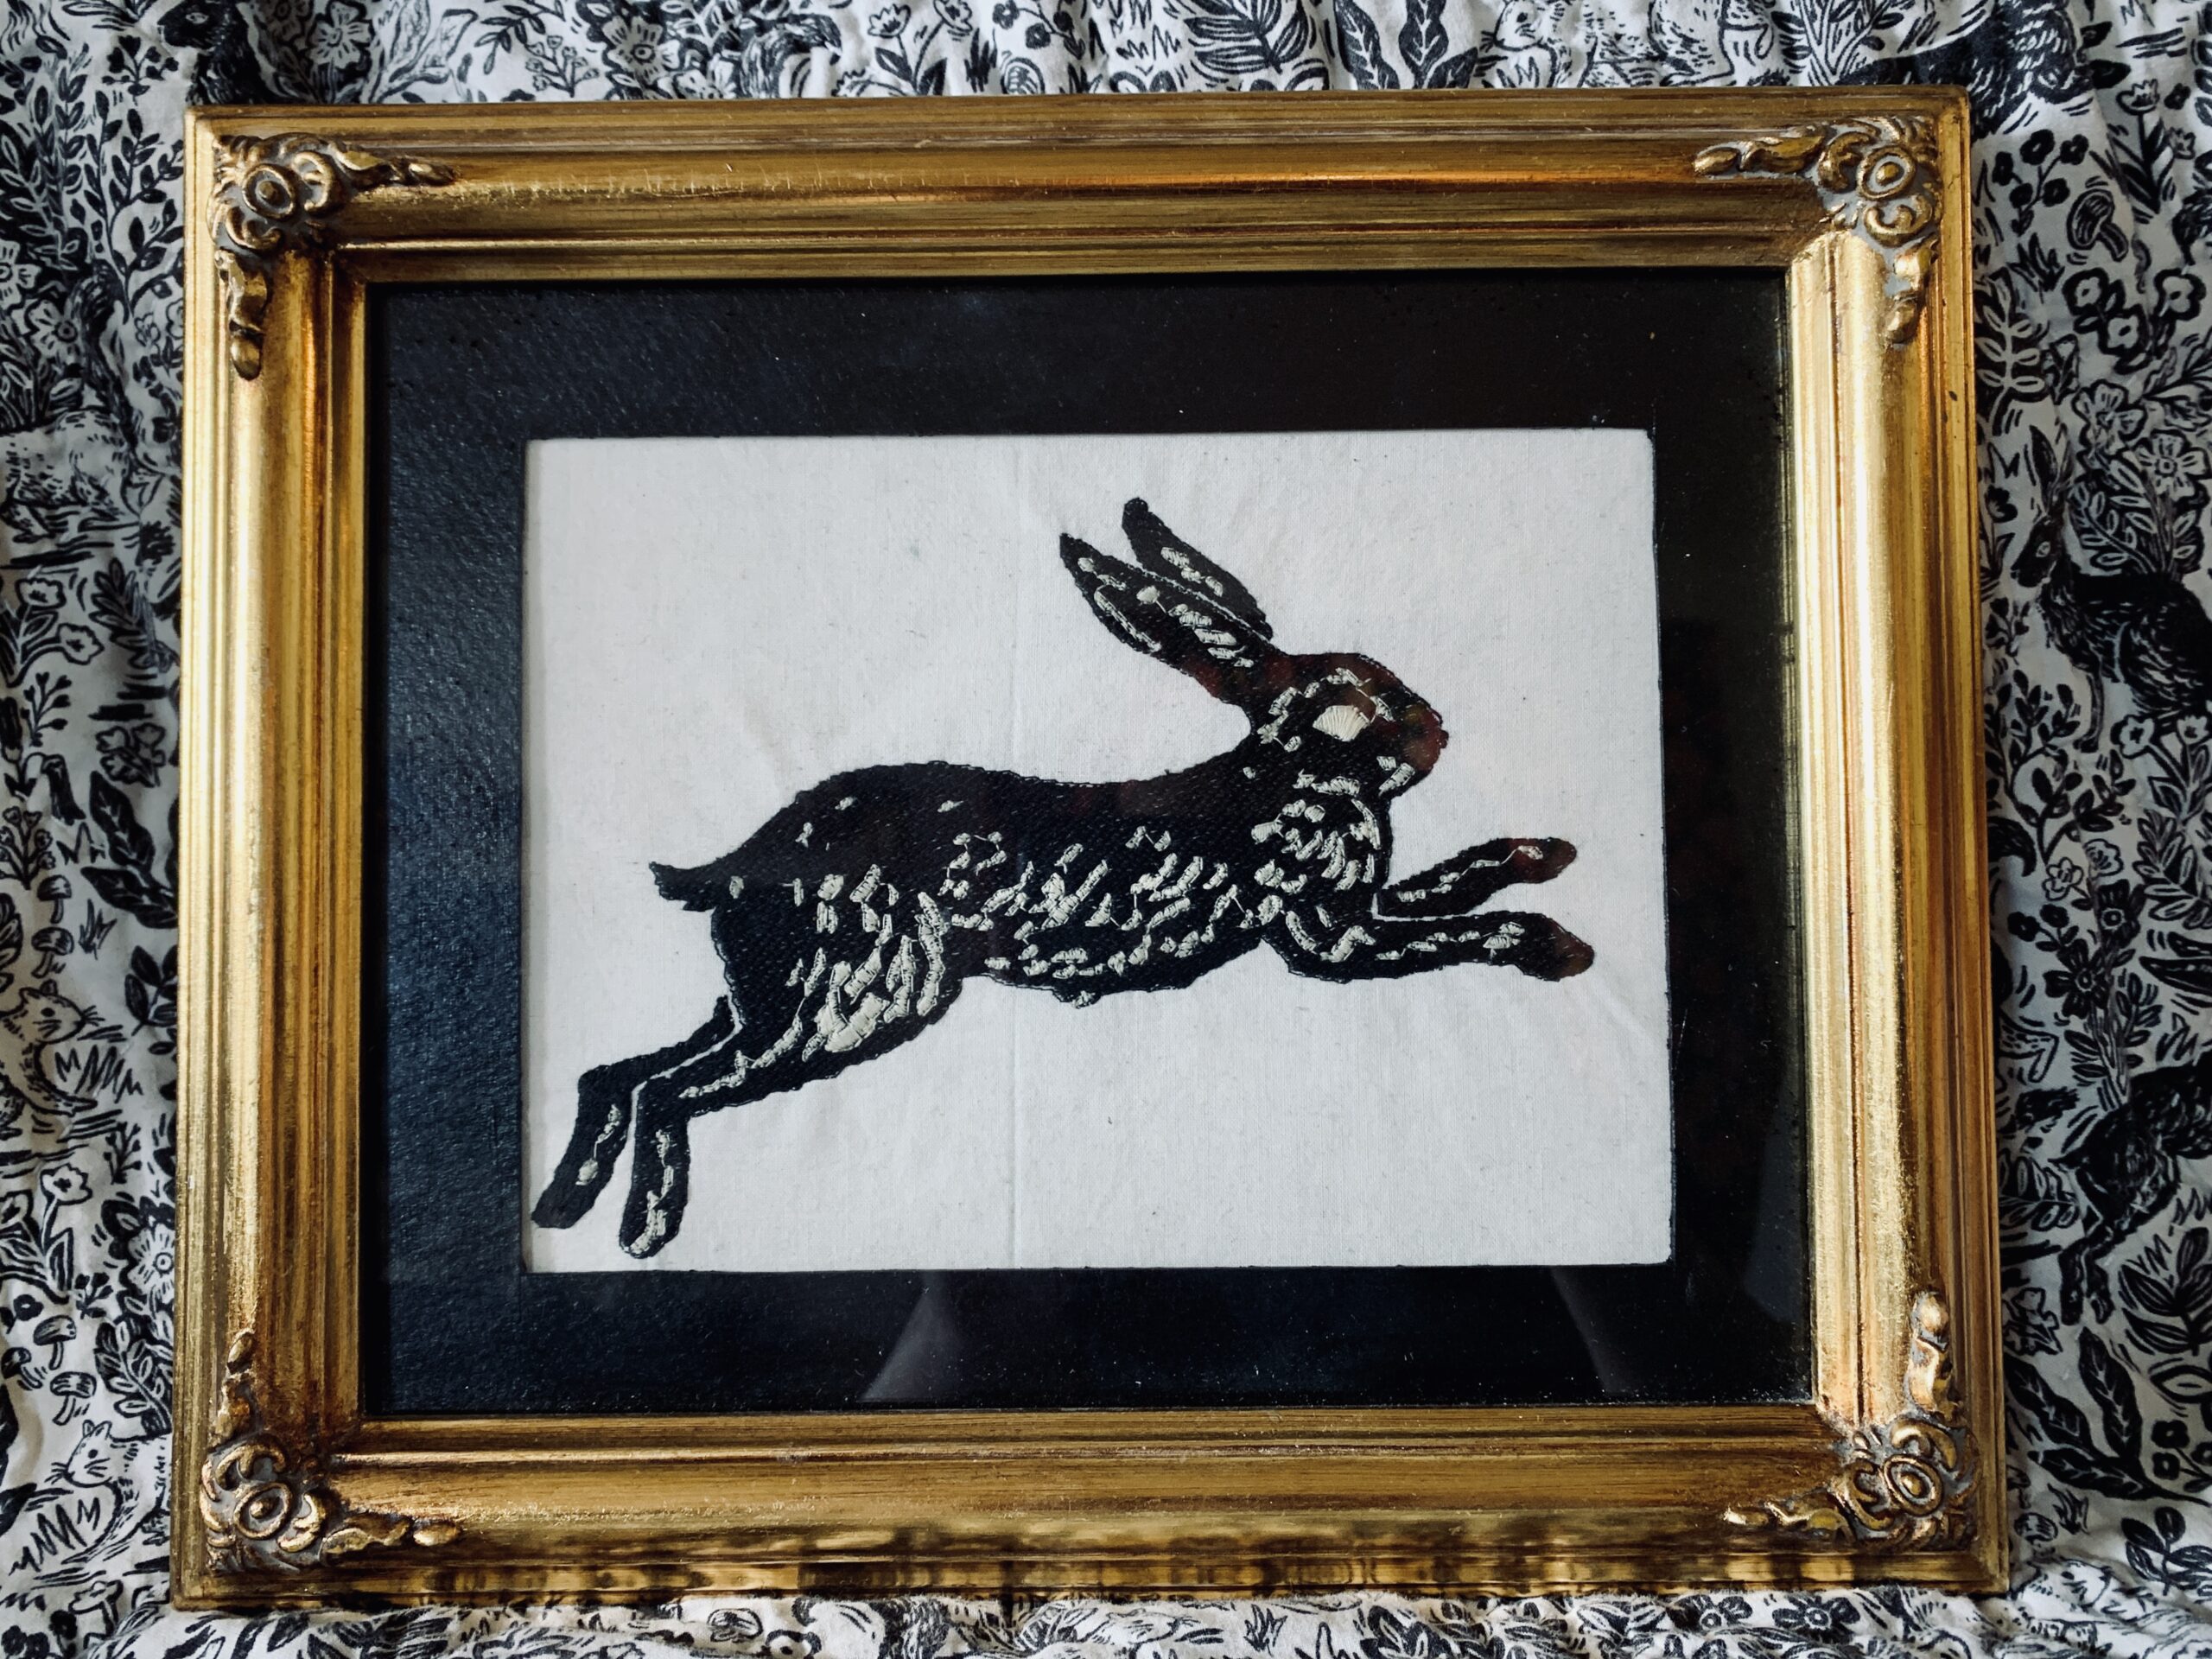
    framed fable embroidery


    I now have the beginning of a new gallery wall above our couch. The quilt you see here was made with Rifle Paper Co's Wildwood collection, which features the Fable print that I used for this embroidery art. We love small animals like rabbits and squirrels, so this was the perfect piece to add to our wall!
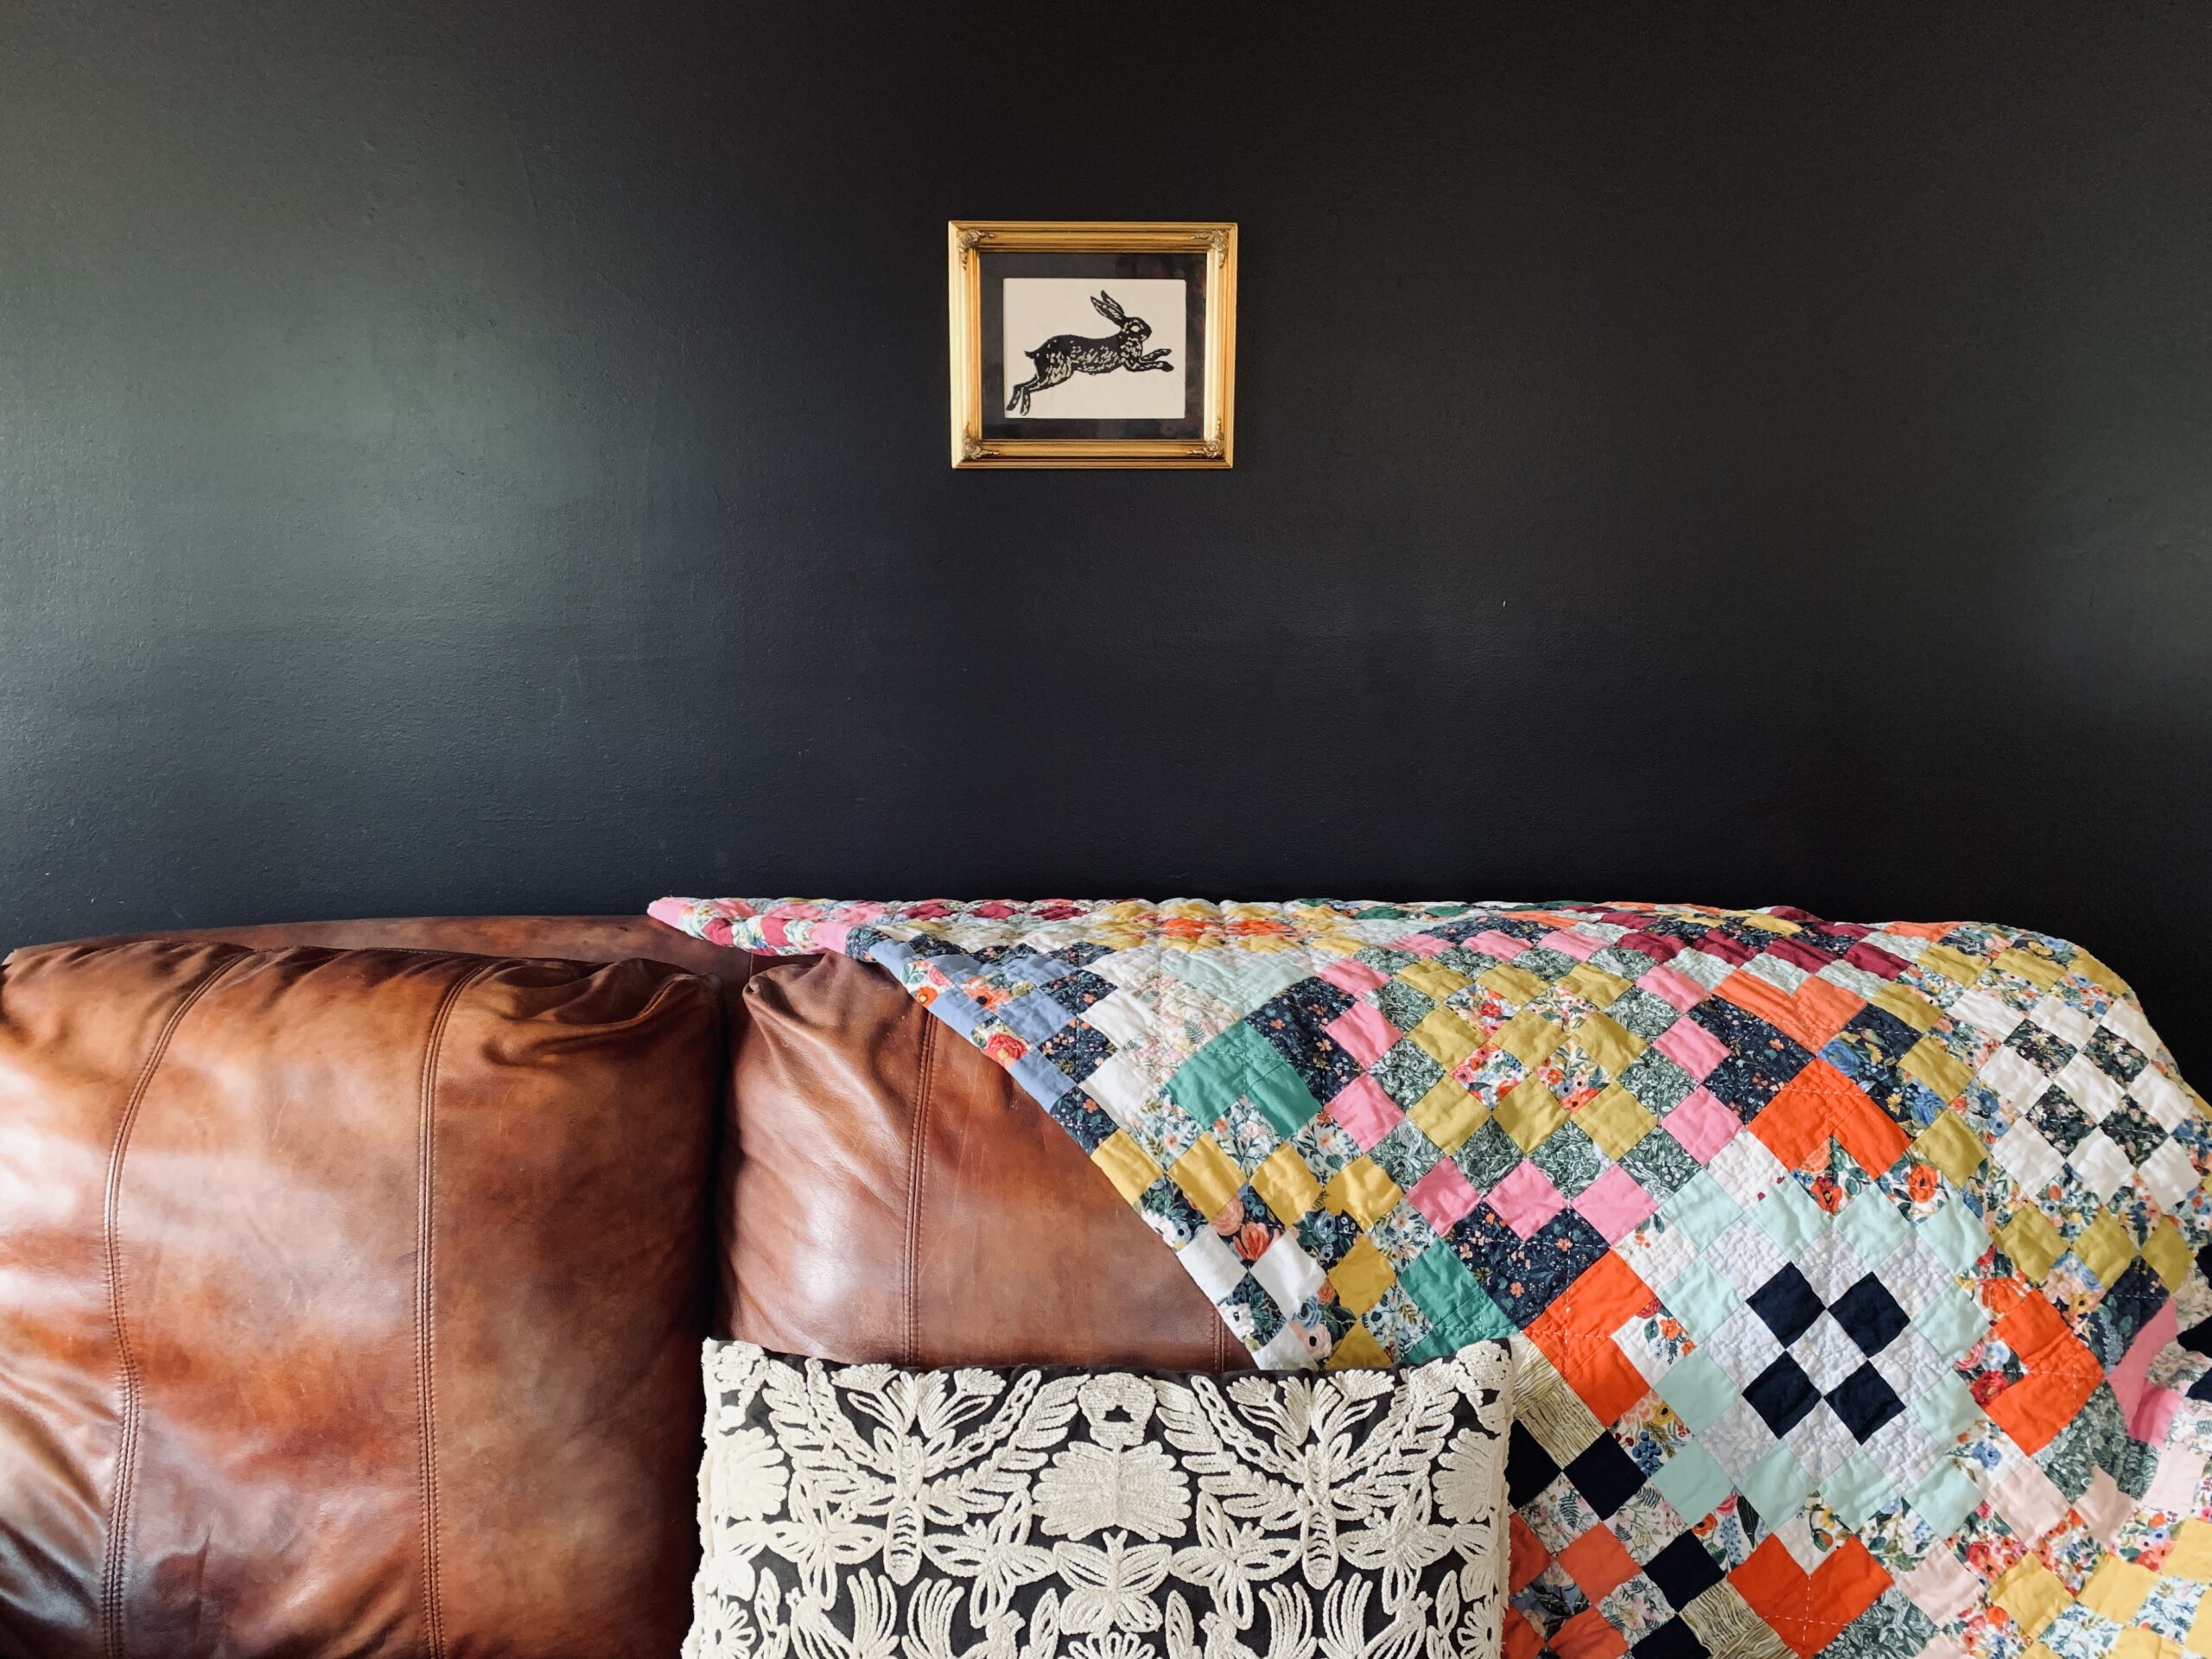
    framed embroidery


    The sky is totally the limit when you can create your own embroidery! I hope this will inspire you to create pieces that you love with your embroidery machine and Janome's Artistic software! I'll be adding some more pieces to my gallery wall with this method.
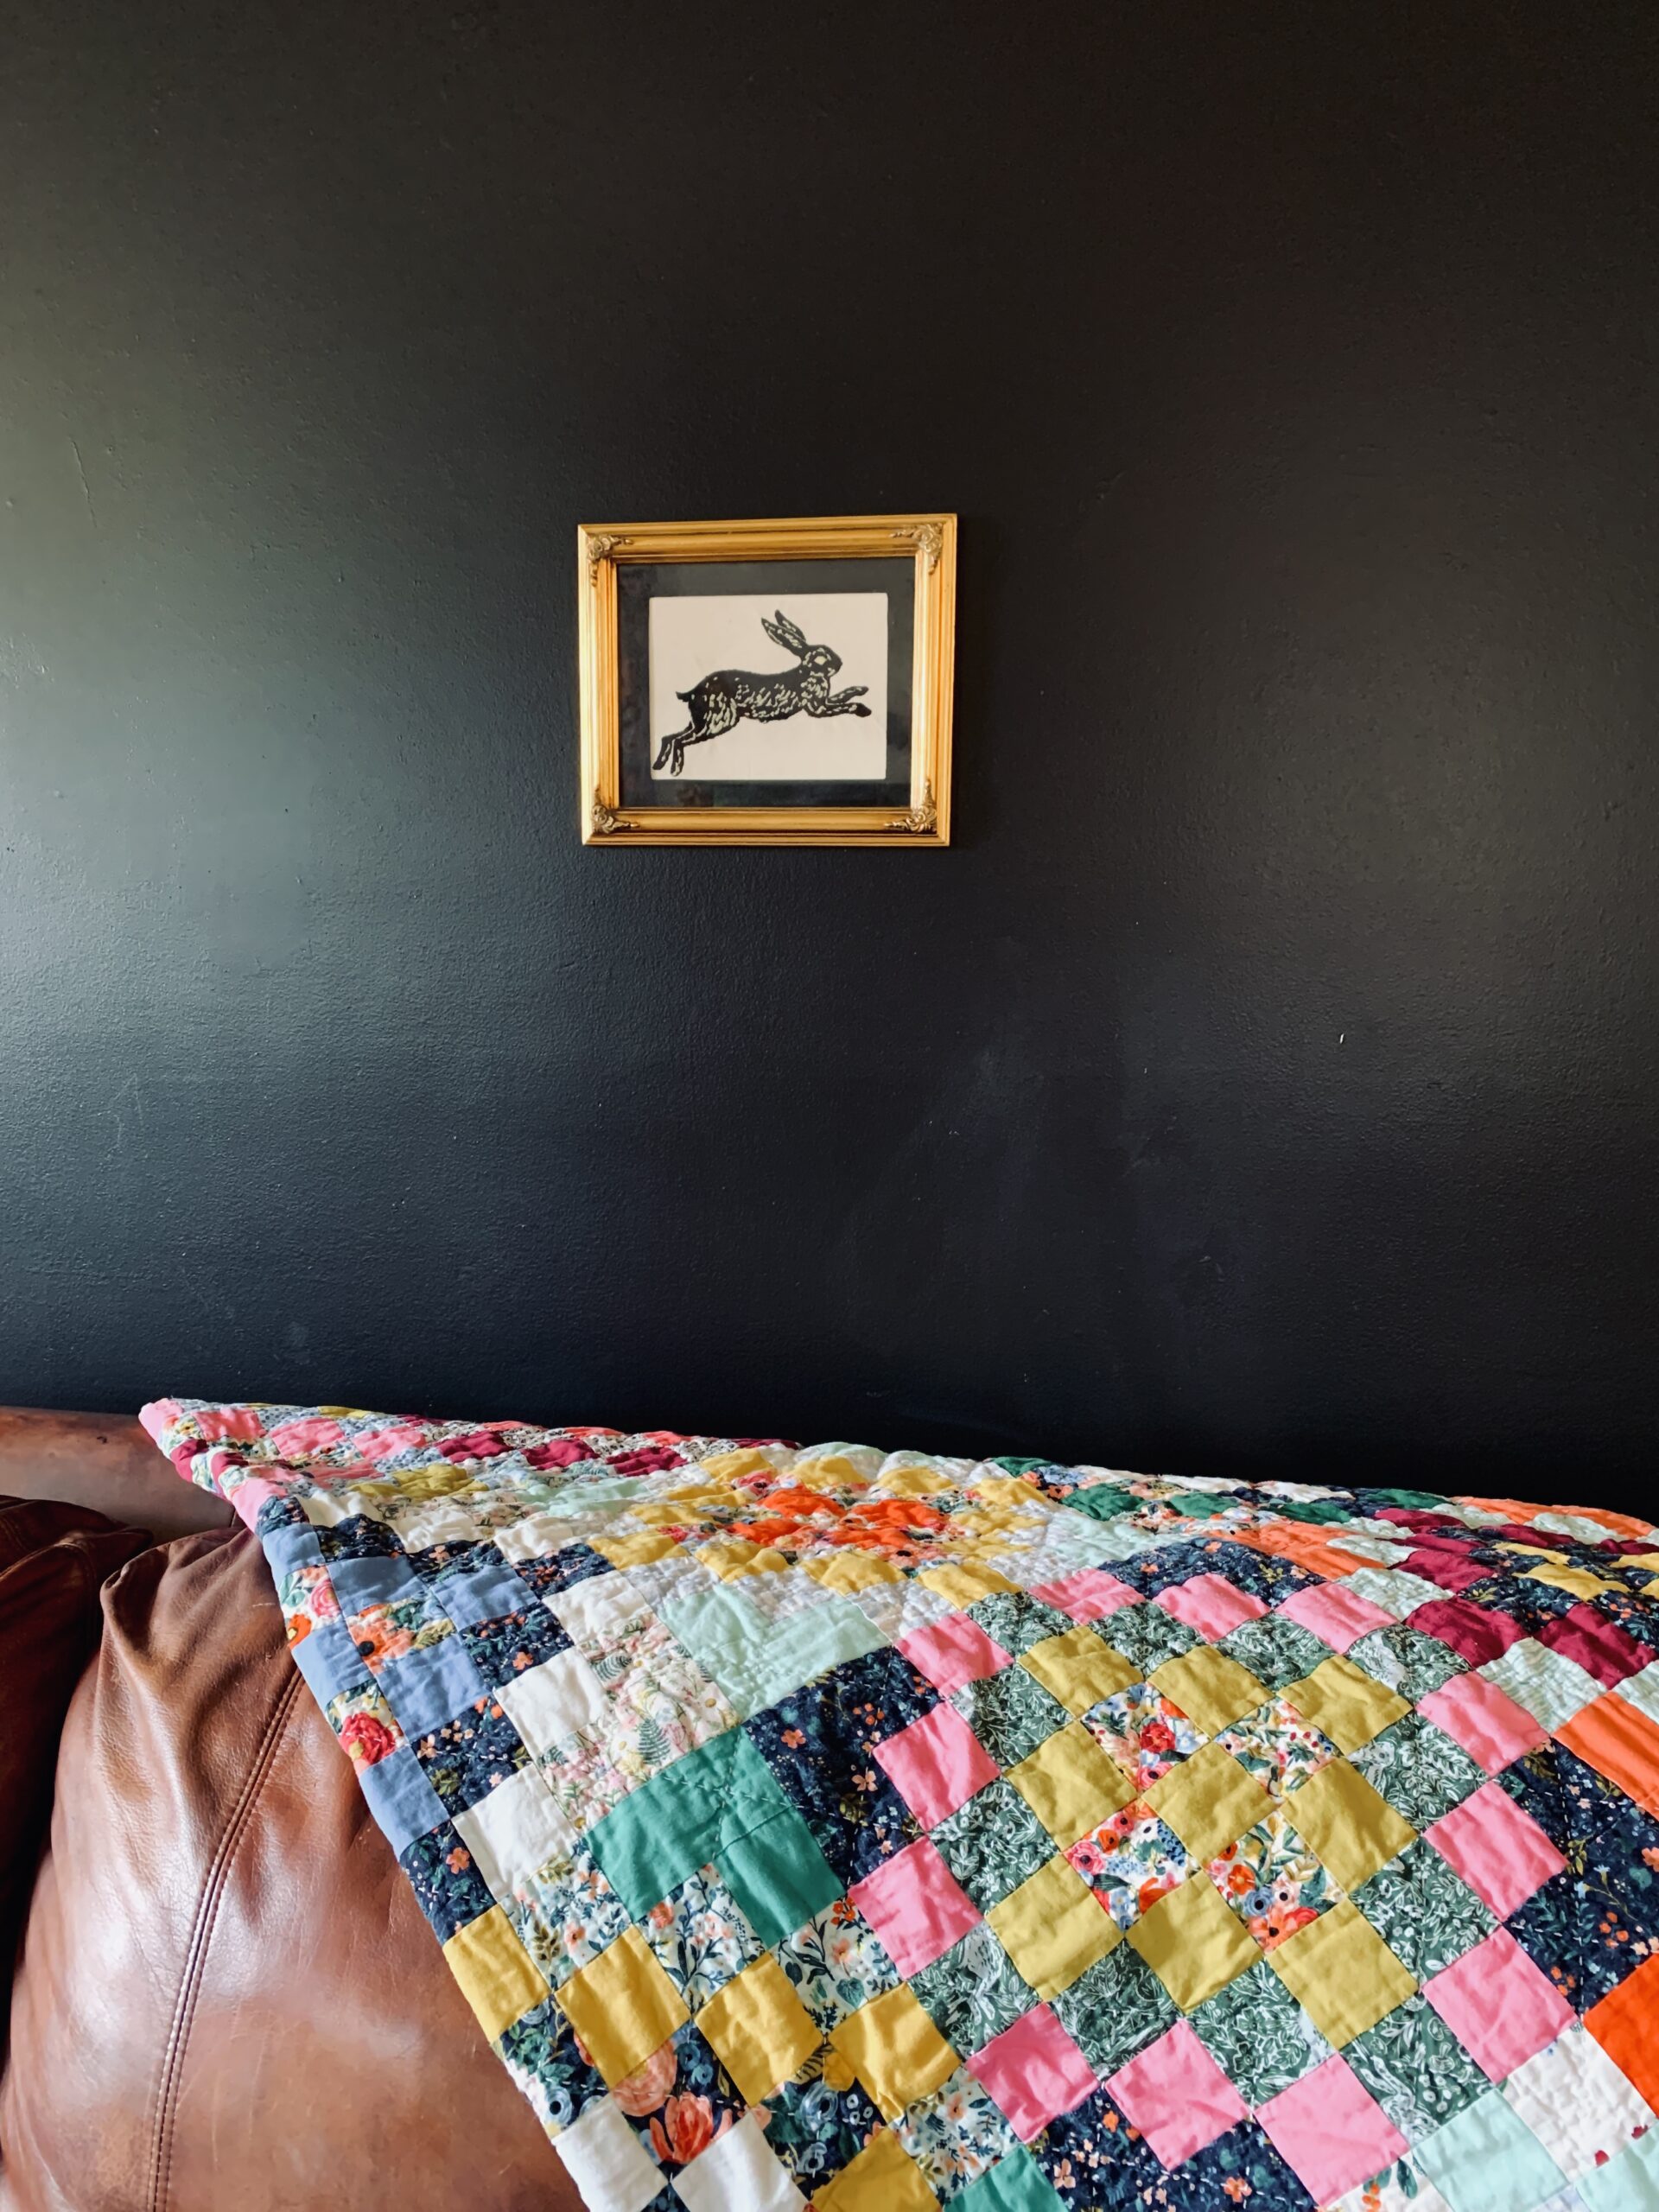
    framed embroidery 2


    Check out some of my other Skyline S9 projects HERE, and see the rest of my tutorials HERE. -Meredith

  • 10/4/2021


    Janome Maker Carolyn Norman from Diary of a Sewing Fanatic is taking inspiration from the runways and The Met Gala and created a wonderful tutorial for you to make your own look to walk the runway or where ever you want to feel stylish! 

    I sew on a Janome 9450QCP which is a Quilter's sewing machine.  However, as a garment sewist, the machine has so many quilting features I adore.  This month I decided to explore the 9450QCP's quilting abilities by making a patchwork dress. For Fall 2022, several designers have shared patchwork and quilted garments in their collections which inspired this dress.


    First materials ~

    Most quilters use quilting cotton for their quilts. While the designers I was inspired by used silk in their garments, I decided to go with denim which is a more practical solution for my lifestyle. Also, there's such an interest in sustainable sewing in the sewing community right now, I took this opportunity to make my dress primarily from scrap pieces and remnants leftover from other makes.

    Pattern ~

    I used the Style Arc Jema Panel Dress as my starting point. However, any simple tunic or shift dress pattern would work to recreate this look. I also chose to highlight one patchwork section of the fabrics used in this dress, as well as the piecing the pattern suggests.

    Construction ~

    Basically sewed this dress using the quarter-inch foot and the straight stitch plate to insure that my seams were exactly a quarter inch. Cause I'm not a precise sewist so I need all of the help I can get! 


    I took one section of the pattern and measured out six blocks...


    Then I added 1/4" seam allowances all the way around...


    Pieced those sections together first before making the rest of the dress...


    A few close-ups of the patchwork on the dress...


    As with a quilt, I added a lining to cover the patchwork seams of the dress...


    To finish the neckline I inserted piping that was applied using the piping foot and the topstitching was done with the quarter-inch foot.


    Otherwise, this was a straight sew.  Okay, okay not really. I tore the dress front apart and recut some of the blocks three times to get a patchwork mix that I liked. I think that's also something quilters experience when trying to get the block to look right!


    Anyway here are few pictures of the finished garment...


    The 9450QCP made sewing the patchwork so easy! Having the enhanced lighting, the extra space to move my dress around, and all of the sewing feet to make each task simple to do is why I love the machine so much!


Prev 1 2 3 4 5 6 7 8 9 10  ... Next 

Tags

#freesewingtutorial 4th of July Applique Block of the Month Bunny Carolina Oneto Christmas Continental M7 Cosplay Cosplay Tutorial Costume Crafting Decorative Stitches DIY DIY Accessories DIY Father's Day Gift DIY skirt Embroidery Everyday Applique Father's Day Fiesta Weave Lunch Mats Fiesta! Four Fabric Quilted Project Bag Free Bag Pattern Free Pattern Free Quilt Pattern Free Sewing Free Sewing Pattern Free Sewing Tutorial free skirt tutorial Free tutorial Fun Projects Garment Sewing Good Tidings Quilt Along Green Goddess Dress Handmade Gifts Heidi Proffety Historical Costume Tutorial Holiday Sewing Home Decor How To How to Machine Bind How to Make a Quilt How to Make a Quilt. Free Quilt Pattern How to Make Panties How to Quilt How to Sew How to sew a top Janome Janome 9450 Janome AirThread2000D Janome Artisan Janome Artistic Digitizer Janome Conitential M7 Janome Continental M7 Janome HD3000 Janome Maker Janome MamoryCraft 15000 Janome MemoryCraft 15000 Janome MemoryCraft 6700p Janome S9 Janome Sewing Machine Janome Skyline S7 Janome Skyline S9 JanomeHD9 Lifestyle Machine Embroidery Maureen Cracknell MDW Melanie Call Memory Craft 15000 Moon Garden QAYG Quilt Block Mother's Day gift Napkins Patriotic Pattern Pillow Pillows Project QAYG Quilt Block Quilt Quilt As You Go Quilt Block Quilt Block Pattern Quilted Project Bag Quilting Quilting How to Quilt Rainbow Block of the Month Rainbow Quilt Block of the Month Rainbow Quilt BOM Reversible Zippered Pillow Rolled Hem Foot Scrappy Star Pillow Sew Sewing Sewing Machine Sewing Project Sewing Tutorial Skyline S9 SkylineS9 Stuffie Summer Sewing Project The Hype Tutorial Valentine's Day
DEALERS
The TWO Closest Dealers to you are:
19 PUTNAM AVENUE , PORT CHESTER NY, 10573
914-934-2934
196 Boston Post Road , Orange CT, 06477
203-878-1654
Find Additional Dealers