7/6/2021
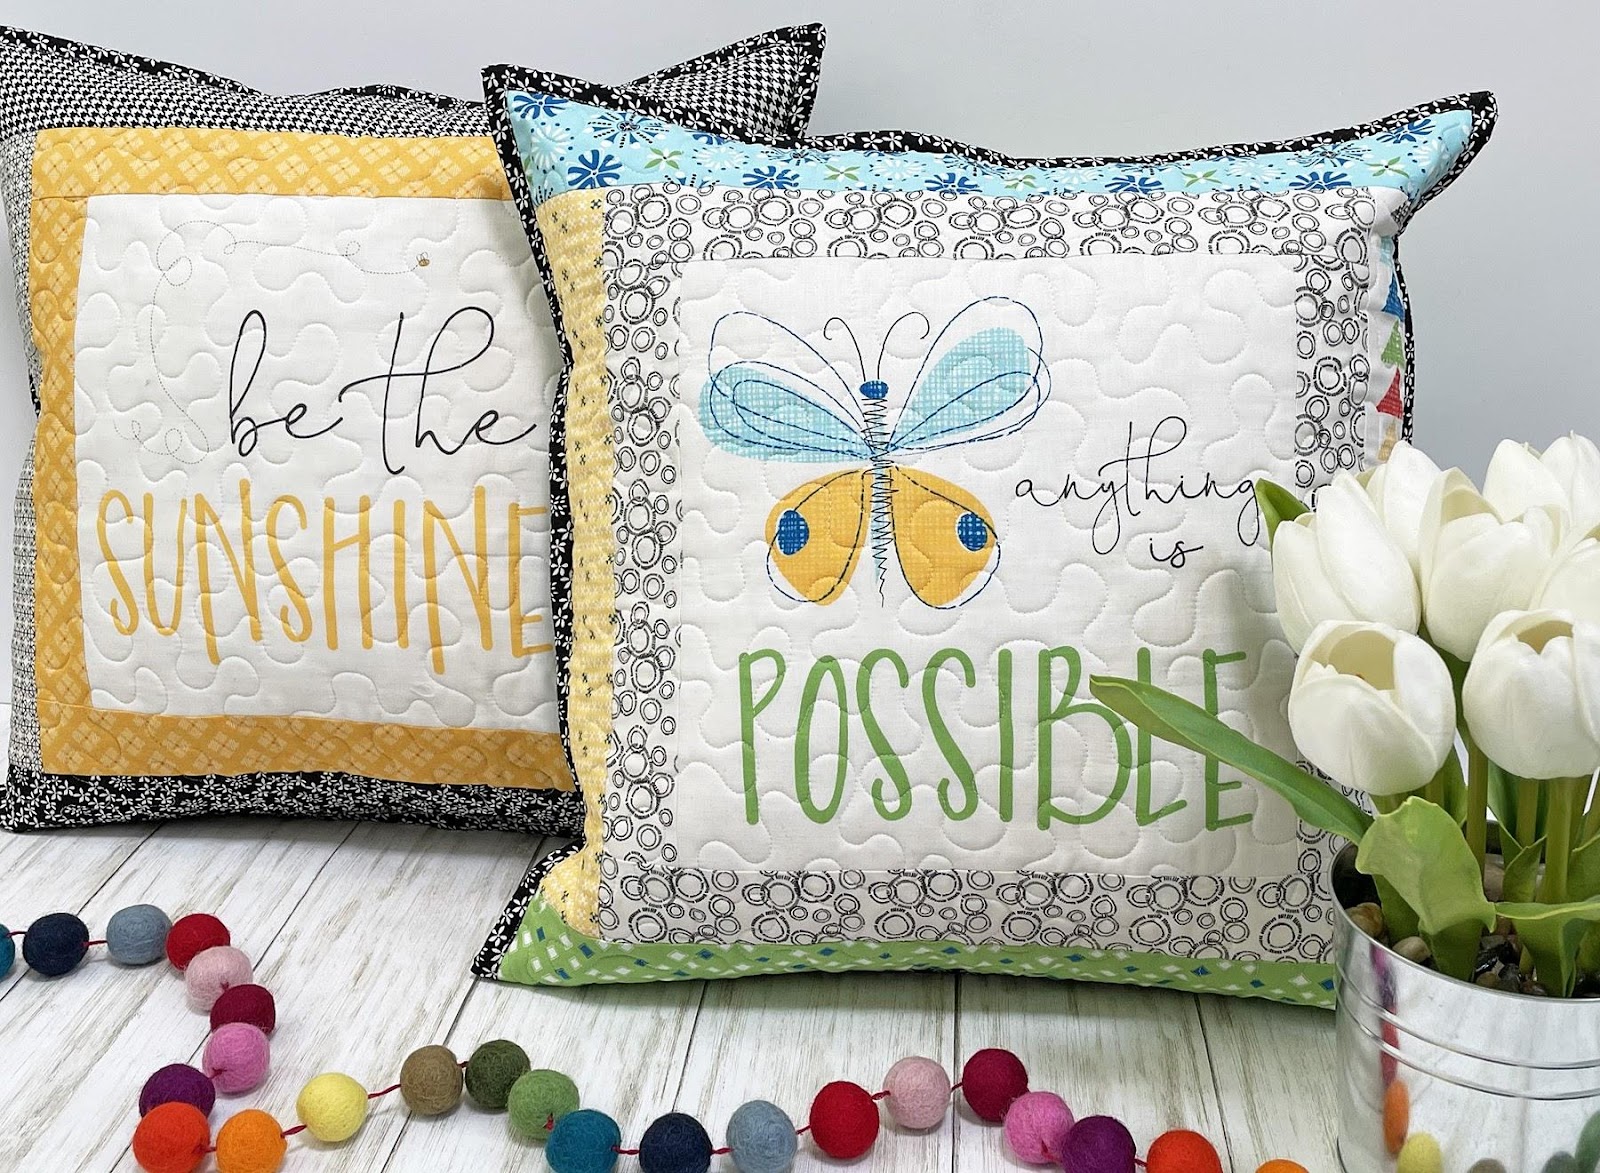
Save time and have more quilts finished by machine binding your quilt! Janome Maker Melanie Call from Machine Binding Tutorial with Janome M7!
![A close-up of a map
Description automatically generated with low confidence](https://lh3.googleusercontent.com/u4iM3zgNaYUPuJ0f4GkMv1jrB2euon39f6IRC1qHygboWBSOivjxRLUyDw4PHPZ2f_nZf8uJHAPL3hXanAFSEg9fxWEpl1BQcNPKw4sf5t4WE10S-6BnOfnz0ZTEUK8MJbrQtUo)
Hello Janome Friends! I'm Melanie from A Bit of Scrap Stuff (Blog or Instagram) and today I'm sharing my favorite technique for machine binding!
I absolutely love machine binding my quilts, pillows, and projects because it is durable, quick, and looks fabulous! This is how I bind 99.999999% of all of my projects. It is the way ;).
Ready to Learn: Machine Binding
*I'm sewing on a Janome M7 - so your Janome sewing machine screen/controls may look a bit different.
Supplies:
![A picture containing text, appliance
Description automatically generated](https://lh6.googleusercontent.com/UnOIzI0_F8dqS6-tbQZLurlCXo1T-fmy_IDHOAEym8XJcfbNMi5XYufg7GM2OswBpQ-0ssAjGJD73bcNTisuXgUaBdioJa37MPXJwTH1jO1UrWQPMrrjskmC9UyKBlLjeyblivQ)
Step 1: Make Binding
-
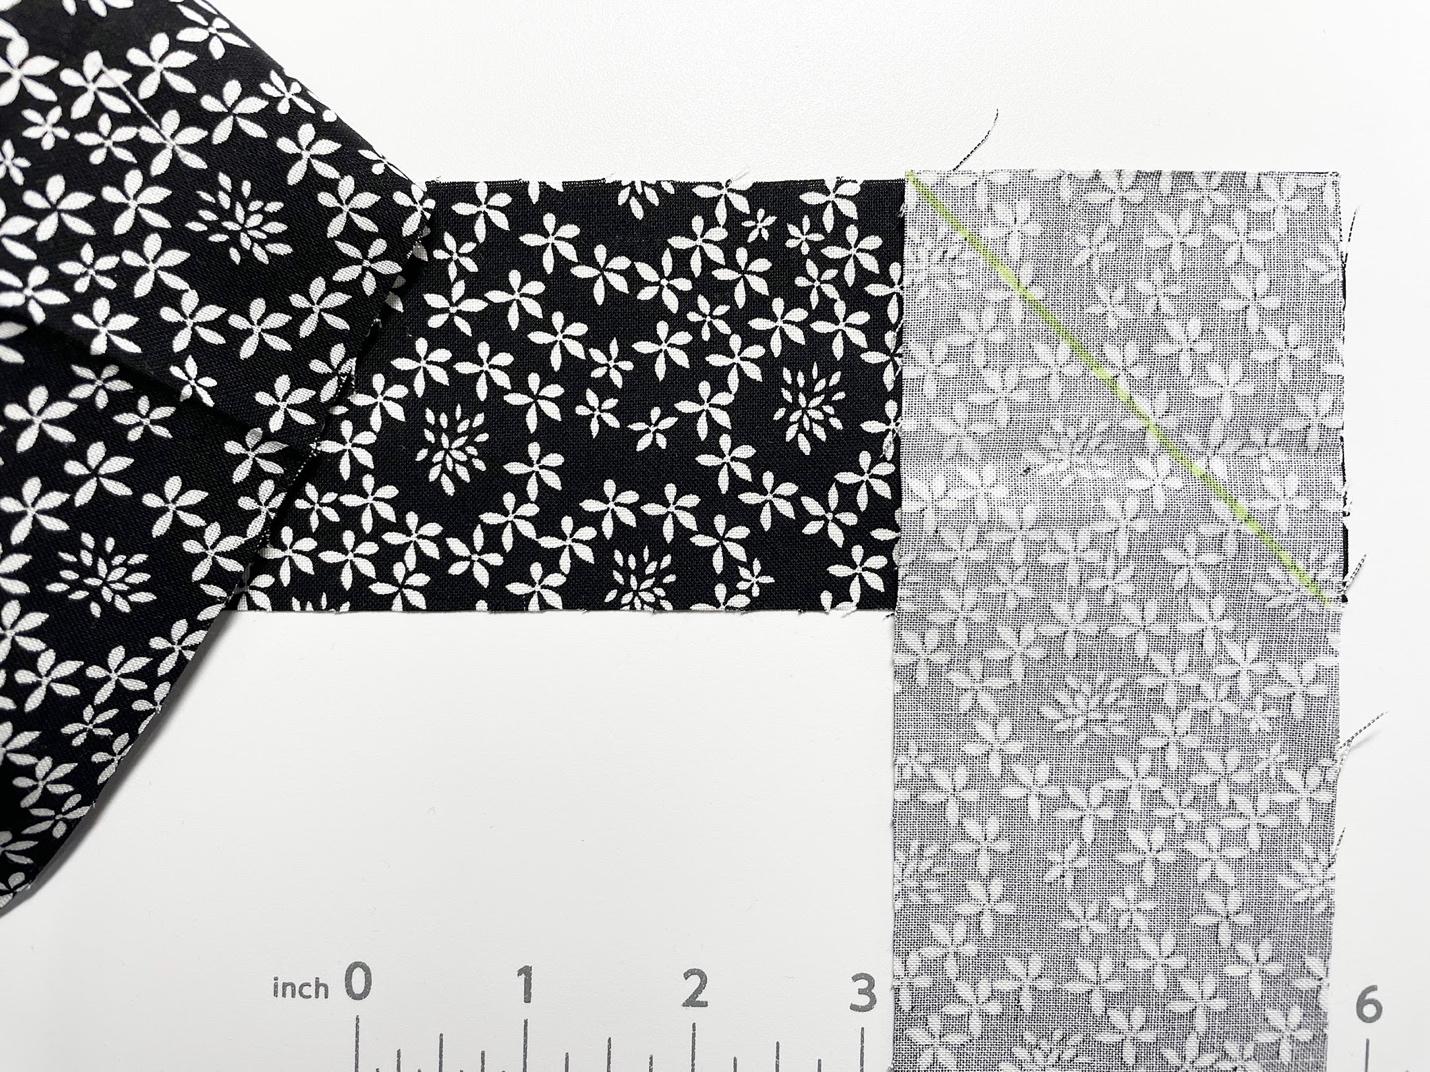
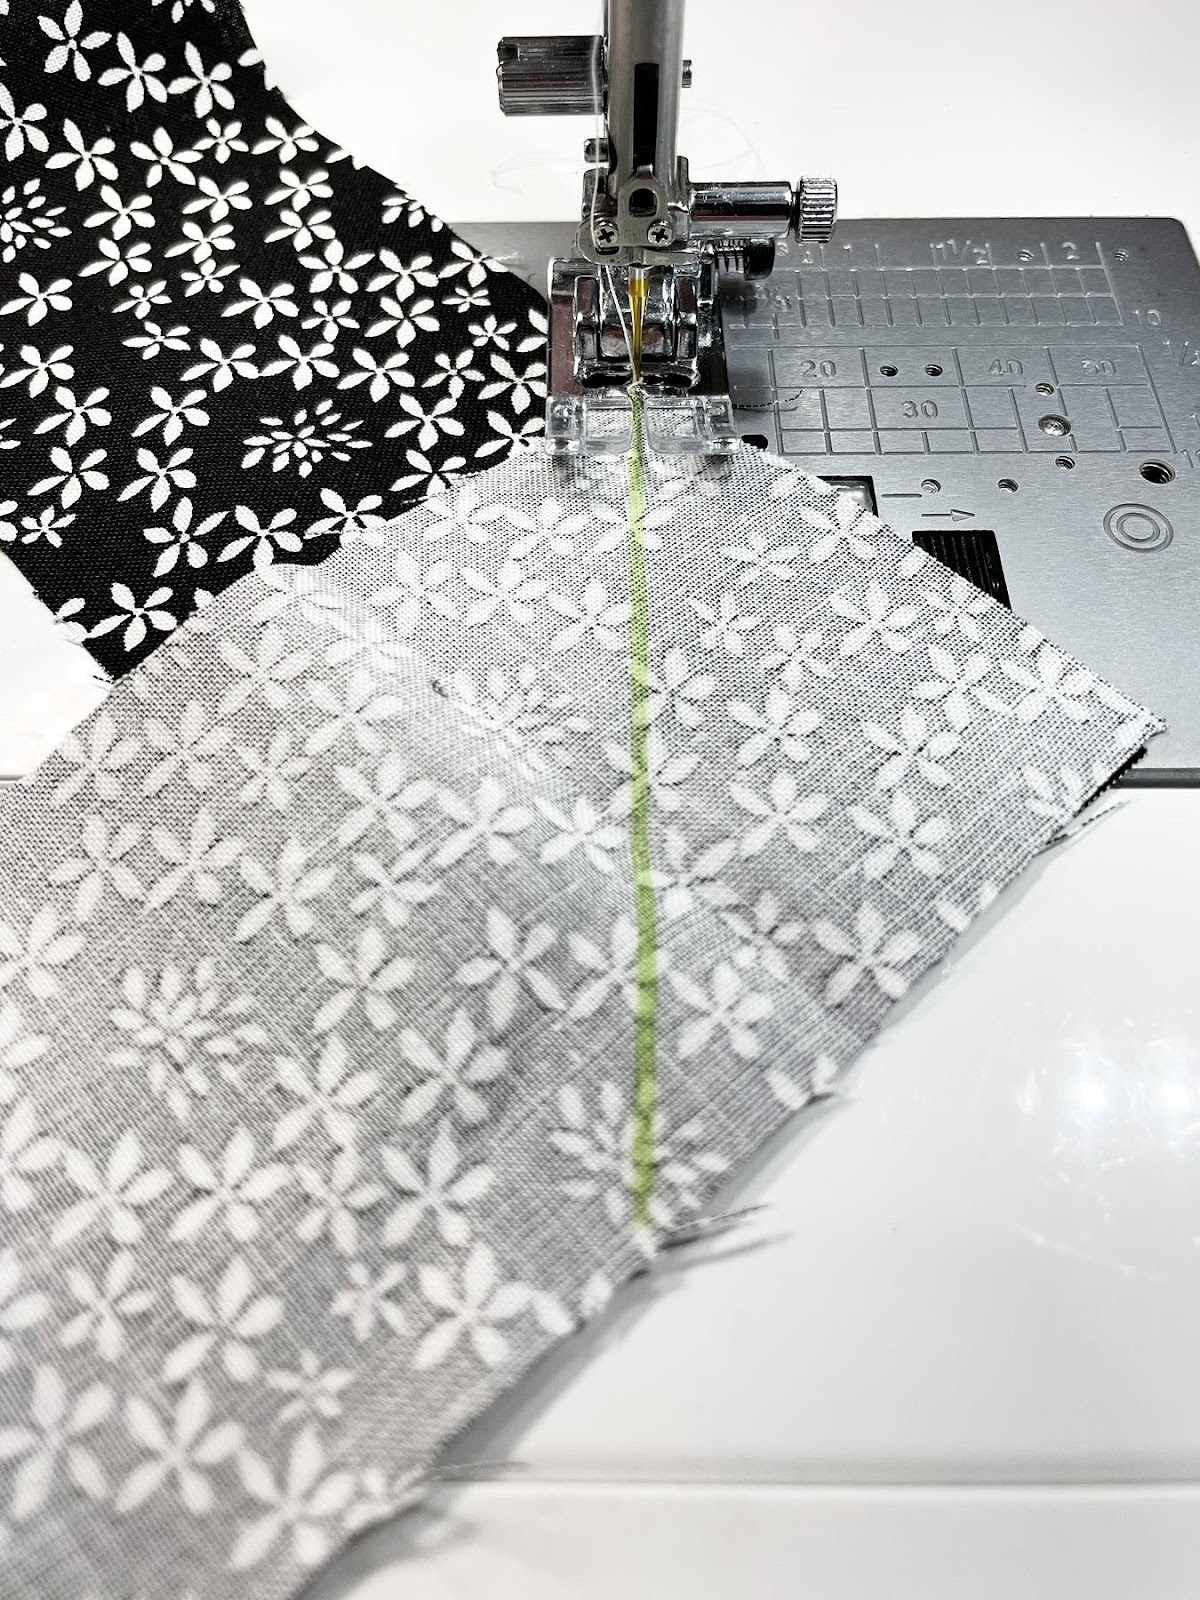
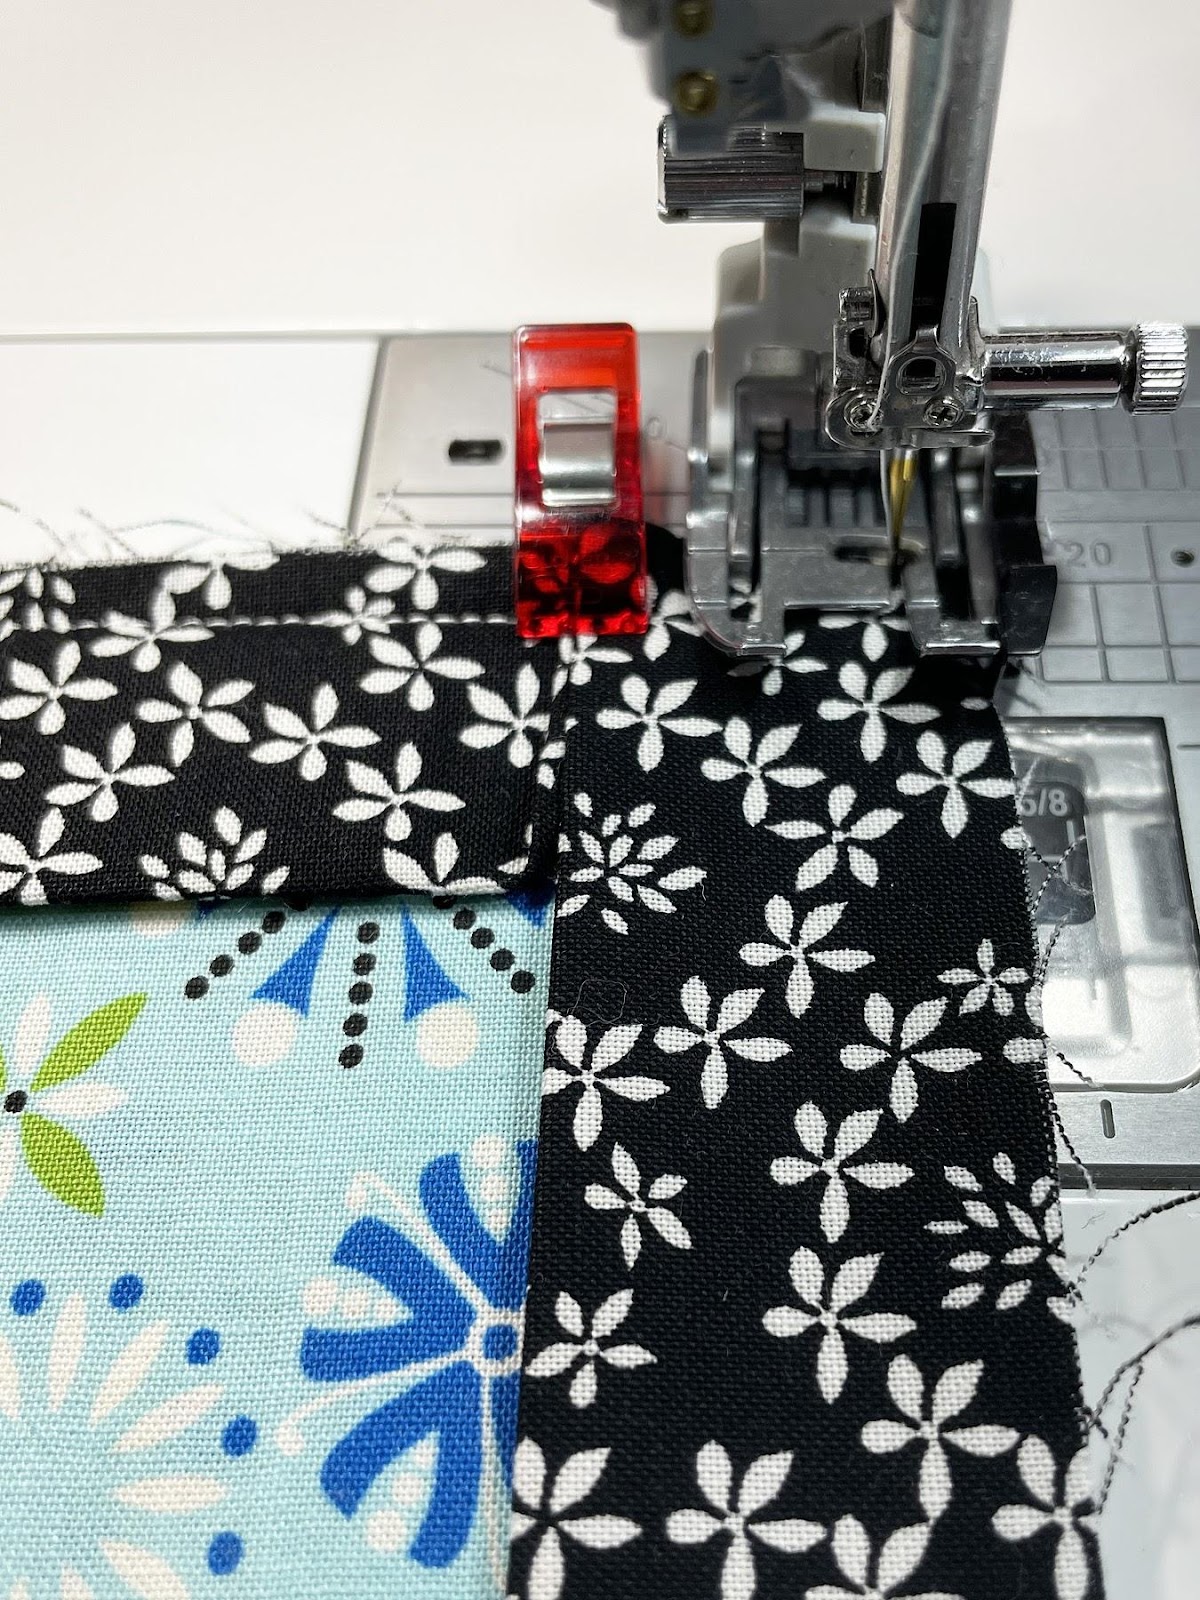
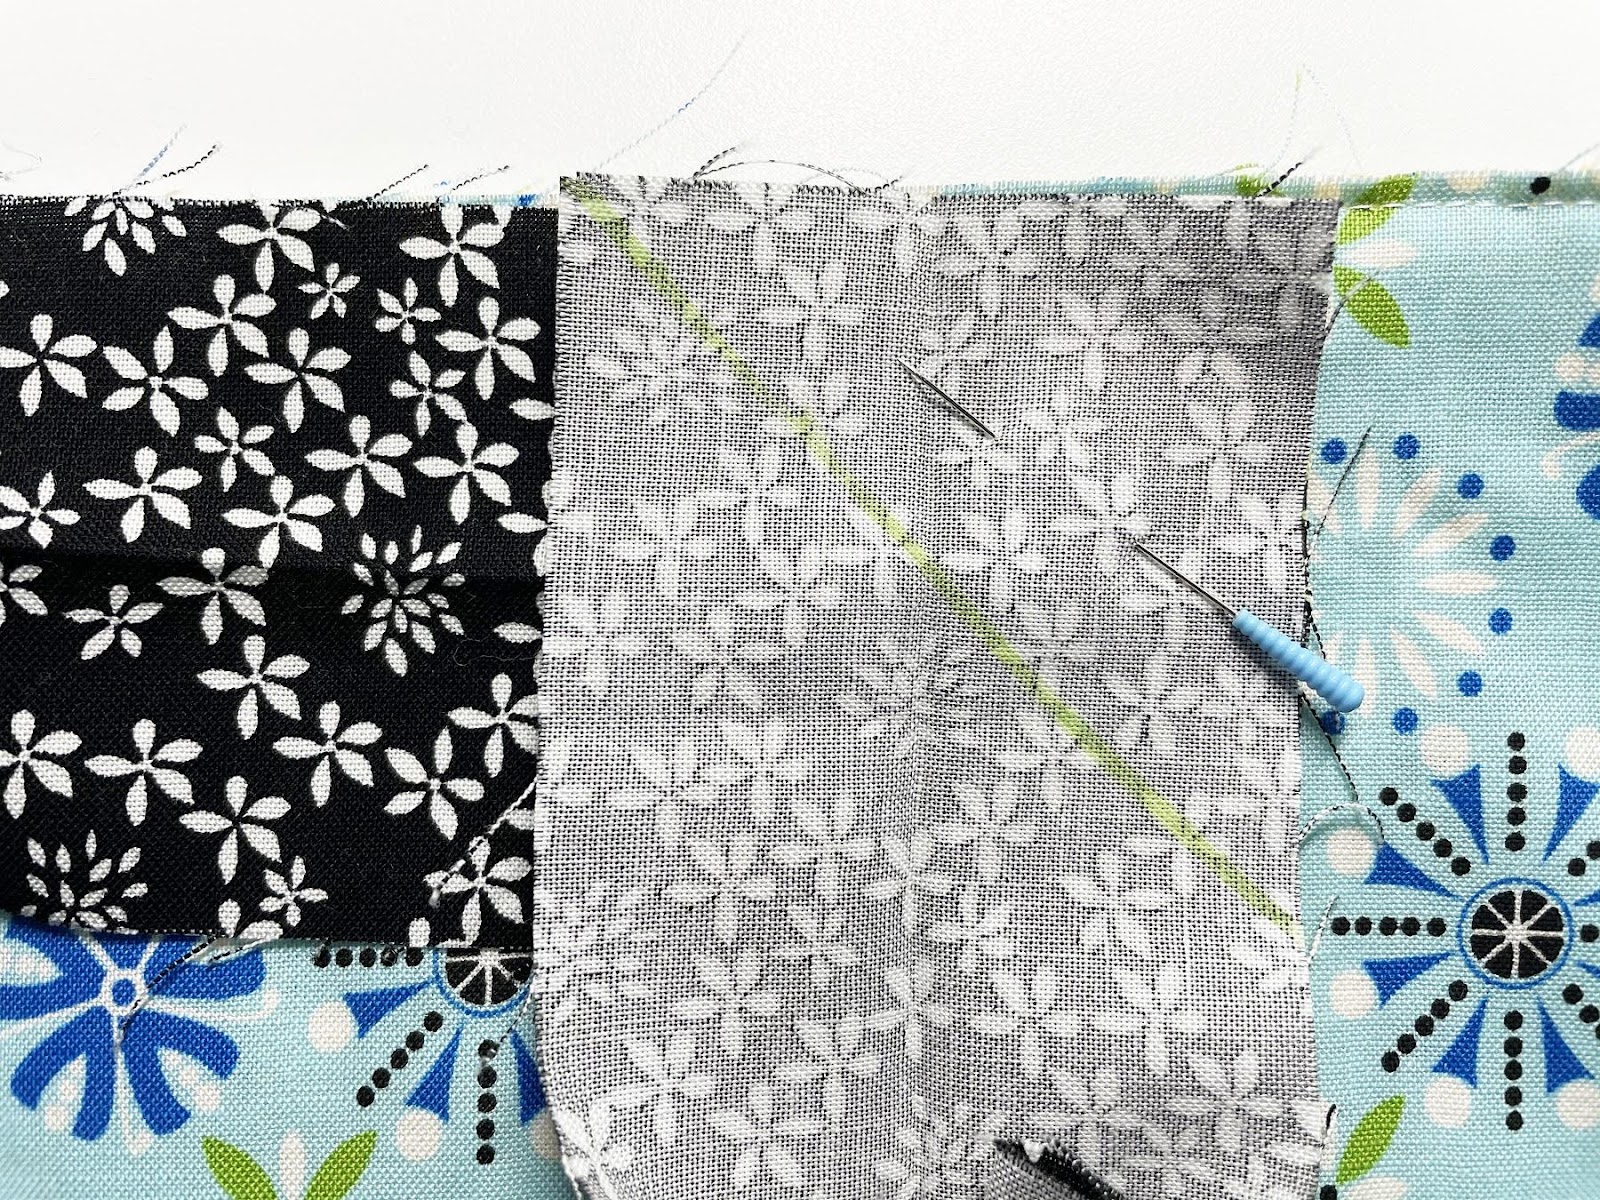
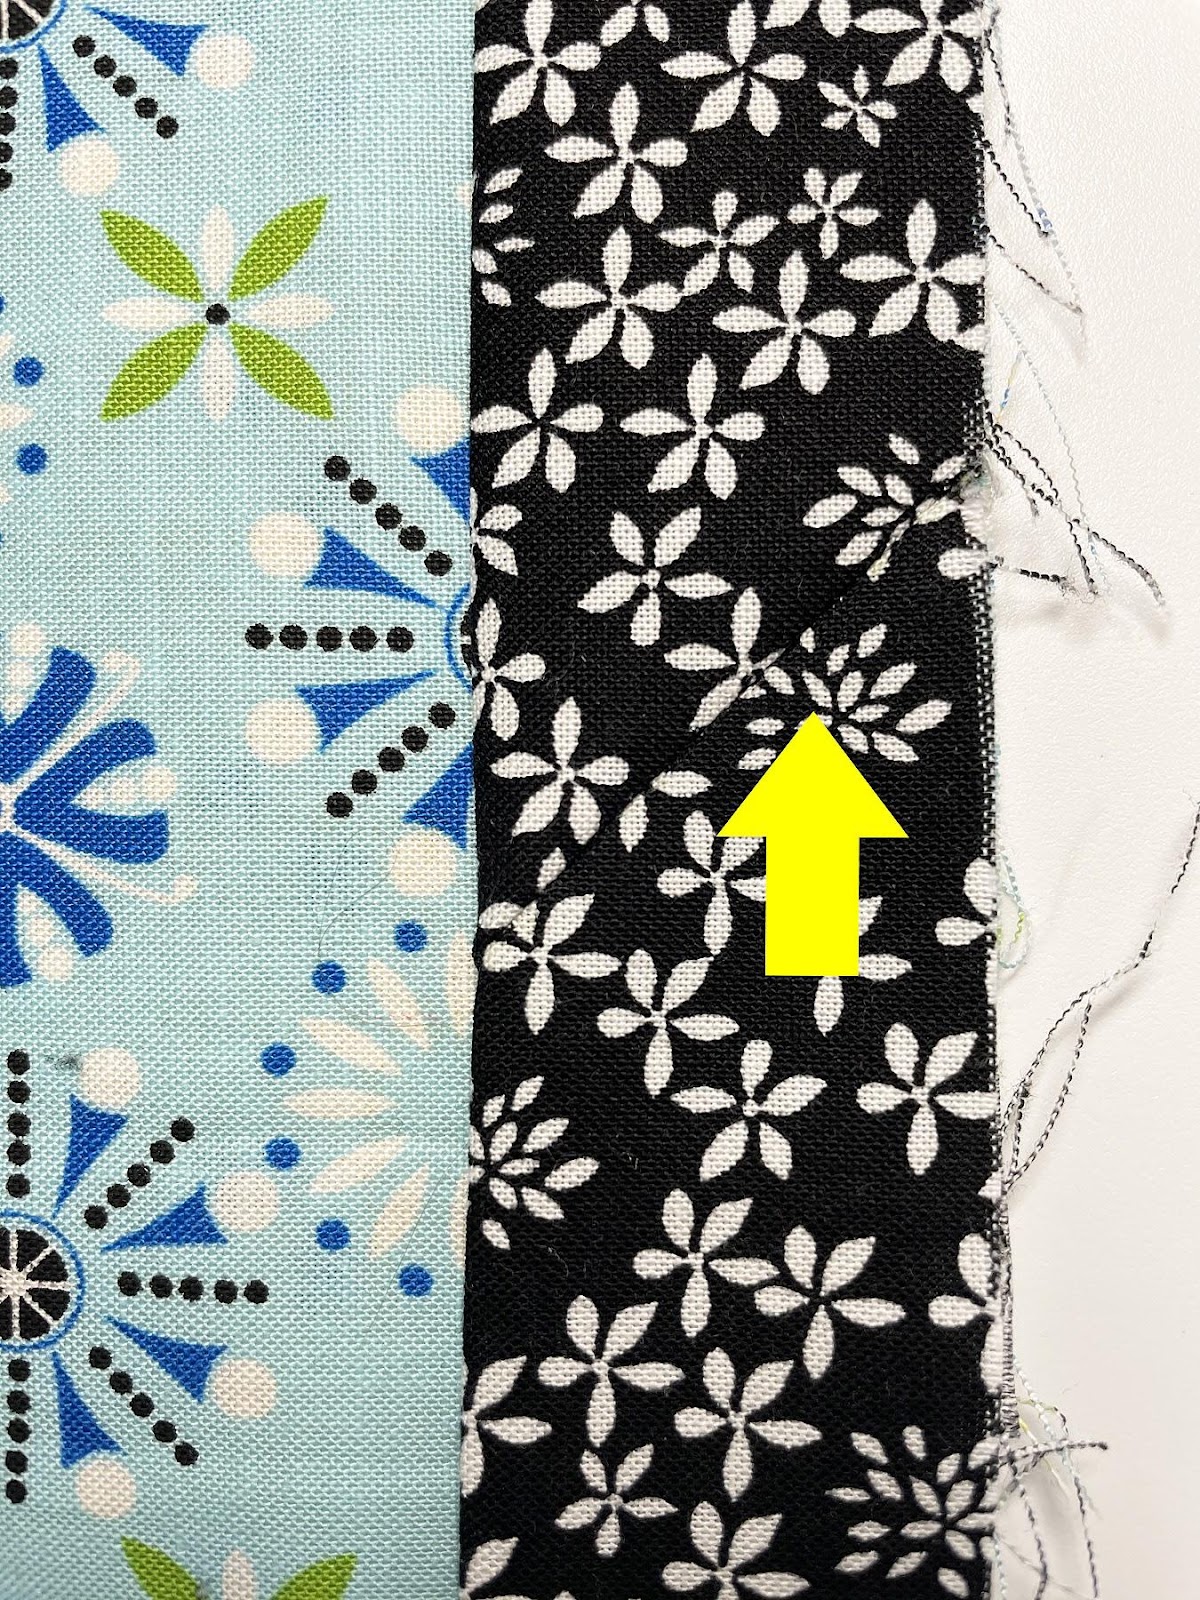
If multiple strips of fabric are needed - sew 2.5"binding strips together on the bias to make 1 long binding strip. Sewing strips together on the diagonal (bias) creates fewer bulky seams.
-
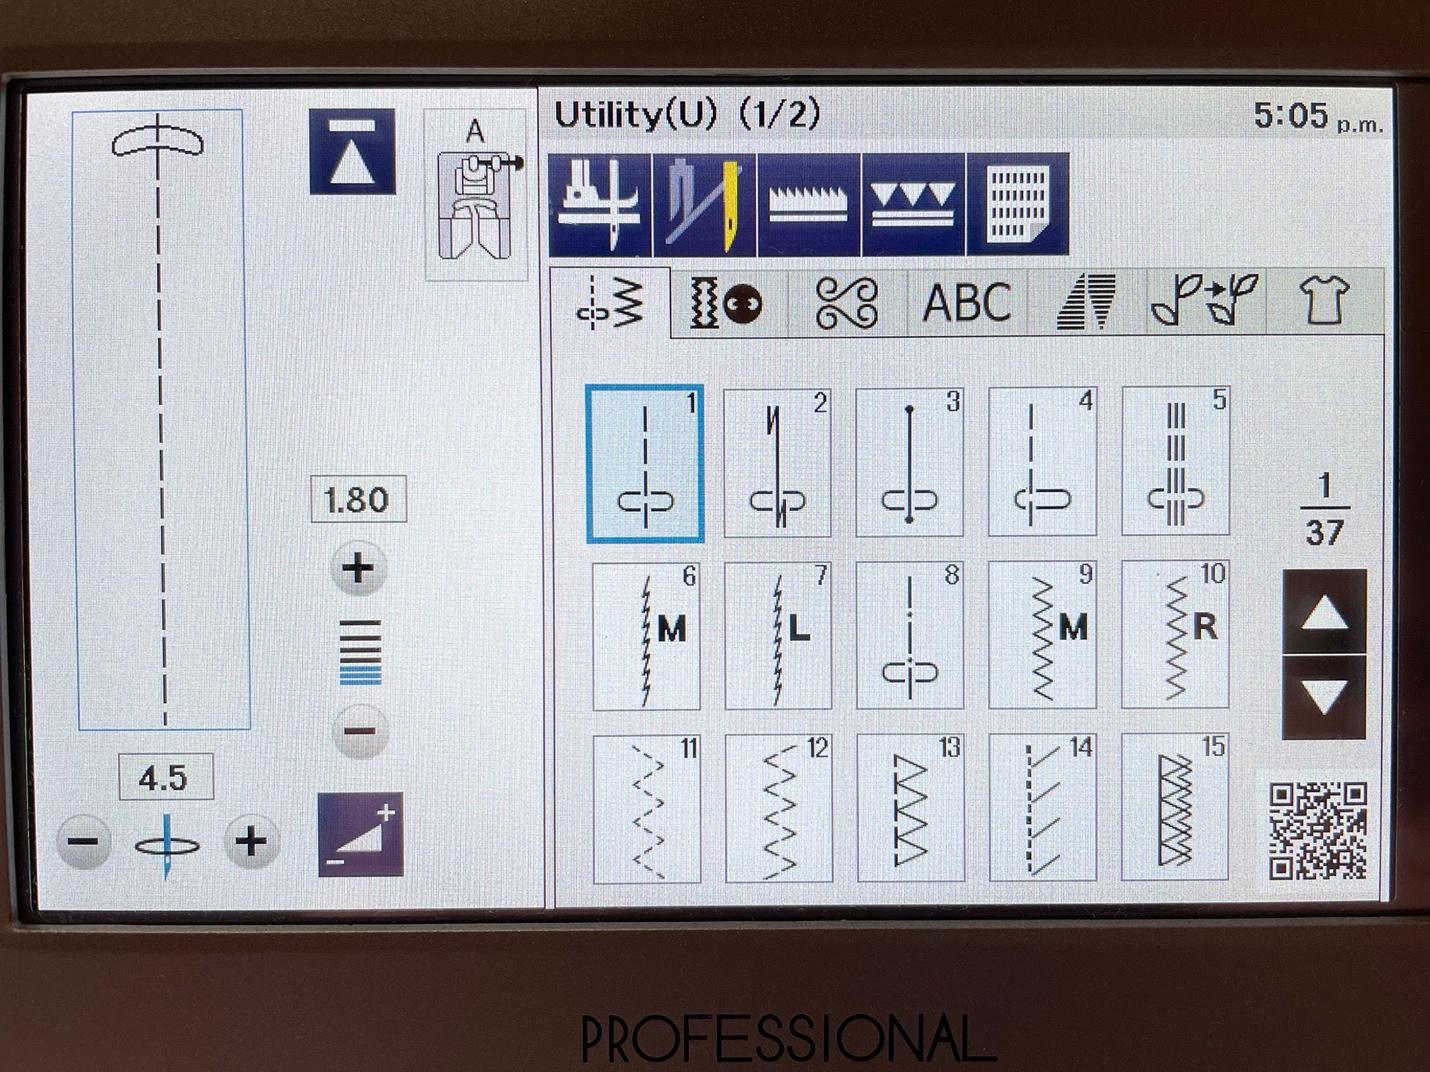
Janome M7 settings. A foot, straight stitch, 1.8 stitch length *May also use Dual Feed Holder with UD Foot (walking foot) if preferred
![Text
Description automatically generated with medium confidence](https://lh6.googleusercontent.com/9fNTaZ3L0C6LVqY0odq8InddZ4nLUmtQDQ5jQglXnTCSNV-wb18JB4WXpOKRsPW_vtbwwFiLmdQ6k0AqL5VL9W4M8M8k3ShlEmLUZvC2_1wN4TxO8XttGo-SdJKE1weCu0G5rQo)
![Qr code
Description automatically generated with low confidence](https://lh5.googleusercontent.com/FaAPbsgAOUjzaUsw2wxnhsdSBbI3Ty5QJCu9H_zC_Fq6PwVu9plbmMQ0IVMM-Y-0cBj0YYKpOfVnl18zLBSn8UVcLfE-YG1_PGFAd4yKQubzs-PHH_eW0A1n5RaysxoaFZBUjI8)
![](https://lh6.googleusercontent.com/C5DO3d4K2p-RbELNTbuauQny81JMrdQvT_pWK5Ya8gBXdb1dkFYWy0qXu2G0eY8pcqd43B8sQRZq9isVM-U4cF1UrdbgAzSwA0Lf0bDMAkyic2UakrhqUs7rDzCjZGWB3X39Agk)
![](https://lh3.googleusercontent.com/N4sz9aiz4wMU8NJbzx12F_xVX2wFO7n7cPw6jmm6Dr0yYnvIV26ljpGGsAeEFZKTom6NYzihYODgEz_EWZ6Y4m3nF0v7EQ5HfFC1U2y_2NhNlNLR7PapJvhu9DGx0kpmfvQjcLk)
![A picture containing indoor, footwear
Description automatically generated](https://lh6.googleusercontent.com/Fw9D5qROdzif09qGAdv9mVE2cxXZ61gD2ipA87gGrcFChBGTYDQnxoLu2KTmLY2C9eIhlsuPAyn8qlI13BVaejOeI9ZC1vK74e3MzHzNAygFqTBaojeRfKZ5f8TPYlL6Sk5dNoY)
Step 2: Attach Binding to BACK of quilt/pillow/project
-
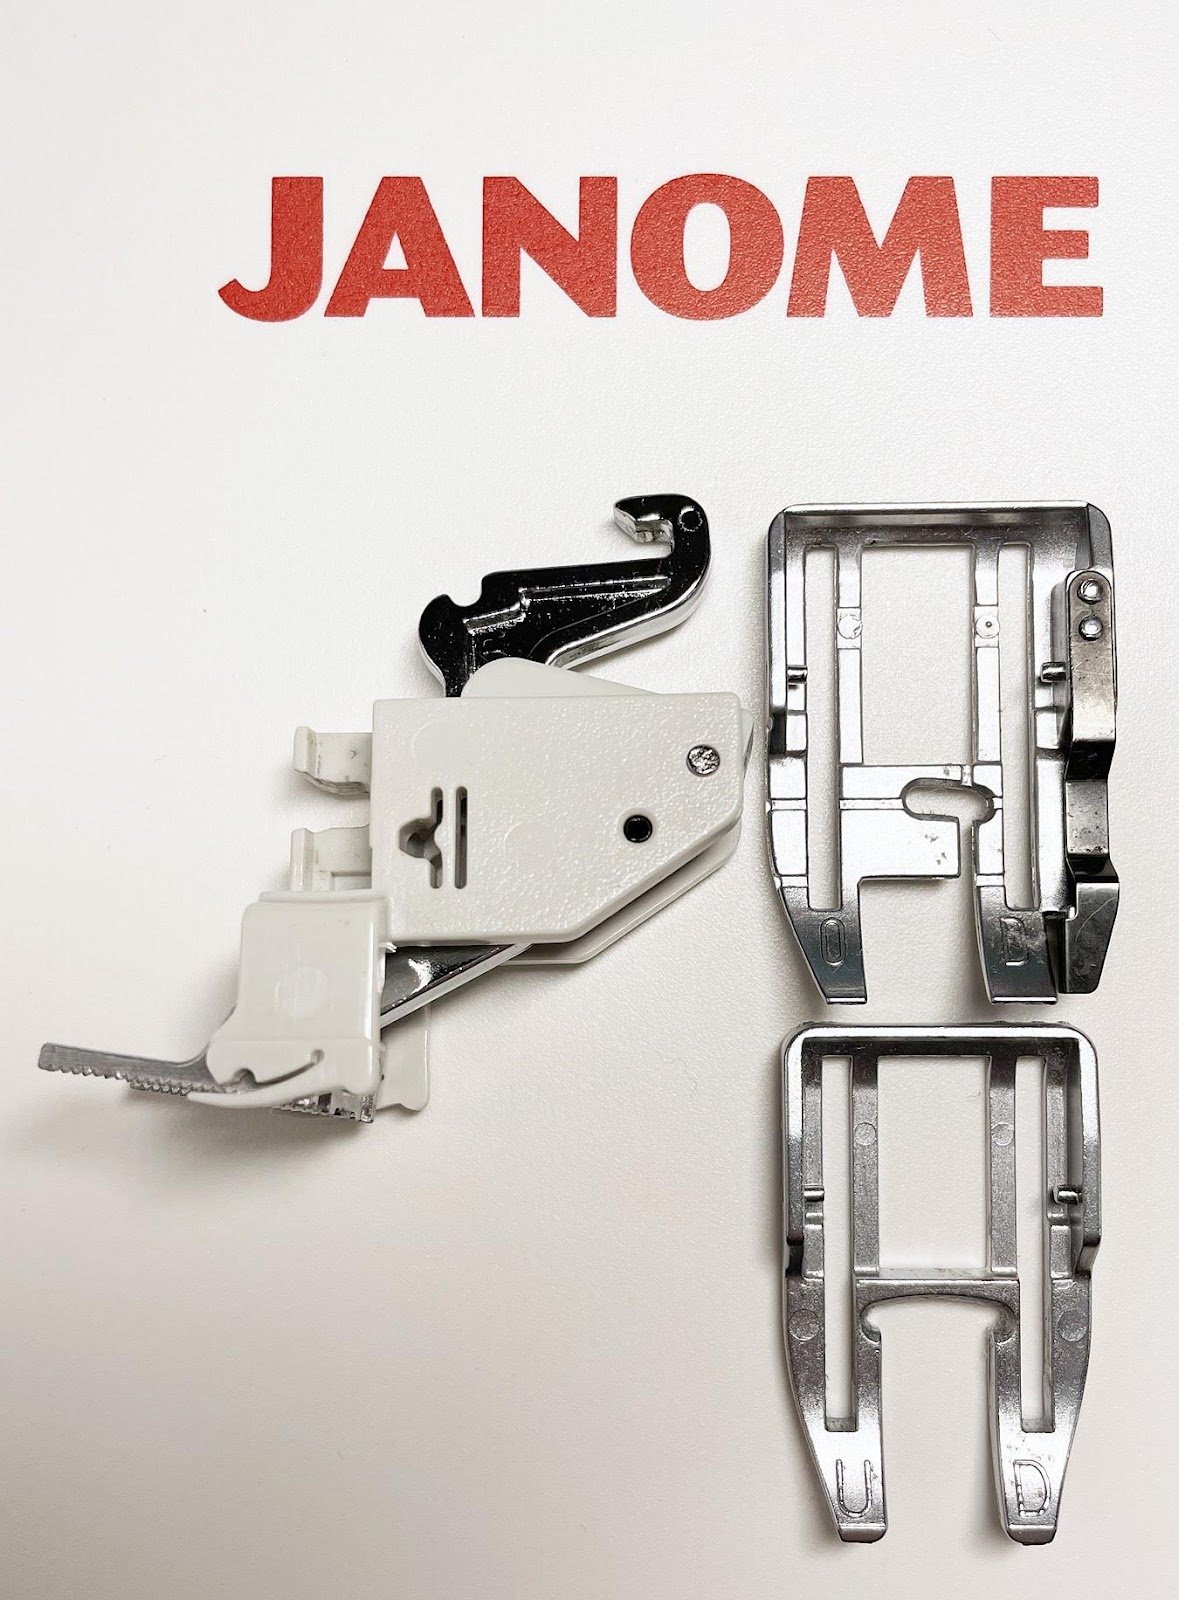
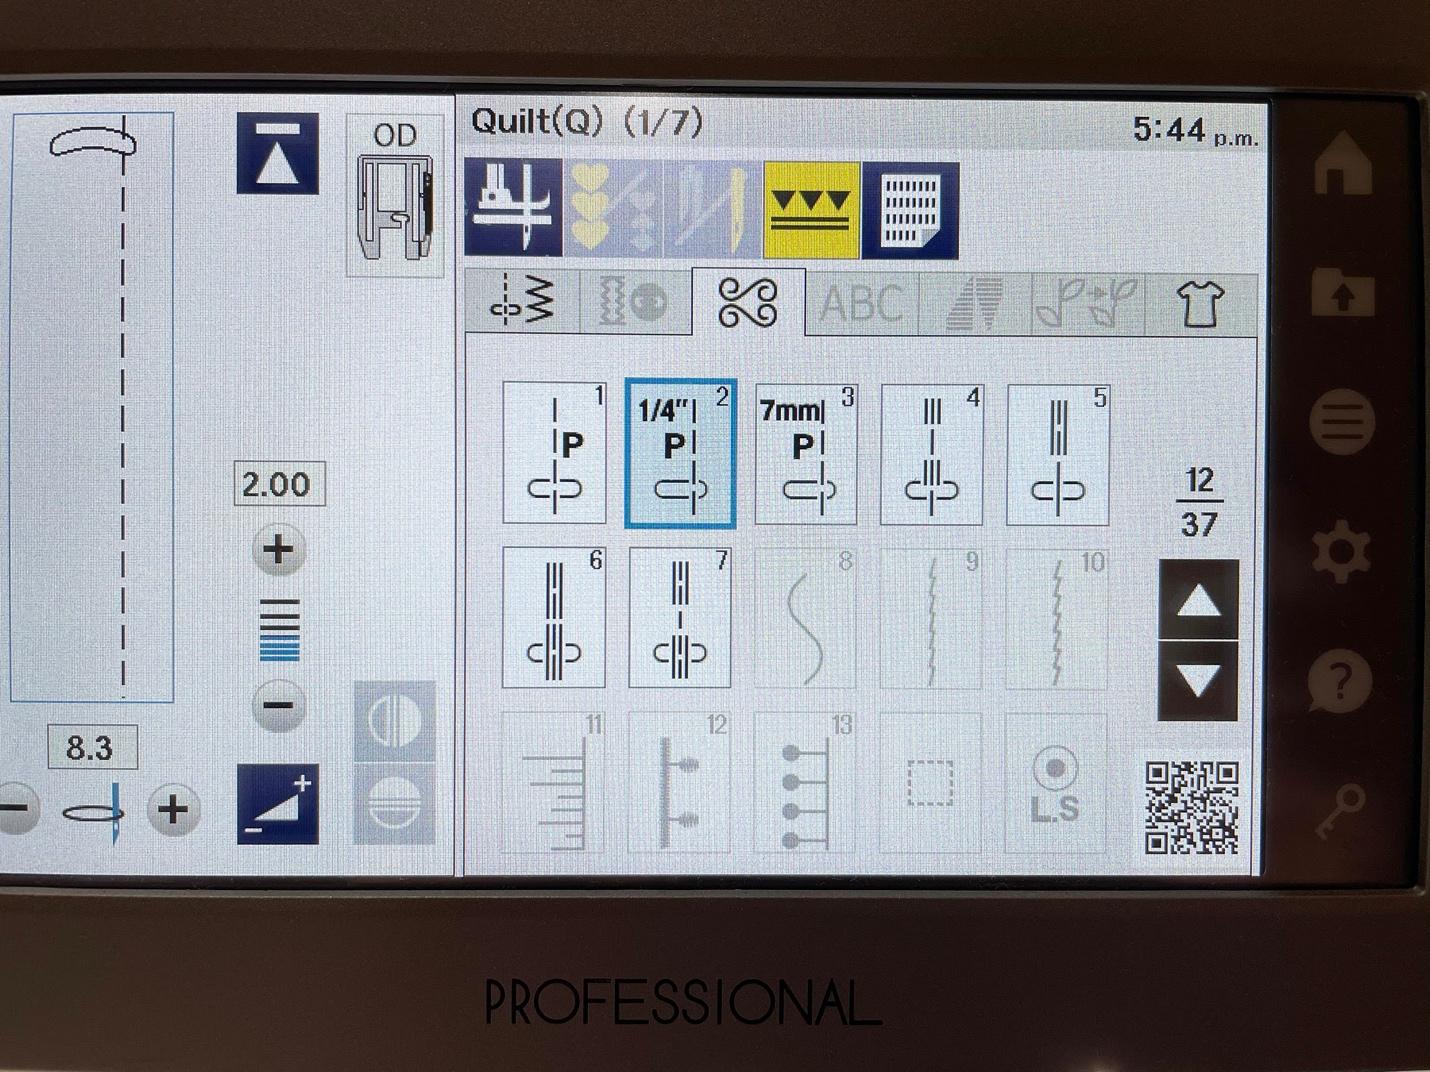
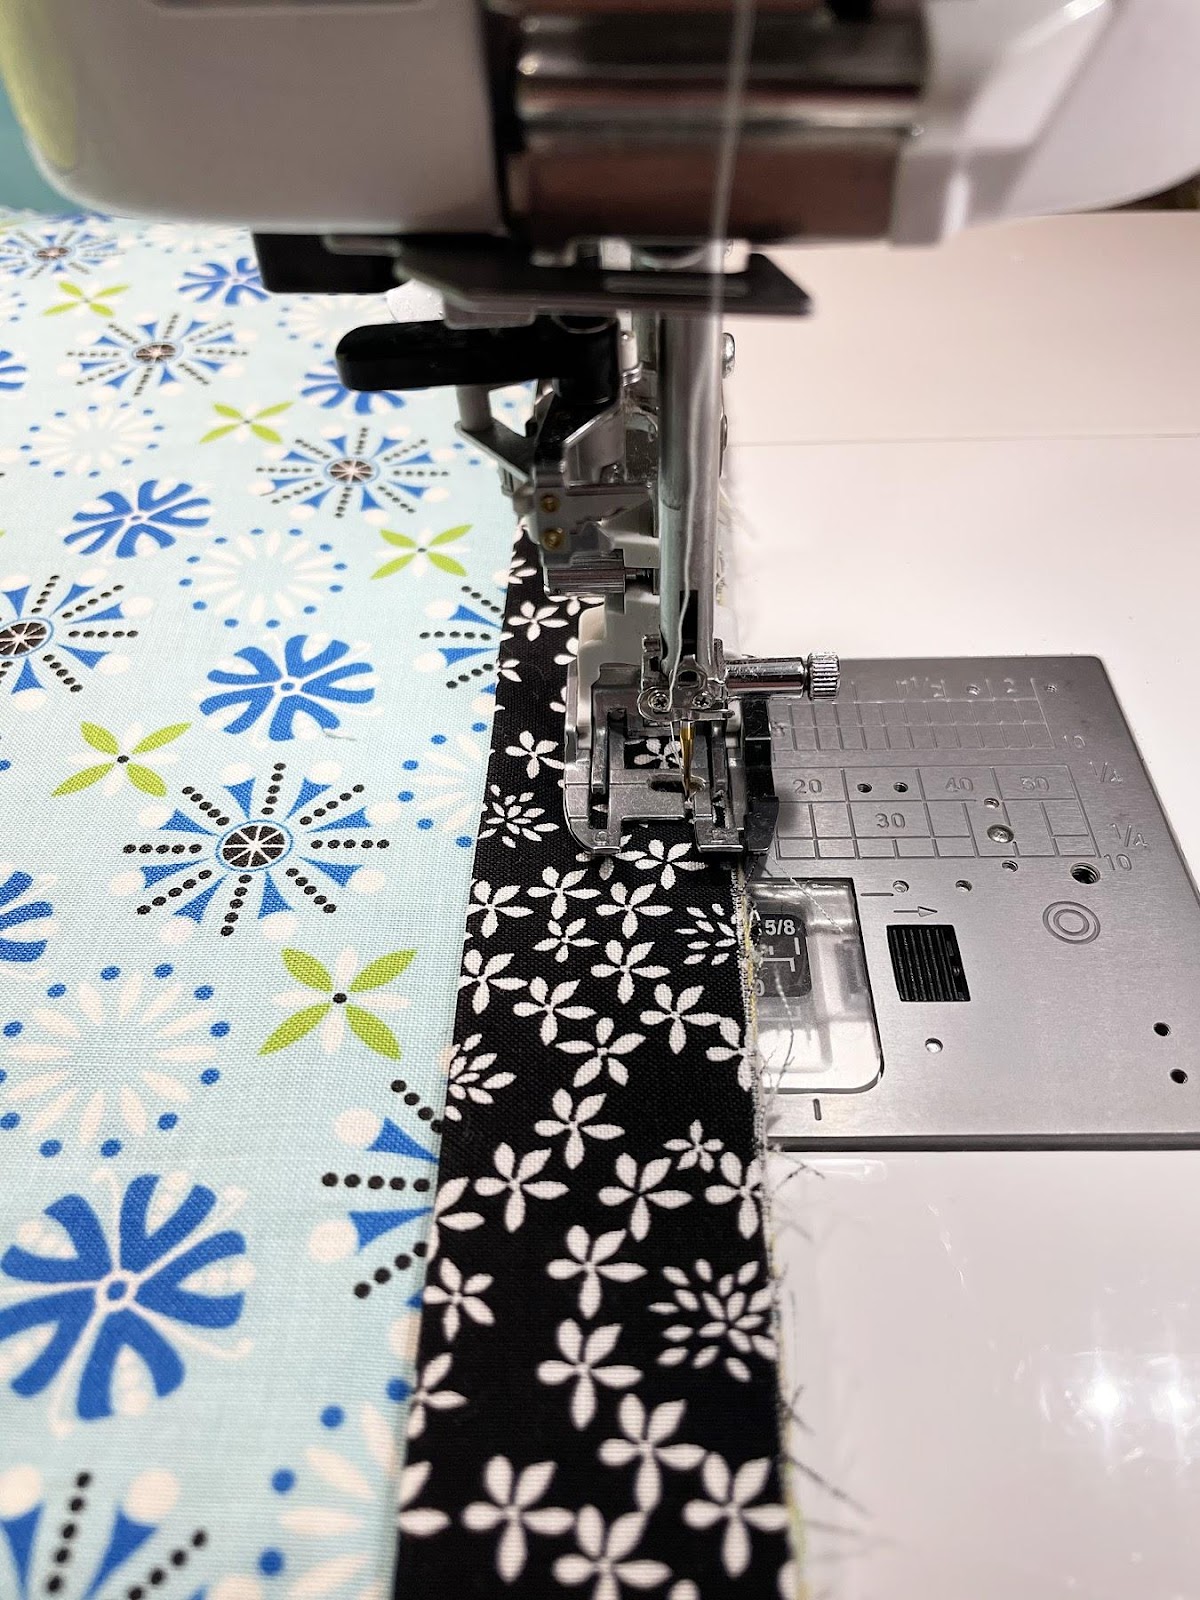
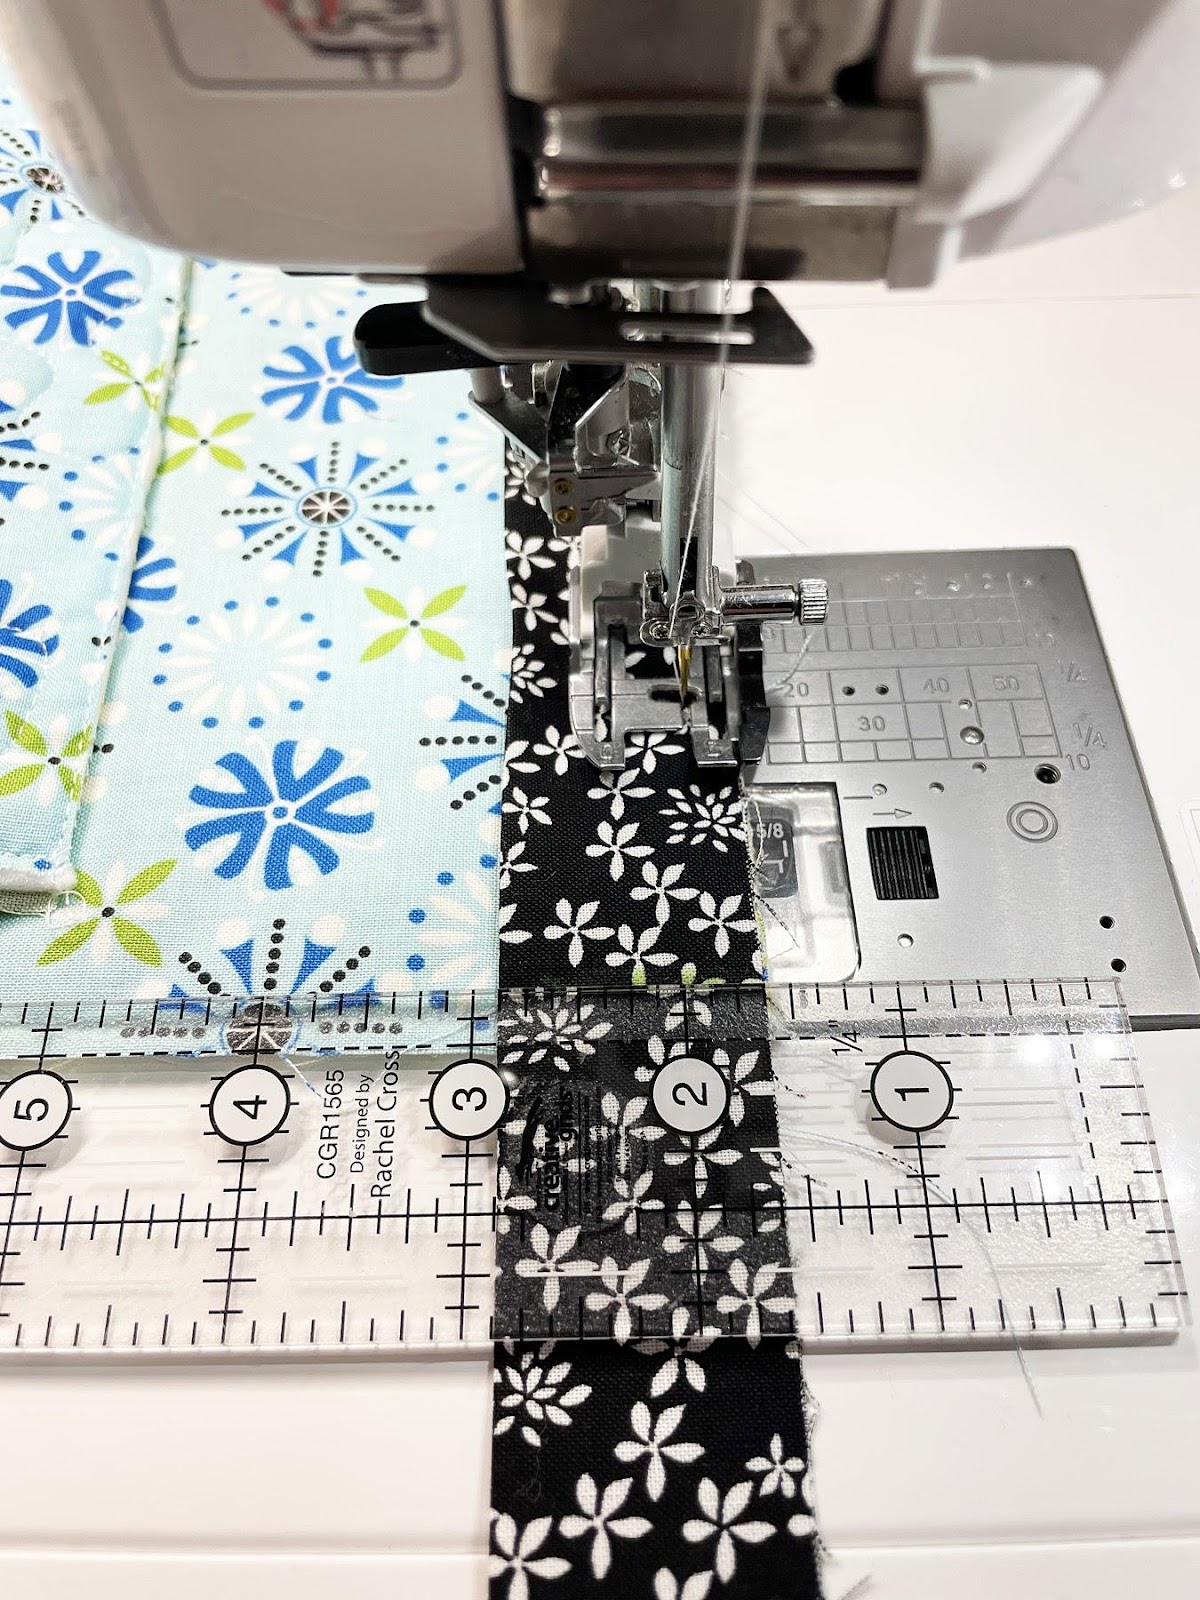
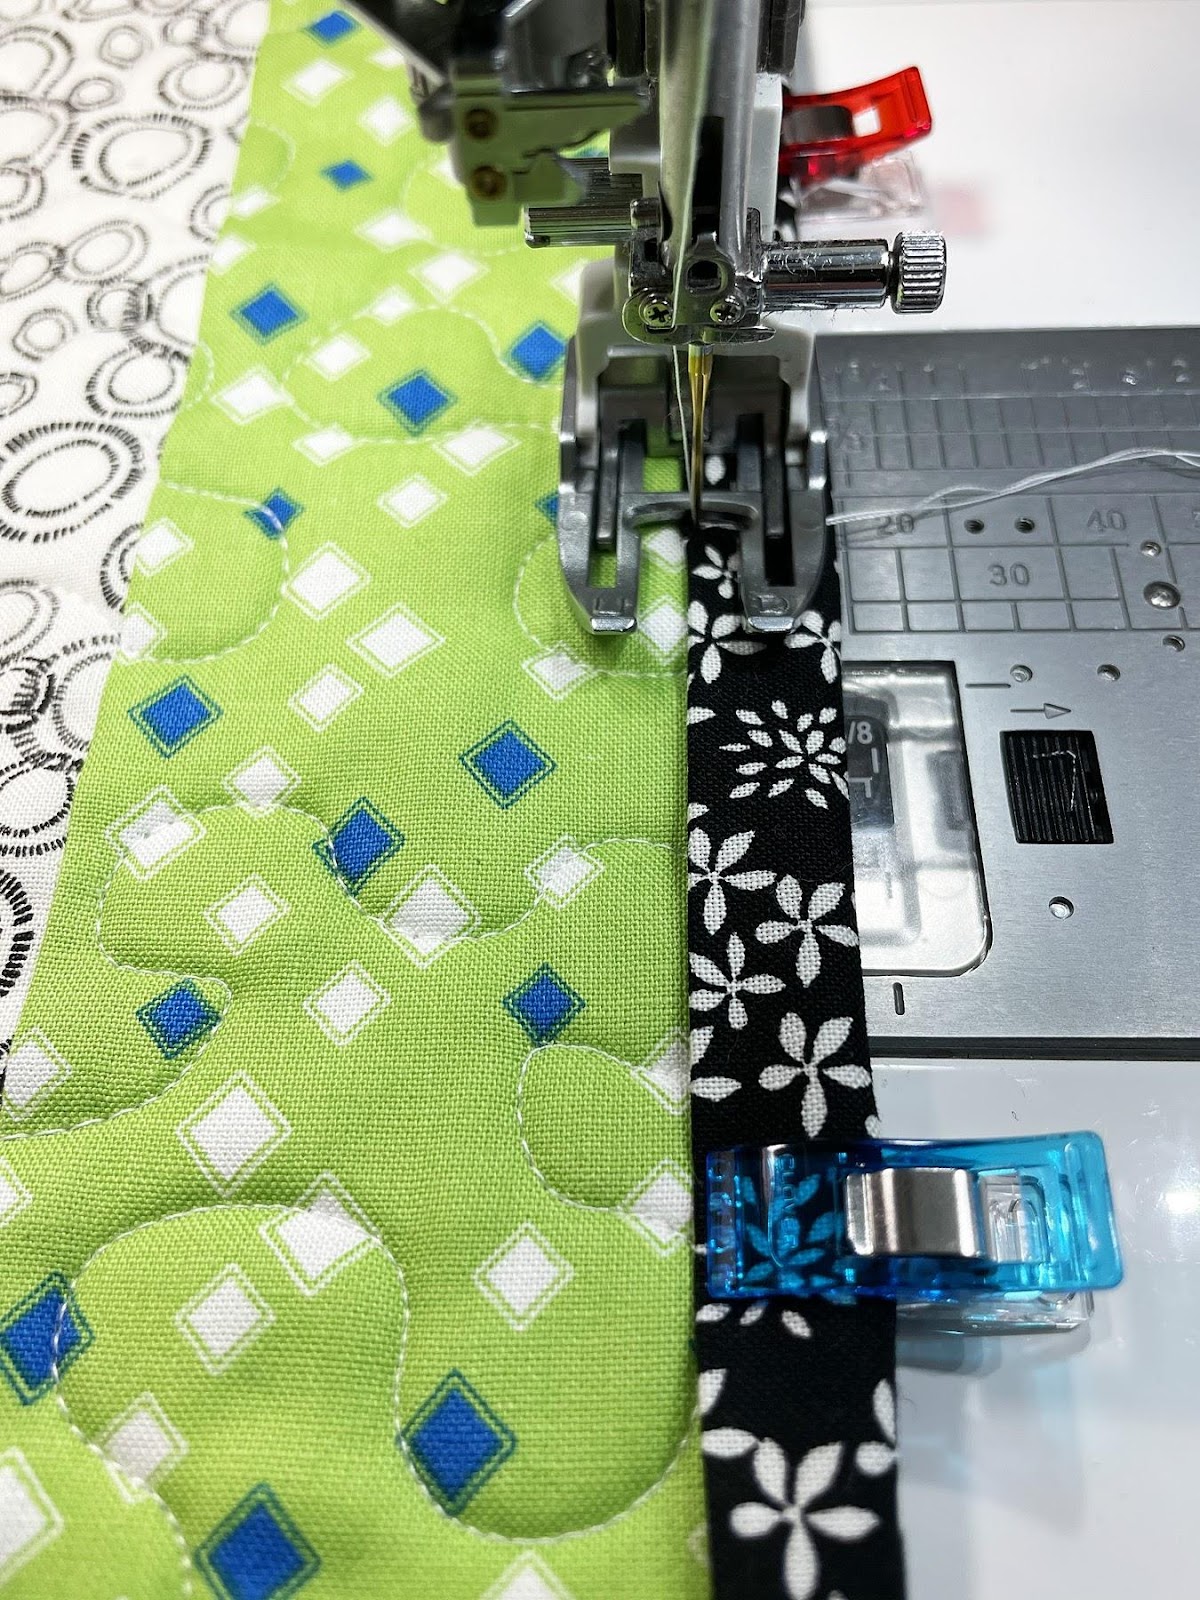
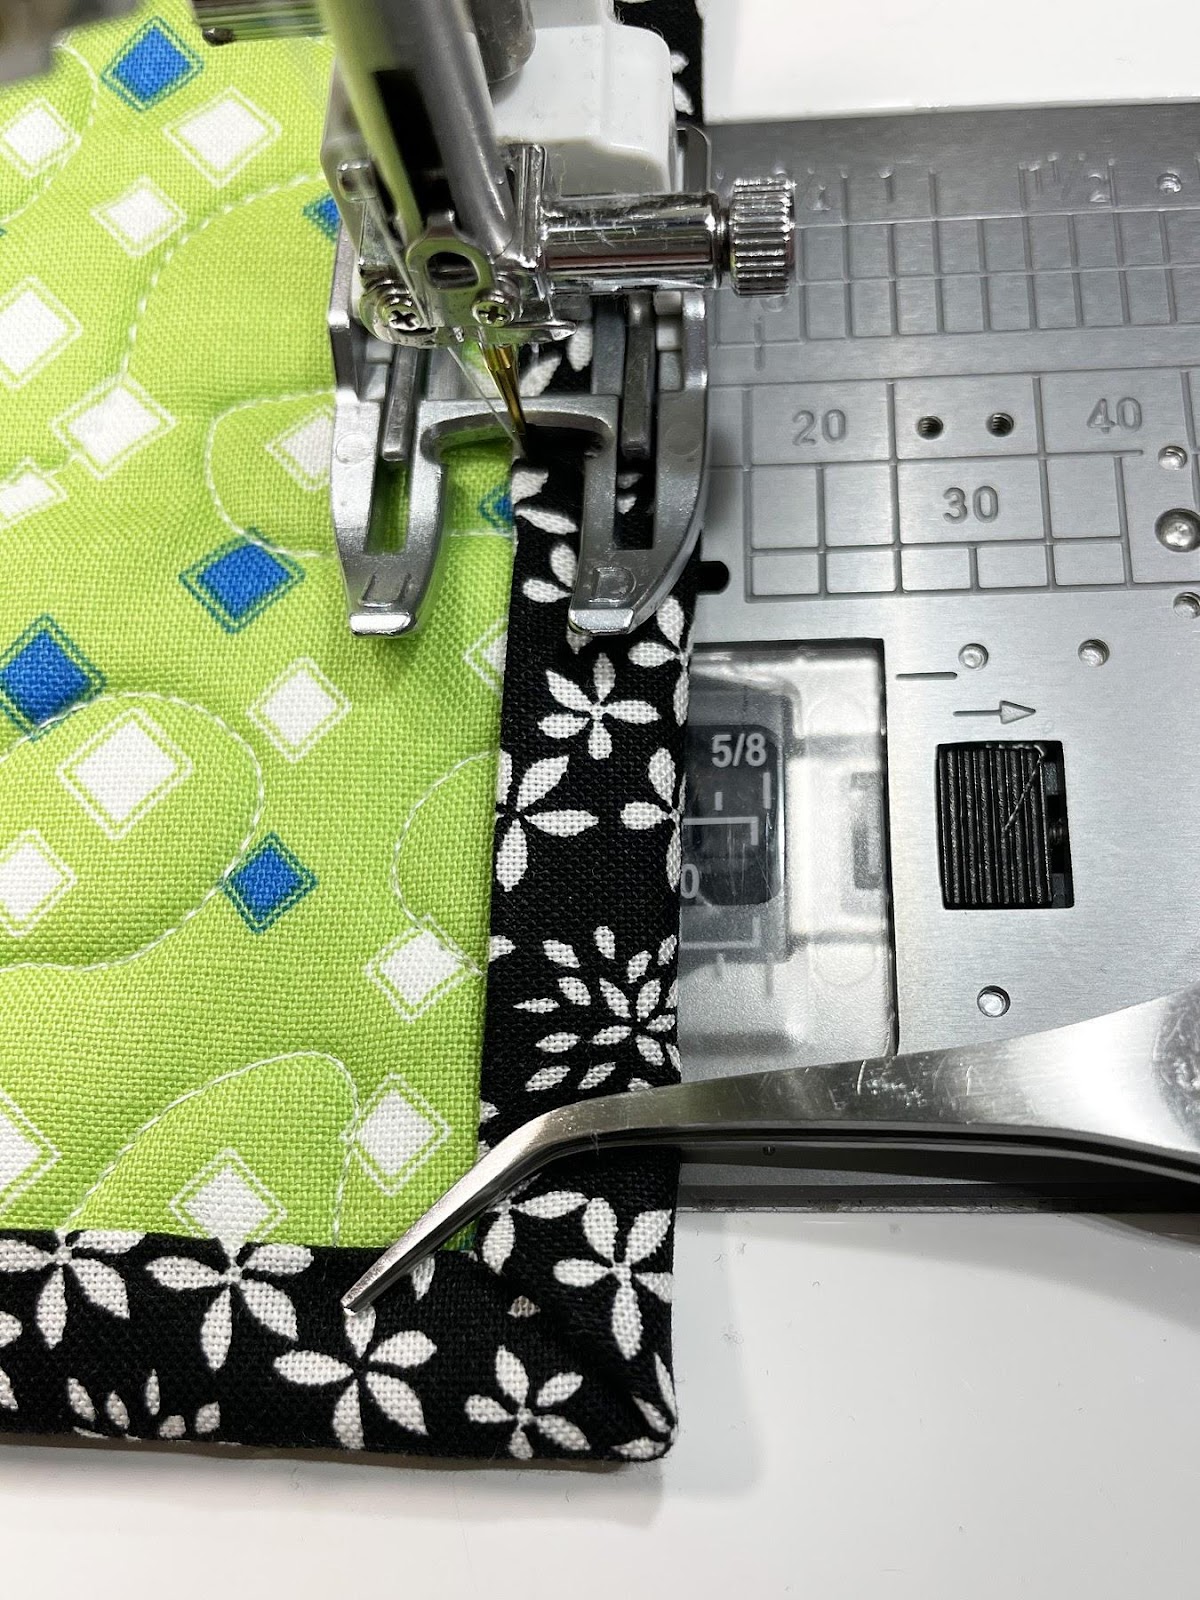
Attach Dual Feed Foot Holder (walking foot) with 1/4" OD foot attached (top foot in photo). Needle position 1/4", Stitch Length 2.0, and activate Dual Feed button on screen (highlighted in yellow in photo below). I prefer to use my Dual Feed Foot for attaching binding as the machine is sewing through multiple layers (quilt top, batting, quilt backing, plus double-fold binding).
![A picture containing text, appliance
Description automatically generated](https://lh6.googleusercontent.com/UnOIzI0_F8dqS6-tbQZLurlCXo1T-fmy_IDHOAEym8XJcfbNMi5XYufg7GM2OswBpQ-0ssAjGJD73bcNTisuXgUaBdioJa37MPXJwTH1jO1UrWQPMrrjskmC9UyKBlLjeyblivQ)
![A picture containing text, indoor
Description automatically generated](https://lh5.googleusercontent.com/WGVpzX7rK2_kHEYmmU6jErpdVCQGBNw2bgj0Lqp9SDbdXpt6BF4M0u85Vfy_x6dMYWIzOnO-p14TOh2sUaF_gOcxz1MwNPfZ3gGvFB5NwC5HdvirgC6dOyEp8LGIrGL42FwibZA)
![A picture containing indoor, appliance
Description automatically generated](https://lh6.googleusercontent.com/LsSNFHXB0XUJ8MKvPm_kVFF6MnjqozxTA2Uto_gCAIr5R-Ir6AiDy0Jho50LIiaMwYpetfj8p2fcqkXfhLvmzwVxarDLNR4mwLuR9K66u3SzDoSVaHWyg-MZ7-g3F6g_ip7oESs)
![A picture containing text
Description automatically generated](https://lh6.googleusercontent.com/ulPcKZ3jJ87trK-viLsM6eScadKgDf-I_ChoWqeQoIp9Vqn-q8xoLhDWg5GBc4QSqhD9353BKfjCI2NV3G1scwhdsOiarYOfYD2YcgOzO_BL7e3YAMNUQno1HdKgMBKD-KsnrqA)
![A picture containing text, fabric
Description automatically generated](https://lh5.googleusercontent.com/ce7o9dx6ddkyBJjsipUVlR7aiIigXcOLuflkTMmRvUQhGt7JsjpNeXA1SPxdT0h3rb0V9d3lFh8JiTaiD6K-kPpZZJjD7YIR3oqNbWAKsKsvov82NYqerBUKBo0CXPaDt60Tkoo)
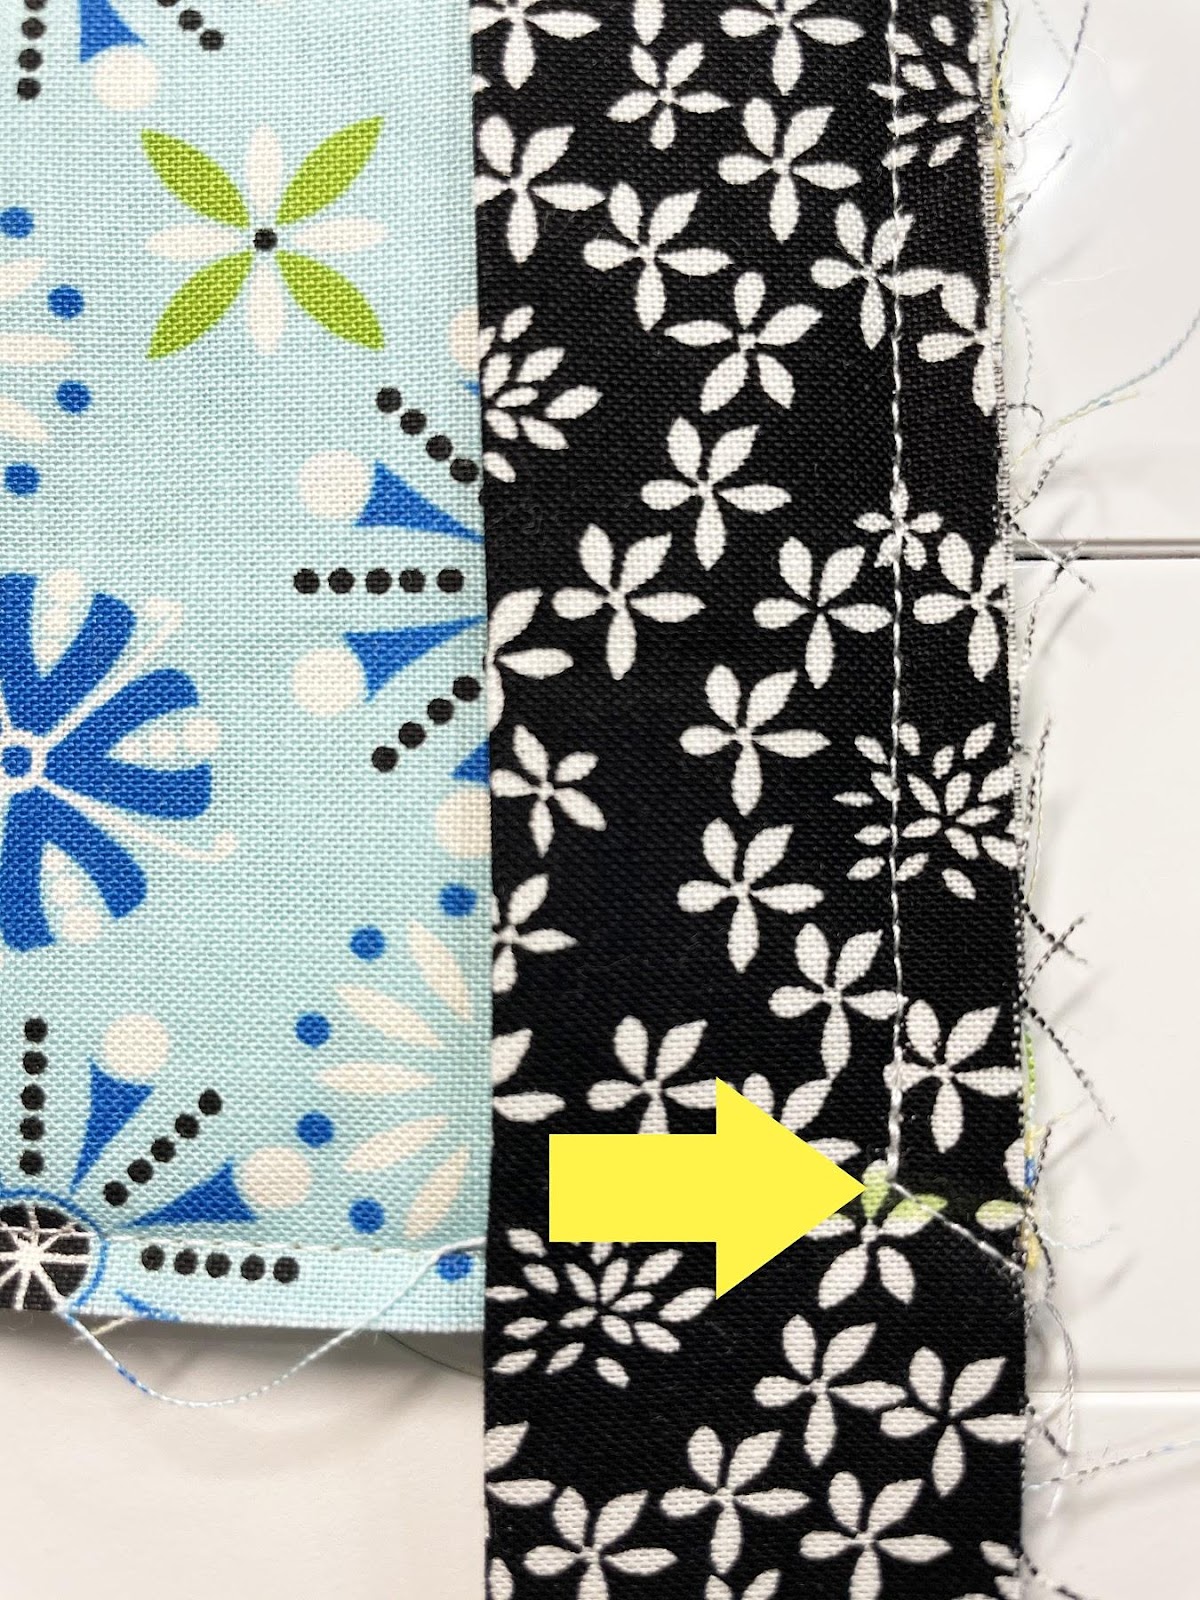
Fold binding upwards so edge of binding aligns with edge of project and stitched line from previous step when you stitched off the project at a diagonal to the corner.
![](https://lh5.googleusercontent.com/5udHYLp7hvZcuX2u1xJP9FmUzt-GN-50fxG-_yy1Xnk-CTUbzeN2EEXKeKA8JpKfqtKpIbNW6KMS2ADFndPqTr7btevRChwQxIerg9f_3s5BfLlccYZ1ykOiVwXVBT1ckQ_BEn4)
![A picture containing text, fabric
Description automatically generated](https://lh4.googleusercontent.com/yaxzFmTKj4xSE1BV8p8KRntFz_Z-WEuI7x59s4F7J8roQyVbHR9T5Whp41kIy-5iPoUJX9XsvXeapEbRE3vuDaHaYGVmUM2gCWoJLFI5sy4w9lr1h8F__lbEBZLzc-7838EMX8U)
![](https://lh4.googleusercontent.com/qpuwsYdzfpPieQTWsK9eQzoT9Yt6evGsw4BWhT4SM3S7RPazv-4E4z8Z-_Kc8uNHvgg9c0PwEdlmeMV3uZlQ98JqZ-7f4S0rJnBrxGZPW4iUmt52mGbwg-l0JMWM1r2oic84Xak)
![A picture containing text
Description automatically generated](https://lh6.googleusercontent.com/YqFQEAaF3P2y5g2efQwgD9xT7RS60XIqYcBuUHb8H3xaaDFsdzi-BEXlk9vkjxMBwP-oUHoQCR2DYEUKVS1DYX8E7zF53CWlweavH0d6tEijNra8P2pE9FT3mmRbKqeJgaIasC8)
![A picture containing text, fabric
Description automatically generated](https://lh3.googleusercontent.com/4augLnFiwsJ9PhGxsy3gRlnpqG3Ug7-rR3iJSB_wbiDCjb76iXP-icY4VptodIlWV0oLo79Qo6LkJbP1nv4IU8YrIYSxCn9_NWQ2g7KyVq9EJVgqEgUDHt9s63Zs1sKpvRbPqIU)
![A picture containing fabric, gift wrapping
Description automatically generated](https://lh5.googleusercontent.com/uQ2I7Xk_EQffxeuafJ6cWvgL9RAOdbT591pqYPQSVMvGuUWX_ArcxNQAeMGqG4WtaIptj3ztb102YKJuFejDXoh_OO1gT7Lz8OvGJgIf4cNWiMpQAQDQut2JjPr-G0811sr9tG4)
![A picture containing fabric
Description automatically generated](https://lh5.googleusercontent.com/XmeMKF433G30O-vz3IoZZSd9gbz7cpKYnRaLf60uOXG225Hn4Qk5LLrX70gpT1sMQ-CGkJsMuTBjpPr3cHDbZTRxWF9PaD0_Rol77HumEBirRj6alj9YsgLvb7jHo-89wMYam3k)
![A picture containing text, fabric
Description automatically generated](https://lh4.googleusercontent.com/FeIfBZLro50yq75P2Zq_tjPlbz5lGxmrQLaf5c6w_NYUBfMc1EygHZ-Tr4JhxBI_fBKWQq9XBppUhDsJmVn0NuuknTzb6gAJ1KTMafYeMY0_CR29j6hpDlG07Godv4nRVpwnUMI)
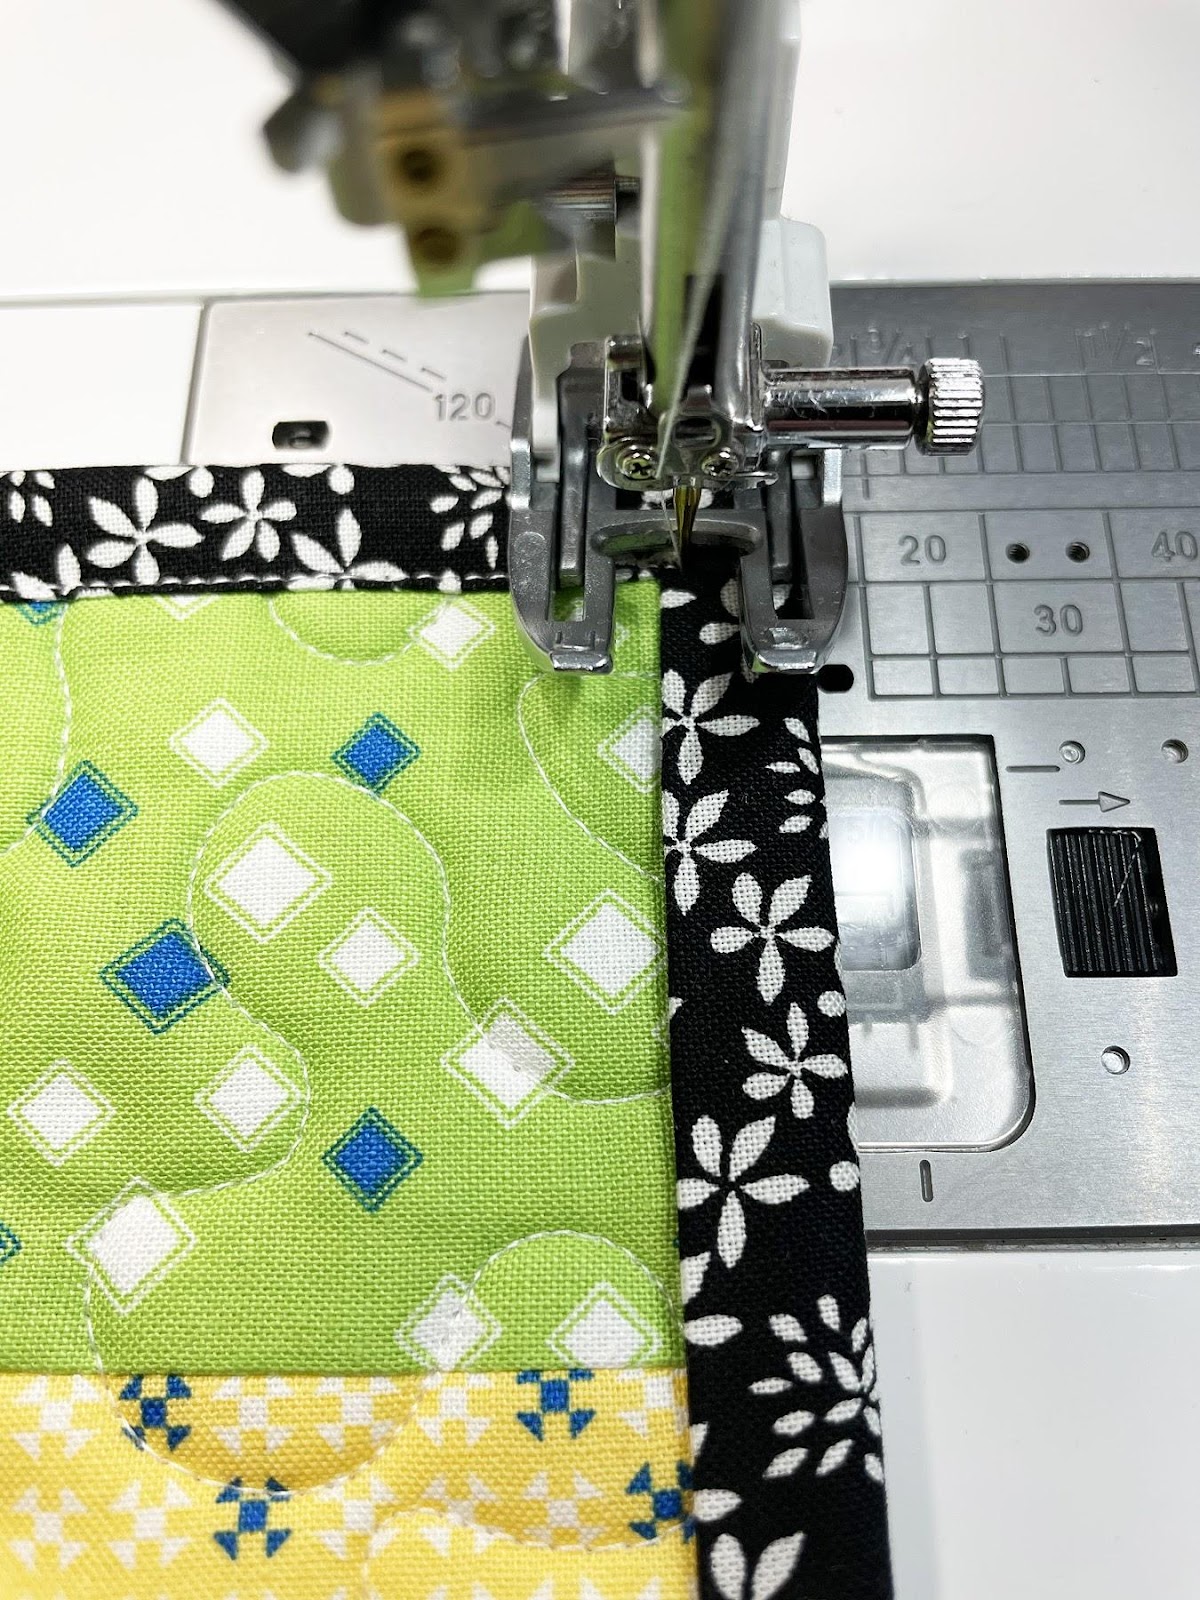
Step 3: Stitch Binding to FRONT of Project
-
Change to Dual Feed Open Toe UD Foot, Dual Feed Key selected, Needle Position Center, and Stitch Length 2.0
![A picture containing text, indoor, screenshot, several
Description automatically generated](https://lh6.googleusercontent.com/hensiTRUFtpQ2jXlCk9Pwki9GRQCsIlQDreLPt1SuThJktvOoCk6SVeigeGLVvDlJ7xENVCI9MglpjXDZTqK-En-2bmwTttc1GhTBgNYksydJCyhCqNt-2nBbb7LcZMT8AXAZzQ)
![A person standing next to a machine
Description automatically generated with low confidence](https://lh5.googleusercontent.com/4BSoph3RyKycFU3TVHtSd10kOLIKvYVLNrs2VBQVvO5CVPRkEAX6ThLEoaghBUXAliC99sxHhot6aIC7egEPMR3BD6si8kBAbncbB_zZ4cqli7kAKYzStfD61IszJ-5Ma8hoRkc)
![A picture containing indoor, decorated
Description automatically generated](https://lh6.googleusercontent.com/g3cshgF971zKXpg8TA6-i3Ohf-0LSObzYjglZv_1pkzvxSWaxKRYKFWDWu6Xh1t_d6WrzNYpEzDA2eSilkqZKeMUKUUWz0Wx7UCF-Xurh-uuzNUjjY2h5NzlJLpRv0R1EZnO5_E)
![A close-up of a computer keyboard
Description automatically generated with low confidence](https://lh6.googleusercontent.com/frLlhBZxZLVnQKO4NeMS97Jh3-UYDKMjGYkaWVFac_CEBPJxJ4mLtw1U4f7VX3tzjLbVdJAITjmPhFARla_r572XqMJlADmPYeVA240Fos07iy4EyAqqiHML1Uflcc4OIQrxsPo)
![A picture containing appliance
Description automatically generated](https://lh6.googleusercontent.com/z7EtvksG__0iMkPCCVqqy5ExUBqYHEhEtS064Bj0hchkaQrZGovzm3QdNp3vScATp3gXLgOLcbxep2p0FY5MZp4t_9mVob96hOUozq9Bx21wLwKTPptmIvmX1LlwTCr4GQM5q2M)
![A picture containing fabric
Description automatically generated](https://lh4.googleusercontent.com/9z0KlLivATnUGQa6NO4xREy8ld1PatyZXkEFK7UwHmAQrtp30W9UgzFOnGx4bTv_DyOxRzIYN1xyDVtgxhi3_0C8cIQVVn_rbFremRK6hdoQ-V1JoWJpmp7TFRAJwgFYZc31uck)
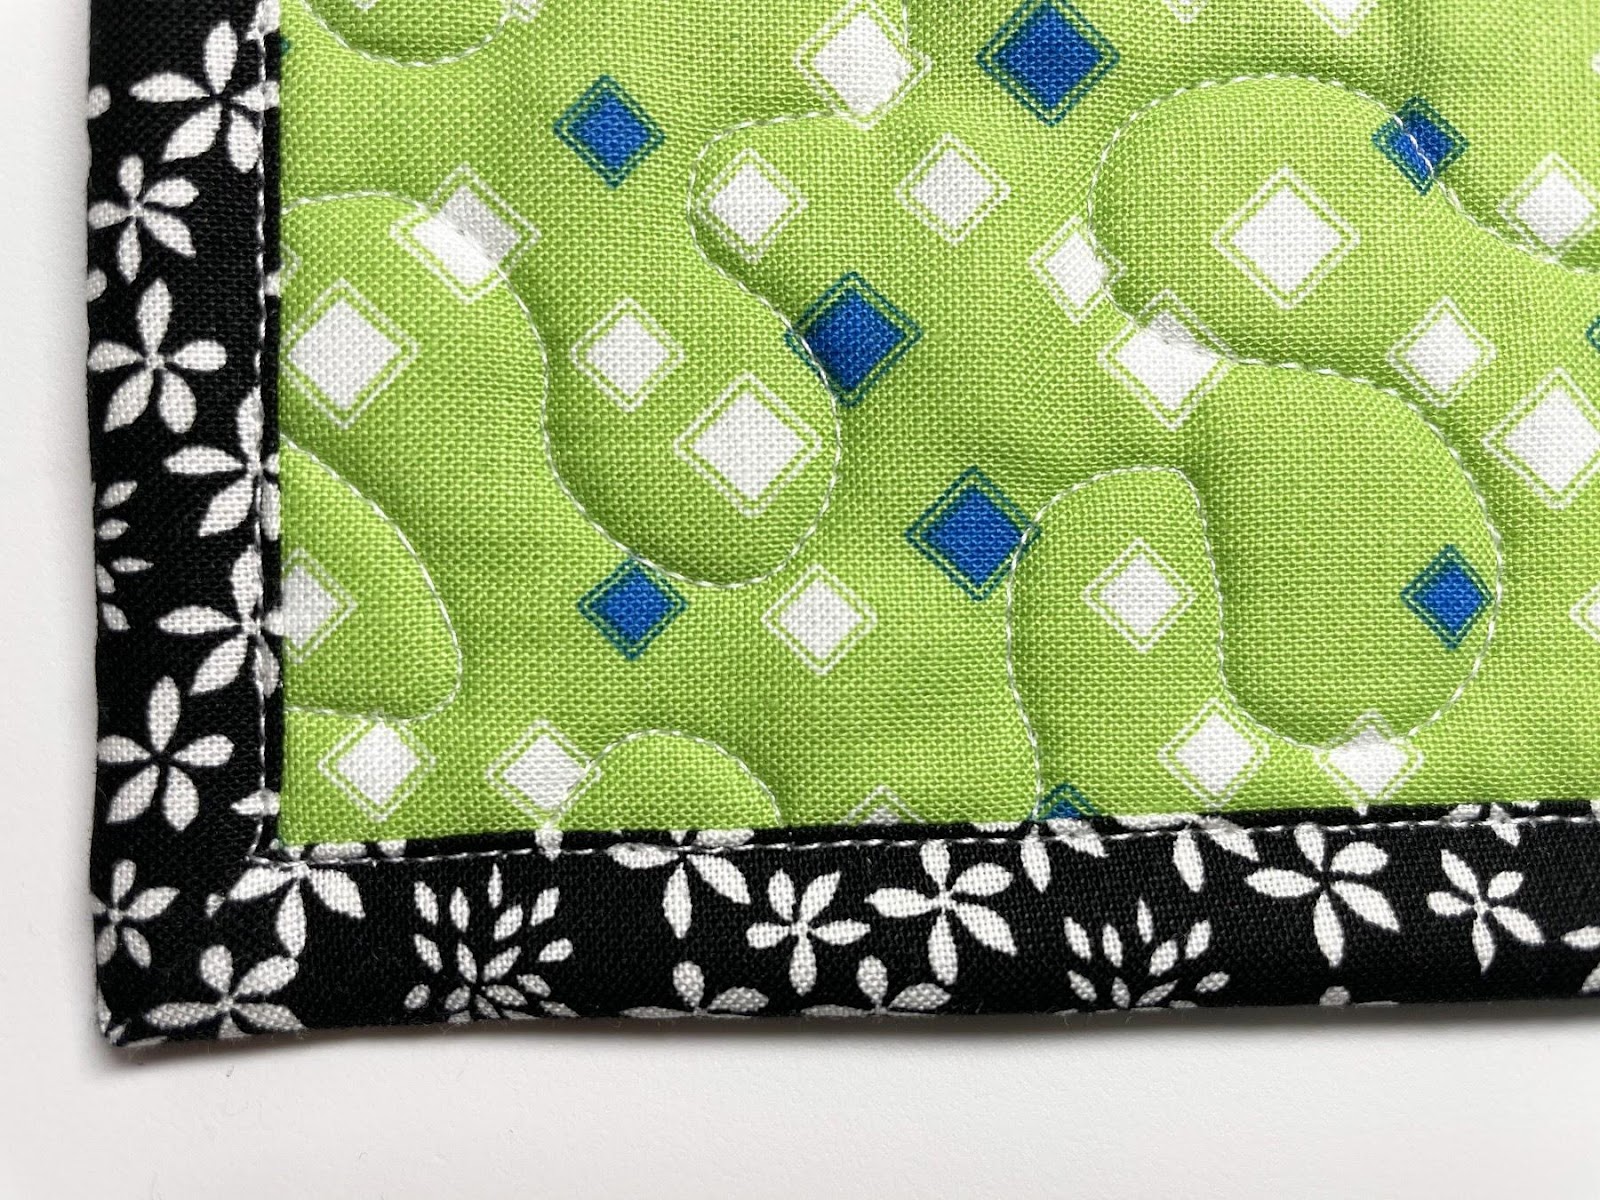
Congratulations your project is now bound and ready to be loved!
![](https://lh6.googleusercontent.com/rW9M84jDkEZe__9jgj864h1eSrP4oytLYqbqSq2Khmd-J6Ye8w-e9TZBBvEAQqBxEm0RCn8Ob_zpV1XEBrMxdpJ02l6mQg9calhJ6ntFhm87TR73RLaXaNzuDECtGJXKdw7shdw)
![A picture containing text, fabric
Description automatically generated](https://lh3.googleusercontent.com/4a97gU2jODi0-8HAMhSHsDaiLzvD0GHyVOcCdDPyg1kEjuyClFOcWwa7frt36QyT7myw6lDqtGp0KZFeEJRpzYbGWJSwloAoBFIWl7OjuA4JrjzDQ-o6UR7mmrXqq43DzMusuUE)
Tutorials are available for Oh Happy Day Pillow front (HERE) and attaching an exposed zipper for pillow backing (HERE)
![A picture containing indoor, decorated
Description automatically generated](https://lh5.googleusercontent.com/q2LR9_wSUQbKhTpXvgUalxMZ33Qi91qJA22B7m3o8fyhdsuLu6K1JkqYVrMZCiiIHMJNWyzcHlx3JvULEC6tbuOA7oxGhlvdi2BPfroG1KdhqpbFozbQCbqHwVaWxgxljPN9VR0)
Be sure to follow me for more sewing fun and more examples of machine binding! A Bit of Scrap Stuff Blog (here) or Instagram (here).
Happy Sewing!
Melanie Call