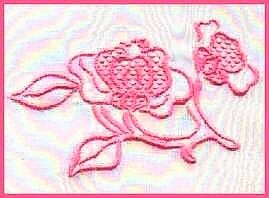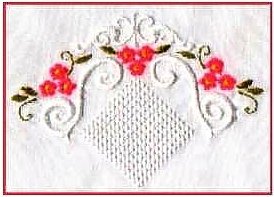
Fil tire is a classic hand embroidery technique that can be digitized to sew on an embroidery machine. Here are step-by-step instructions for recreating this technique with the help of Digitizer 2000 or Digitizer 10000.
- Open EasyDesign and choose Free-hand digitize.
- Set zoom at 500%.
- Right click on the design screen to get the pop-up menu. Click Work Environment.
- Slide the grid sizer all the way to the left to .1 of an inch. Click OK.
- Select Run Line on the Digitize toolbar.
- Select Object Details. Select the Line Stitch tab. Select triple stitch with a length of 2.7 mm. (2.7 mm is approximately one tenth of an inch.) Click OK.
- Using the grid as a guide, click a stitch from the top of a grid crossing to the bottom of a grid crossing. (See Figure 1.) Press Enter.
- Again using the grid as a guide, click a stitch from the bottom of the stitch you just created to the next left grid crossing, forming an "L." (See Figure 2.) Press Enter.
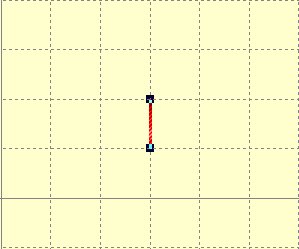
Figure 1
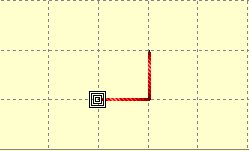
Figure 2
- Click the Select icon. Draw a box around both objects.
- Click the Copy icon on the Menu toolbar.
- Click the Paste icon. Position the 'L's next to each other.
- Click the Select icon again. Draw a box around both 'L's. Click the Copy icon. Using the Paste icon on the toolbar, continue to add 'L's until you have 12 boxes total. Zoom in, and fine tune the placement using the Select icon and arrow keys. (See Figure 3.)
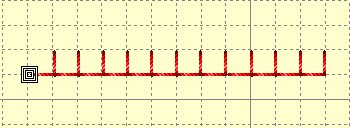
Figure 3
- Select Edit. Click on Select All.
- Copy and Paste.
Note: The new group will have a long diagonal thread connecting it to the original group.
- Select the pasted object. Click the Flip Along Vertical icon on the lower toolbar. Move into position under the first row of stitching. (See Figure 4.)
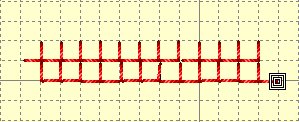
Figure 4
- Select Edit. Click on Select All.
Note: You will now select both rows to copy and paste.
- Copy and Paste entire grouping. Position under original two rows.
- Continue pasting until desired size is reached. (See Figure 5.)
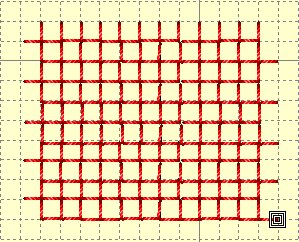
Figure 5
- To delete extra stitches outside the block, click the Select icon, then click the stitches you wish to delete. Press the delete key.
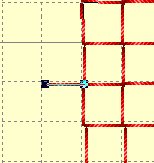
Figure 6
- Save as a *.jan file, then save in desired stitch data format.
Note: Memory Craft 9000, 5000 and 5700 will use *.sew and Memory Craft 10000 owners will use *.jef.
The completed block of fil tire is now ready to use in your own designs. By adding scrolls from the Embroidery Gallery and embellishing with small flowers and leaves, you can recreate the sample embroidery design. Michelle used Flourish 2 and Flourish 5, and edited to create a pleasing arrangement. Select one color for the fil tire square, and a different color for the scrollwork so that the embroidery machine stops for a change of color after the fil tire is sewn. Arrange the colors so that the fil tire sews out first.
Stitching The Design
- Choose a lightweight cotton or linen. Starch and iron
- Attach the hoop to the embroidery machine. Do not add stabilizer.
- Change the needle to a wing needle. Check to make sure the needle clears the embroidery foot. If not, you can remove the foot, but do remember to "lower the foot", even though it isn't there.
- Stitch the fil tire.
- Replace the wing needle with the regular needle. Add a square of stabilizer under the hoop and continue the embroidery.
- When completed, remove from hoop, and trim away all excess stabilizer.
- Press embroidery carefully from the back side.
Fil tire is also used as a fill in cutwork designs. Try placing it under Floral 1 from the Embroidery Gallery. Save as a .sew file, and open in EasyEdit. Use the technique you just learned to select and delete stitches, and remove all excess stitches outside the flower outline. Stitch out the design in the same manner as above.
