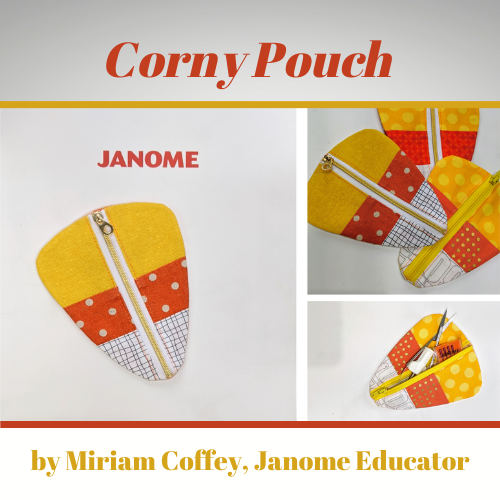
The Corny Pouch by Miriam Coffey is a fun and colorful way to show off your sweet tooth. Follow along with Miriam as she takes us step by step during this short but sweet tutorial.
Skill level: Advanced beginner
Janome Supplies:
- Janome Embroidery machine
- Minimum hoop size 5? x 7?
- Janome Blue Tip needle
- Janome Sewing machine
- ??? foot O
- Candycorn.jef design
Fabric and notions:
- 3? x 5 ?? yellow fabric
- 2? x 5 ??? orange fabric
- 2 ?? x 5 ?? white fabric
- 7? x 14? backing fabric
- 13? x 13? tear away stabilizer
- 7? zipper
- Assorted colors embroidery thread
- Neutral color all-purpose thread
Supplies:
- Embroidery tape or painters? tape
- Sharp scissors
- Paper scissors
- Basic sewing supplies
Instructions:
Sewing Strips:
- Using a ??? seam allowance, sew 5 ?? strips together in following order; yellow, orange, and white
- Press seams in direction of white fabric
- Cut sewn strips in half at 2 ??.
Embroidery:
- Thread machine with embroidery thread.
- Select Edit icon from home page.
- Select hoop icon.
- Select hoop with minimum size 5? x 7?.
- Insert USB with Candycorn.jef design.
- Select open, navigate to folder, select Candycorn.jef.
- Select OK button to go to Ready to Sew screen.
- Hoop stabilizer and then attach hoop to machine.
- Lower foot
In The Hoop Instructions: Colors in (parenthesis) are color stop in design.
- (Dark Green) Press the Start Button to sew zipper placement.
- Select Hoop icon, to move hoop to front for easy placement.
- Place zipper with pull at bottom of hoop, align center stich line with zipper teeth.
- Tape in place at the top and bottom of zipper.
- Open zipper pull towards the center about 2??.
- (Blue) Stitch zipper in place.
- (Black) Stitch out placement lines for candy corn strips.
- On the left side of zipper place raw edge of one striped piece to zipper tape (yellow fabric should be at the bottom).
- (Orange) Sew fabric to zipper tape.
- Fold back fabric and finger press at seam.
- Tape raw edge to stabilizer, to keep fabric in place.
- Repeat on right side.
- (Red) Sew right side of zipper.
- (Lime green) Top stitch fabric in place.
- Make sure zipper pull is centered, for easy turning.
- Fold backing fabric in half wrong sides together (7?? x 7??)
- Place backing fabric in center covering corn.
- (Pink) Tack down backing.
- (Purple) Double stitches the outer shape.
- (Yellow) Stitch out protective edge.
- Lift foot and remove hoop from machine.
Finishing
- Remove project from hoop
- Use sharp scissors to cut out candy corn, close to protective stitch line.
- Use paper scissors when you reach the zipper.
- Remove all stabilizer.
- Open the pouch through zipper.
- Turn project right side out.
- Finesse seams till the side seams are even.
- Press in place.
Give yourself a pat on the back because you are done!
Click here to watch the video tutorial

