How to Make a Sewing Machine Organizer
How to Make a Sewing Machine Organizer

Helping keep your sewing tools handy helps to keep your sewing time more efficient! Janome Artisan Maday Delgado from Sustainable Textiles Designs created a fantastic solution and tutorial using the limited edition 100 Anniversary Janome fabric!
I’m so excited to share this easy sewing room organizer with you and I can’t believe it took me eleven years to make one! I used the Accuquilt Go cutting system to streamline the fabric cutting process. I also included two rulers that you can use instead, to create hexagons and triangles.
With this organizer, you will have all of your favorite sewing notions visibly at your fingertips, maintain a tidy sewing table and celebrate Janome’s 100th anniversary. This project can be adapted to fit into any room or make into a table mat or larger quilt.

Helpful Hints:
I used 1/8” and ¼” seams throughout this project and ironed seams to the side.
When you work with hexagons or half-hexagons, it helps to stitch units in rows vs a completed block, to avoid y-seams.
Stitch length – 2 – 2.2”
The triangles in this project are equilateral (all sides are equal). The stitching sequence is the same no matter what side we choose.
Adjust the vinyl size if you would like to create deeper pockets.
Supplies:
4 assorted color fat quarters or scraps
Janome 100th Anniversary fabric – half a yard
GO! Half Hexagon-4 1/2″ Sides (4 1/4″ Finished) Die
GO! Equilateral Triangle-4 1/2″ Sides (4 1/4″ Finished) Die
Quilt in a Day 60-degree Equilateral triangle Ruler (8 ½”) – Optional
Hex N More Ruler by Jaybird Quilts – Optional
Book – Simplicity by Gyleen Fitzgerald – Optional
Clear vinyl or favorite color (7.5”x22”)
Batting (28” square)
Backing fabric (28” square)
Coordinating 50wt cotton thread for top and bobbin
Clips/fine pins
Machine Used
Janome Continental M7 – with hp 1/4” foot/hp needle plate
Cut triangles and half-hexagons (HH) using AccuQuilt dies
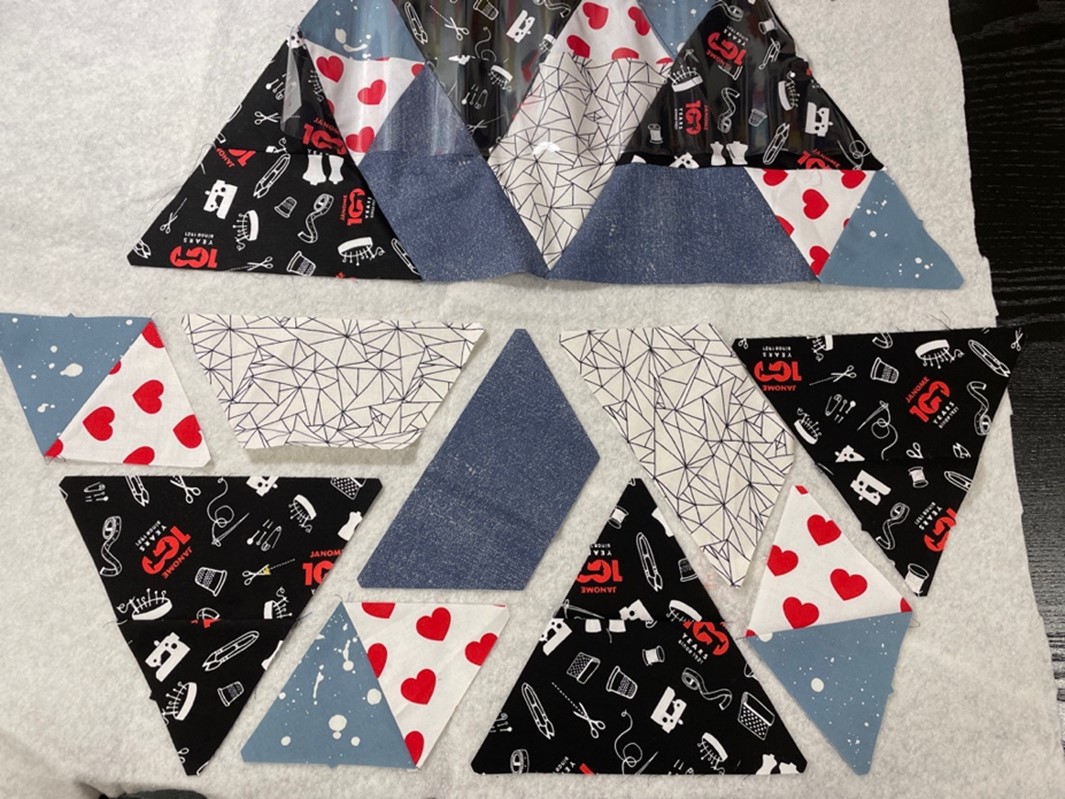
6 Janome fabric triangles and HH, 6 triangles of print 2 (hearts), 6 triangles of print 3 (light blue), 3 HH of print 4 (dark blue), 3 HH of print 5 (geometrical cream)
Make 6 units – Join triangle and HH as shown below


When you have all of the pieces cut, arrange them on your design wall or on any flat surface to make sure you are happy with the layout.
Taking a photo helped me to visualize the pieces that were out of order.

Make 6 of the following unit – the triangle die, cuts perfect dog ears, matching the corners has never been easier.

Add 3 dark blue HH to 3 of the above units and 3 geometrical cream HH to the remaining 3. Stitch the half-hexagons to print 2 (hearts). See below


The finished large triangle units (60-degree equilateral triangle), are comprised of 3 triangles and 2 HH each.
Stitch units in the order below, as rows. You will have two rows. The vinyl will be attached to most of the bottom row to create a pocket with compartments for tools.

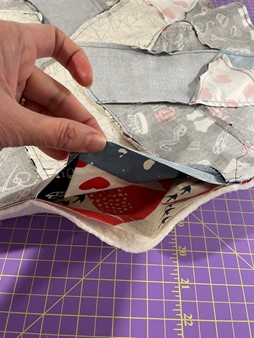
Use 1/8” seam allowance to stitch vinyl to the lower half of the hexagon and two sides. Pin using fine pins to hold it in place.


Using the top as a guide, trim backing, and batting to the same size. Place organizer top and backing RST, batting on the bottom. Use pins or clips to keep layers together.


Leave a 5” opening to turn the organizer right side out. It helps if the opening is left on the side that does not have the extra layer of vinyl.

Push all corners carefully out after turning and topstitch 1/8” or ¼” from the edges.
If you need to press the organizer, I recommend carefully ironing from the backside as to not melt the vinyl.


Now you are ready to stitch/create the pockets of the organizer that will best accommodate the sewing tools you use regularly.

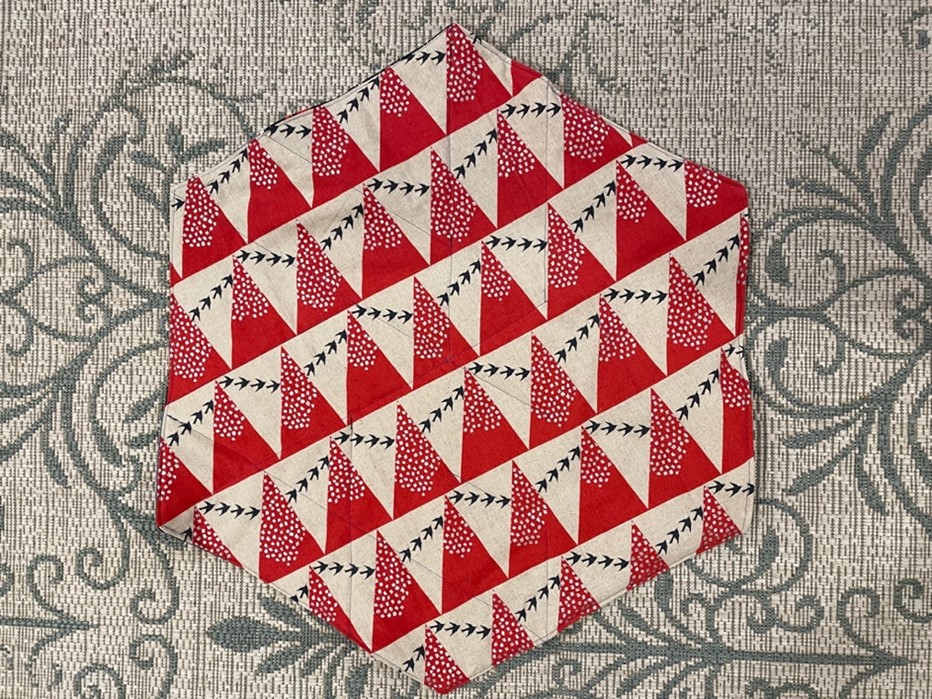
Your organizer is ready to enjoy! As you can see below, it makes the perfect centerpiece for small tables as well.

I recommended a book, under the supply list, that I think you would enjoy from an artist that loves to work with polygons. If you are curious about working with interesting shapes, this book will surely delight you.
Happy Making!
Maday.
Tags
More Blogs
- June 2024 (1)
- May 2024 (1)
- April 2024 (2)
- March 2024 (1)
- February 2024 (5)
- July 2023 (2)
- August 2022 (2)
- June 2022 (2)
- May 2022 (10)
- April 2022 (2)
- March 2022 (2)
- February 2022 (1)
- January 2022 (2)
- December 2021 (1)
- October 2021 (7)
- September 2021 (5)
- August 2021 (4)
- July 2021 (16)
- June 2021 (3)
- May 2021 (6)
- April 2021 (3)
- March 2021 (2)
- February 2021 (1)
- January 2021 (1)
- November 2020 (3)
- October 2020 (3)
- September 2020 (2)
- August 2020 (1)
- June 2020 (1)
- February 2020 (1)
- January 2020 (1)
- December 2019 (1)
- November 2019 (1)
- October 2019 (1)
- August 2019 (1)
- May 2019 (1)
- April 2019 (1)
- February 2019 (1)
- December 2018 (1)
- November 2018 (1)
- September 2018 (1)
Recent Posts
- Easy Sew Pennant Garland
- Curvy Log Cabin Block
- Easy Quilted Pot Holder by Fran Gulick
- Charmed Pillow by Melanie Call
- Face Bandana by Laurel Ryan
- Quilted Sawtooth Flower Pillows by Maureen Cracknell
- The Bookish Pouch
- The Flower Fields QuiltBy Maureen Cracknell
- Someday Quilt by Minki Kim
- New Project!Pet Lounge by Meredith Daniel
