Add a Zippered Pocket to Anything
Ah, the dreaded zipper! One of the most essential parts of creating bags, garments, cosplay, and home decor is also one of the most frightening for many sewing enthusiasts. We are here to say fear no more! Janome Maker Meredith Daniel from Olivia Jane Handcrafted is going to show you not only how easy it is to install a zipper by creating a zippered pocket in anything!!! After you add zippered pouches to everything, you can use this skill builder to go forward adding zippers pillows, dresses, and so much more!

A zippered pocket is such a useful addition to any bag! Did you know they are also incredibly easy to insert? This tutorial will show you how to do just that, and you will be an expert in no time at all!

You’ll need just a couple of things:
- the fabric you want to put a zipper pocket into
- a zipper the length of you want your pocket opening (I’m using a 7″ metal zipper)
- a cut of fabric for your pocket (you’ll need less than a fat quarter!)
- a scrap of interfacing (I’m using SF 101)
- a marking tool, ruler, and cutting tools

To demonstrate this technique, I’m installing a zipper on the front of my Basic Drawstring Bag. It would also make a great addition to my Mosaic Heart Tote, but you can use this to add a pocket to whatever you need! I am using my Janome Skyline S9 with a walking foot for the whole of this tutorial. That’s right! You don’t even need a zipper foot. Let’s get started!
Cut two pieces of interfacing 1.5″x 1″ longer than your zipper. I cut a piece 1.5×8″. Cut two matching pocket bags. They should be at least 1.5″ longer than your zipper, and you will need at least 1″ above wherever your zipper is at. I cut two pieces measuring 11×7.5″. Mark the placement of your zipper opening on the outer fabric. I find it useful to crease the fabric where I want the zipper to be, and then I have an accurate way to tell where to add interfacing.


Place one strip of interfacing on the wrong side of your outer fabric. Center it over where the zipper will be placed, and fuse according to the manufacturer’s instructions. Repeat this on the wrong side of one pocket piece. The interfacing needs to be placed 1/2″ under the top of the pocket piece.
**Tip: to help protect your iron and your ironing board cover, use a pressing cloth!

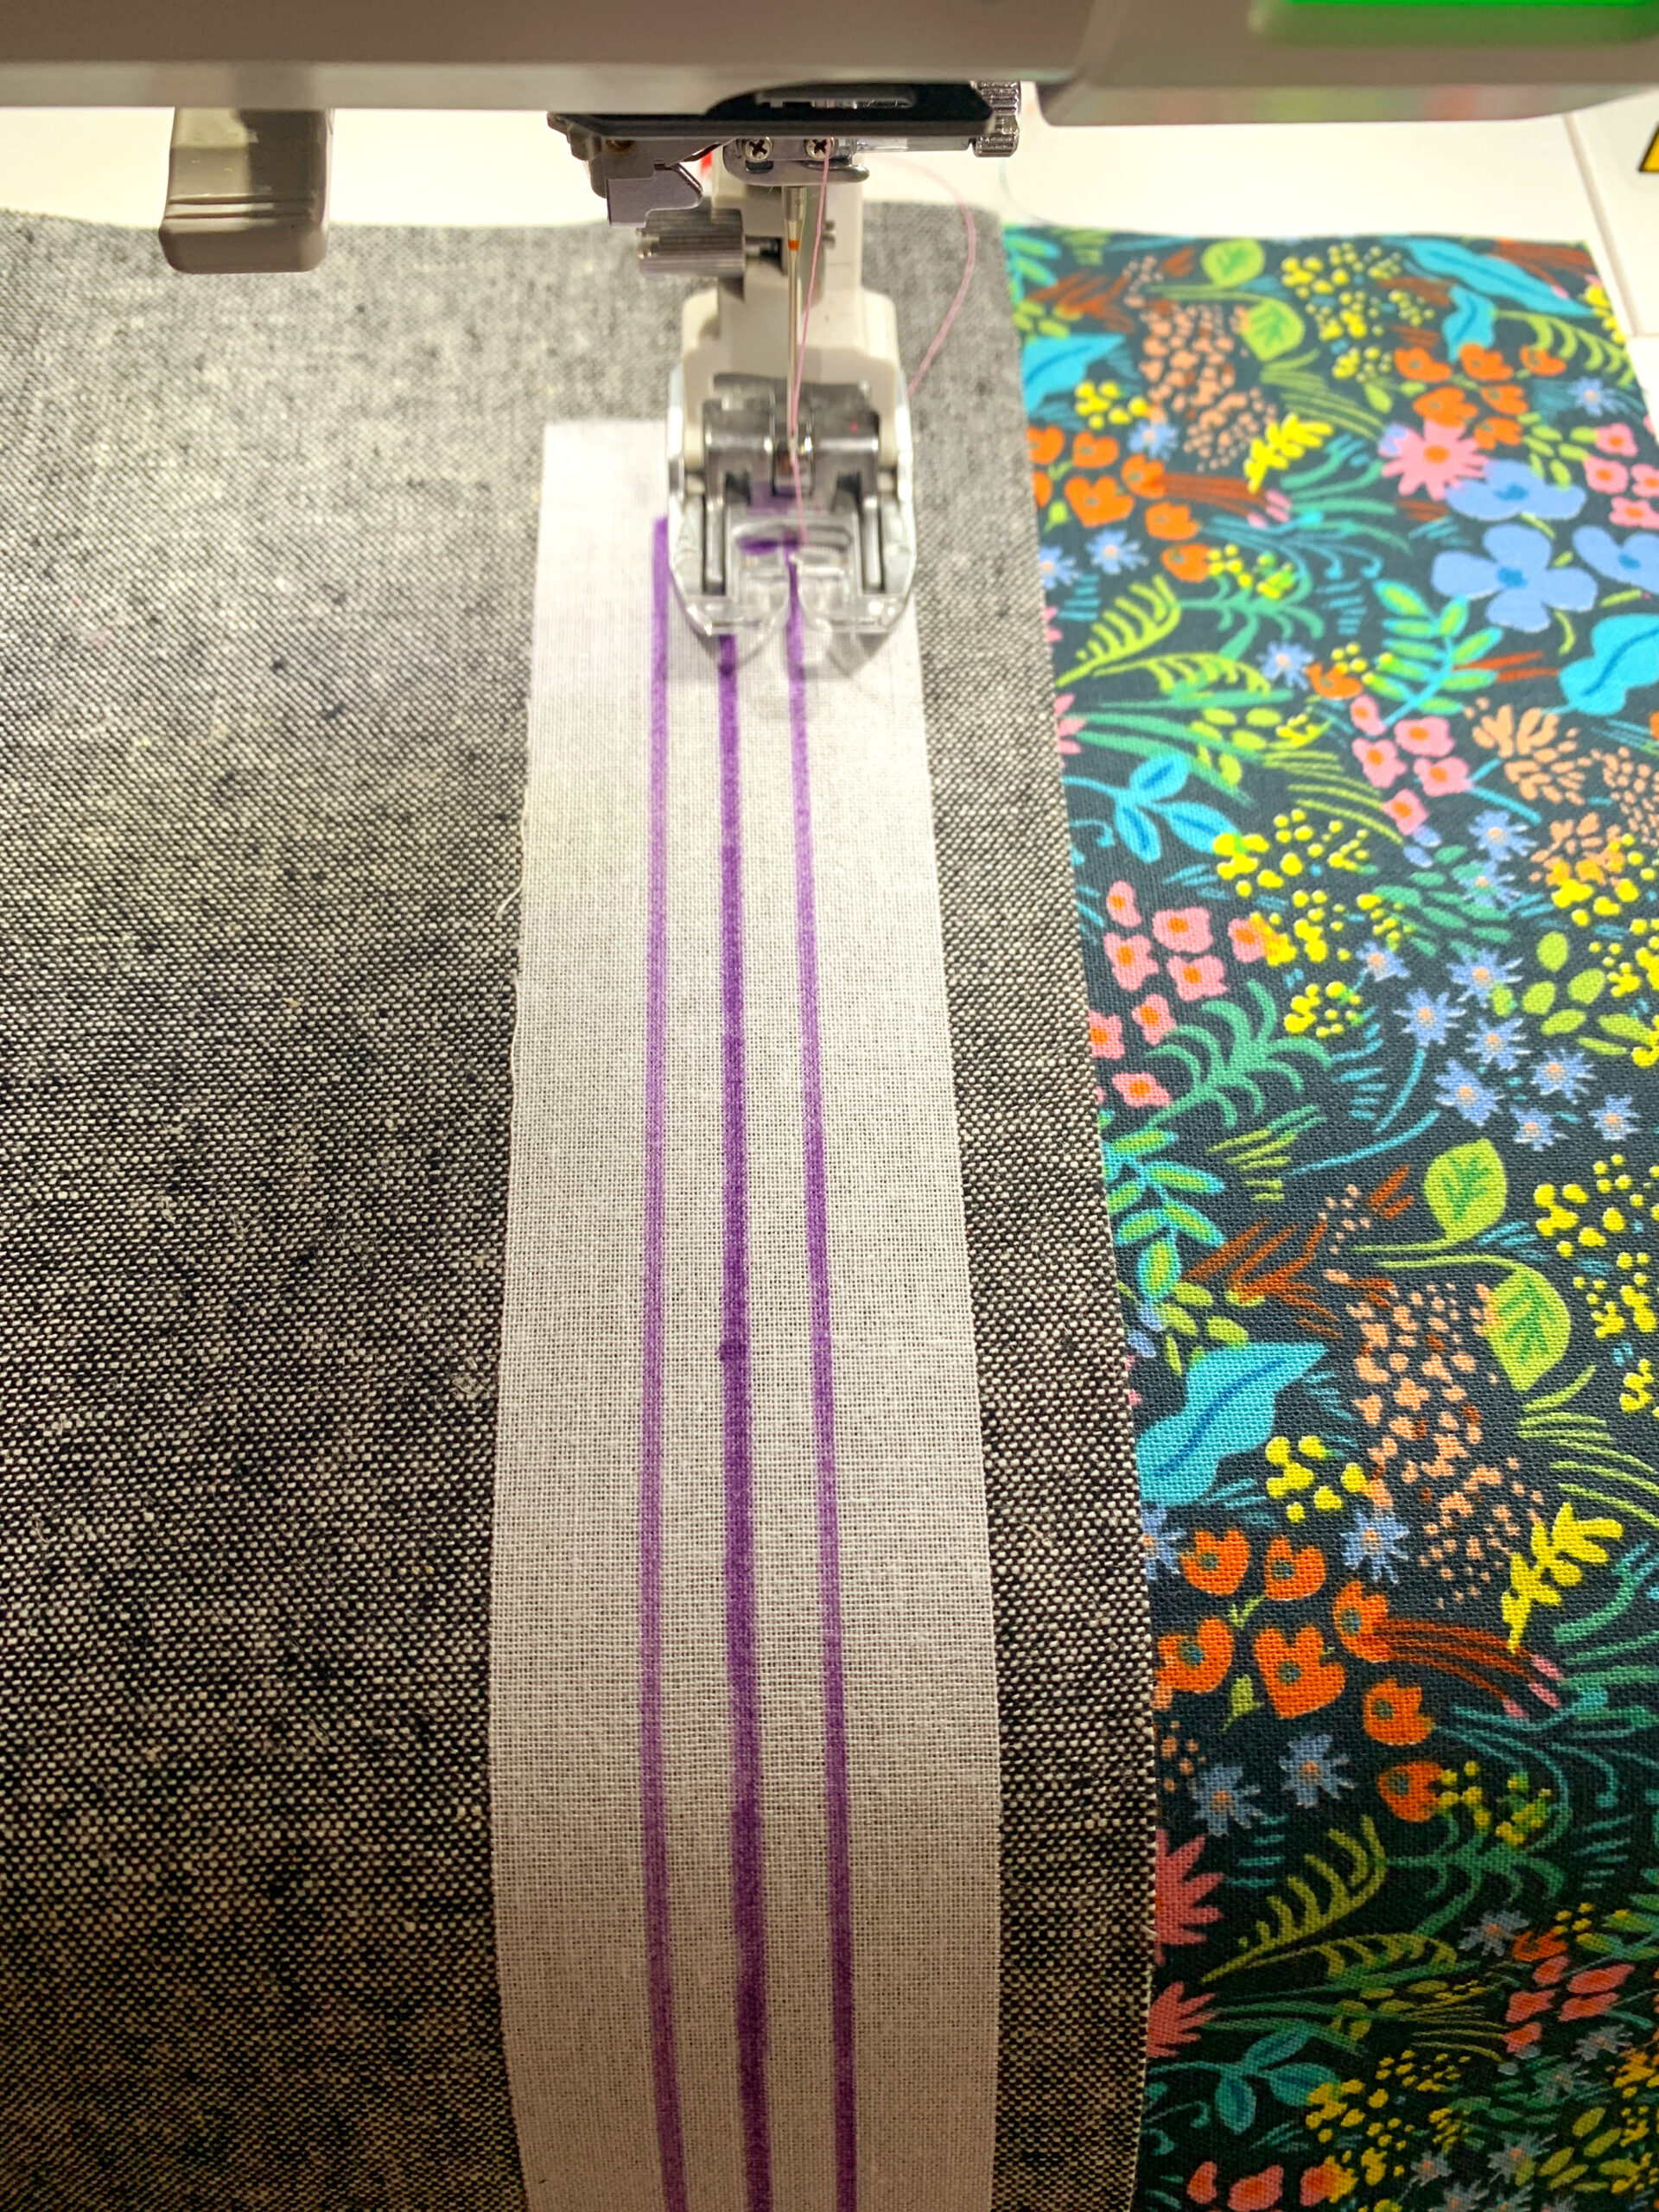
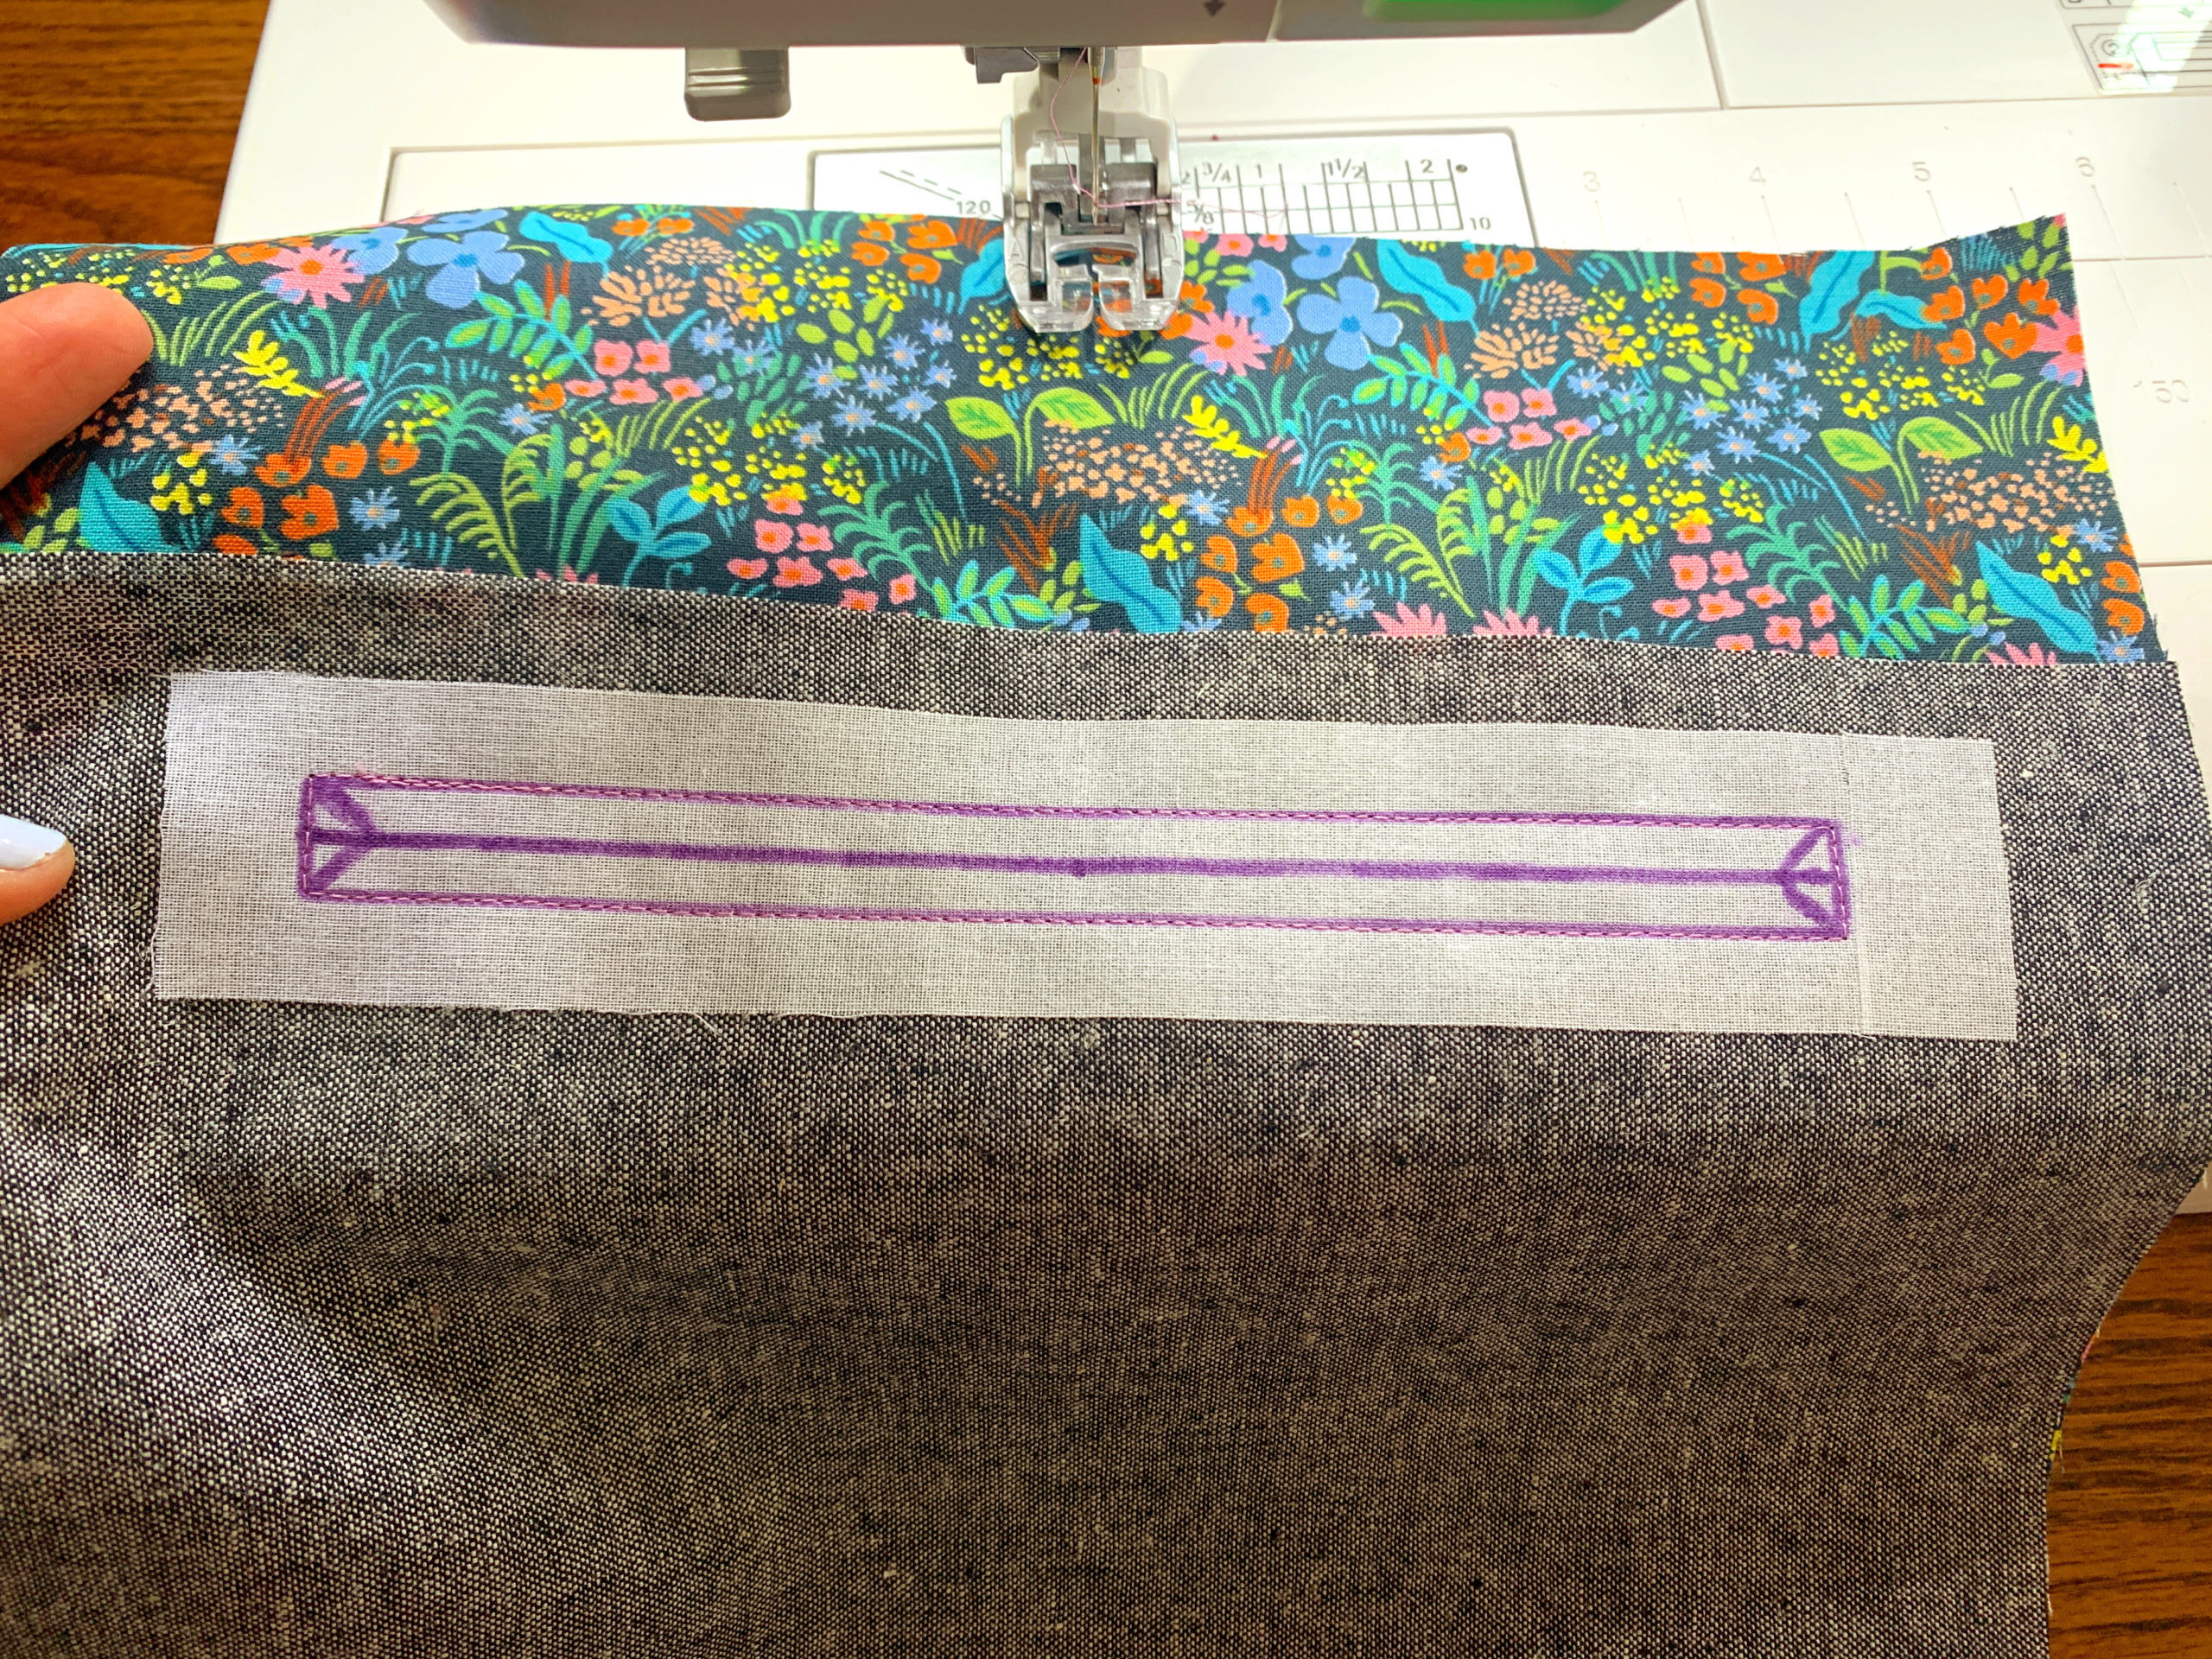
Find the center of your interfaced section on the pocket piece and draw a line that is 1/4″ longer than the teeth of your zipper. I marked a line 7 1/4″ for my 7″ zipper. Now mark two matching lines 1/4″ above and below that line. You will now have three lines. Mark little triangles that reach from the outer corners to about 1/4″ in on the centerline. Align your pocket piece and outer fabric right sides together so that the interfaced sections are at the same area since you will be sewing through all layers in the next step. I used clover clips to keep my fabrics still and in line. Sew around the outside rectangle that you drew, overlapping by several stitches once you reach the beginning. All the inner lines are cut lines.


Using very sharp scissors, cut through all layers along the centerline until you reach the triangle points, then very carefully clip along those diagonal lines to the corners. Do not clip your stitches. Turn your pocket pieces toward the inside through the hole you just cut, and press well.


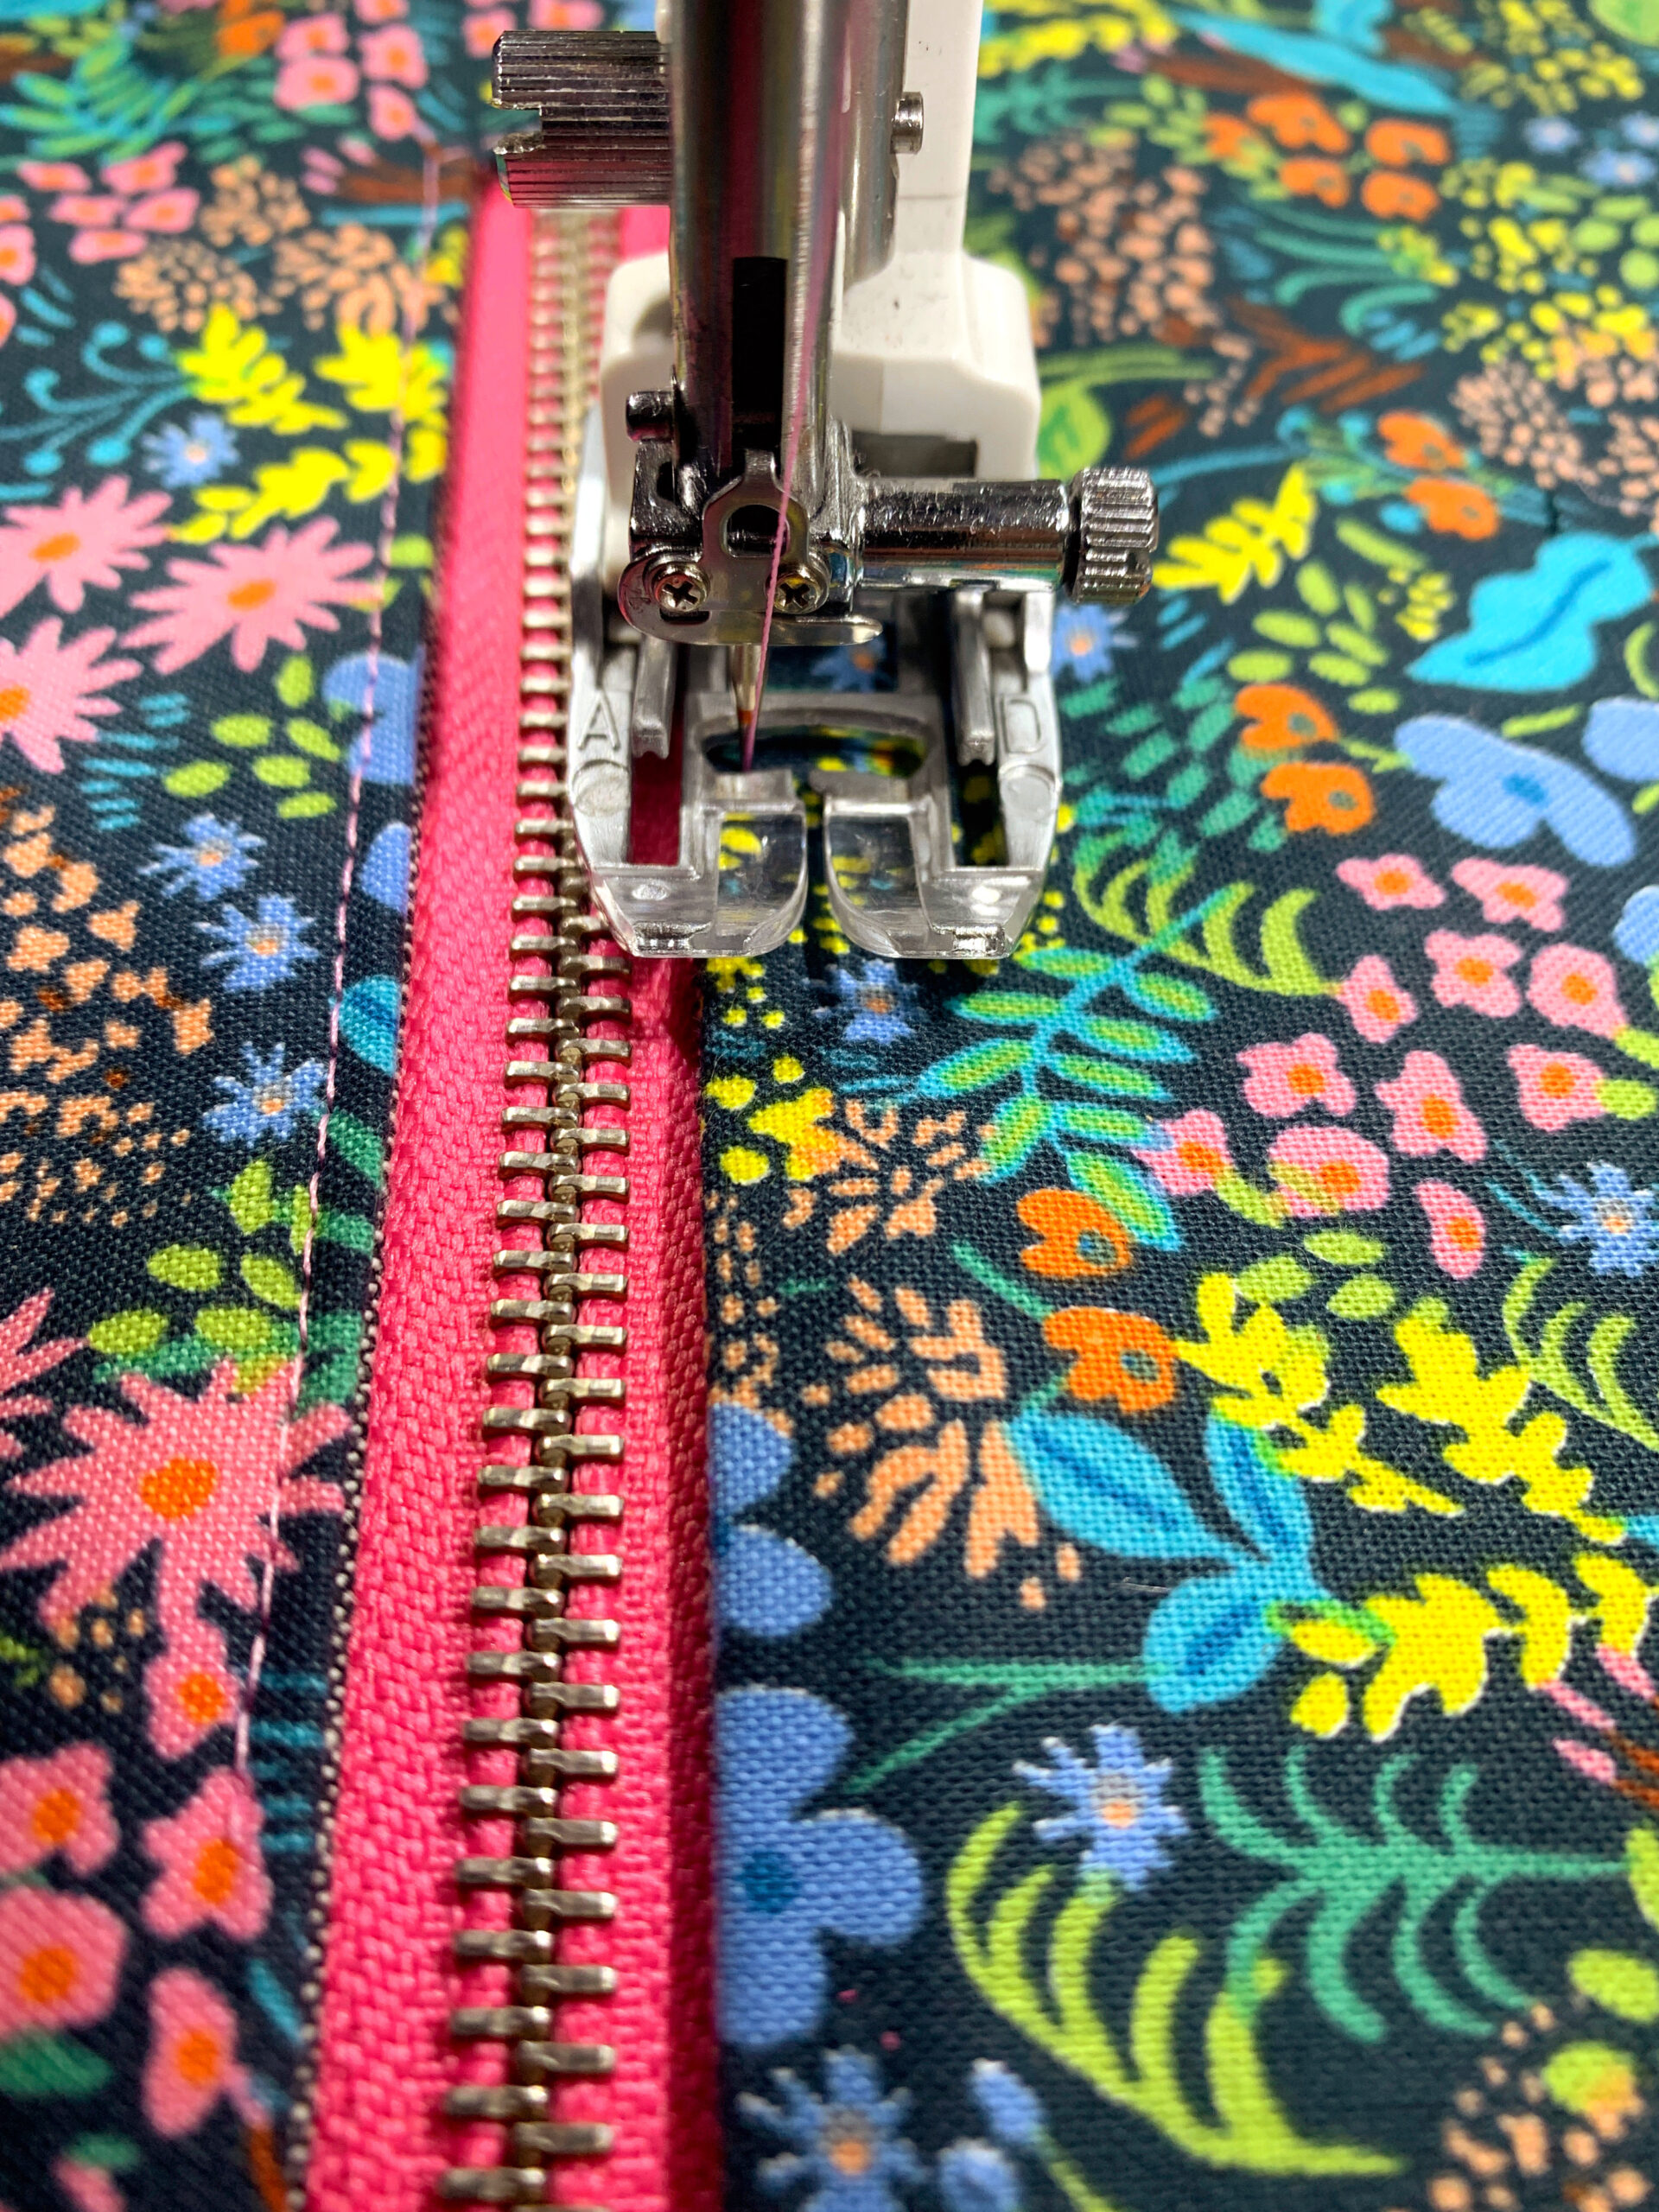
Align your zipper within the rectangular opening, and begin stitching somewhere in the middle. You will want to use a 1/8″ seam allowance since you are sewing close to the folded edge of the fabric. When you get close to the zipper pull, put your needle down, raise your presser foot, and carefully open the zipper so that you can stitch unencumbered by the bulk of the pull. You can then close it again when you need to.


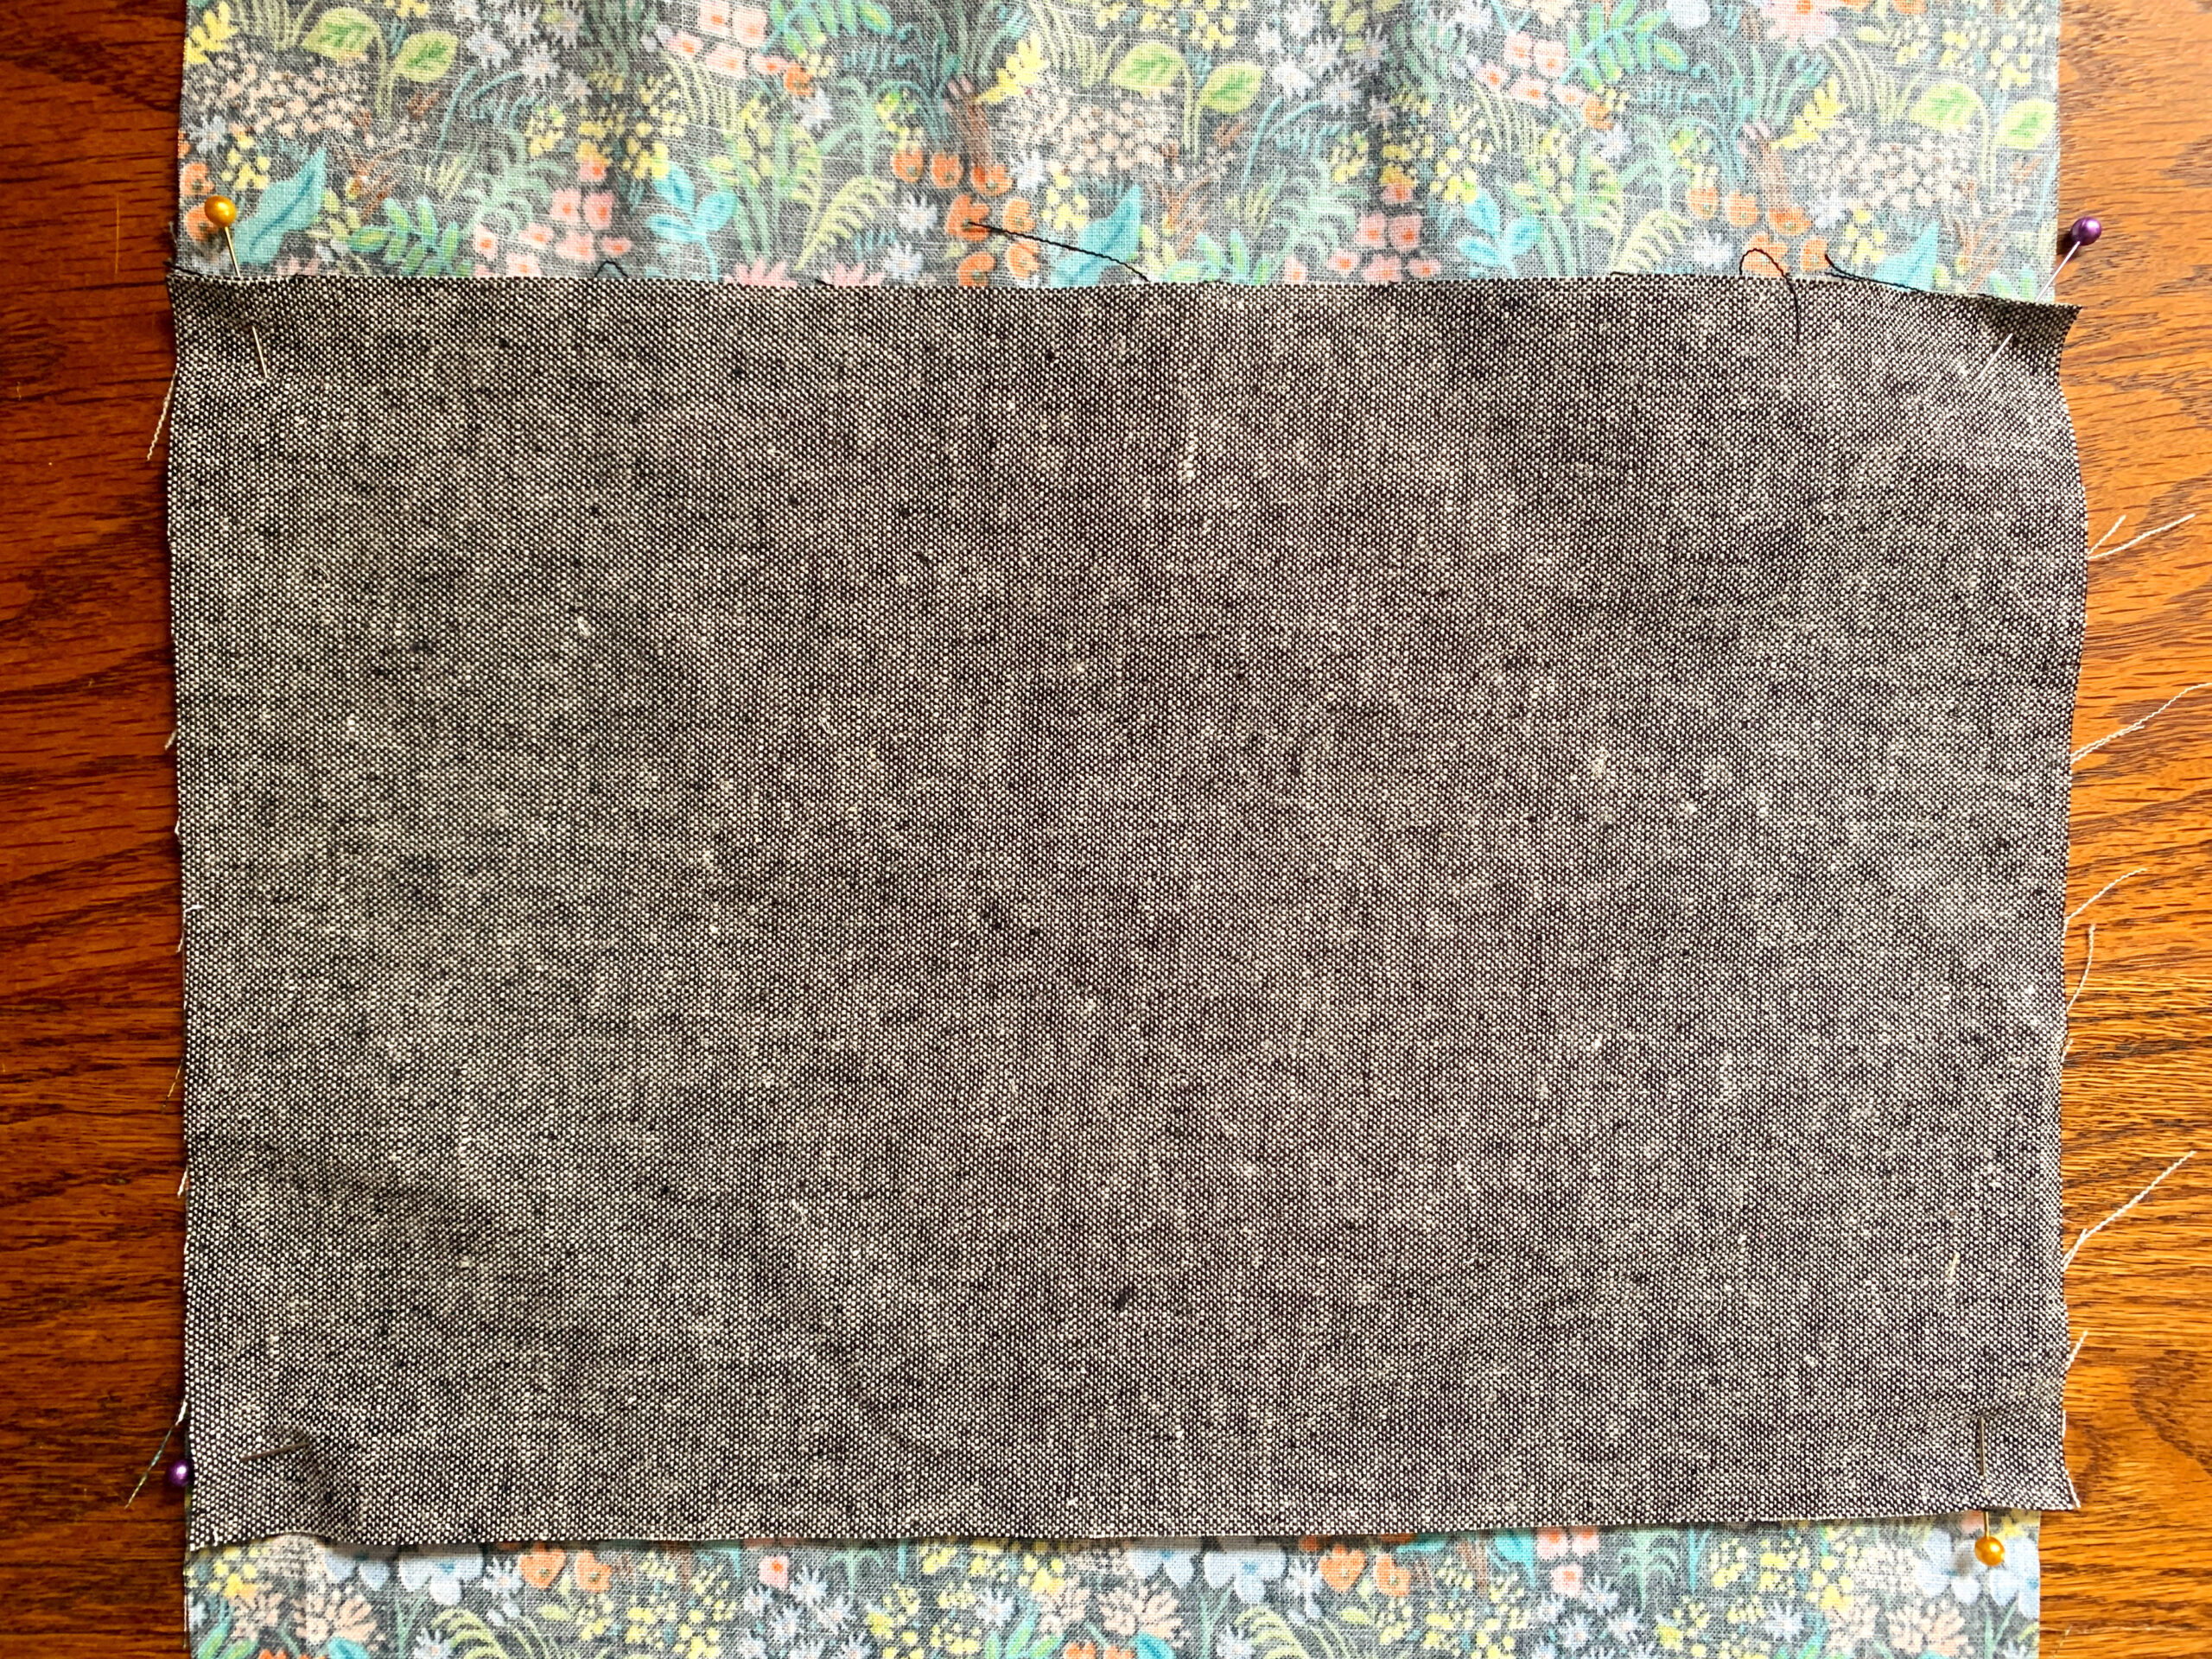
Place your remaining pocket piece right sides together with the sewn pocket piece, and pin the corners. You will now sew all the way around the pocket pieces with a 1/4″ seam allowance. Move the main fabric out of the way as you sew.


You have now completed your hidden zipper pocket!


Give yourself a pat on the back for learning a new technique! You can now include this skill in your sewing toolbox!

Tags
More Blogs
- June 2024 (1)
- May 2024 (1)
- April 2024 (2)
- March 2024 (1)
- February 2024 (5)
- July 2023 (2)
- August 2022 (2)
- June 2022 (2)
- May 2022 (10)
- April 2022 (2)
- March 2022 (2)
- February 2022 (1)
- January 2022 (2)
- December 2021 (1)
- October 2021 (7)
- September 2021 (5)
- August 2021 (4)
- July 2021 (16)
- June 2021 (3)
- May 2021 (6)
- April 2021 (3)
- March 2021 (2)
- February 2021 (1)
- January 2021 (1)
- November 2020 (3)
- October 2020 (3)
- September 2020 (2)
- August 2020 (1)
- June 2020 (1)
- February 2020 (1)
- January 2020 (1)
- December 2019 (1)
- November 2019 (1)
- October 2019 (1)
- August 2019 (1)
- May 2019 (1)
- April 2019 (1)
- February 2019 (1)
- December 2018 (1)
- November 2018 (1)
- September 2018 (1)
Recent Posts
- Easy Sew Pennant Garland
- Curvy Log Cabin Block
- Easy Quilted Pot Holder by Fran Gulick
- Charmed Pillow by Melanie Call
- Face Bandana by Laurel Ryan
- Quilted Sawtooth Flower Pillows by Maureen Cracknell
- The Bookish Pouch
- The Flower Fields QuiltBy Maureen Cracknell
- Someday Quilt by Minki Kim
- New Project!Pet Lounge by Meredith Daniel
