Projects

Mini Landscapes Quilt

Created By:

Carolina Oneto

Skill Level:

With this simple project, you will learn how to cut and sew improv curves, to create a fun block that looks like a mini landscape. You can make as many as you want in different color combinations, to create a quilt in any size that you want. The sample that I create today for this tutorial measures 25” x 14”, a great size for a mini quilt. 

Fabric and Notions Required
  • Sewing machine, I’m using my JANOME Memory craft 6700P
  • 1/4” inch foot for sewing
  • Quilting ruler
  • Rotary cutter
  • Cutting mat
  • Iron & ironing board
  • Fabrics (for this tutorial specific)
    • 14 pieces of fabrics that measure 6” x 10”. For this project a good idea is to select a gradient of different values for one color (I choose green) and 3 piece of fabric in a color that is the complementary color (in my case dark pink)
  • Fabric for backing and binding, batting
  • Threads for piecing and quilting 
Instructions


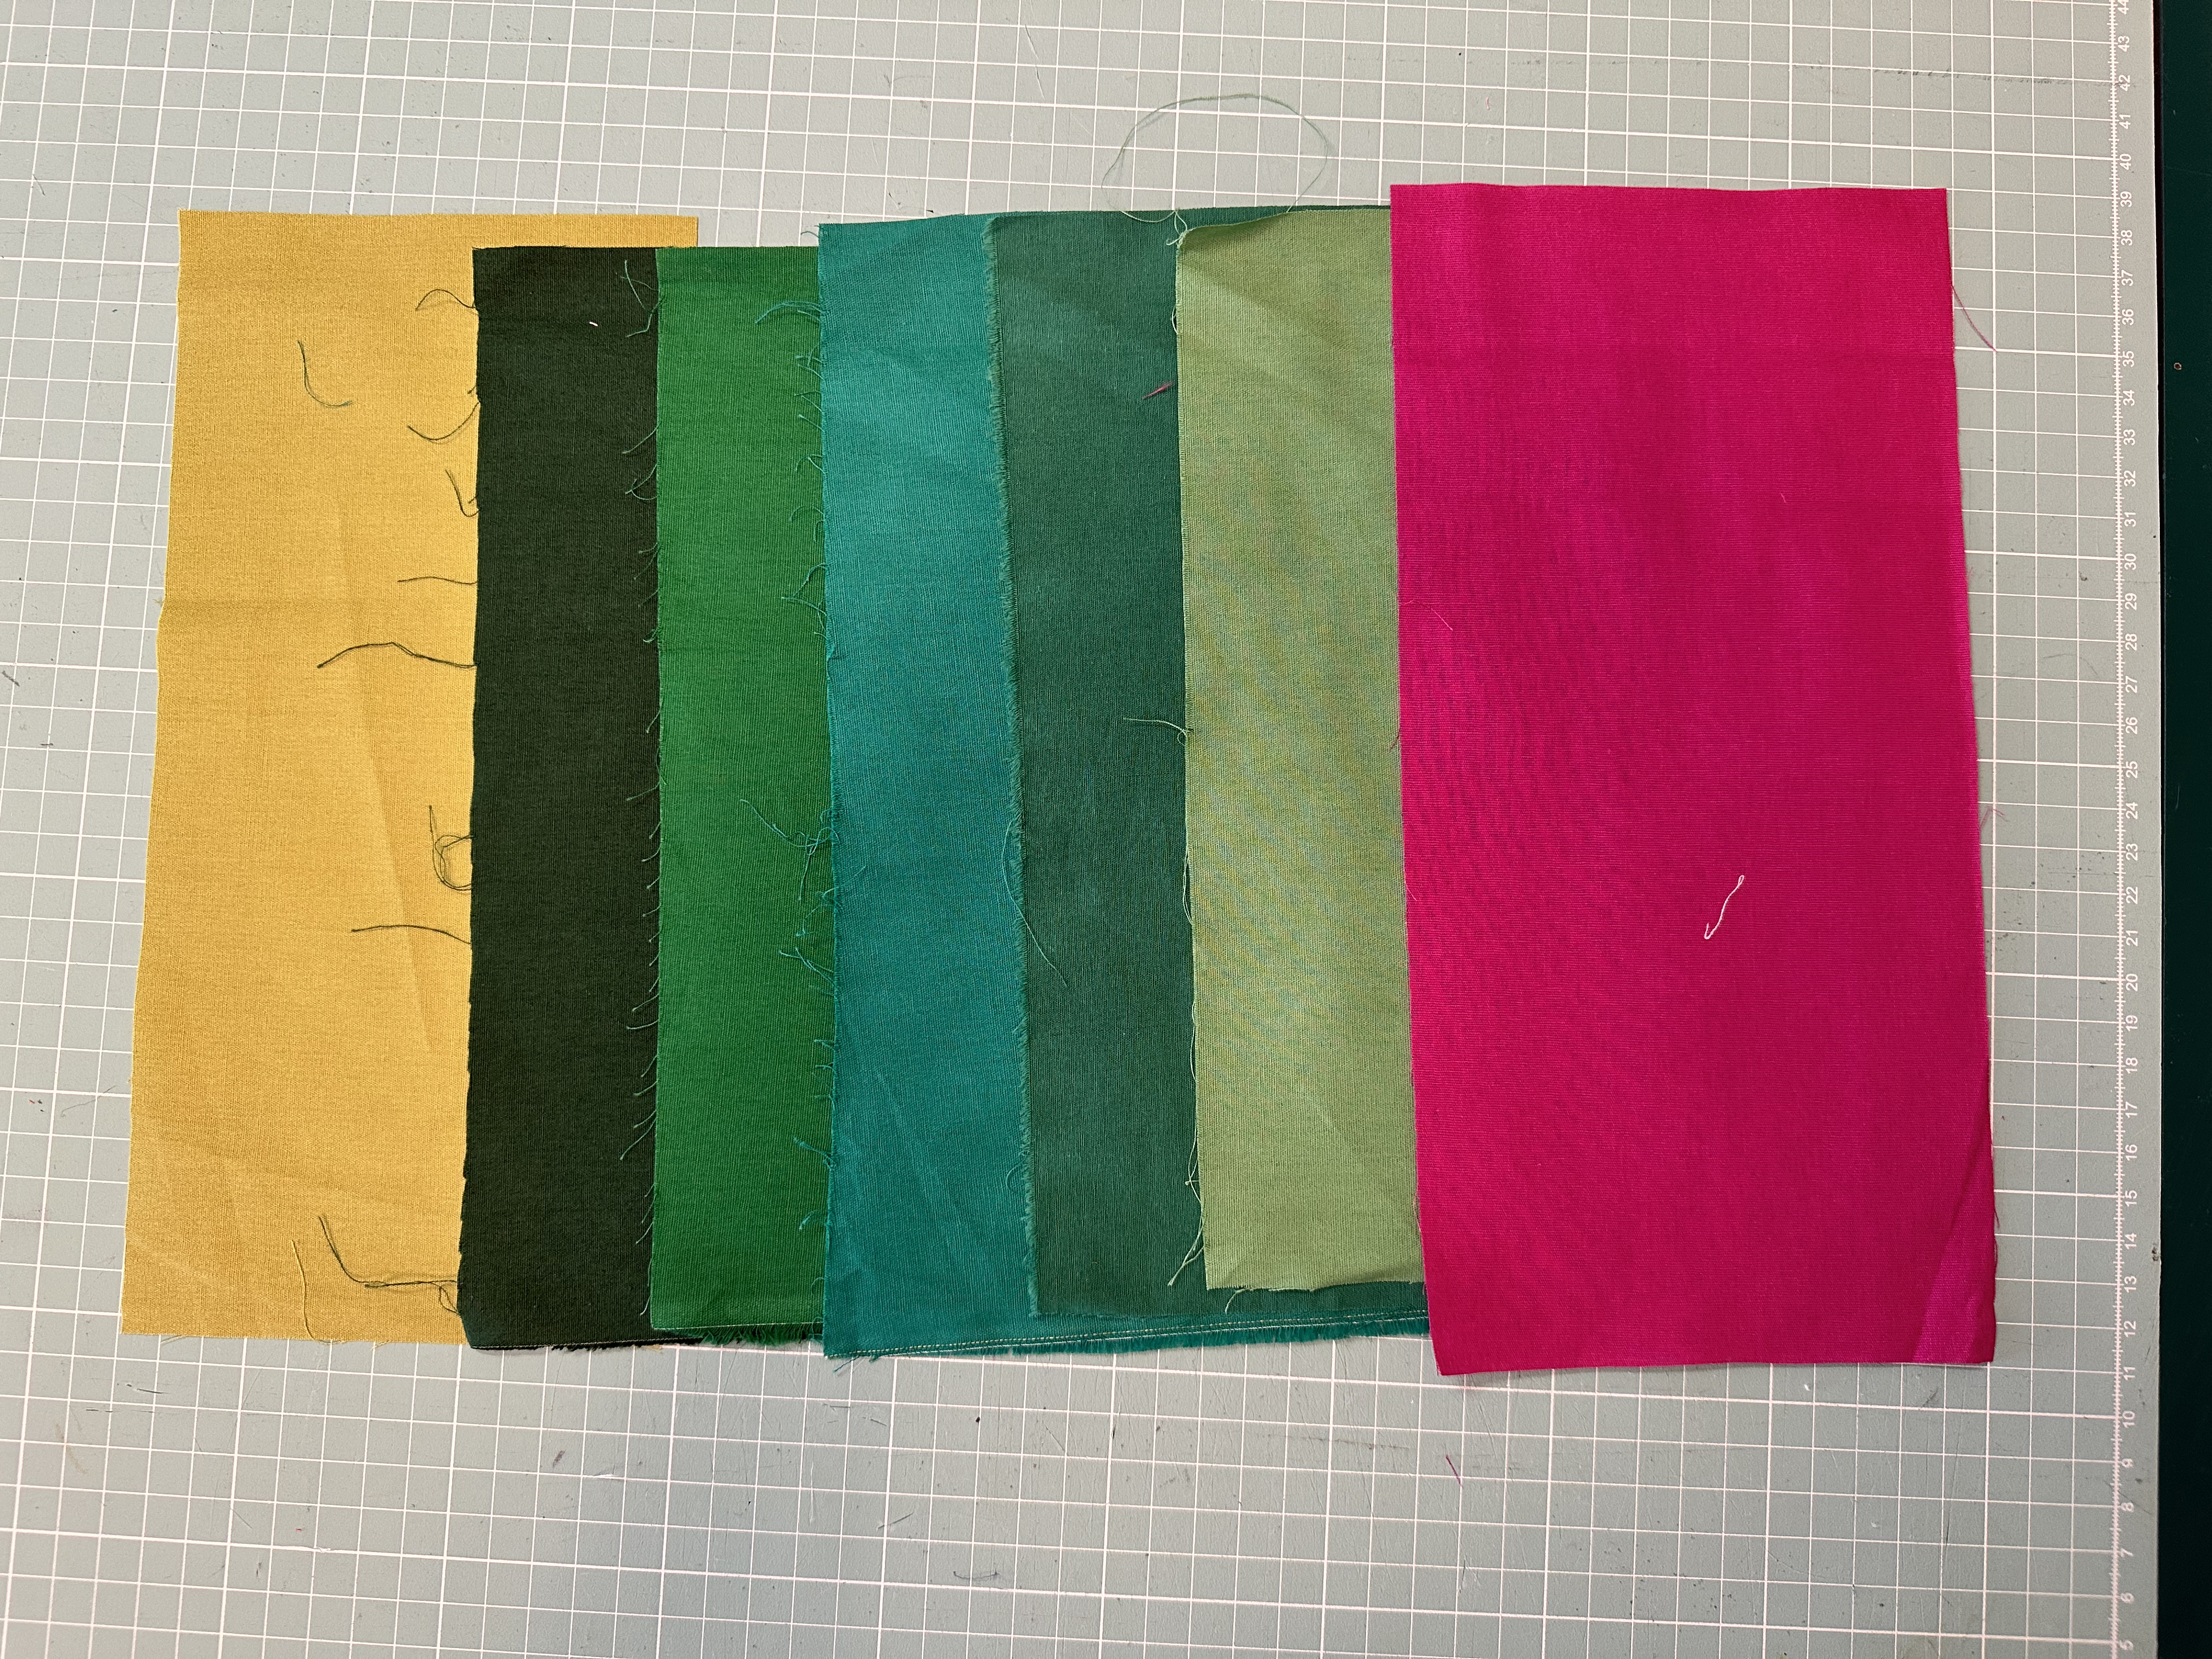
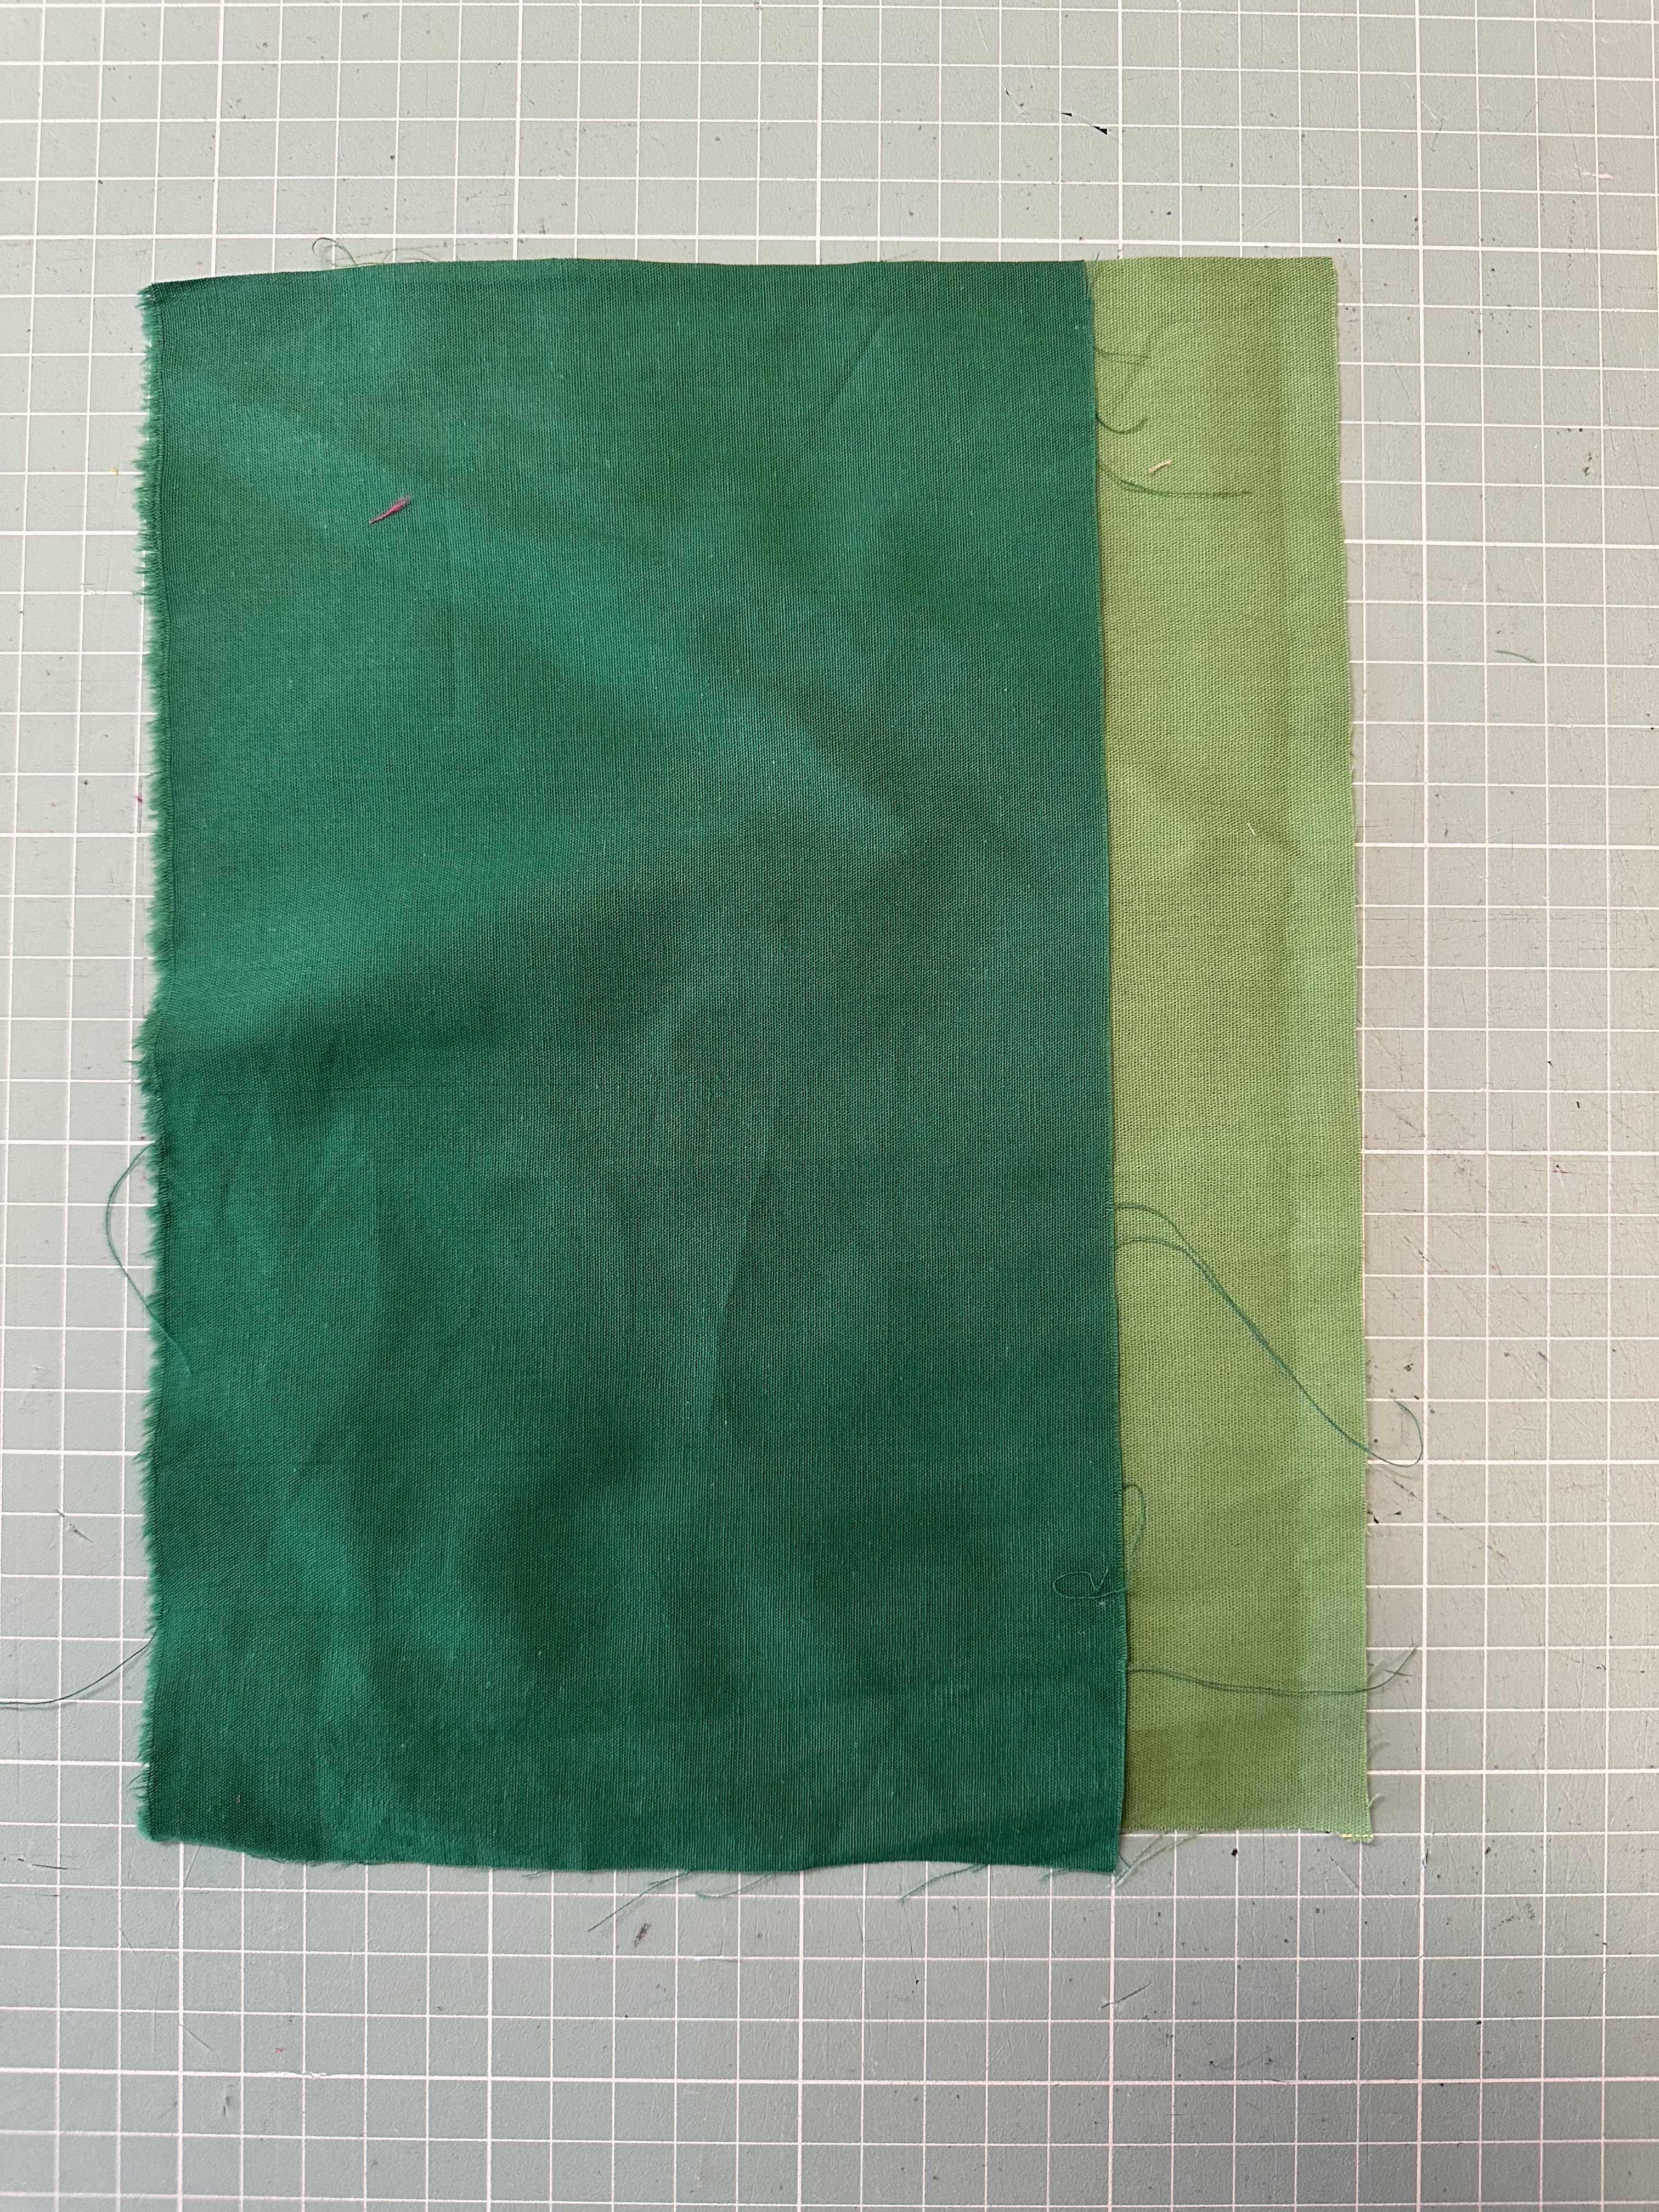
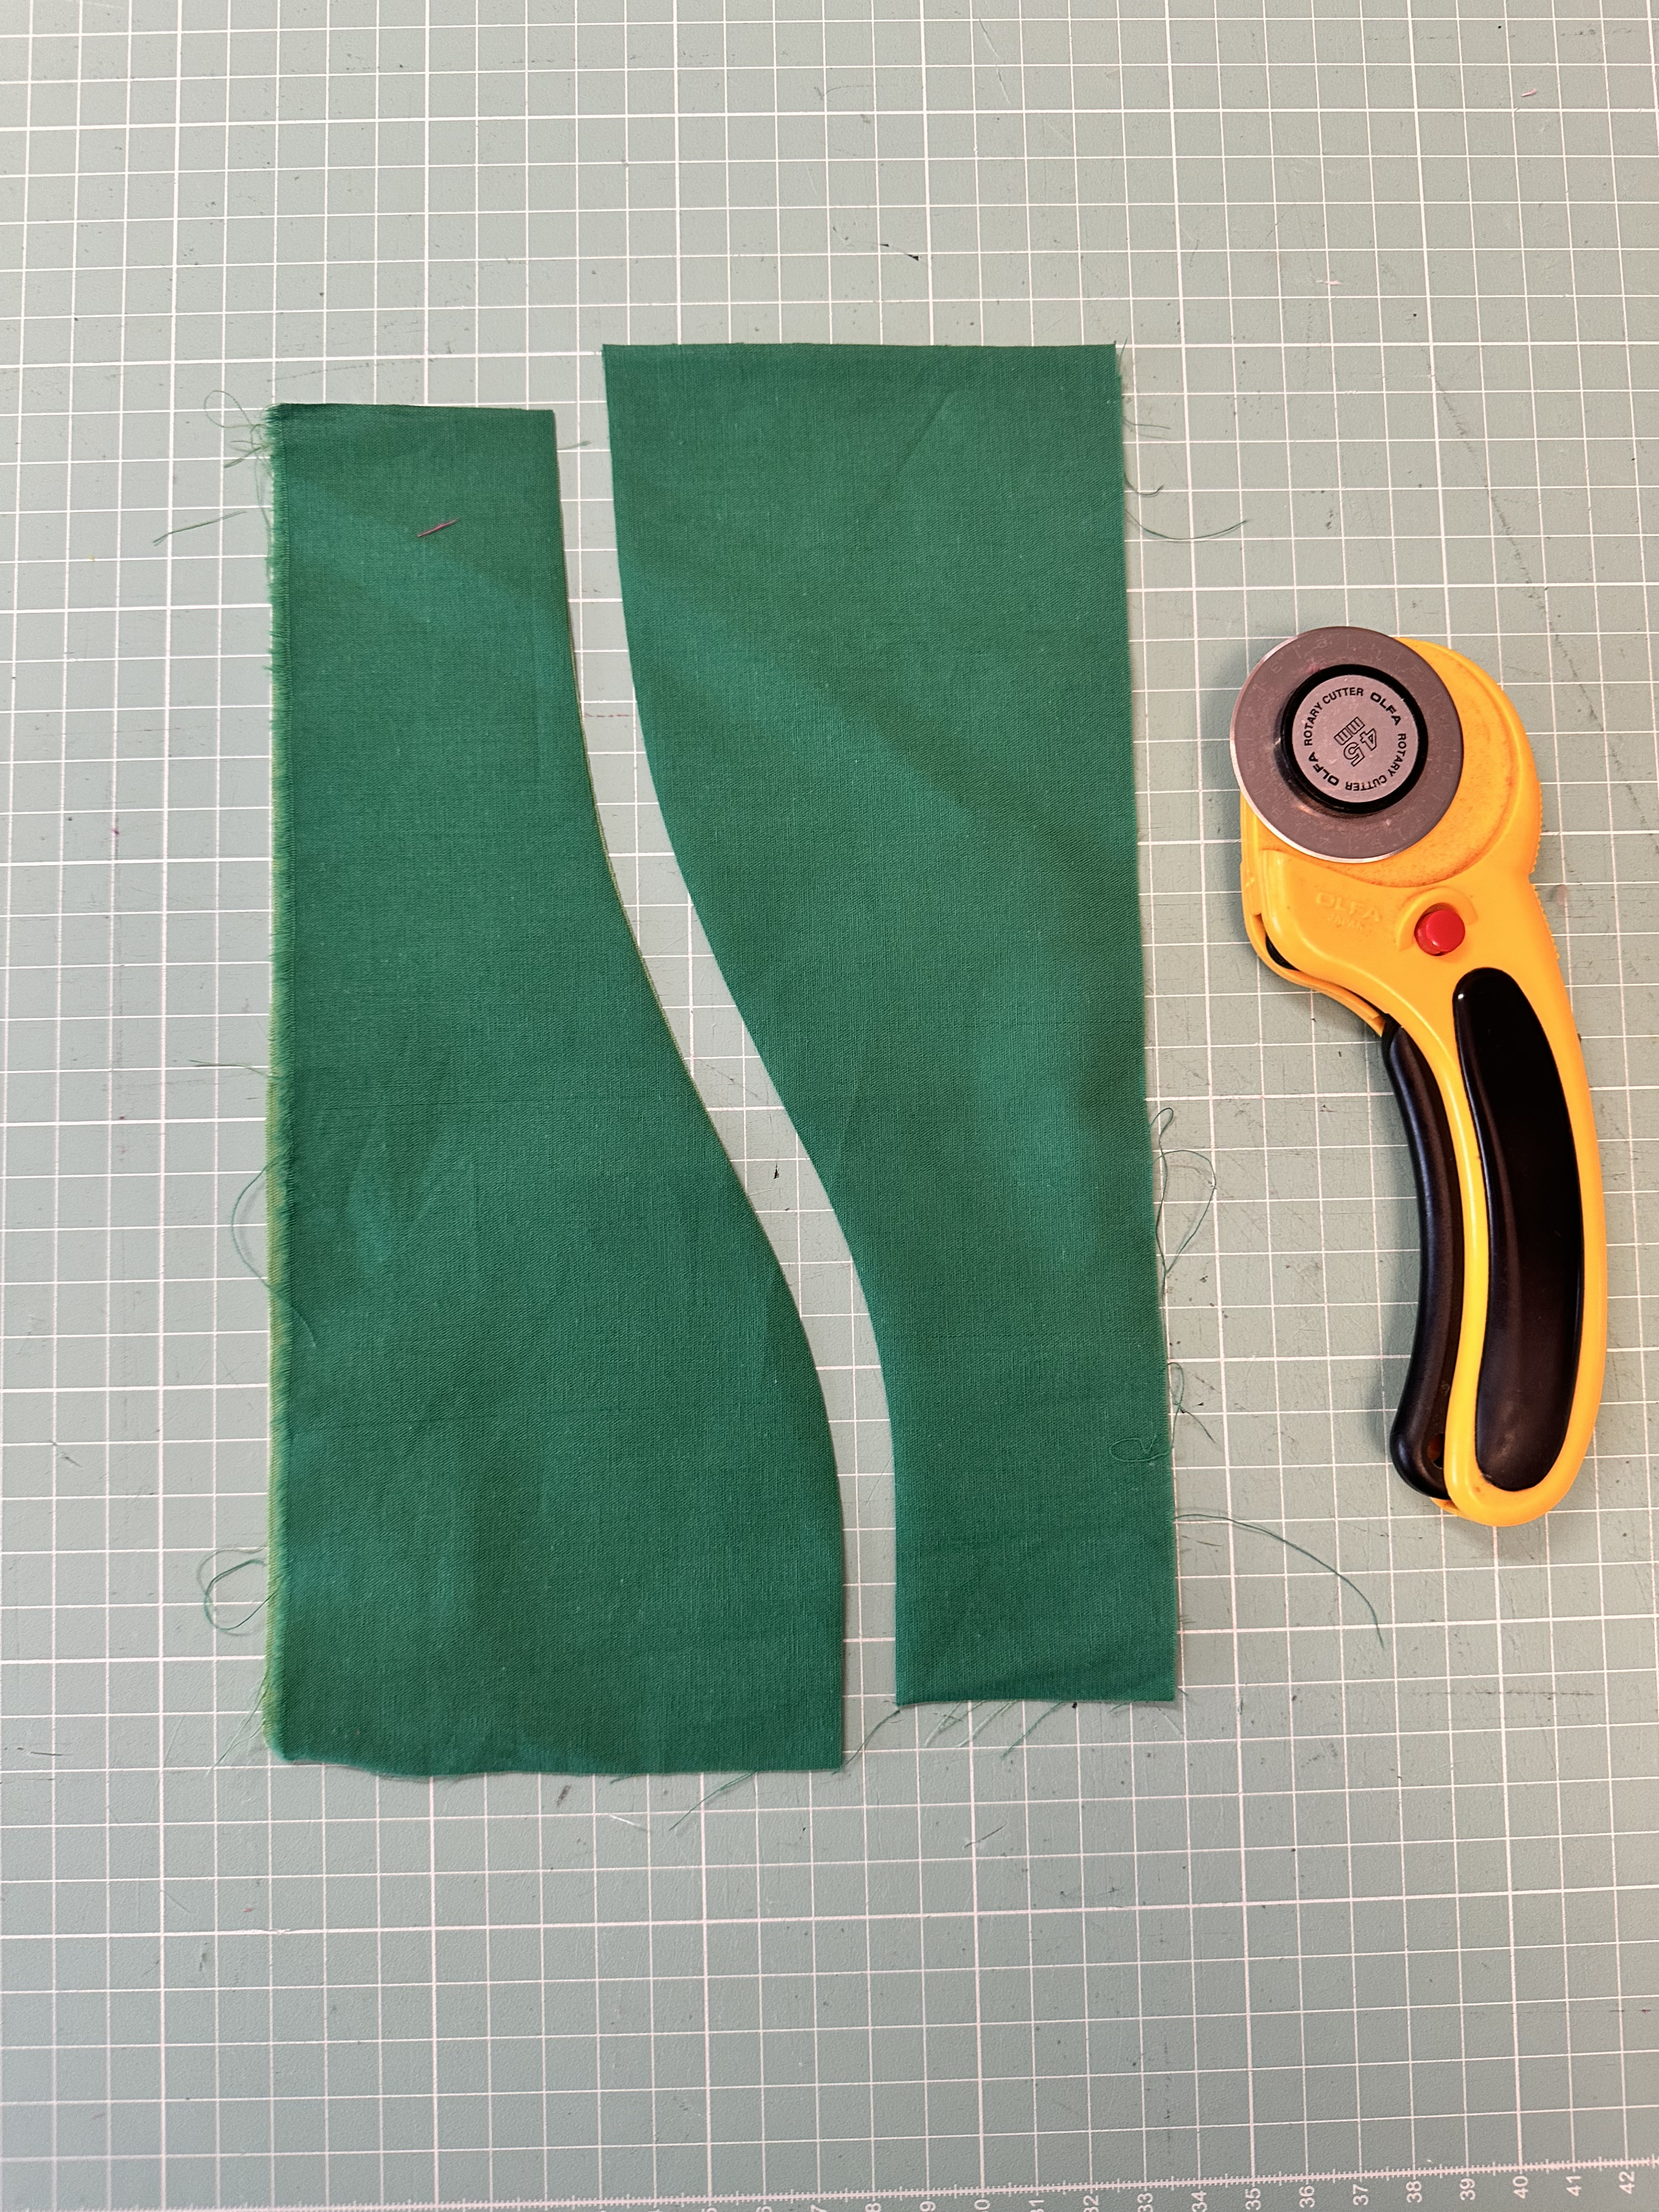
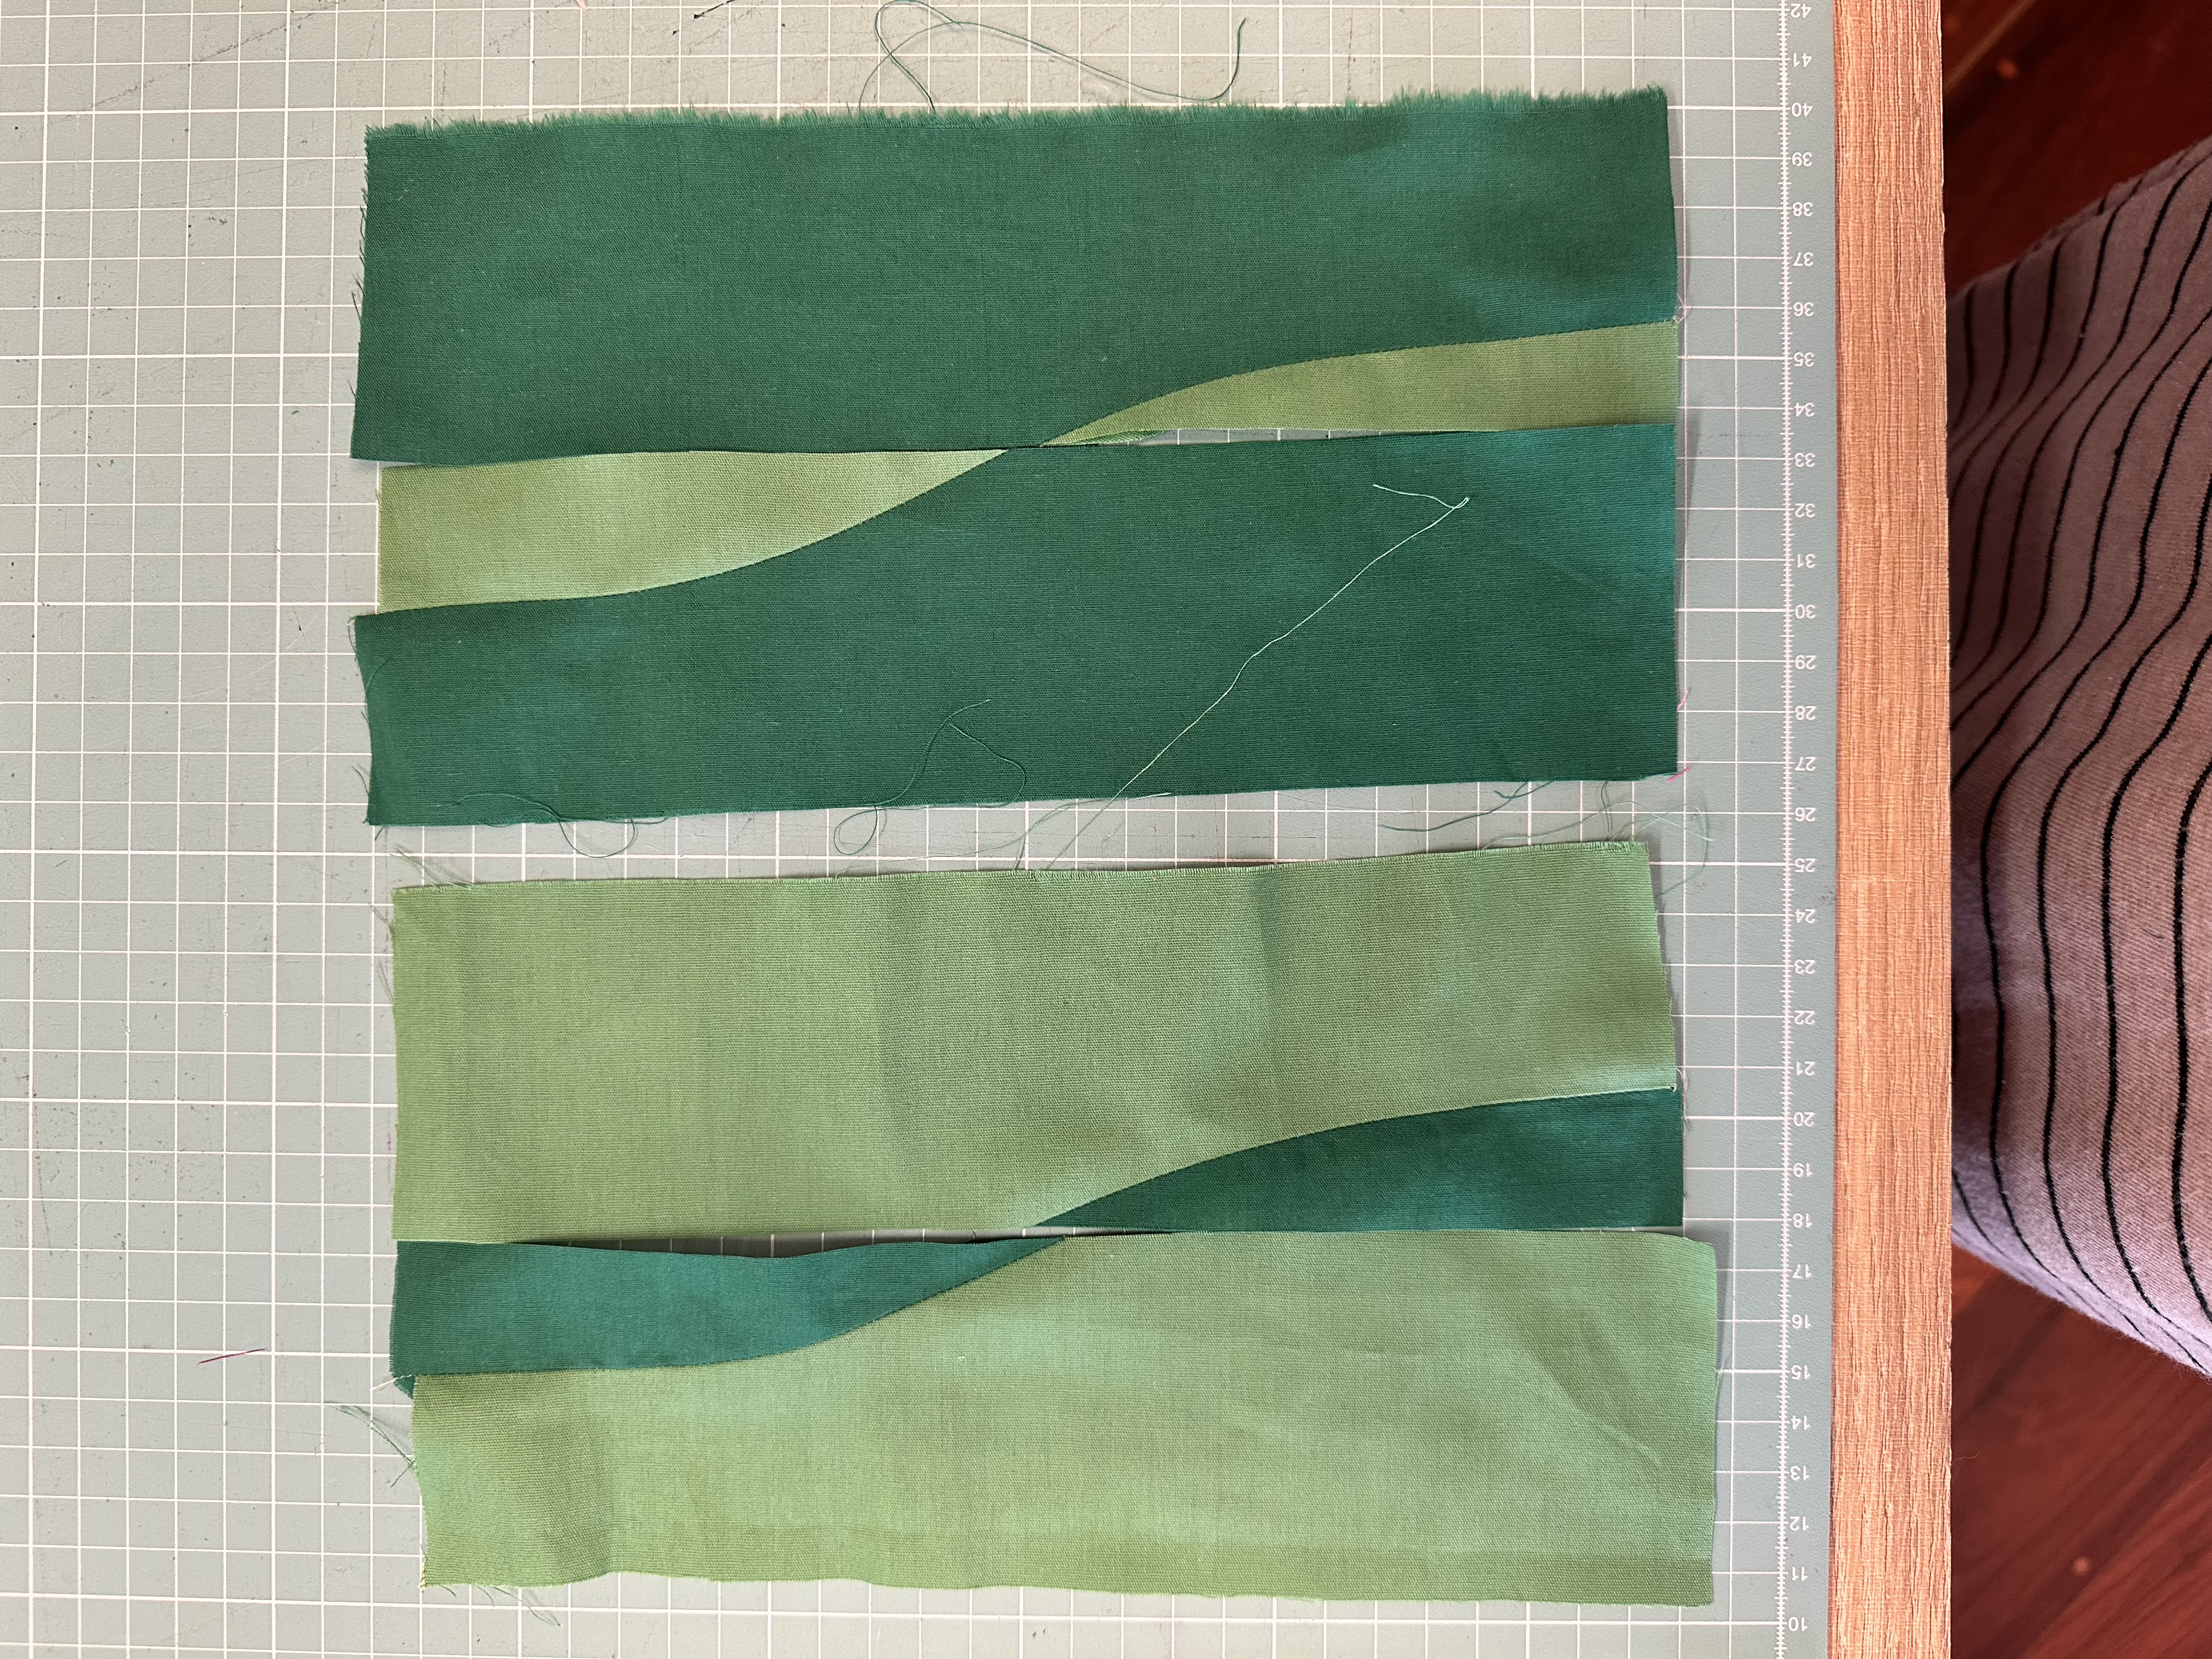
Pick the two pieces of fabrics (you can start with the light values) and overlap them. With your rotary cutter cut a freehand gentle curve (it is key to use a new blade) remember to cut a gentle curve with the shape that you see below 


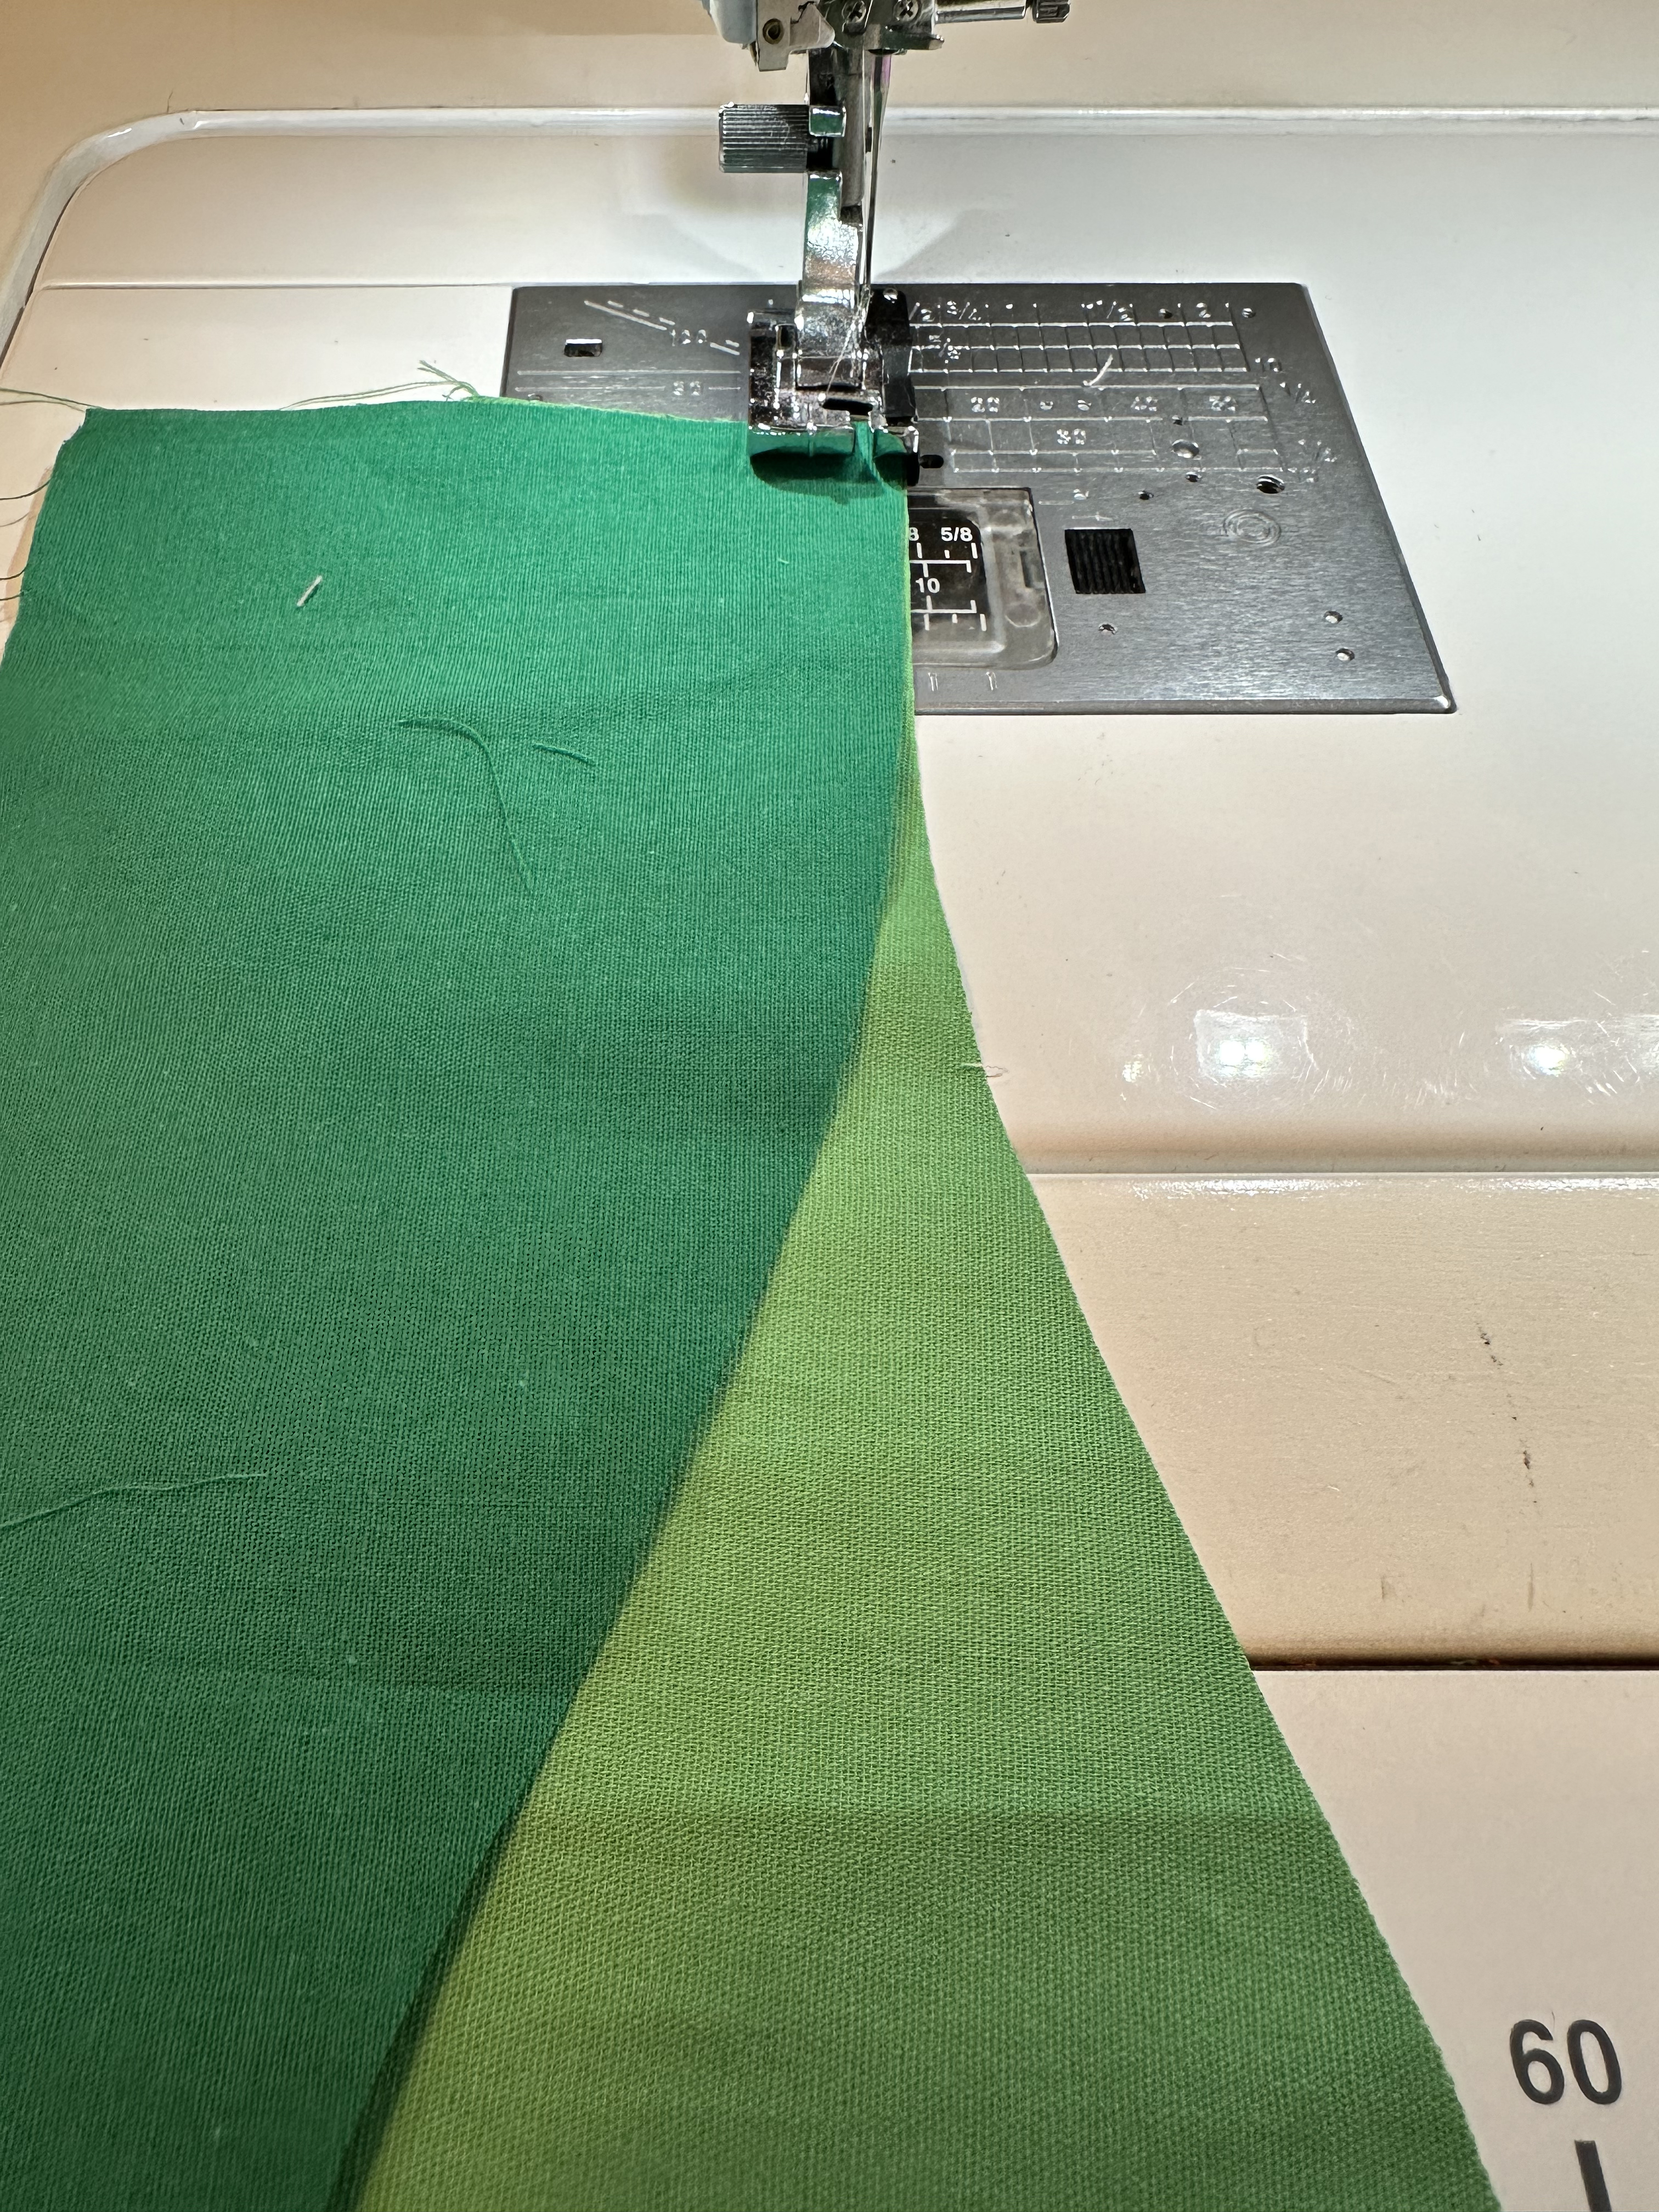
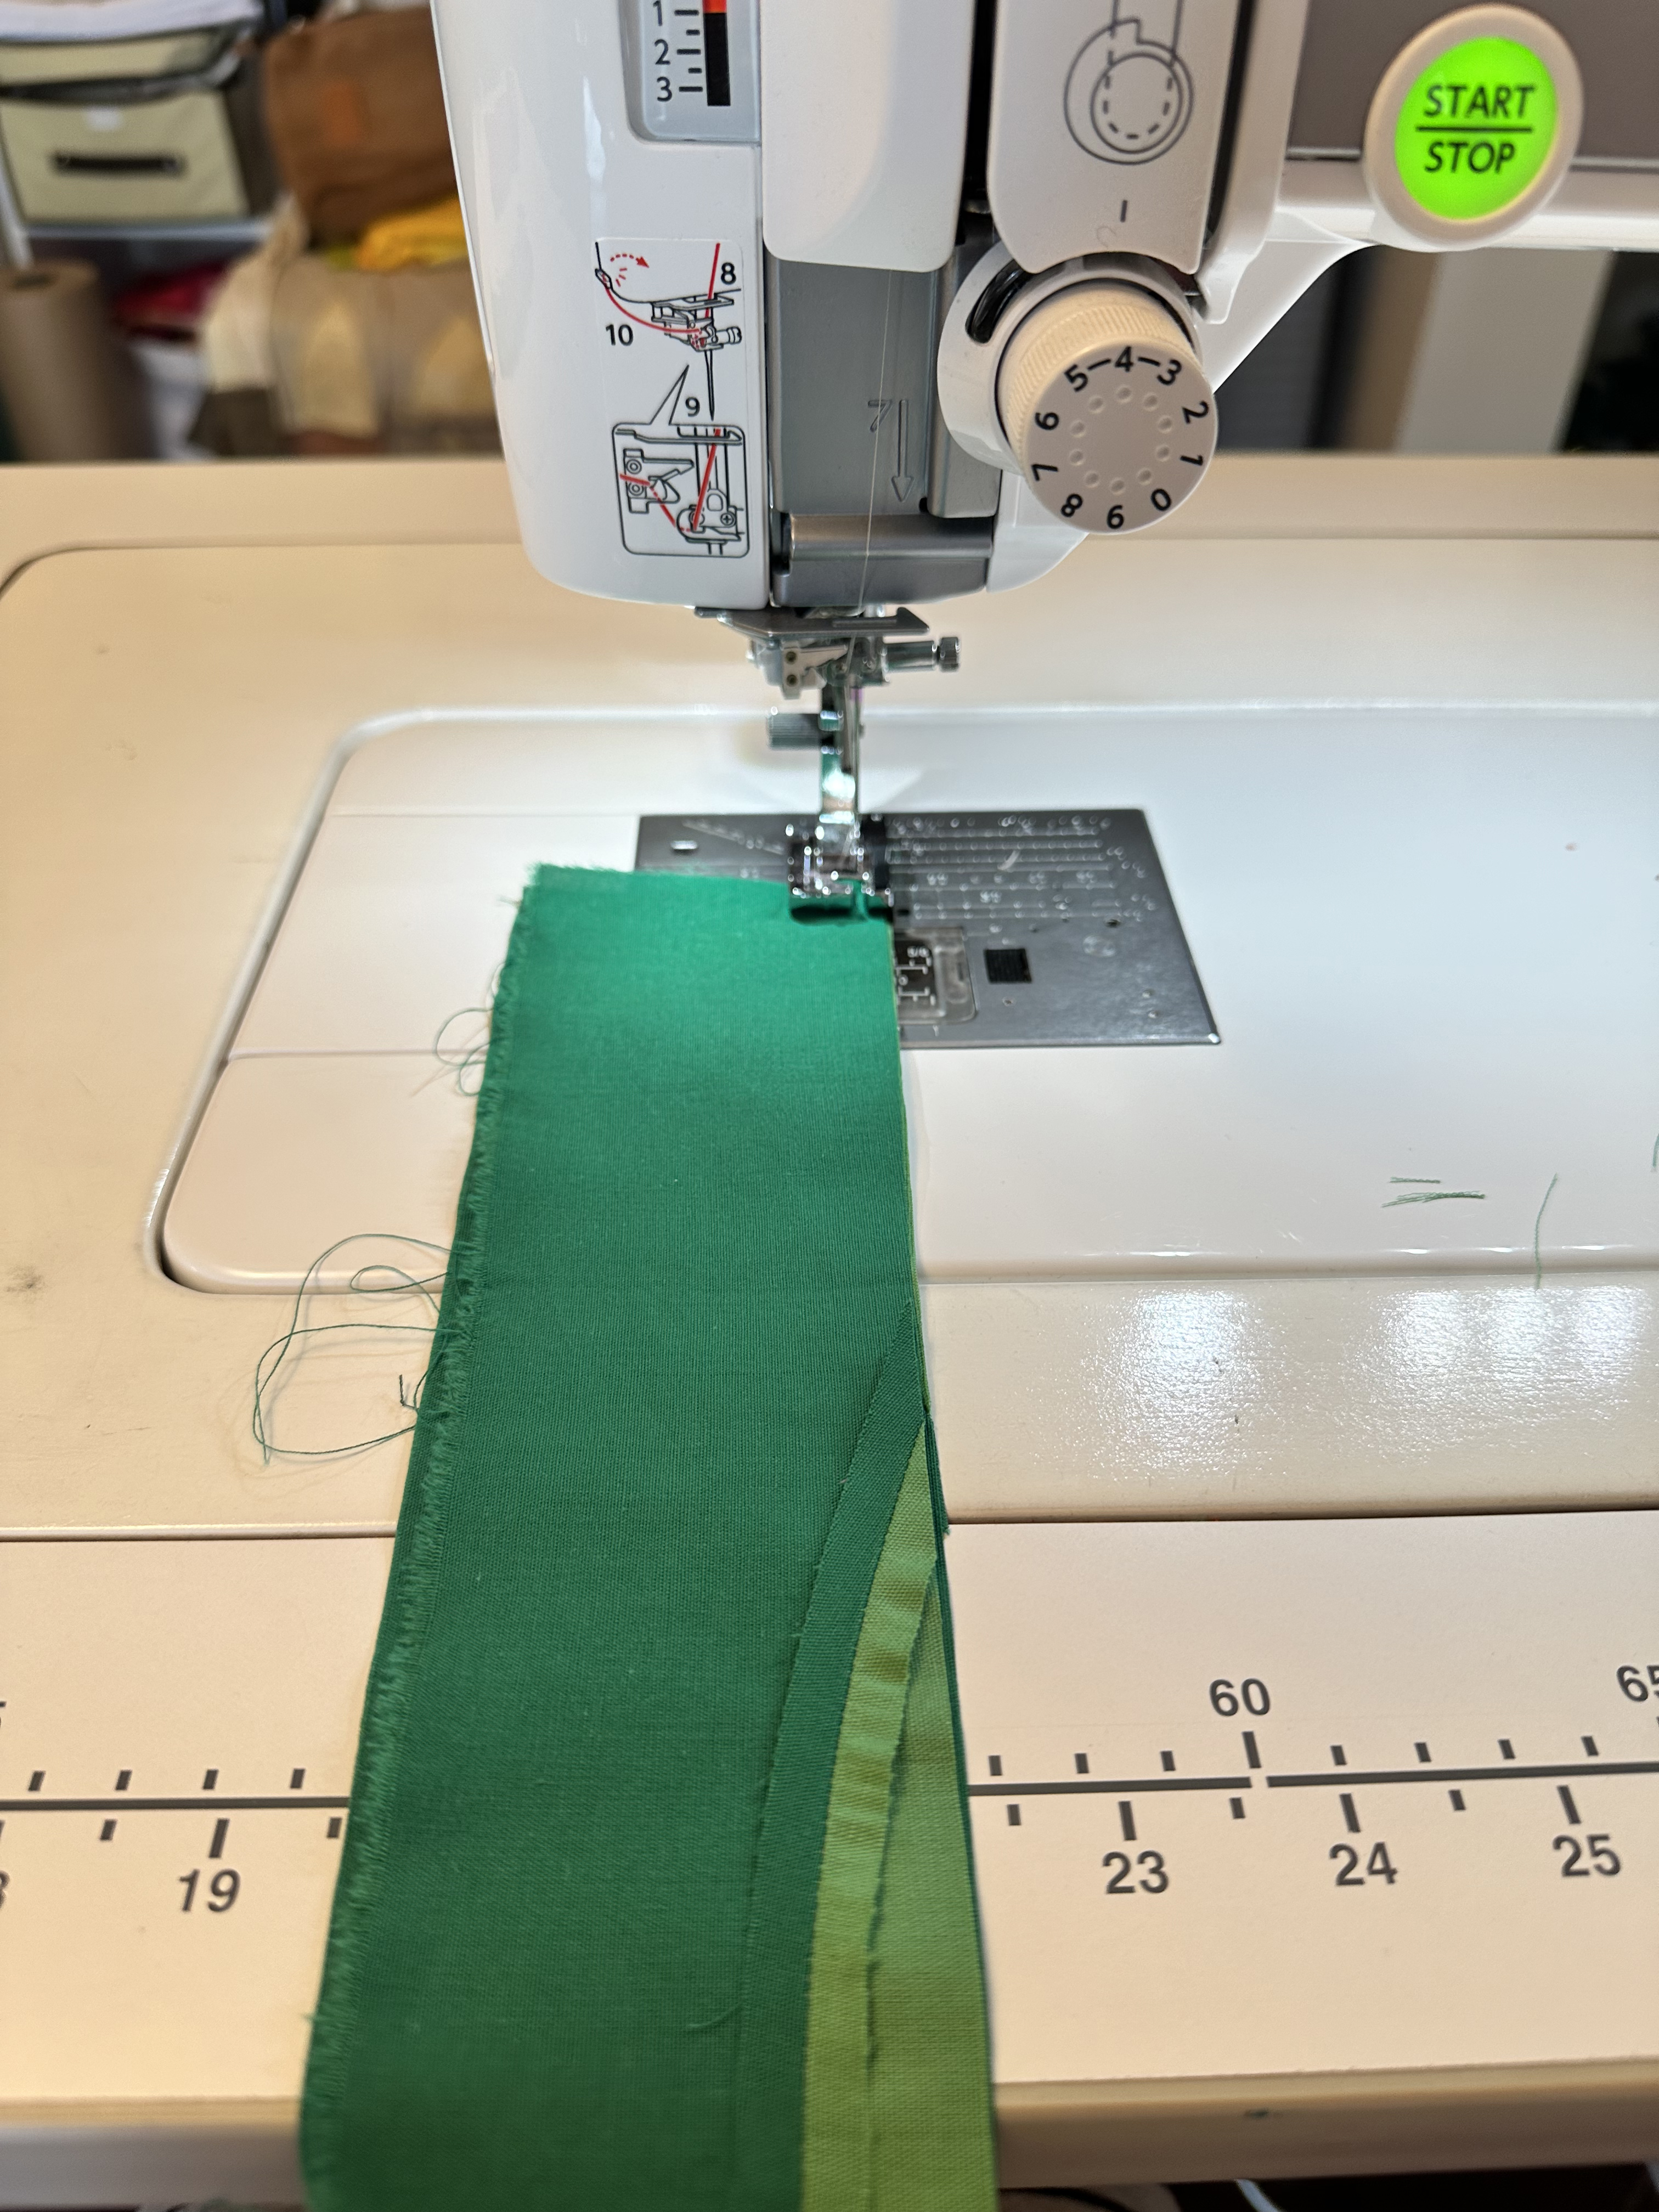
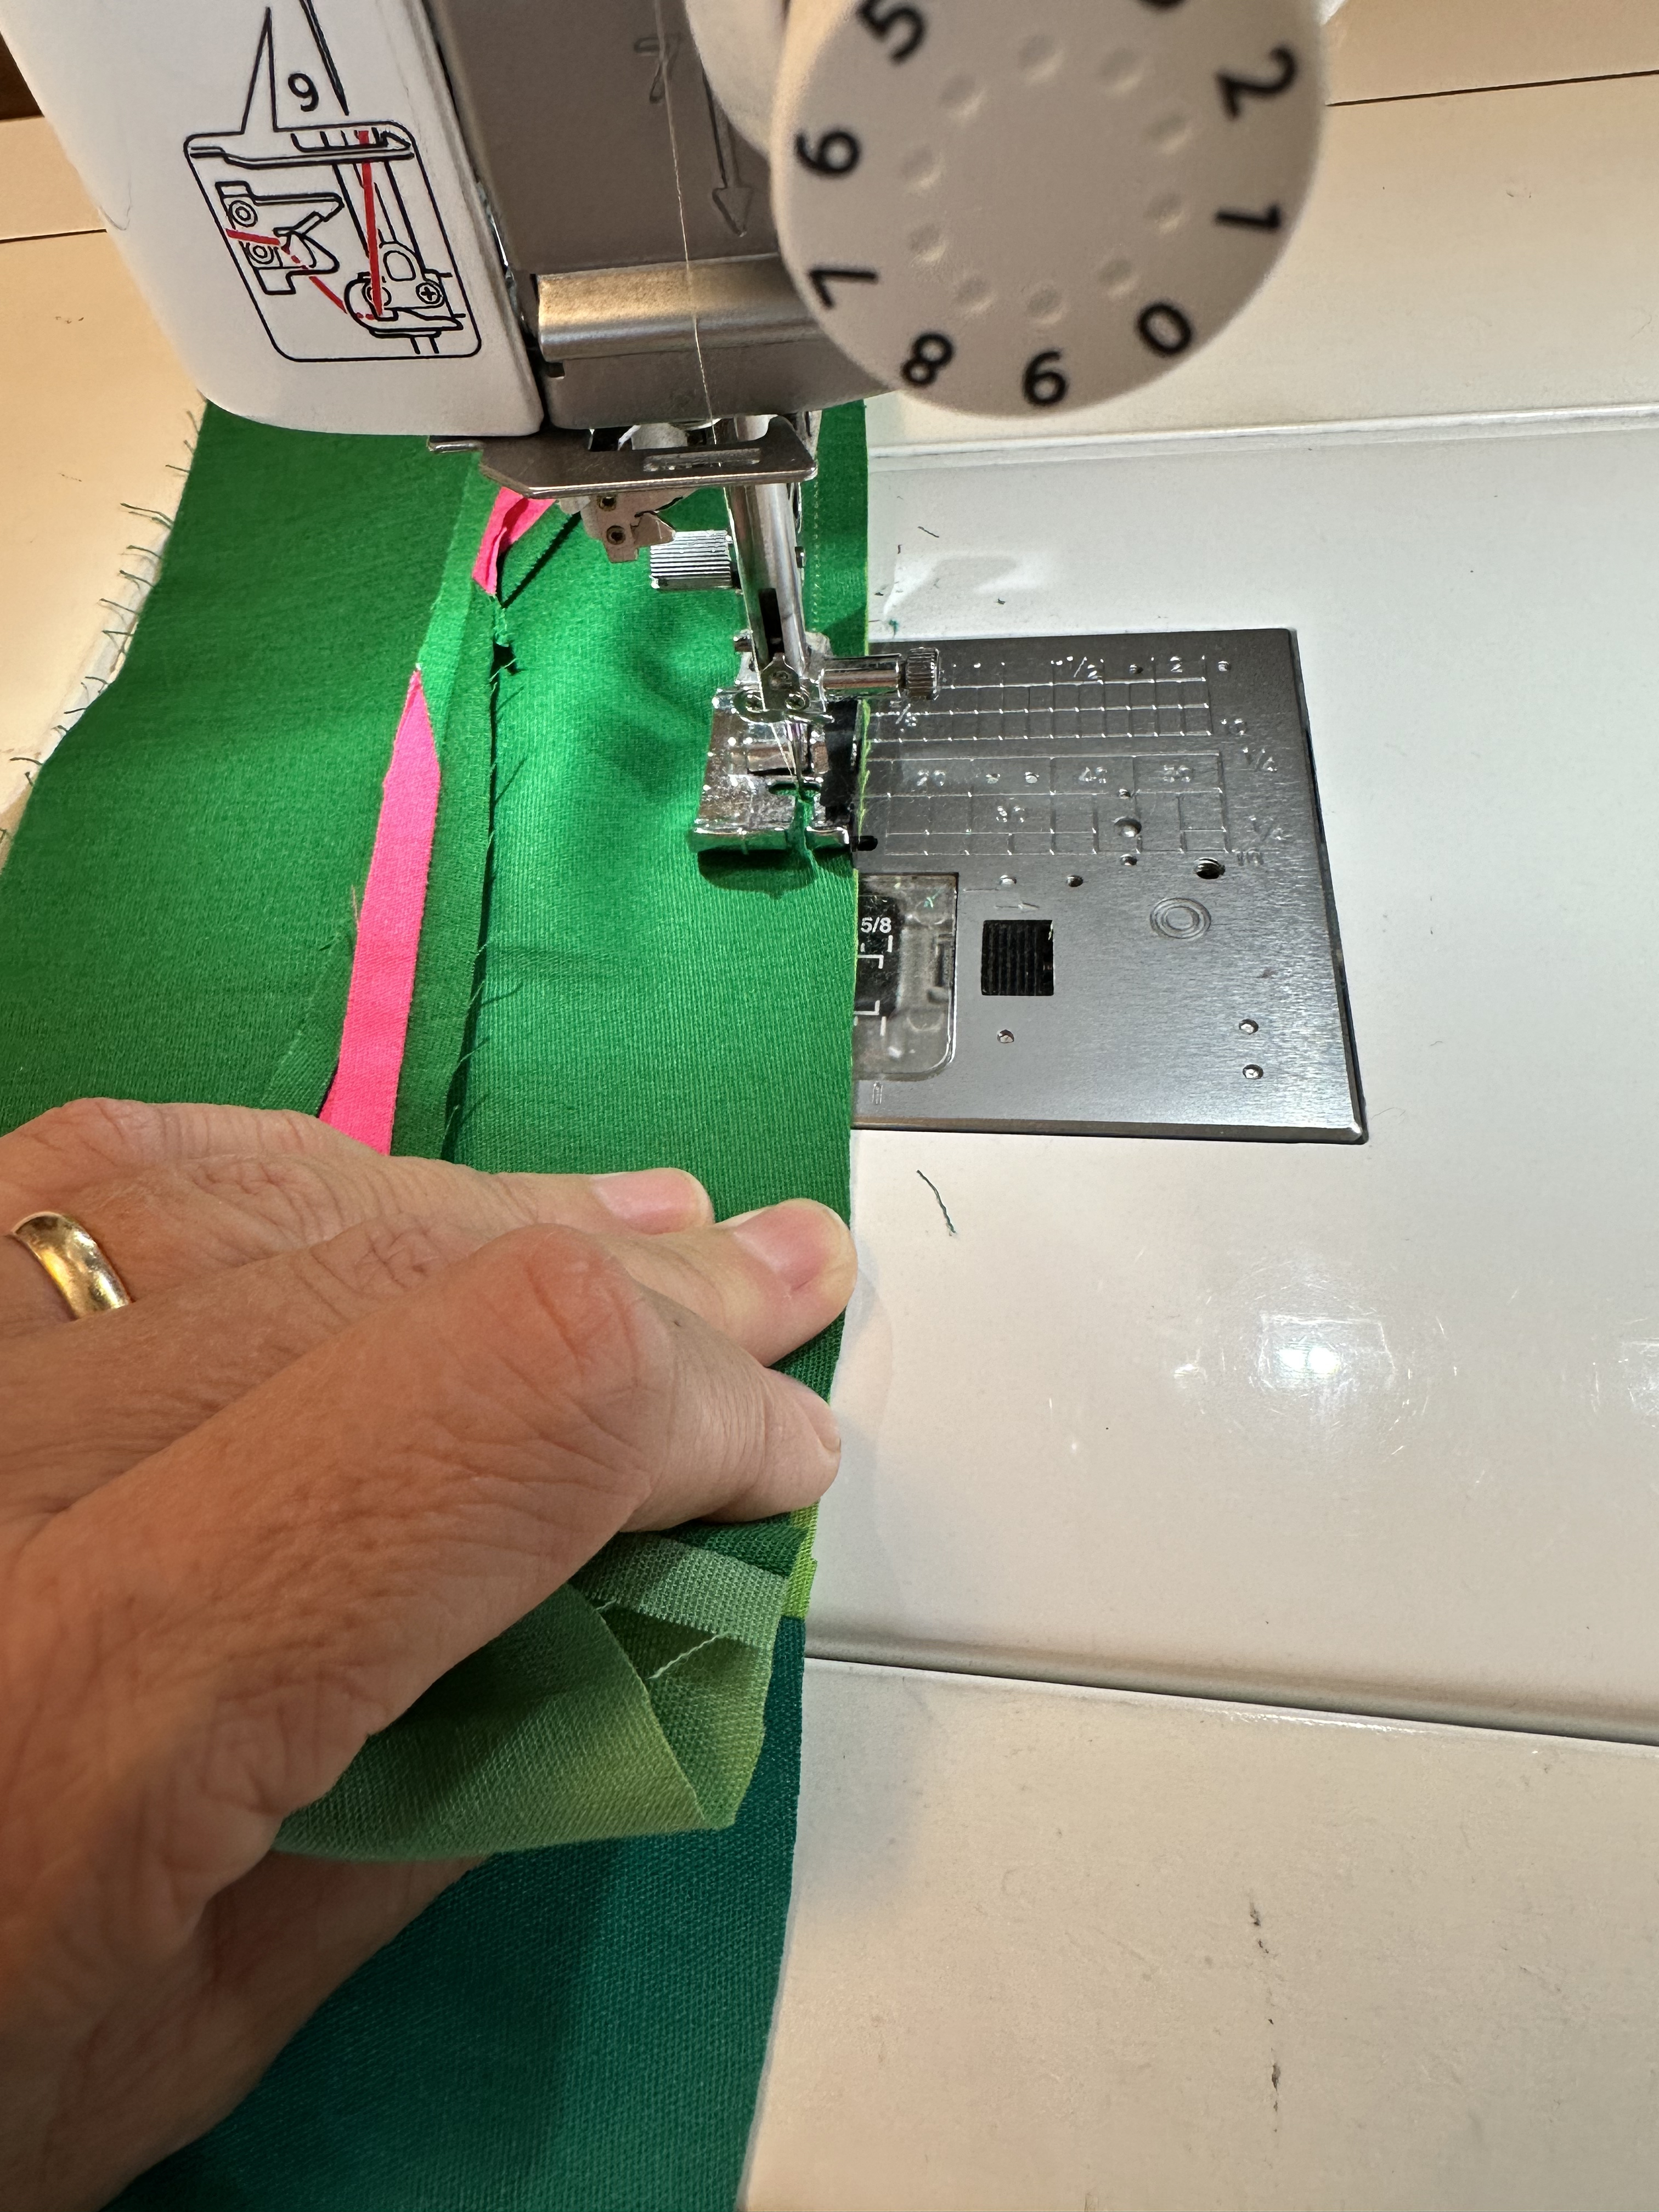
Mix and match, put right side together and on your sewing machine, start sewing with your 1/4” foot, always aligning the two fabrics to the edge of the foot. With your left hand handle the fabric on top and with your right hand the fabric on bottom, don’t stretch the fabrics. 
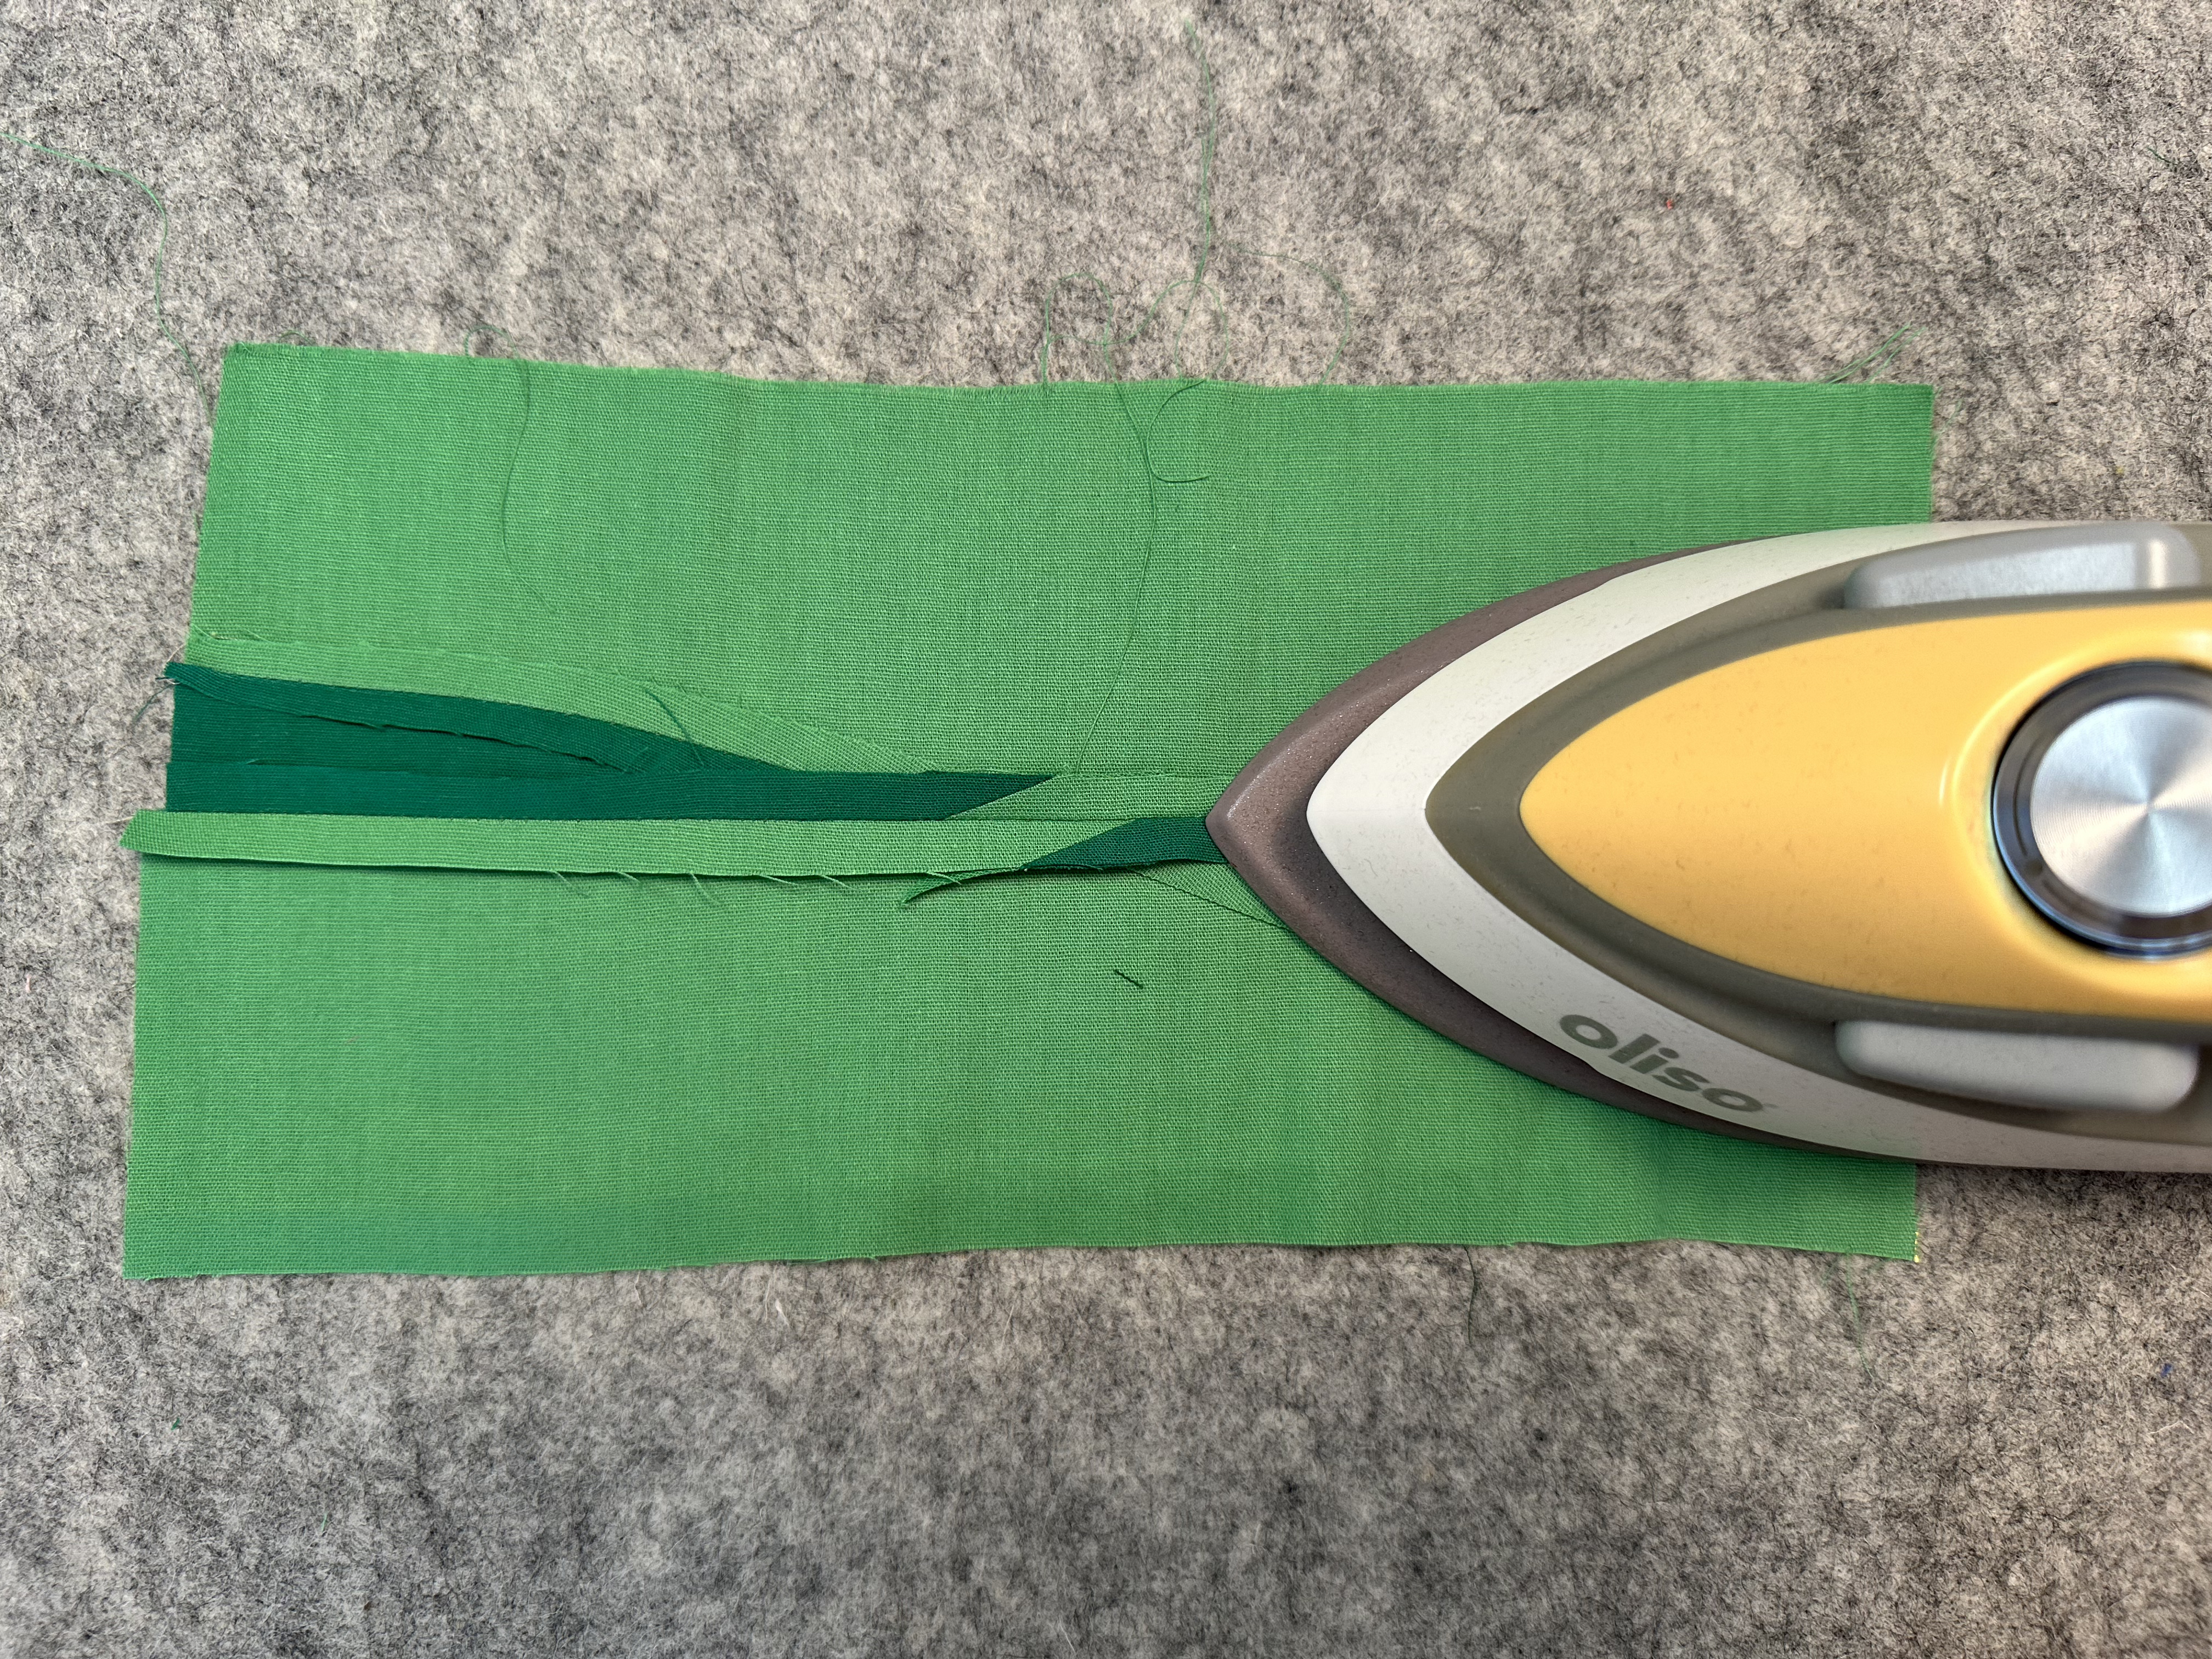
 

Press seams open. 


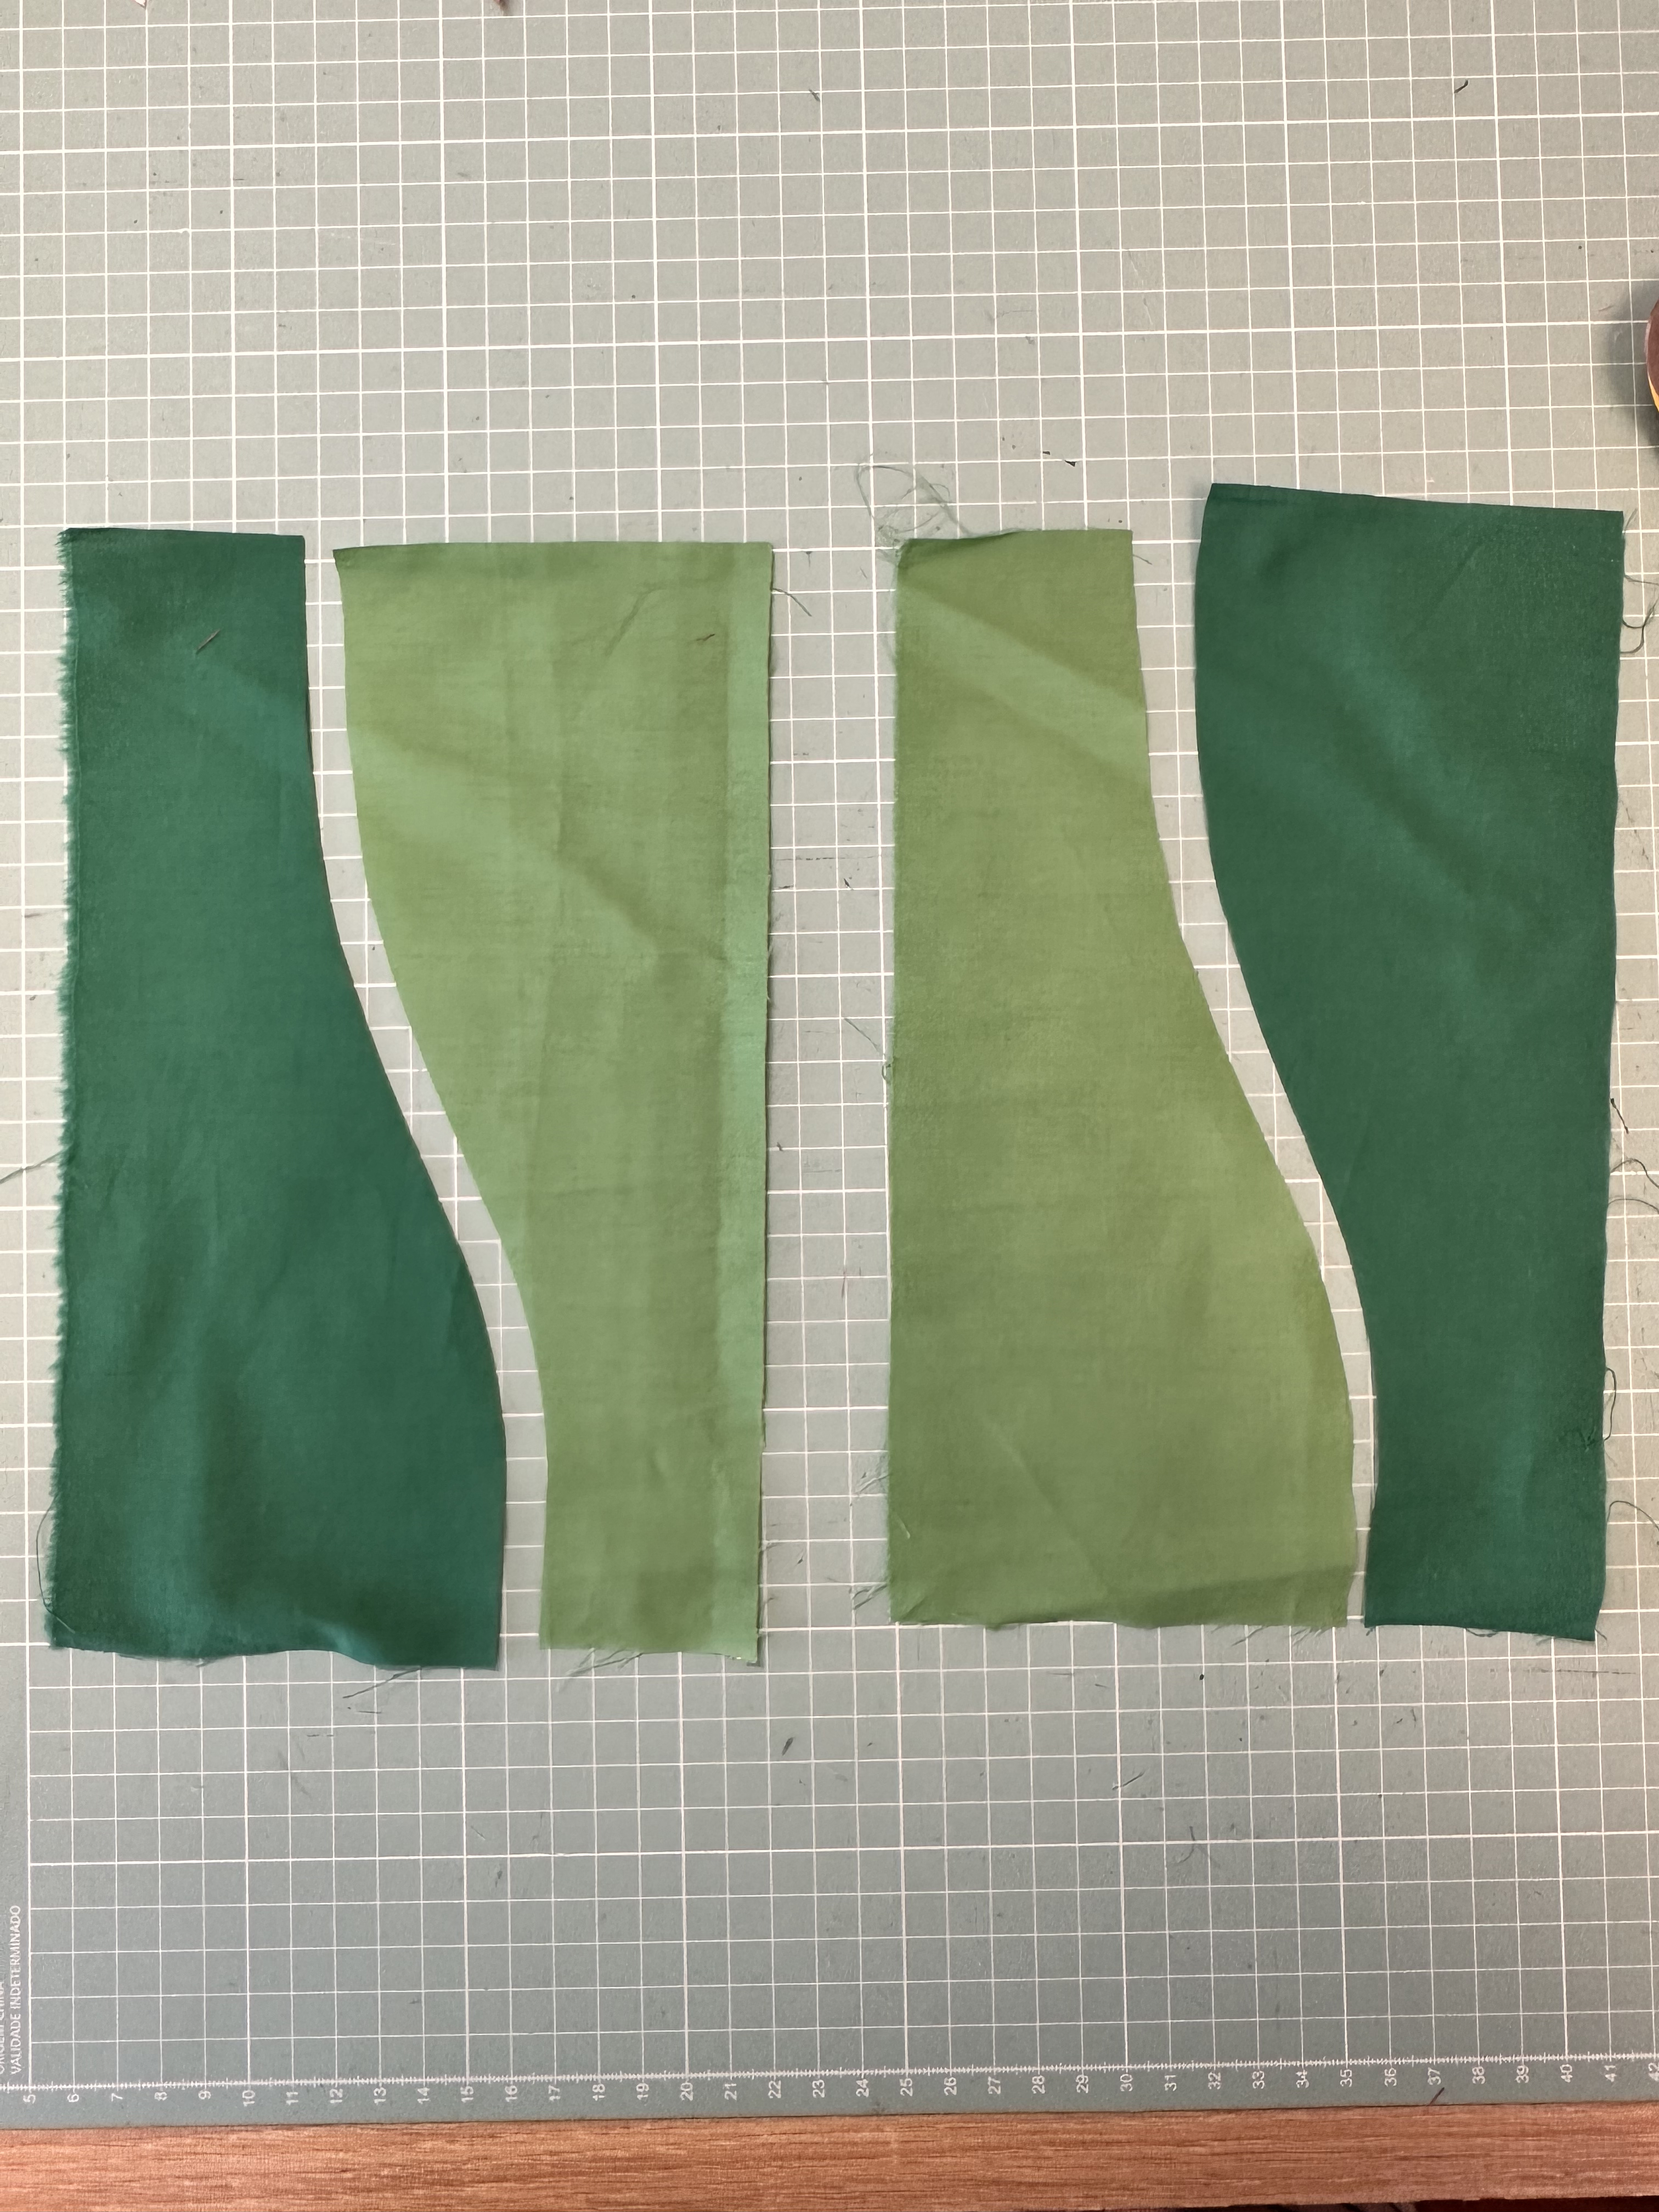
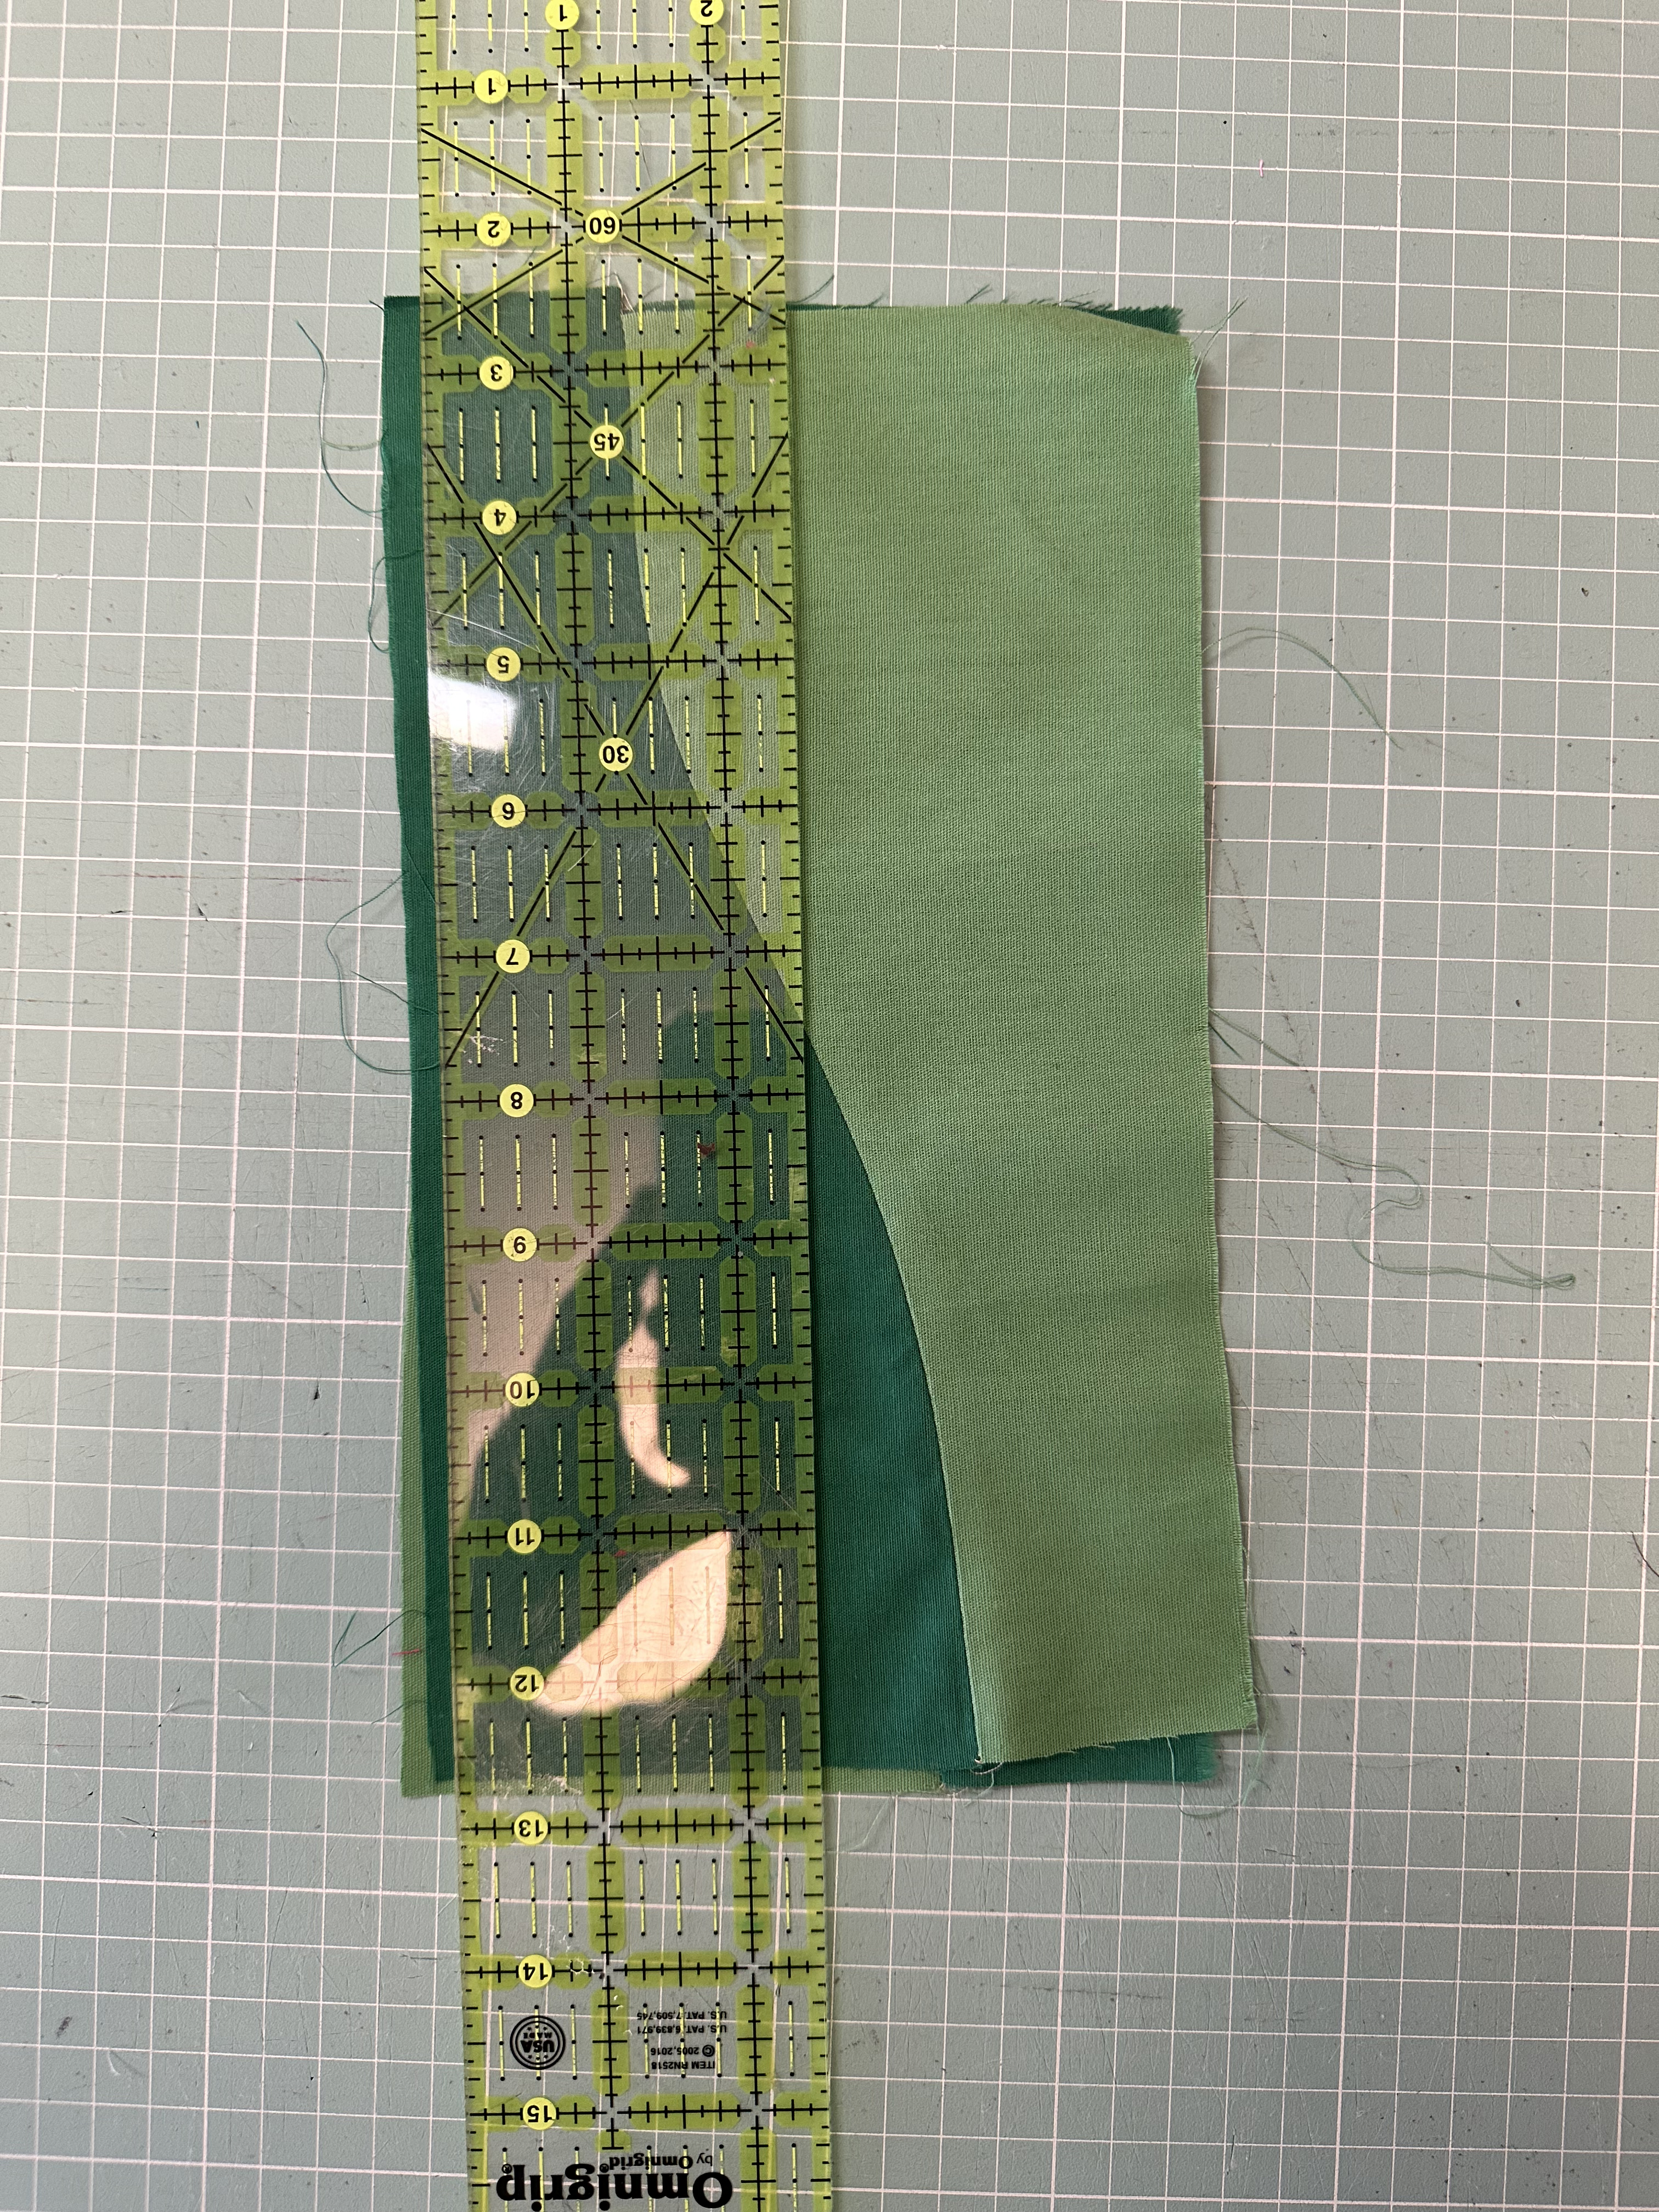
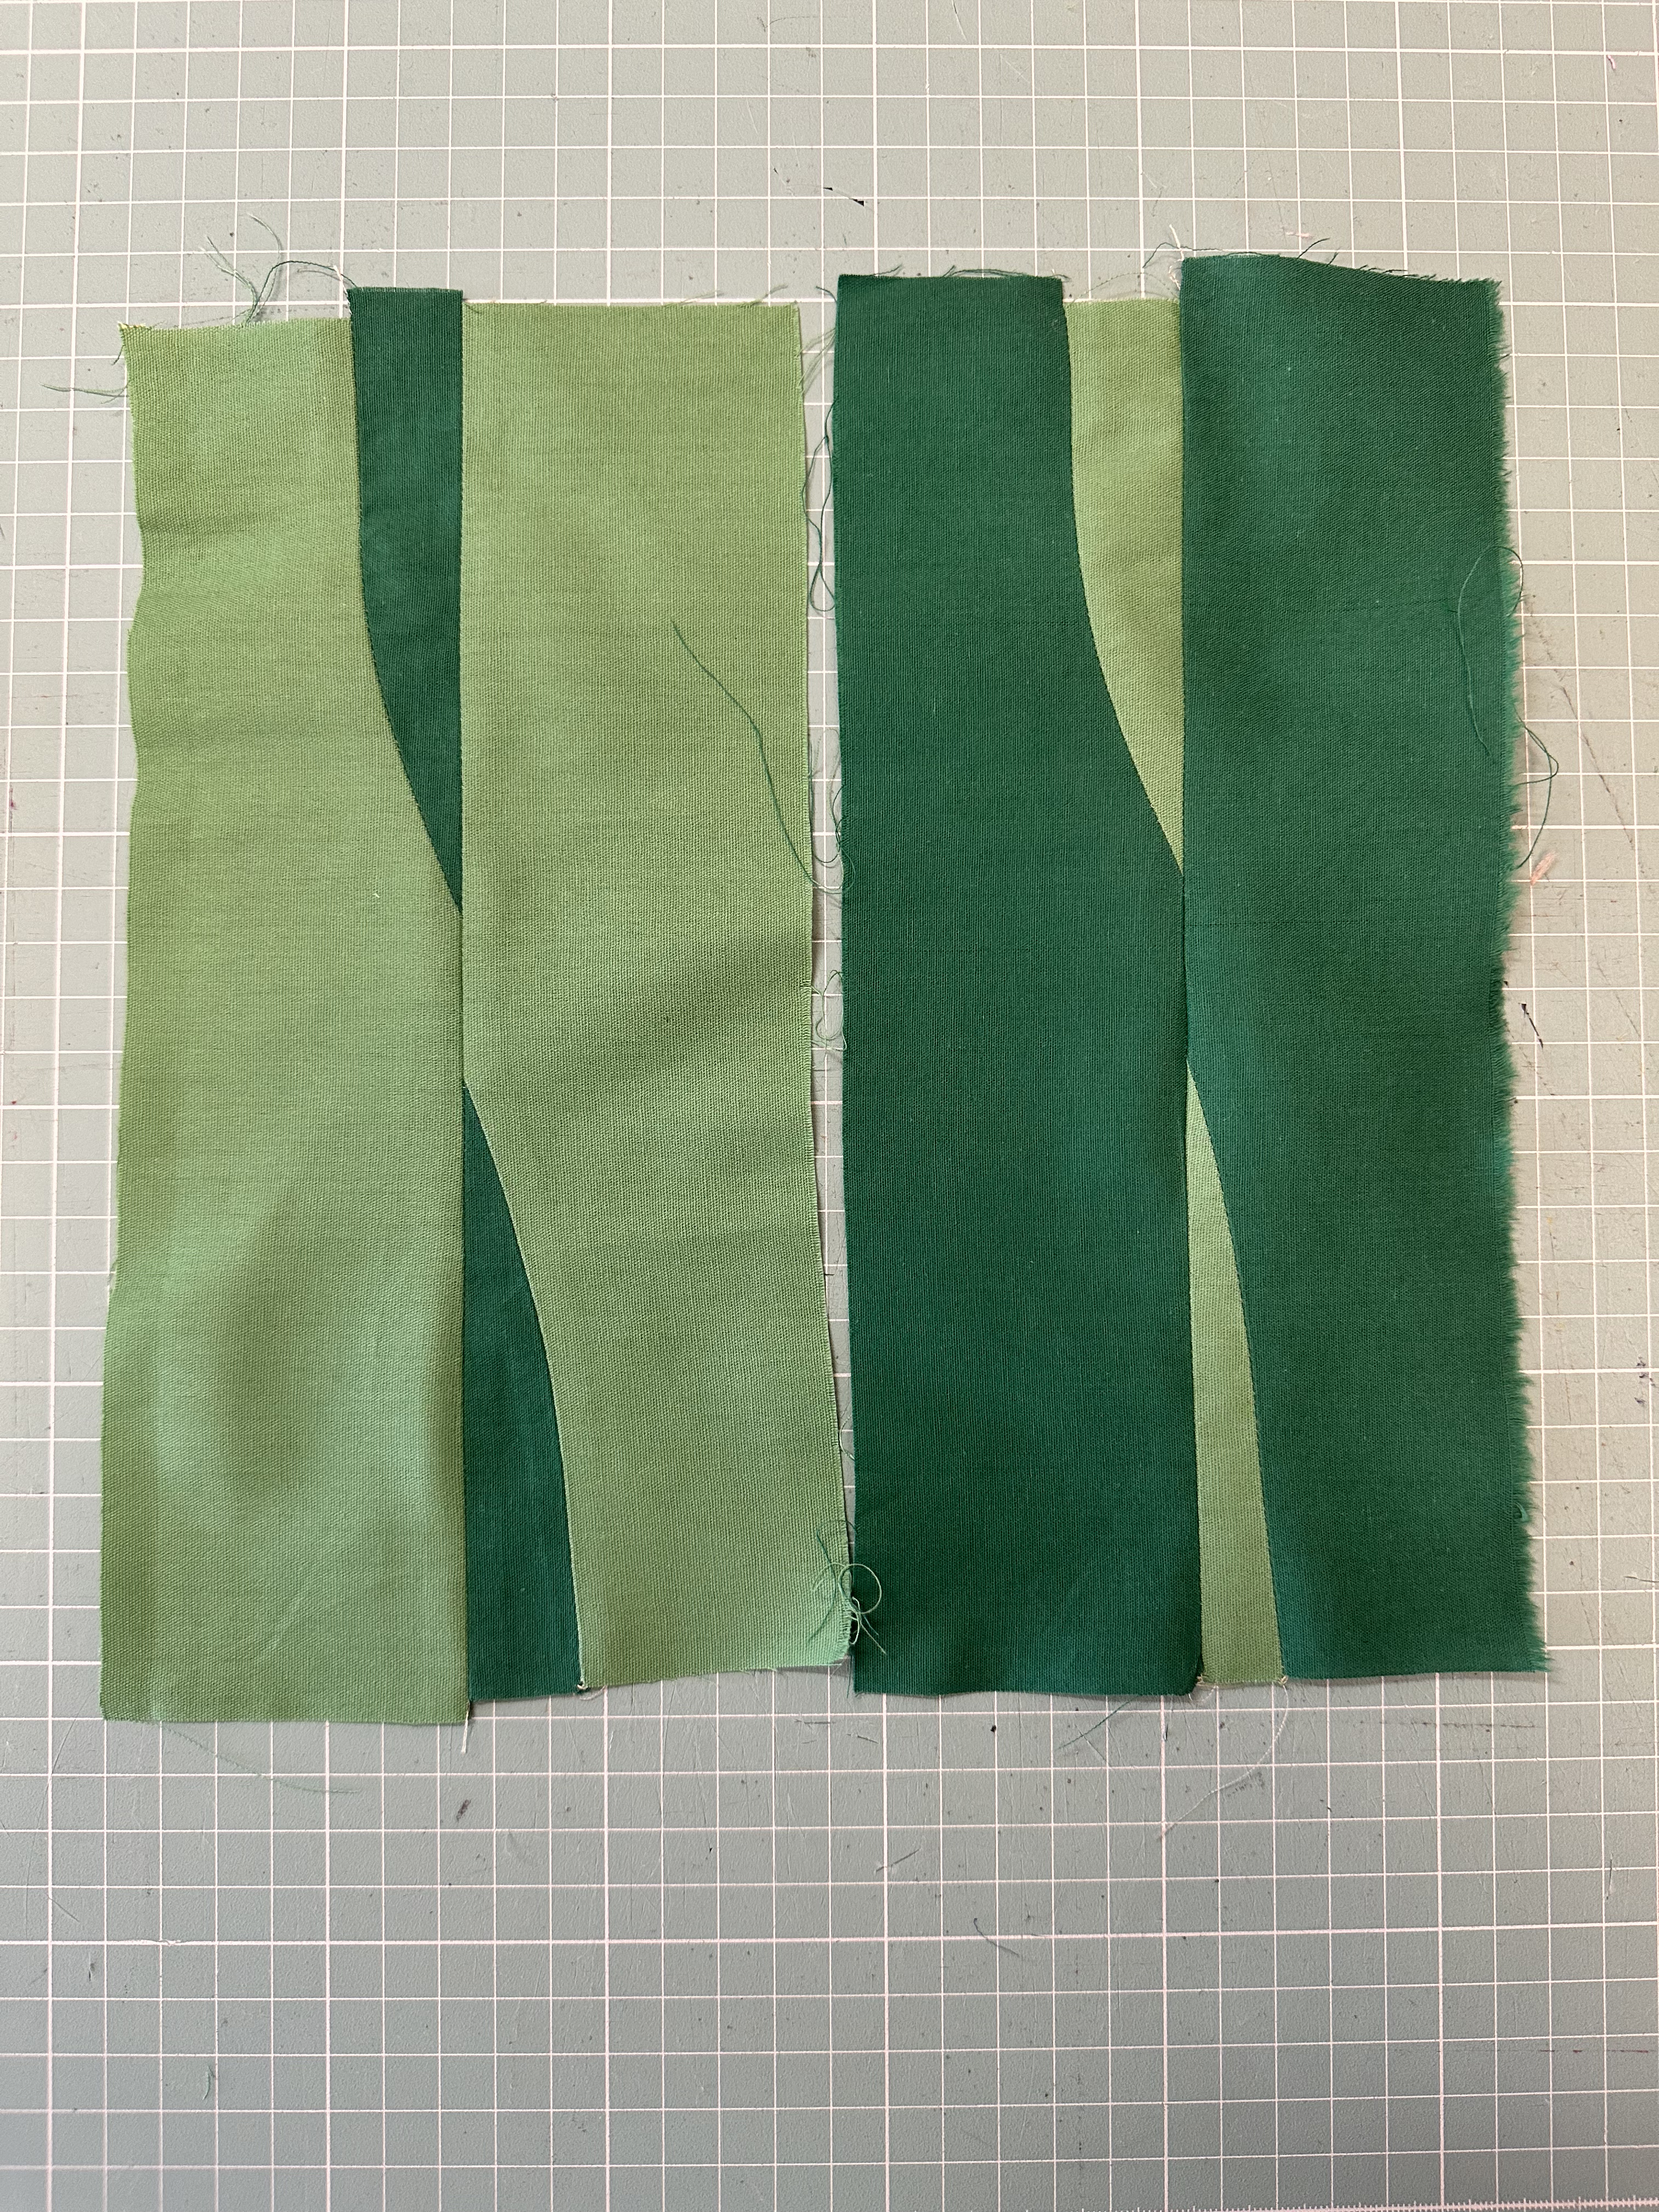
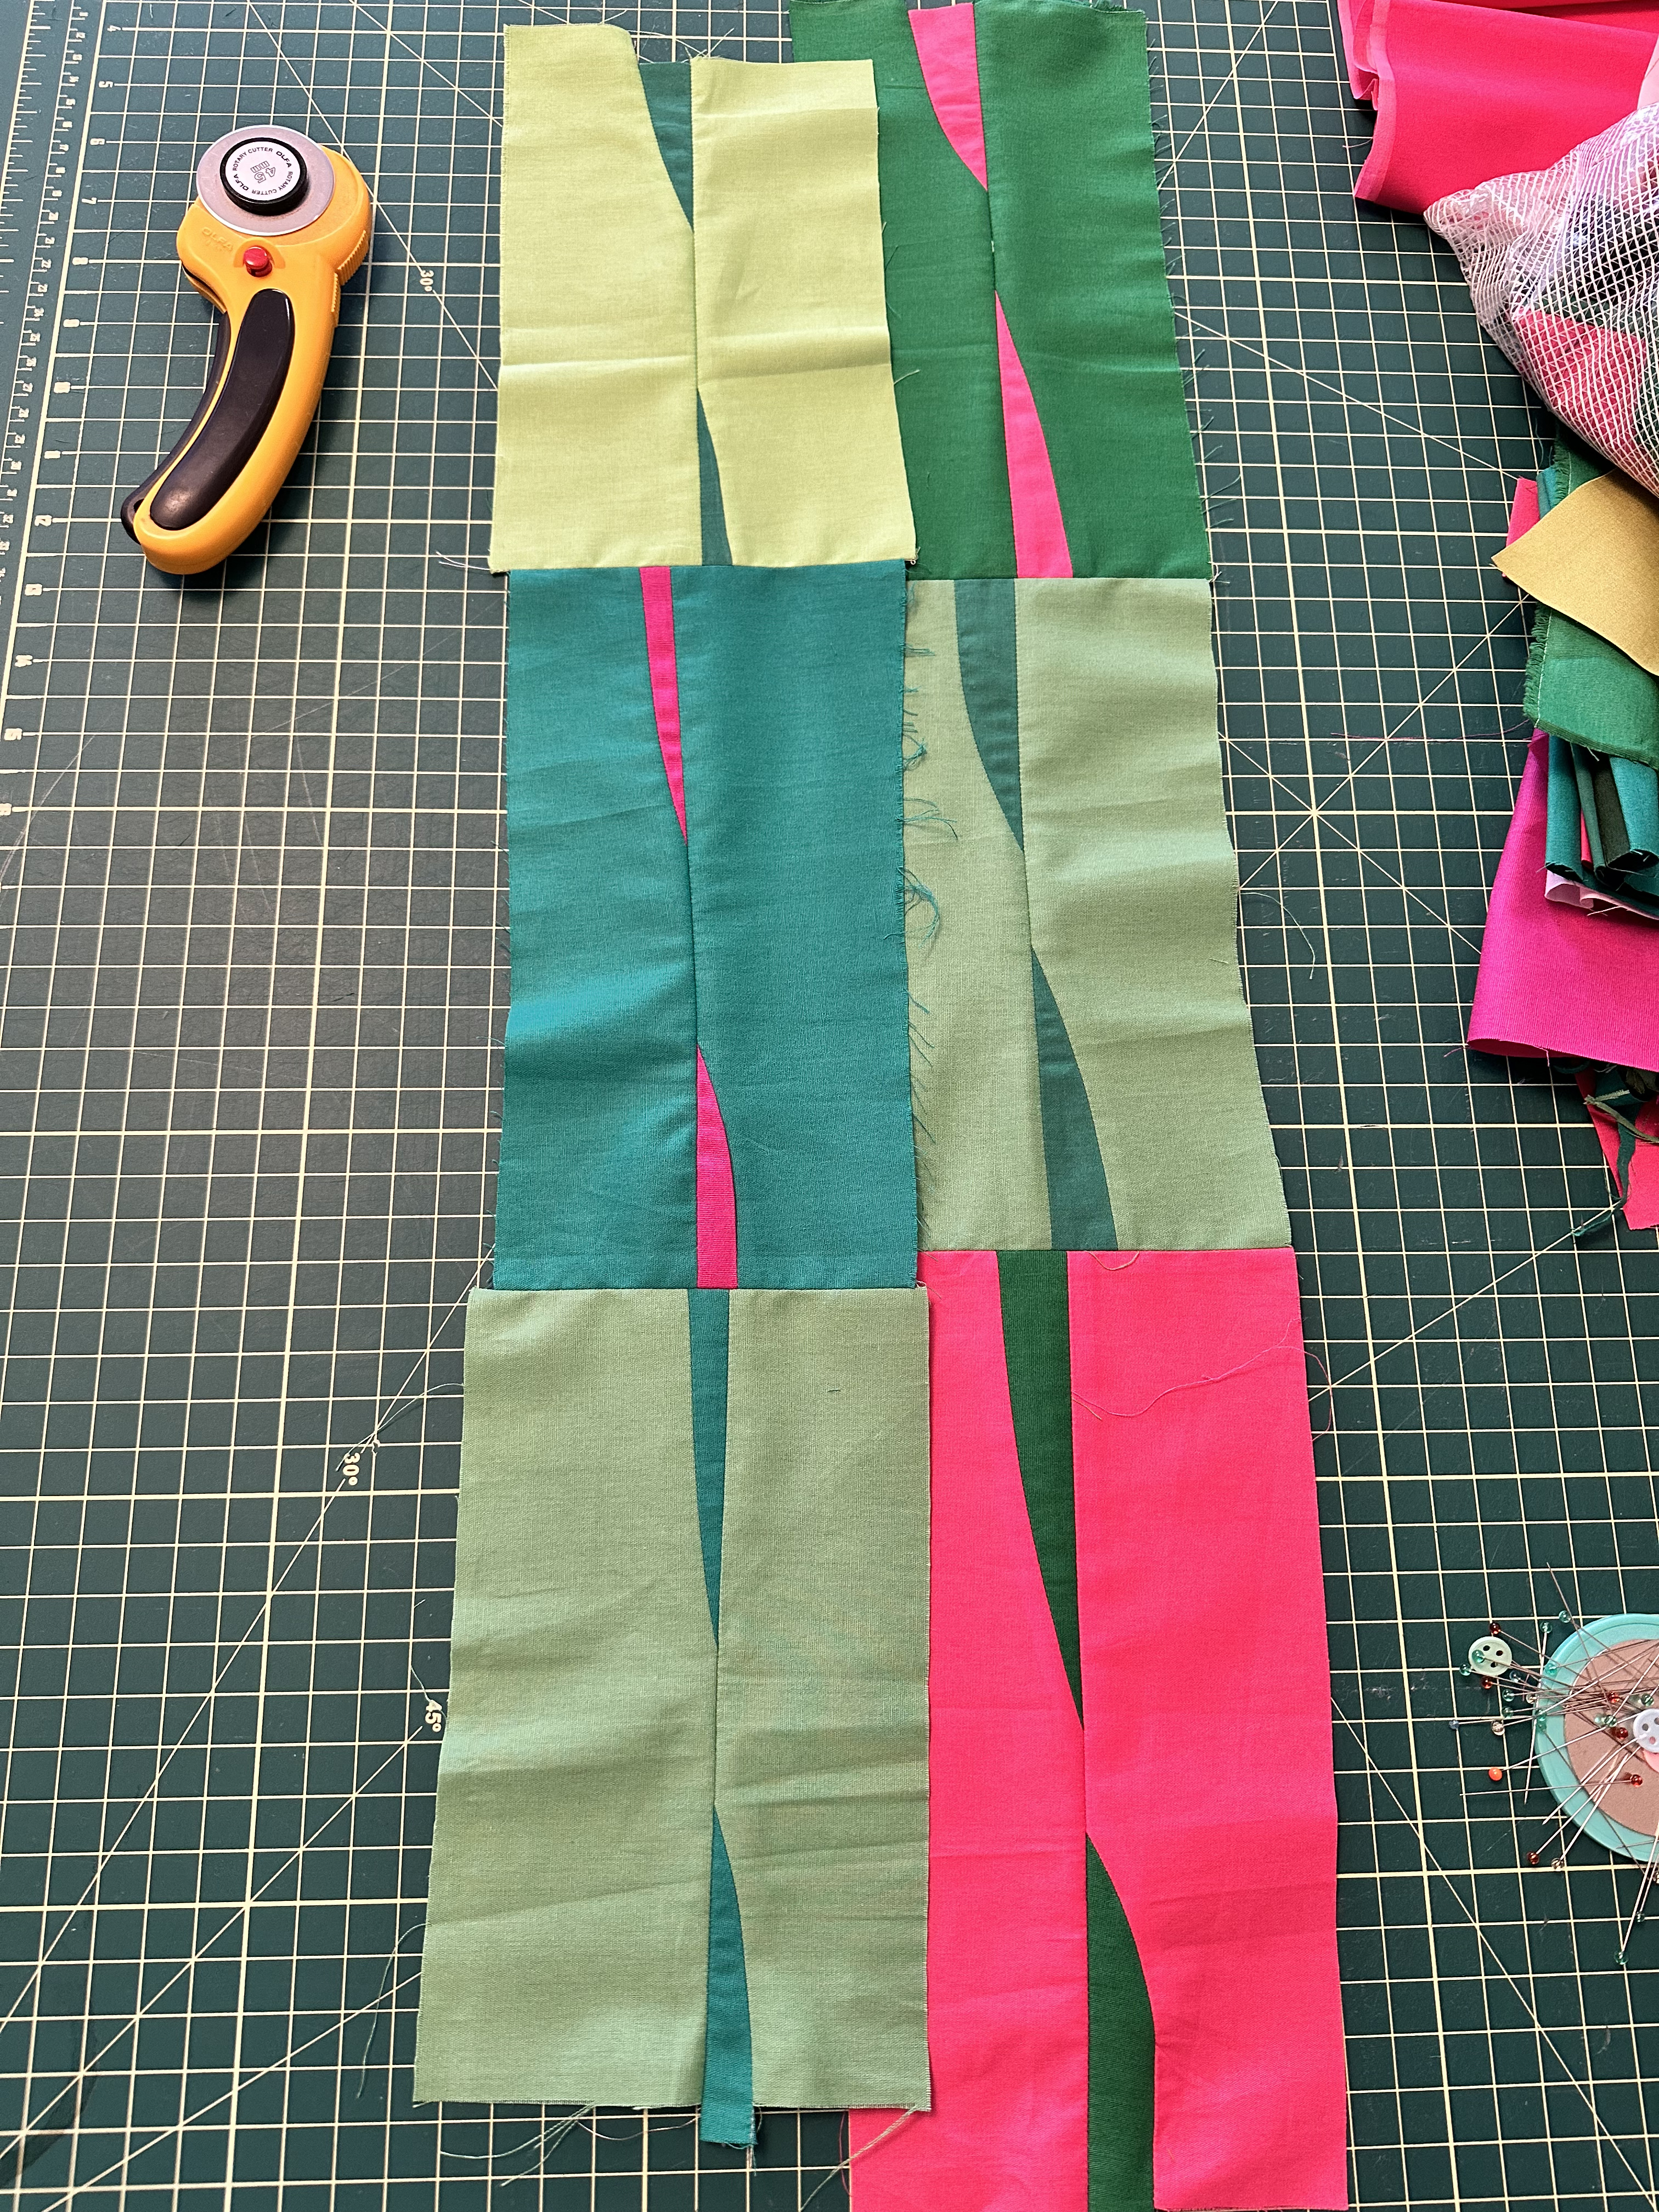
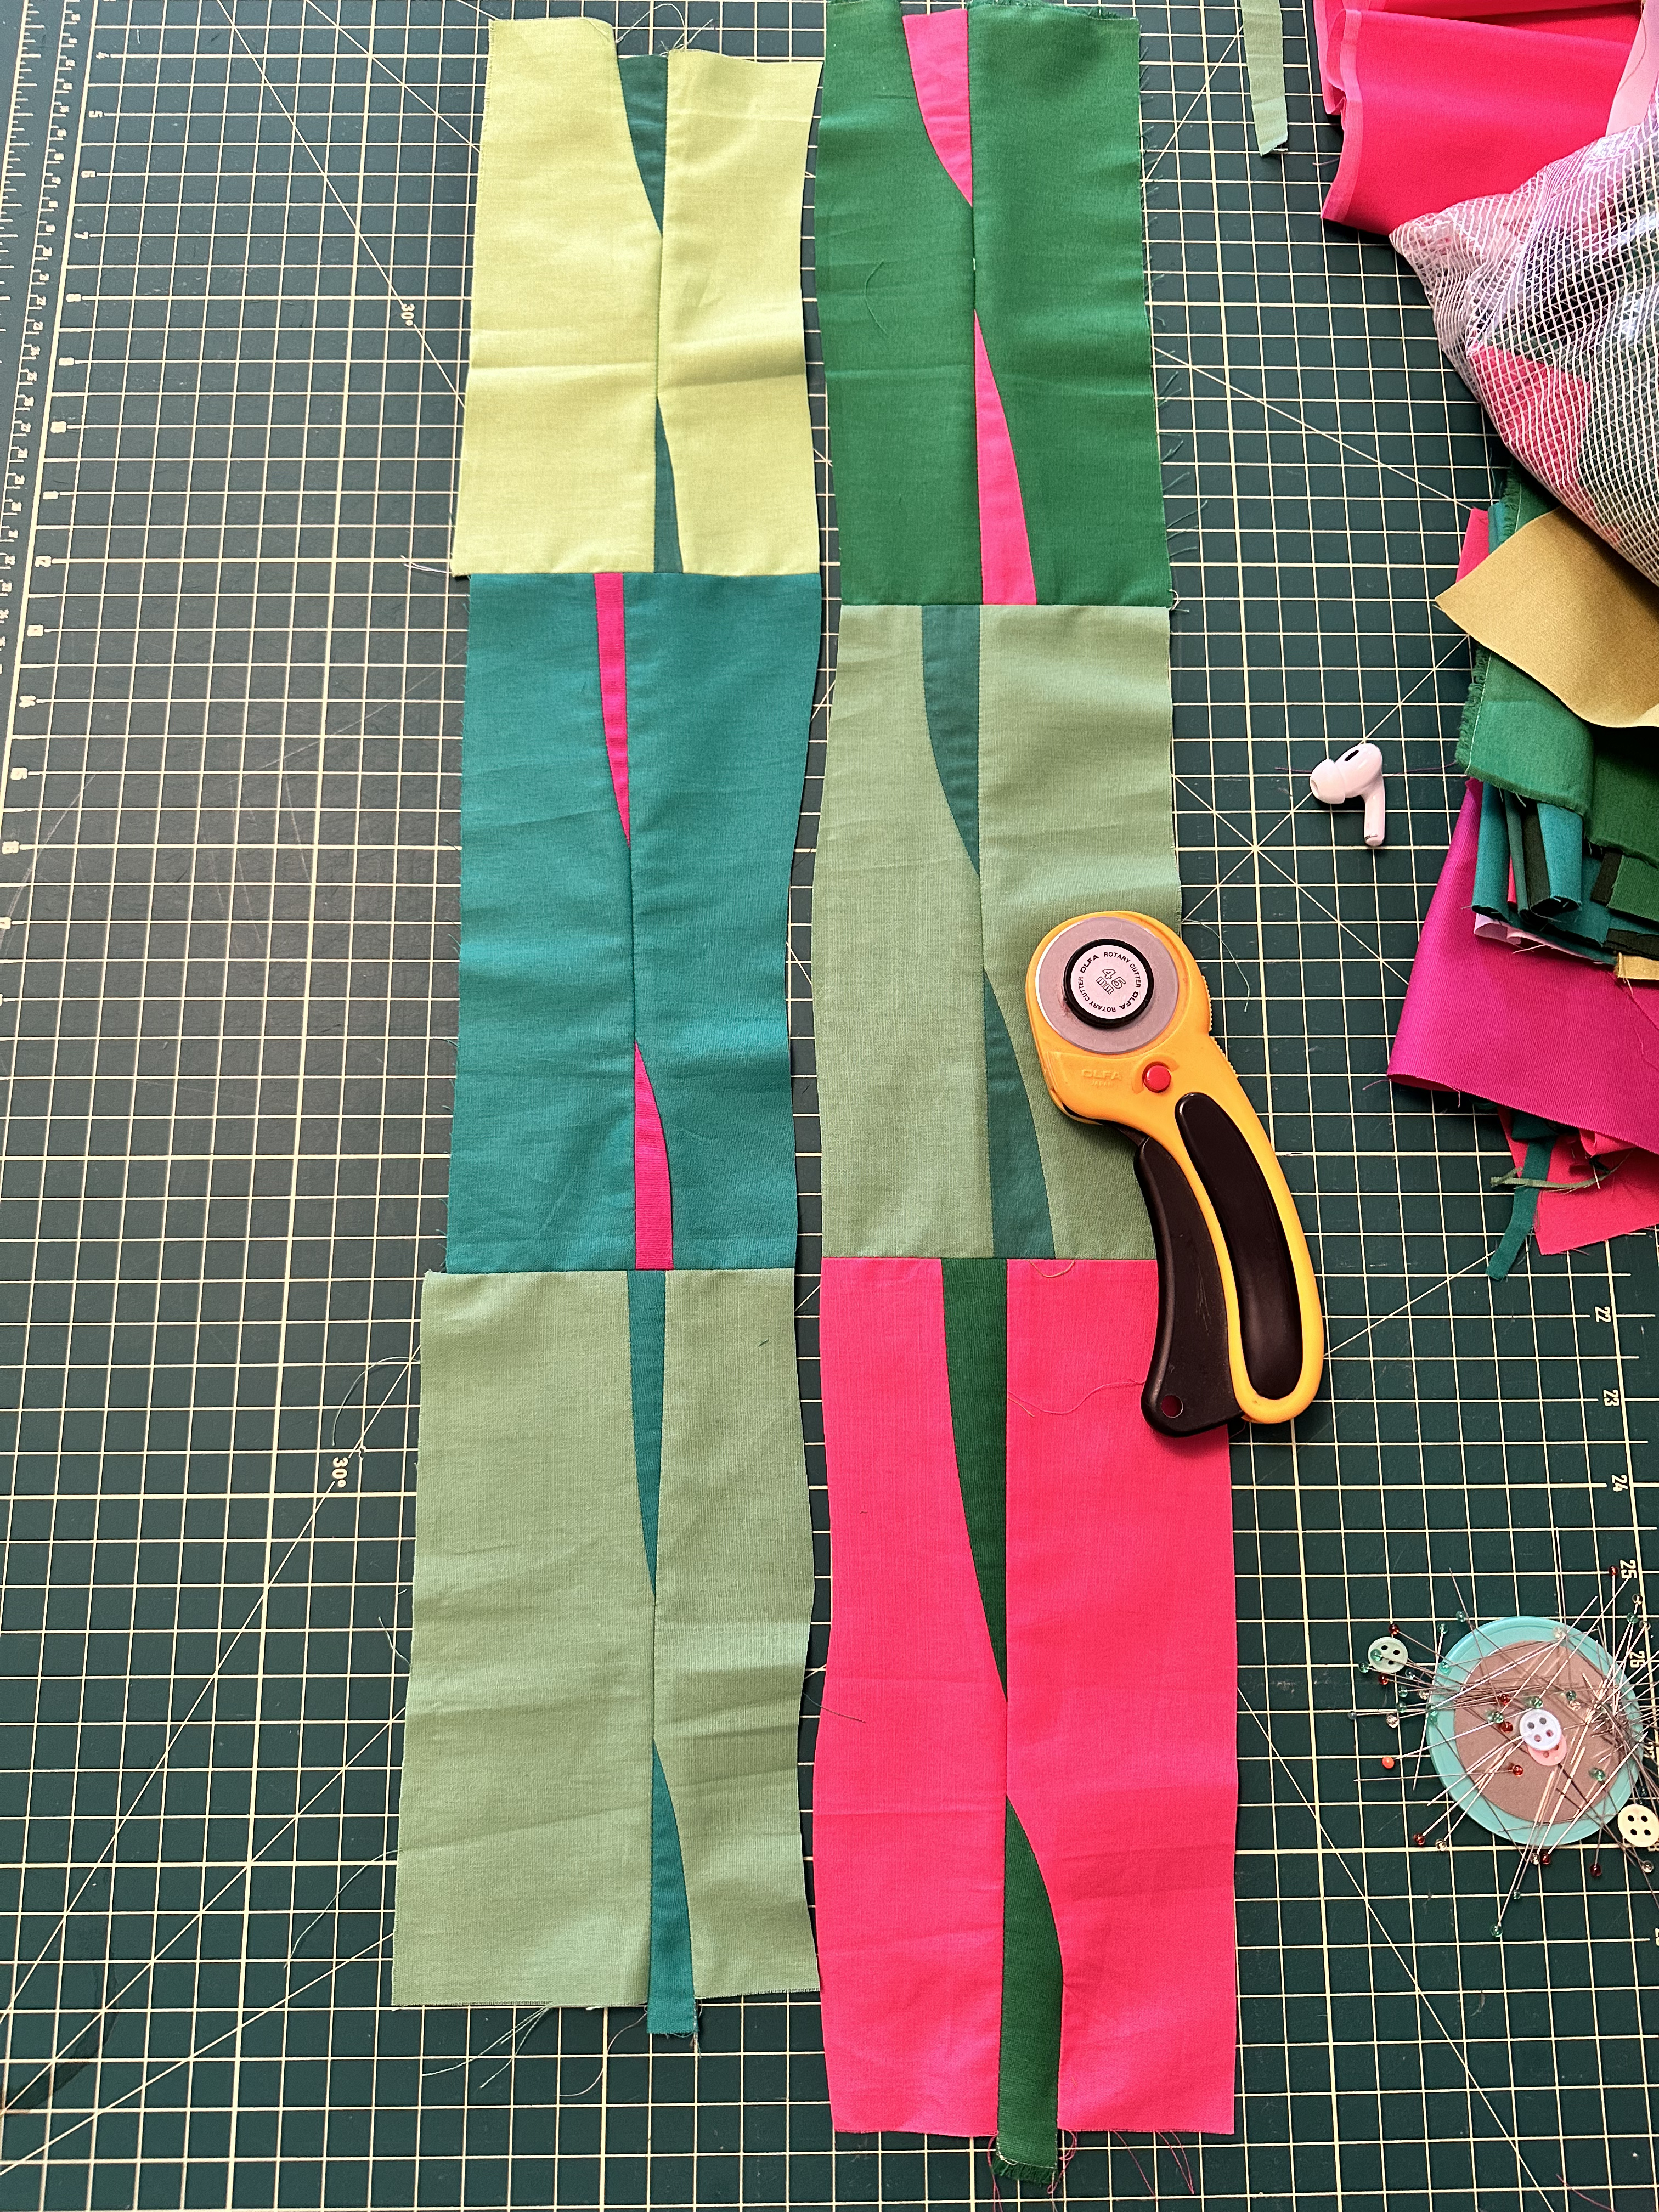
Put both blocks right side up, align in the curve that you cut, and cut with a ruler a straight line in the center of the block as you see in the pictures below. 


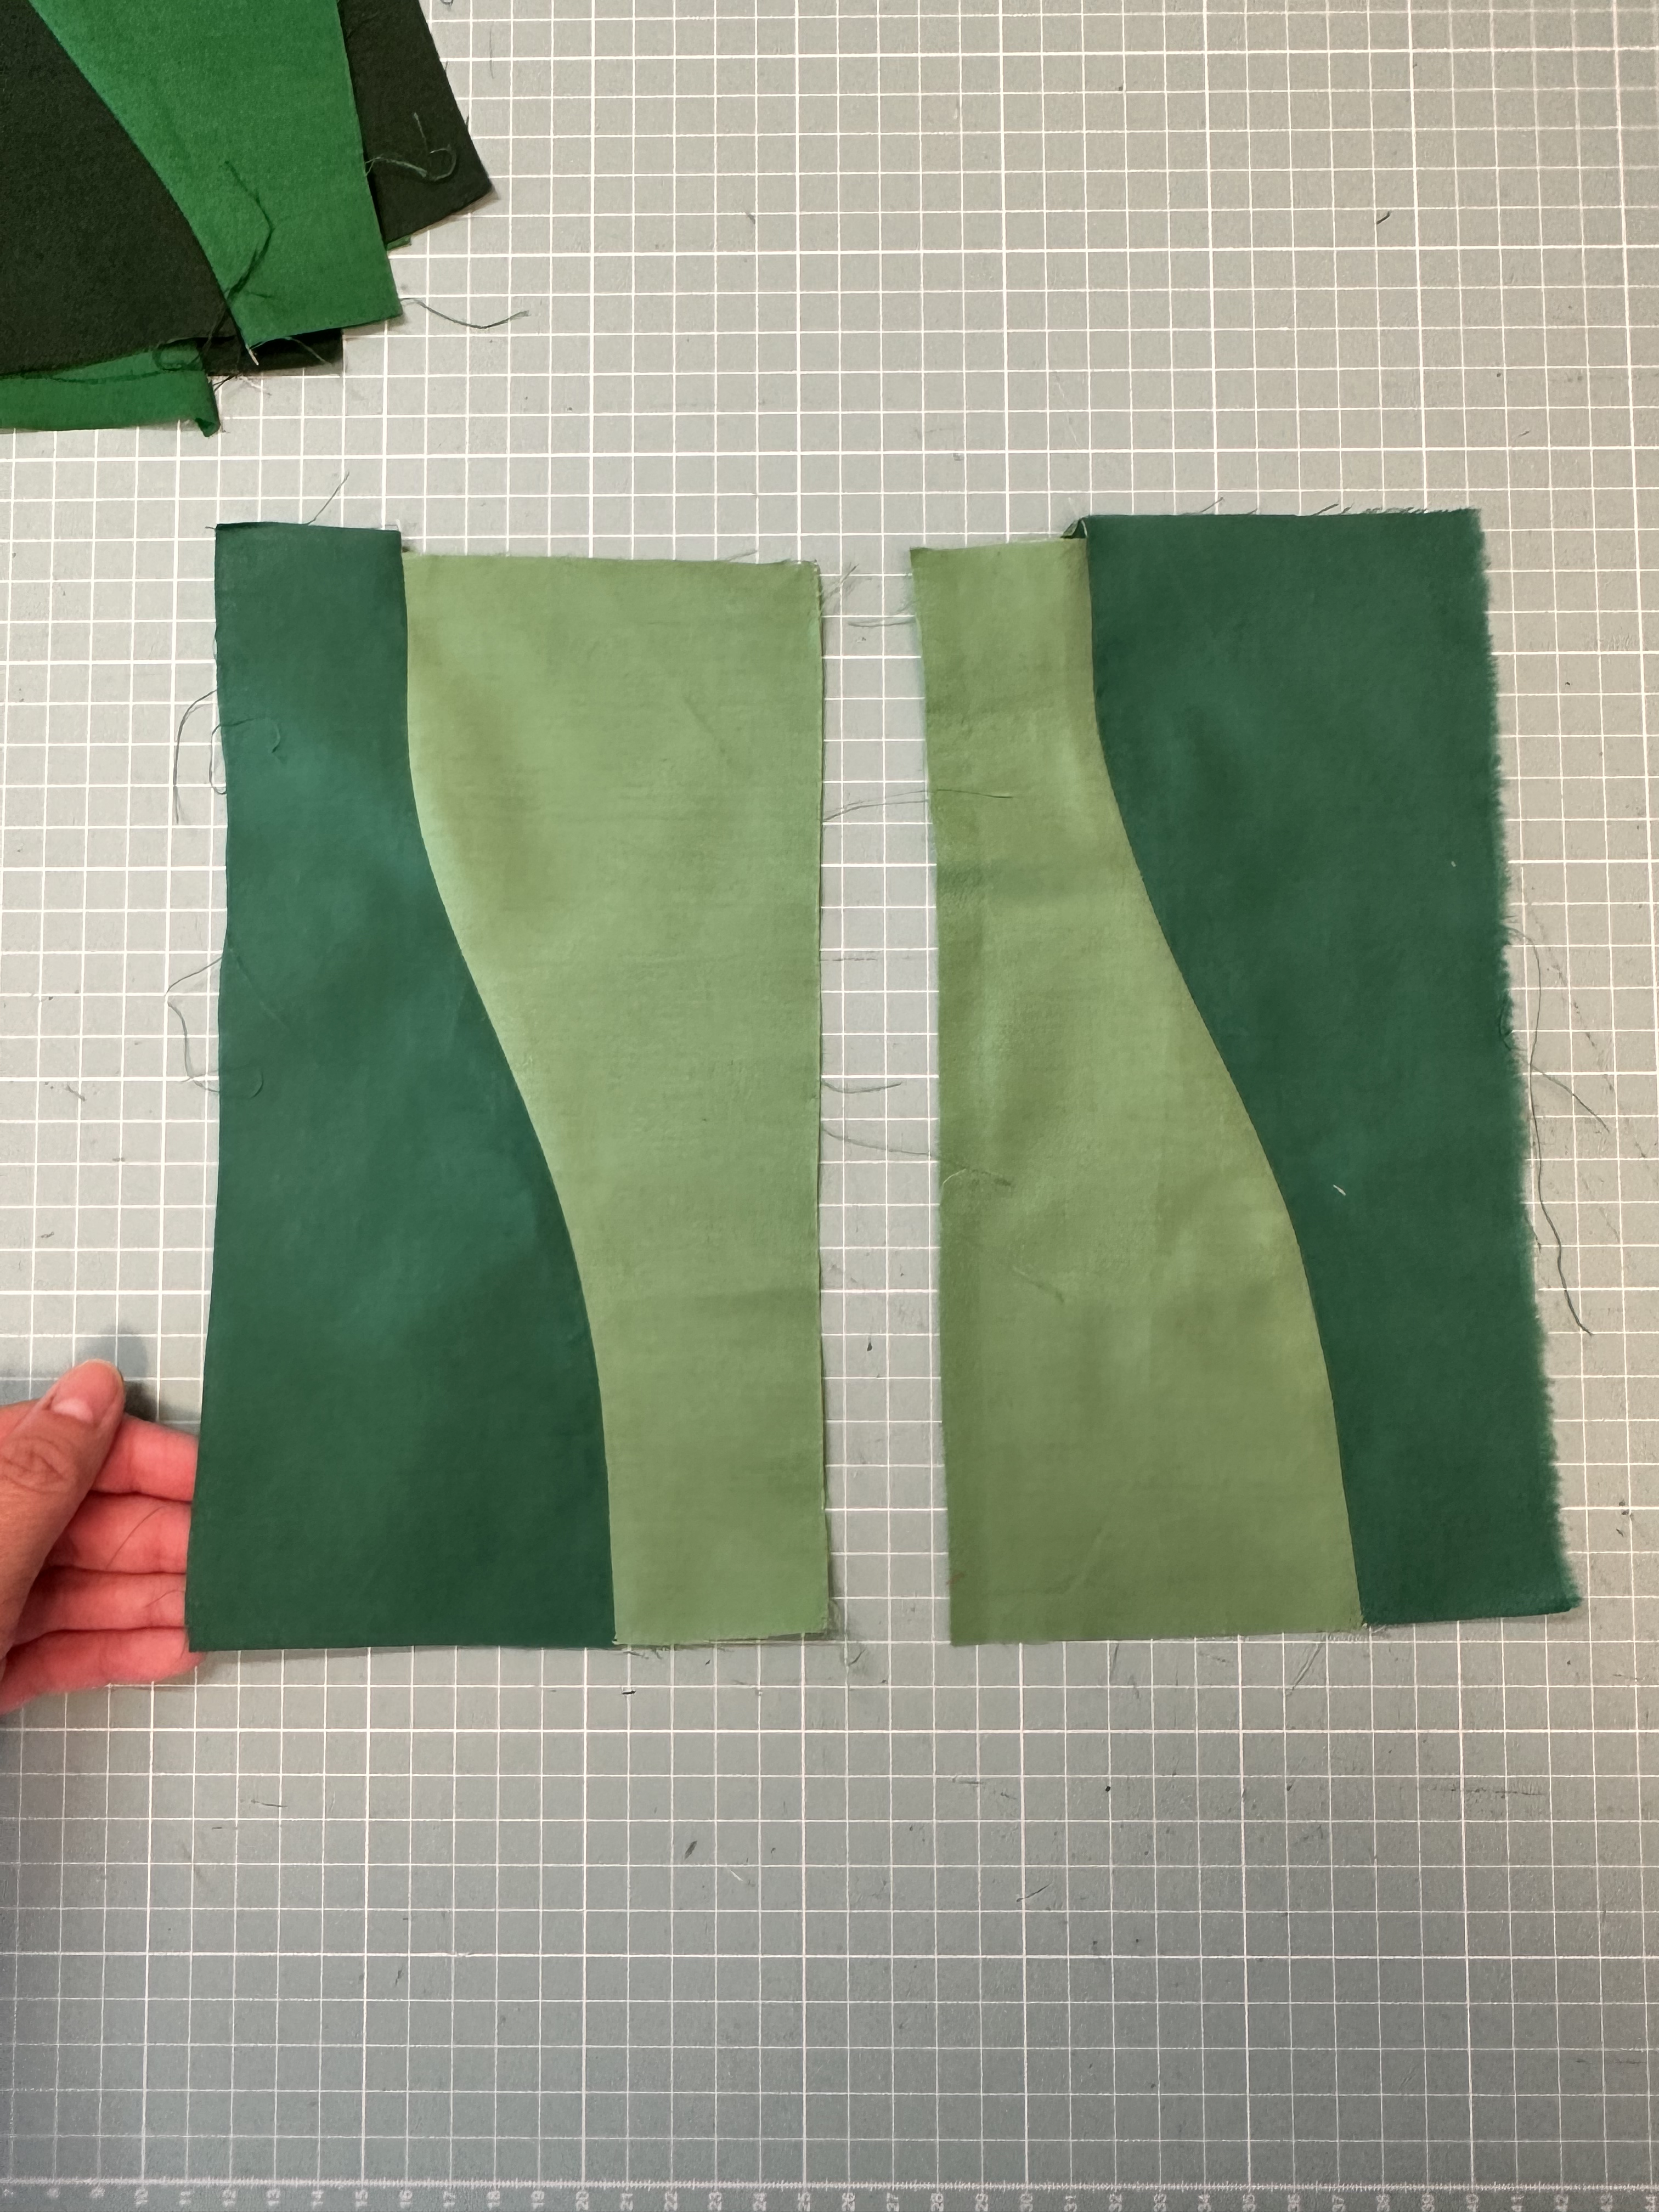
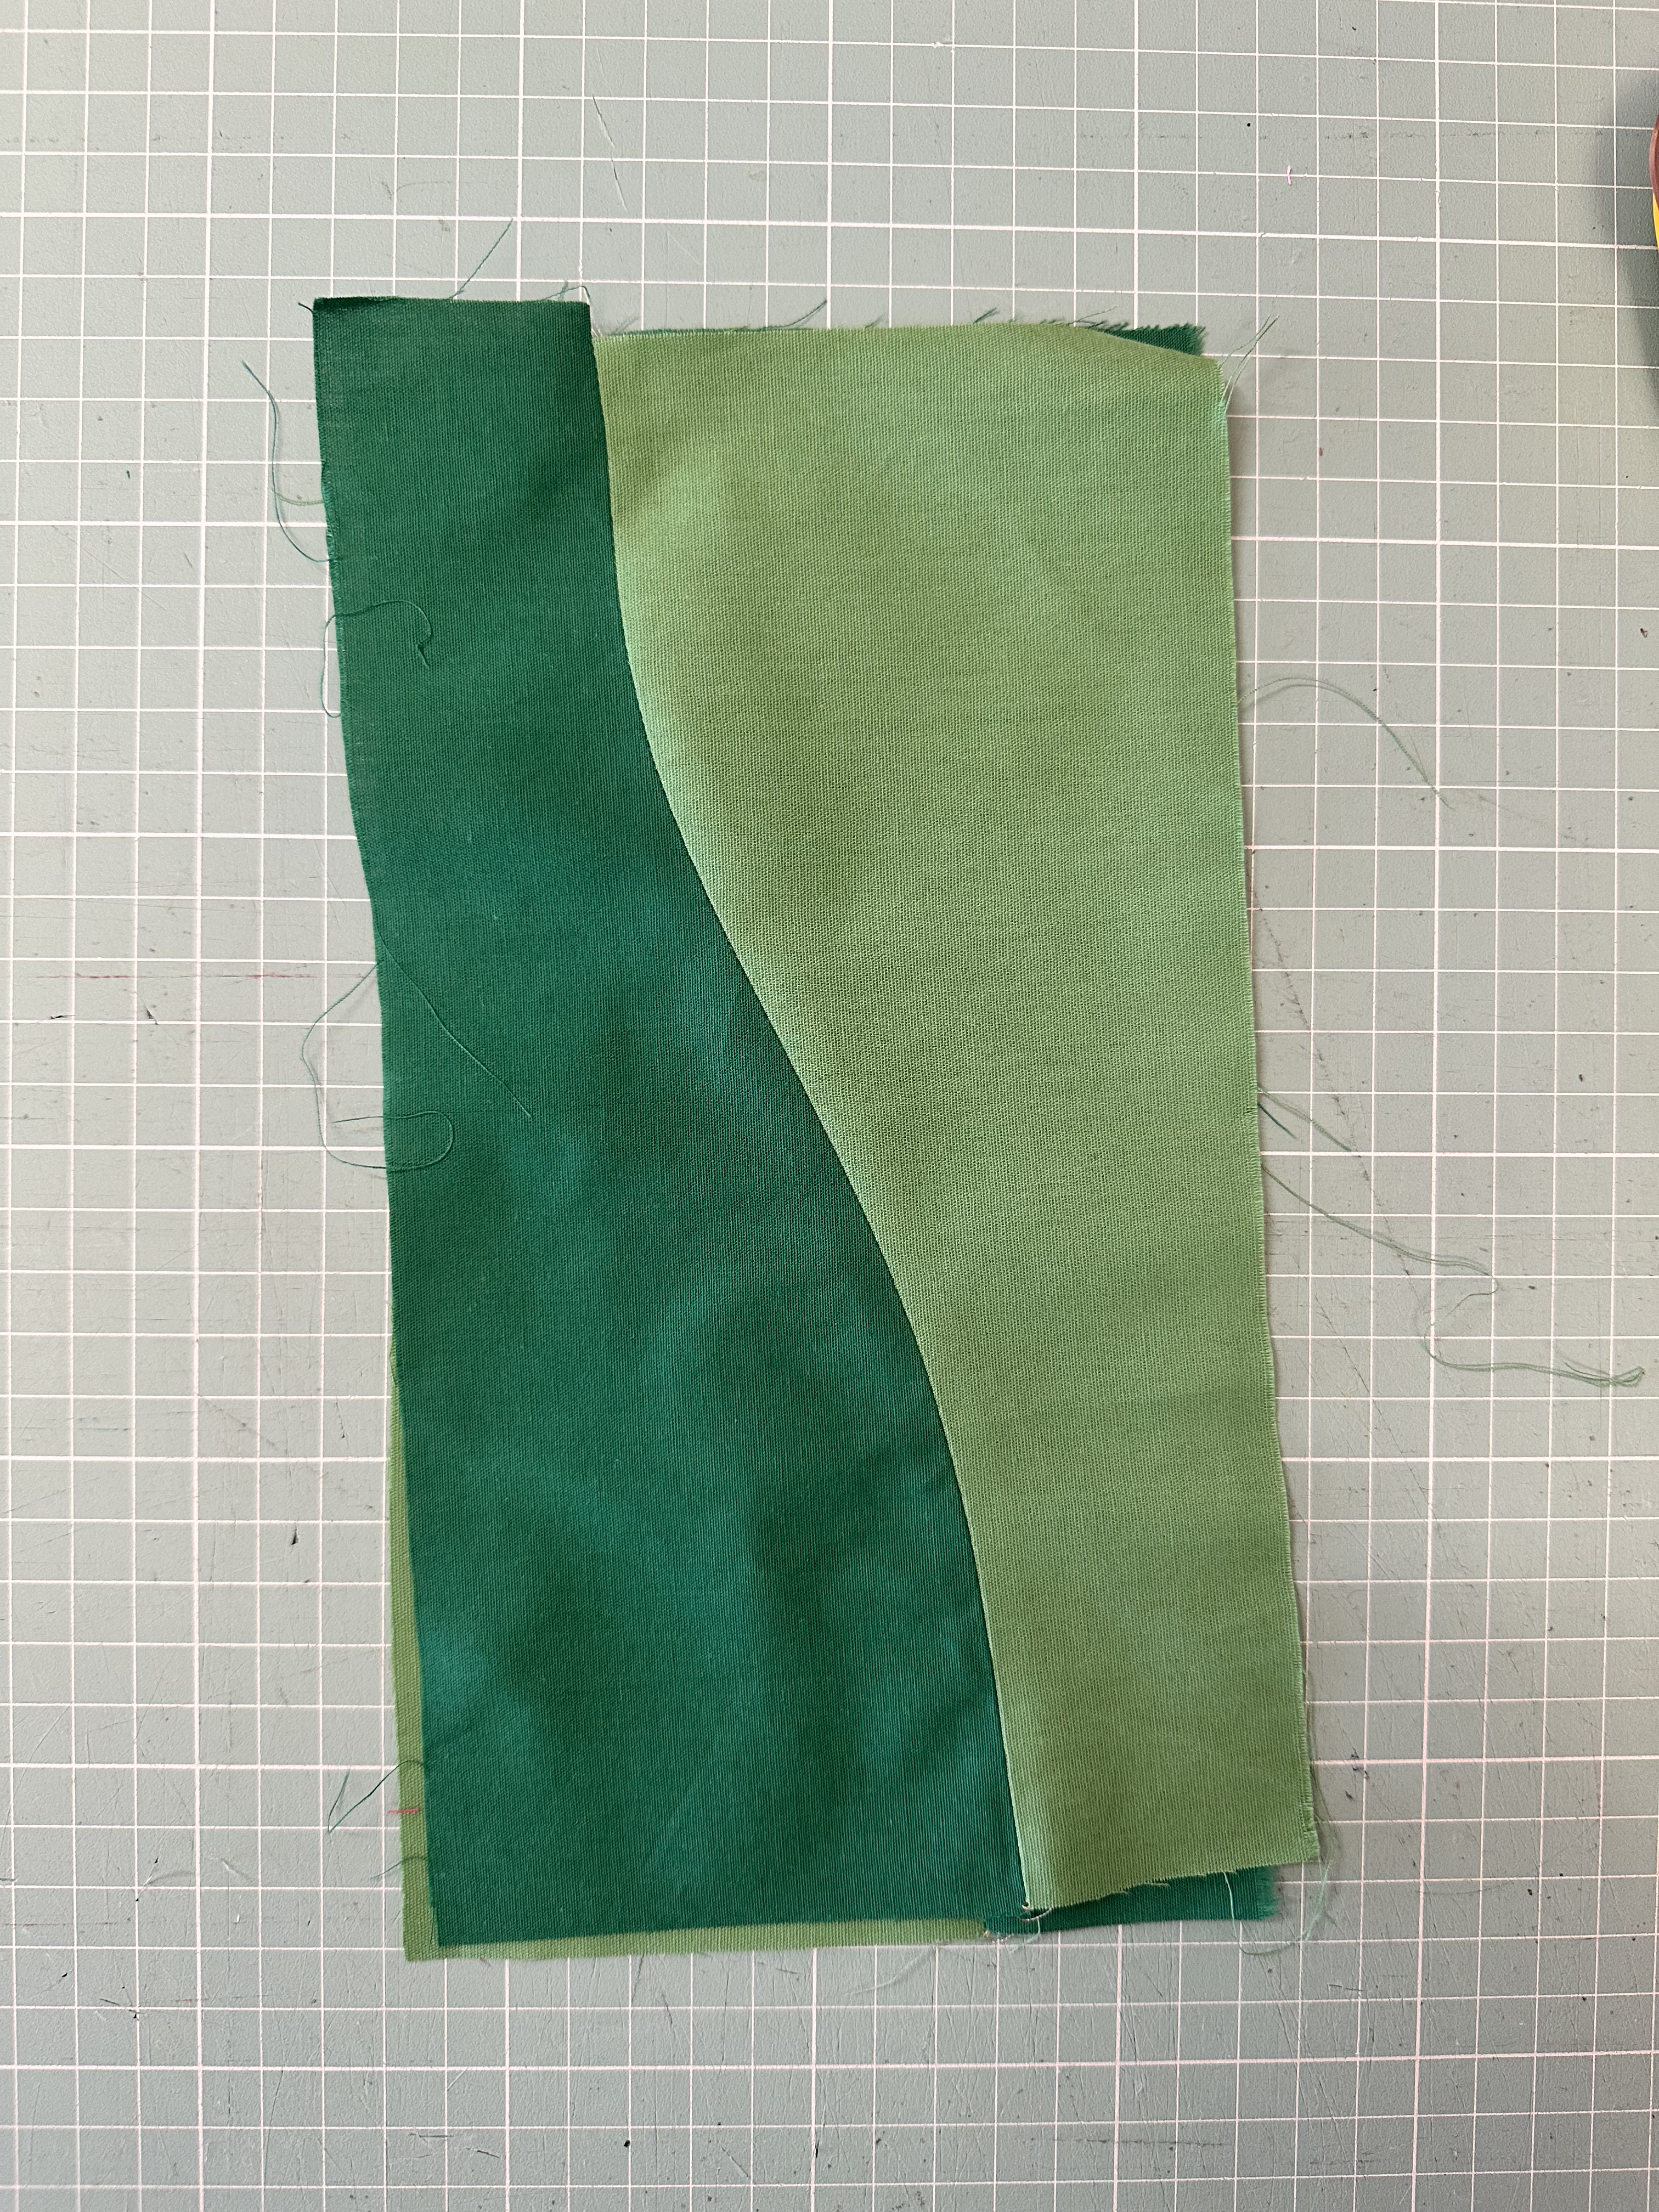
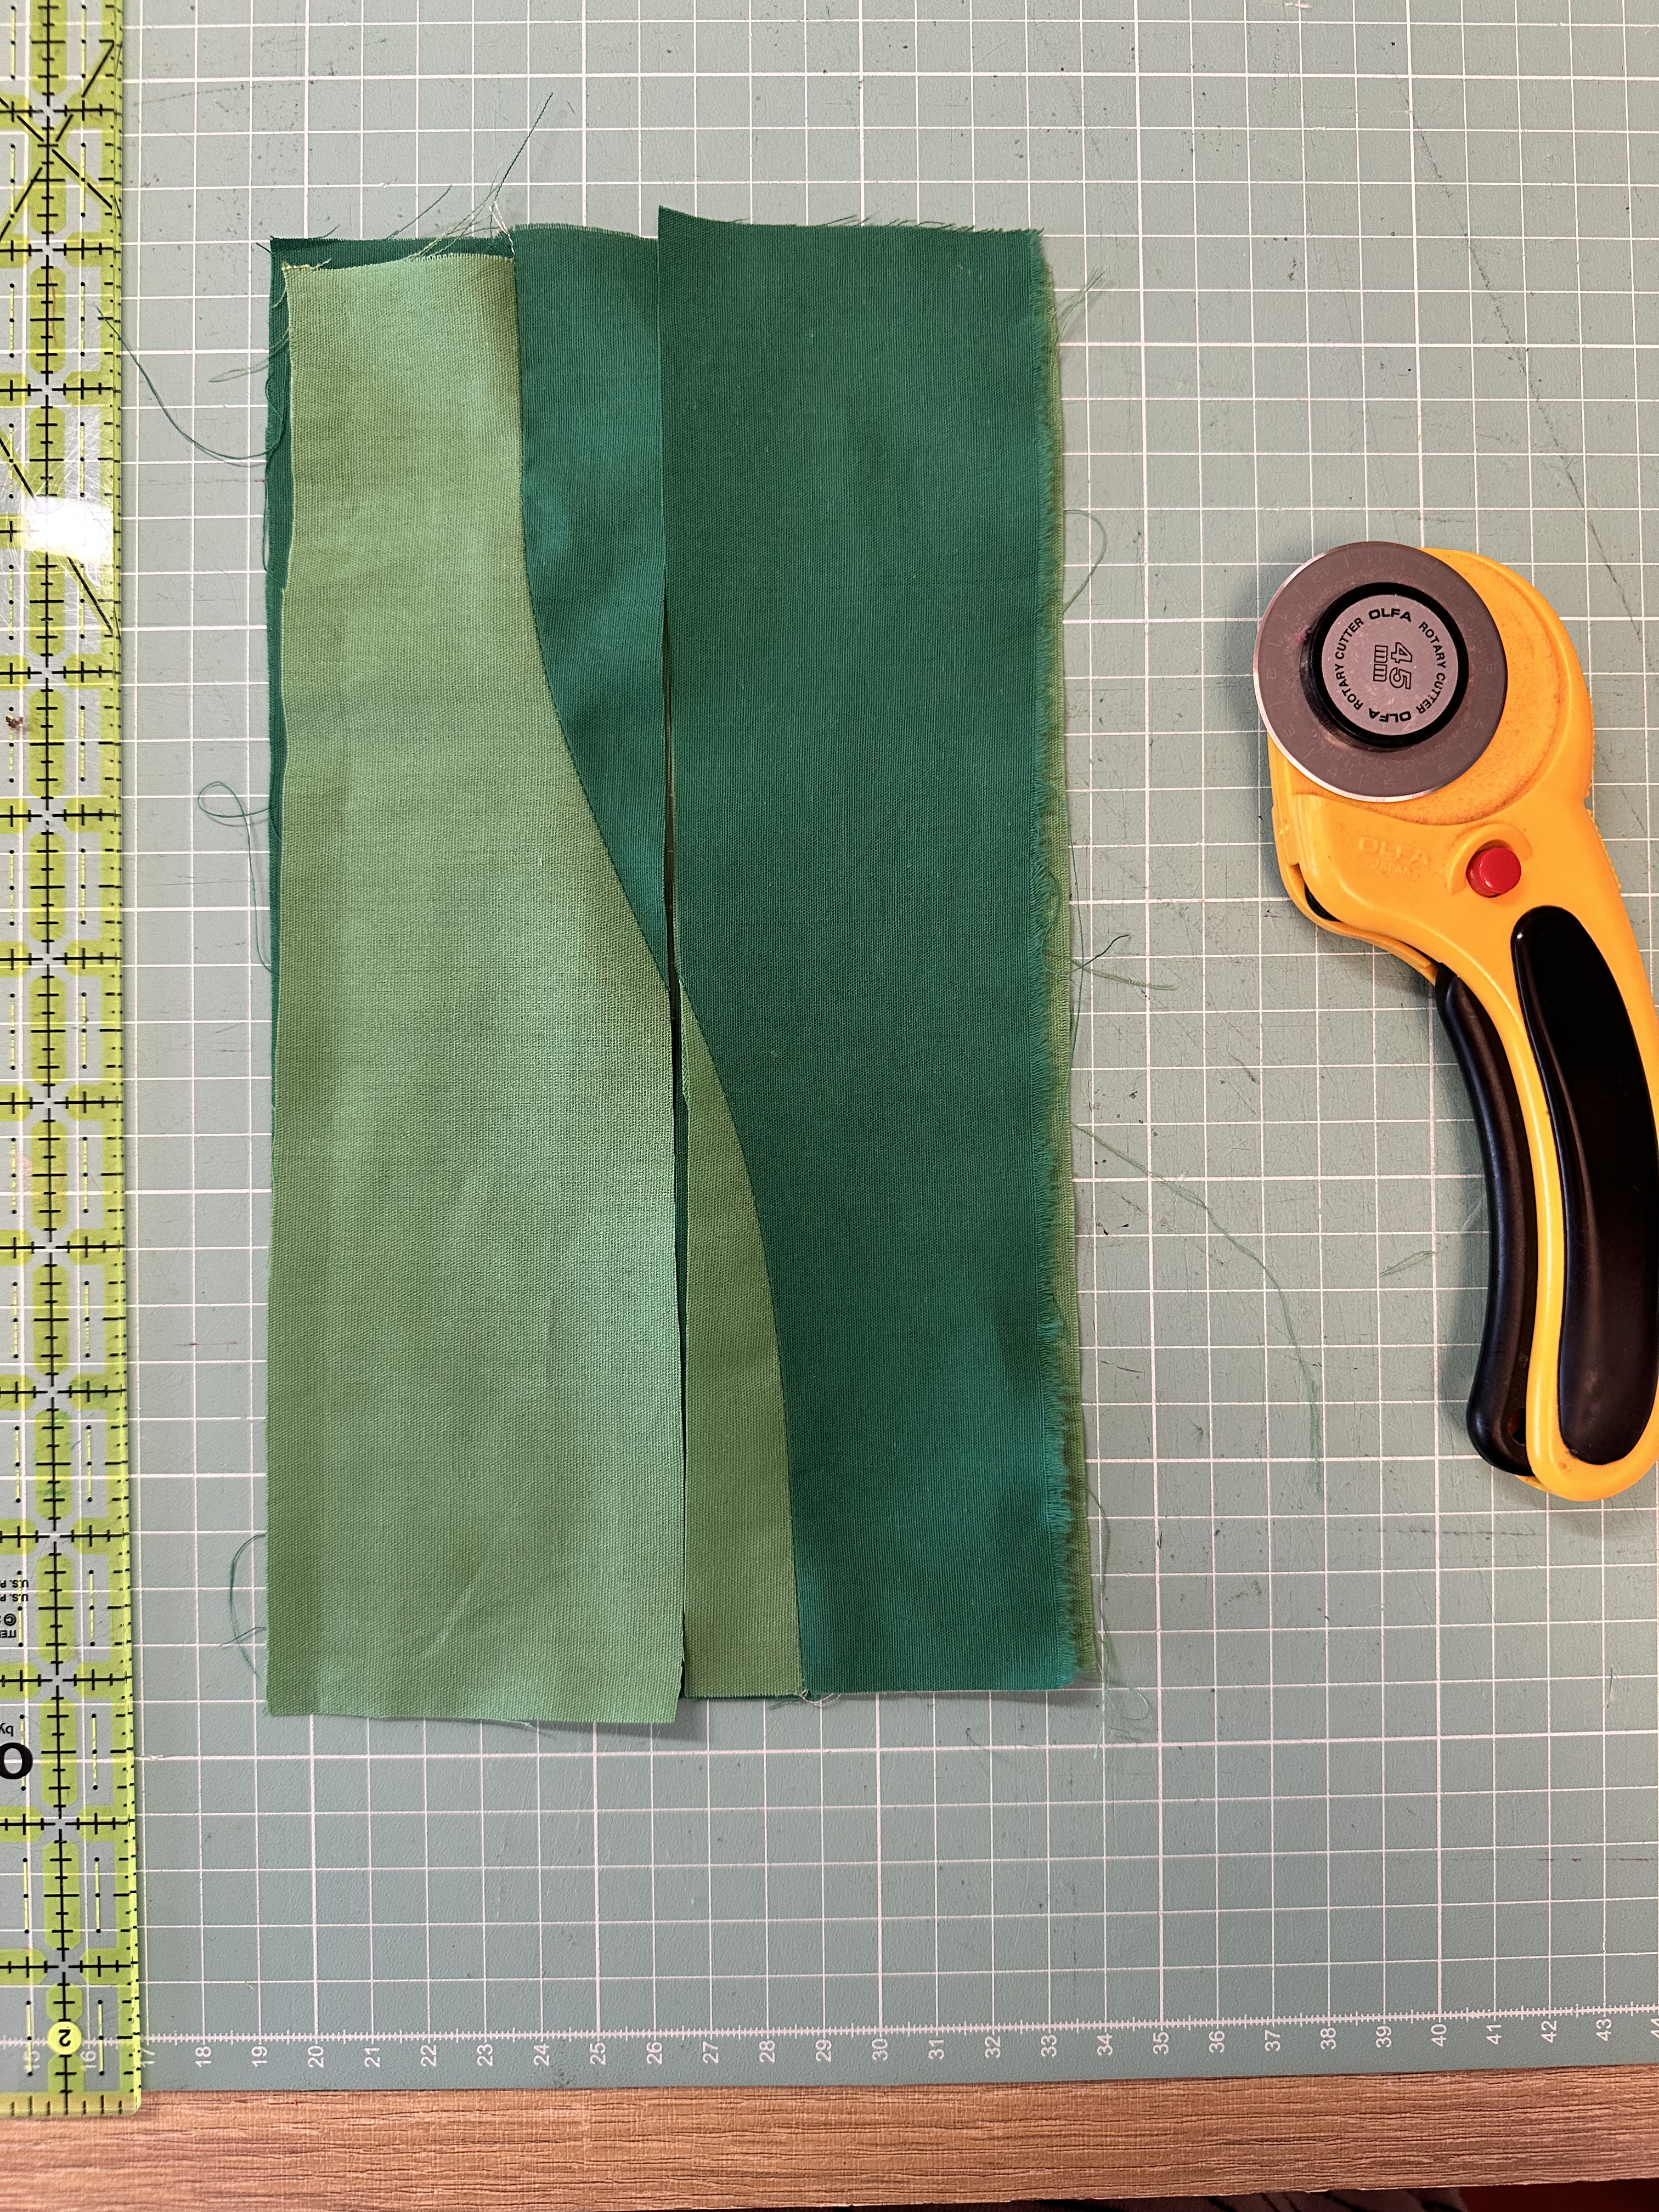
Mix and match, and sew again, press seams open. 


Now you have your first two blocks ready! 


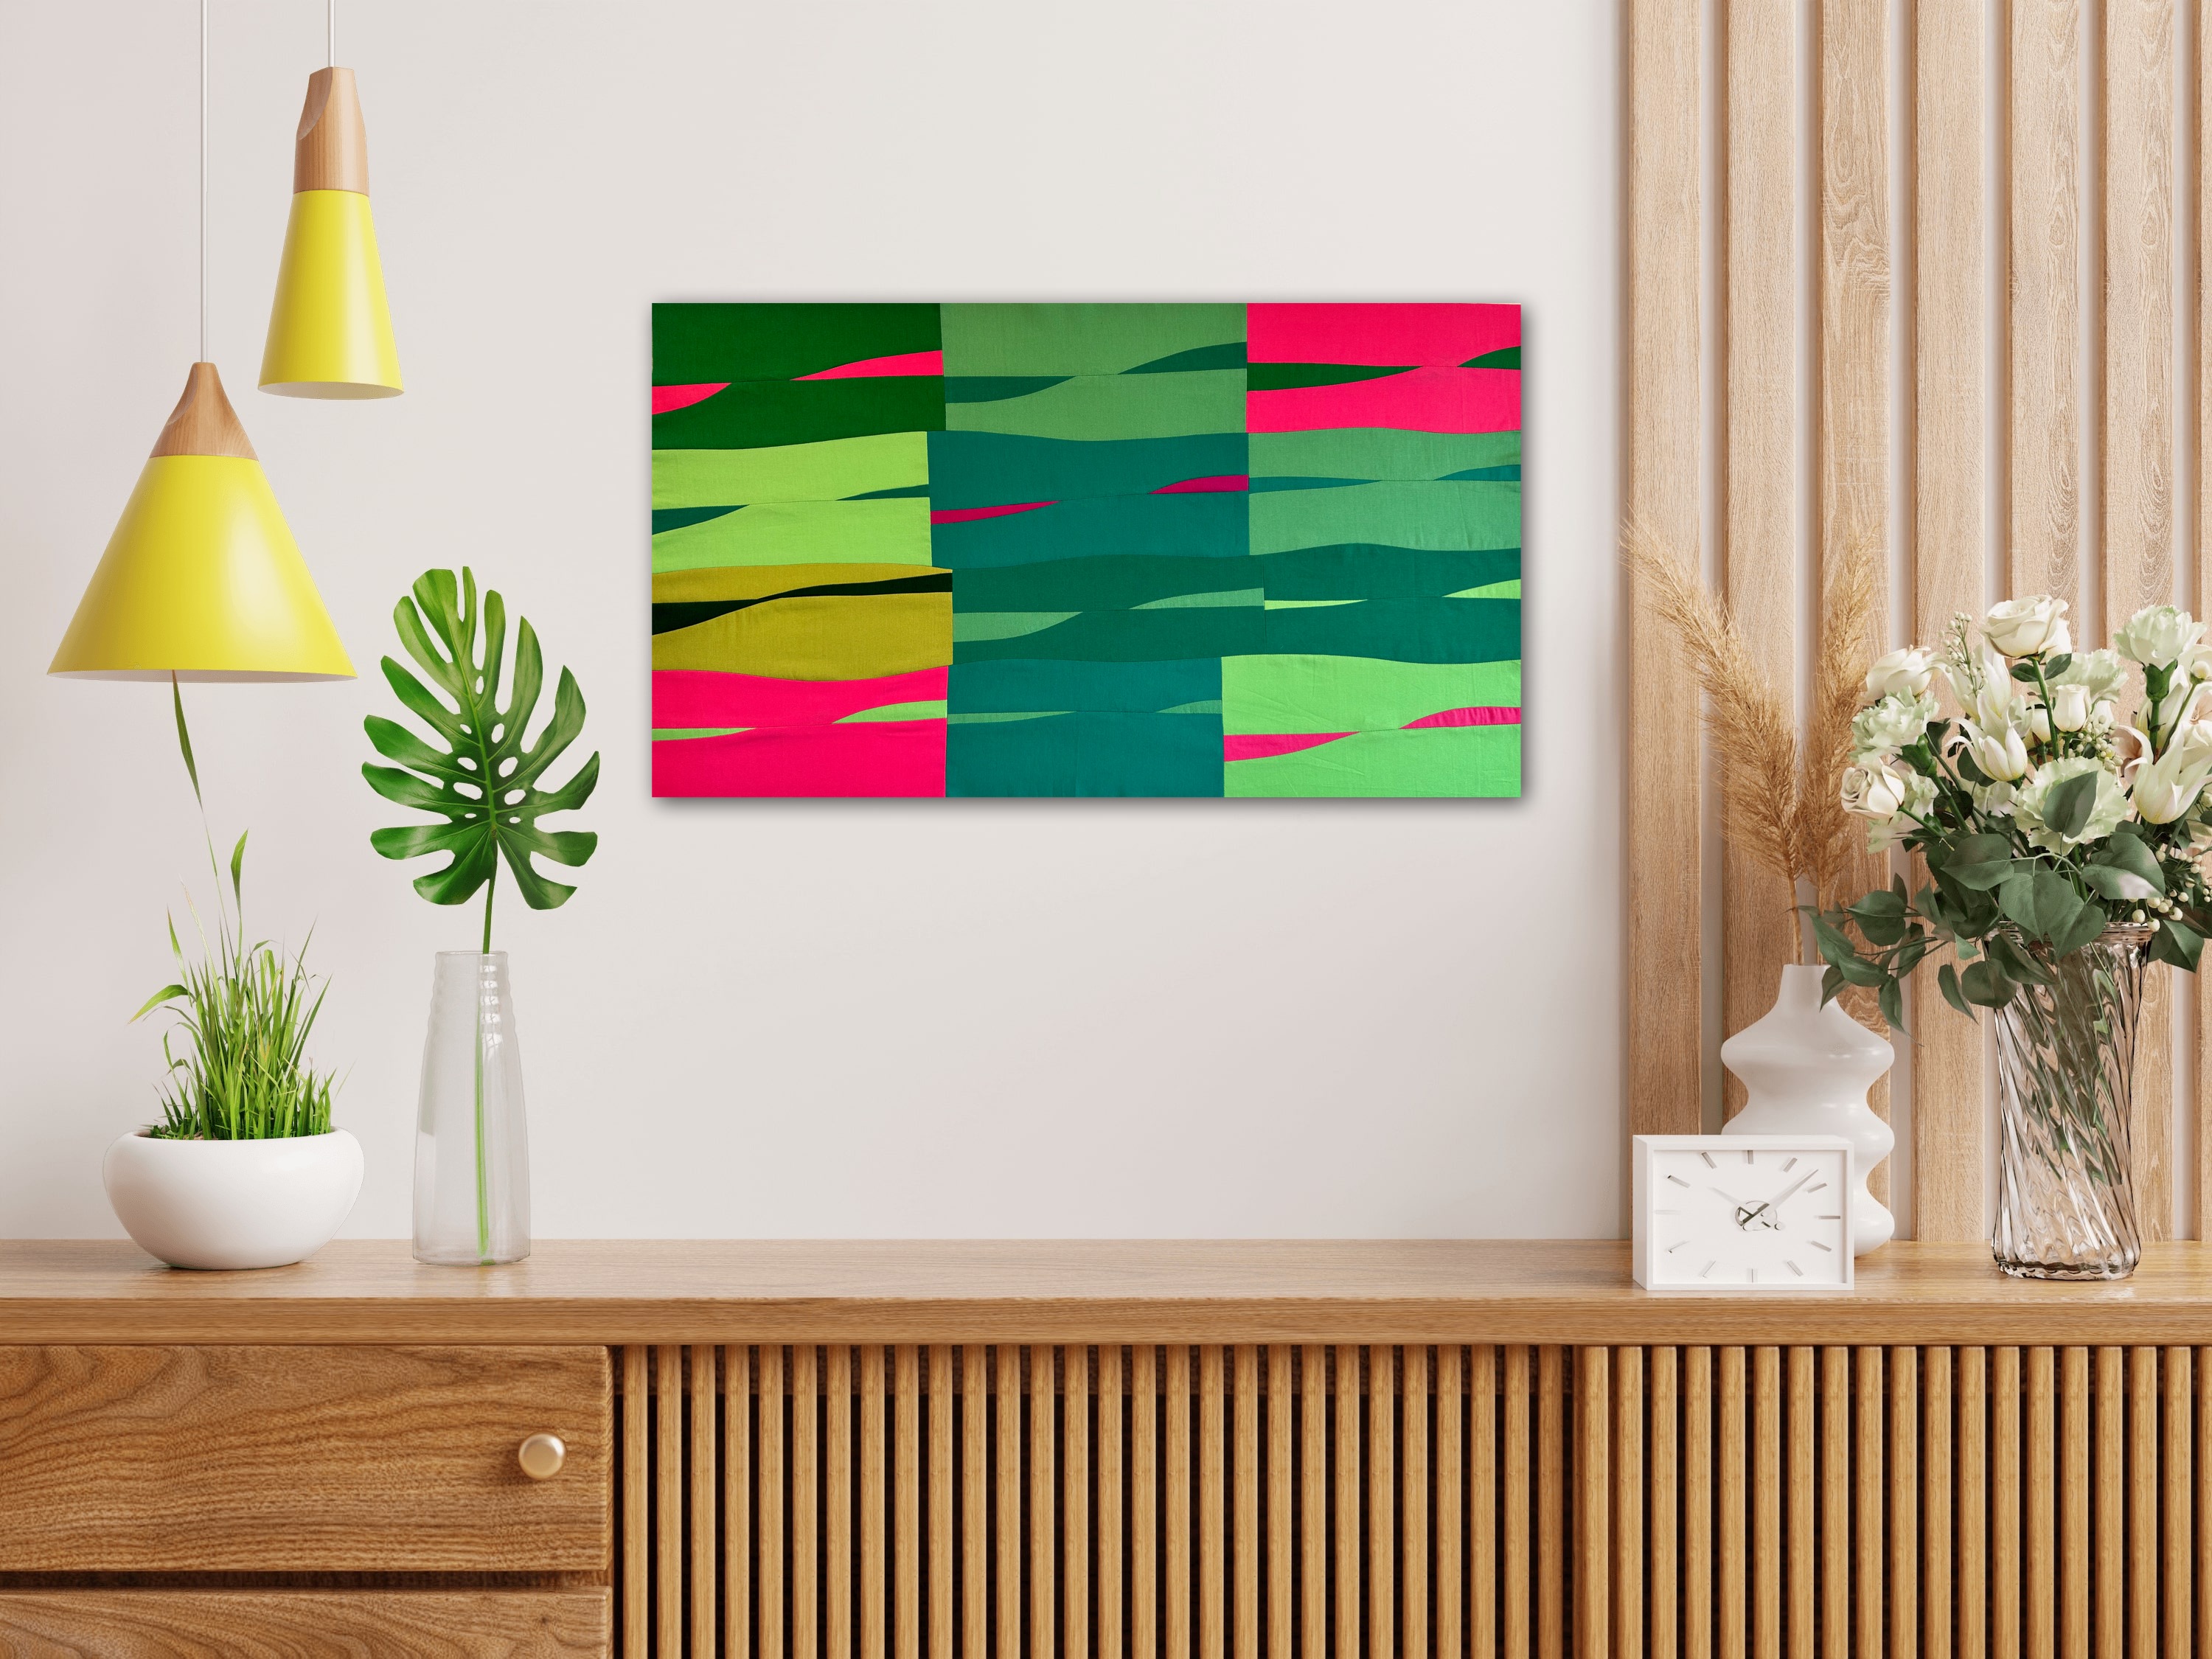
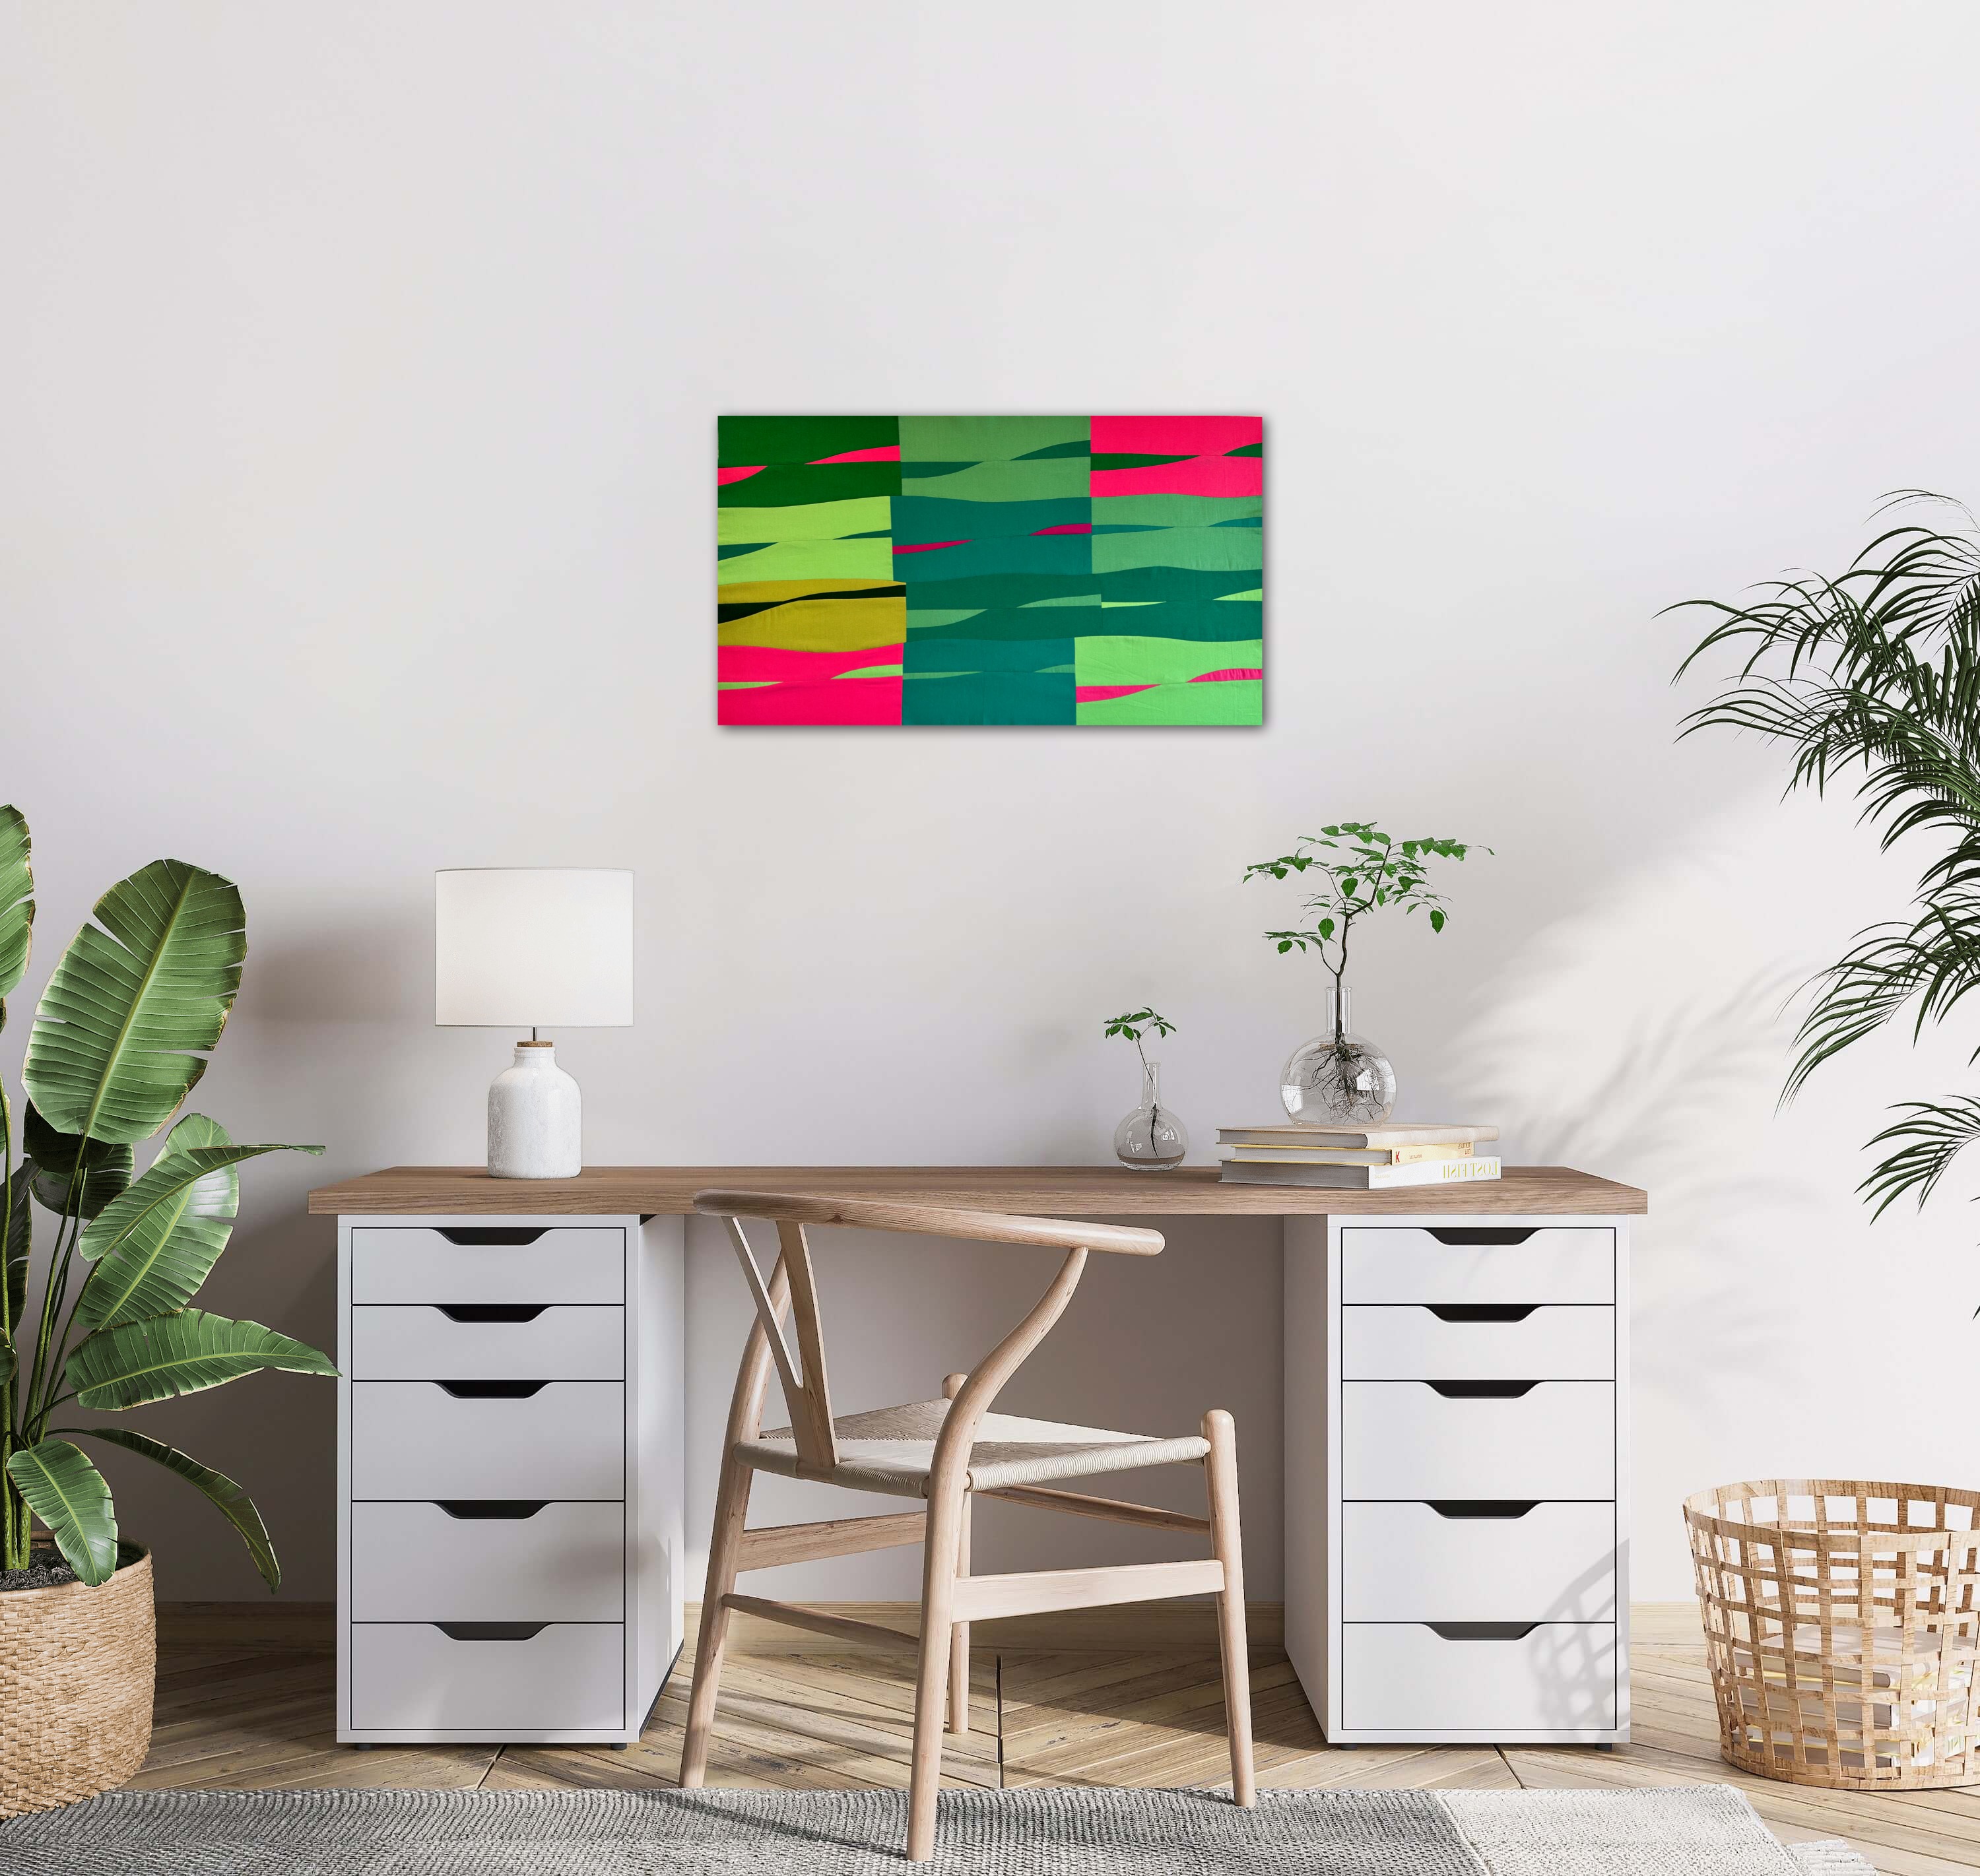
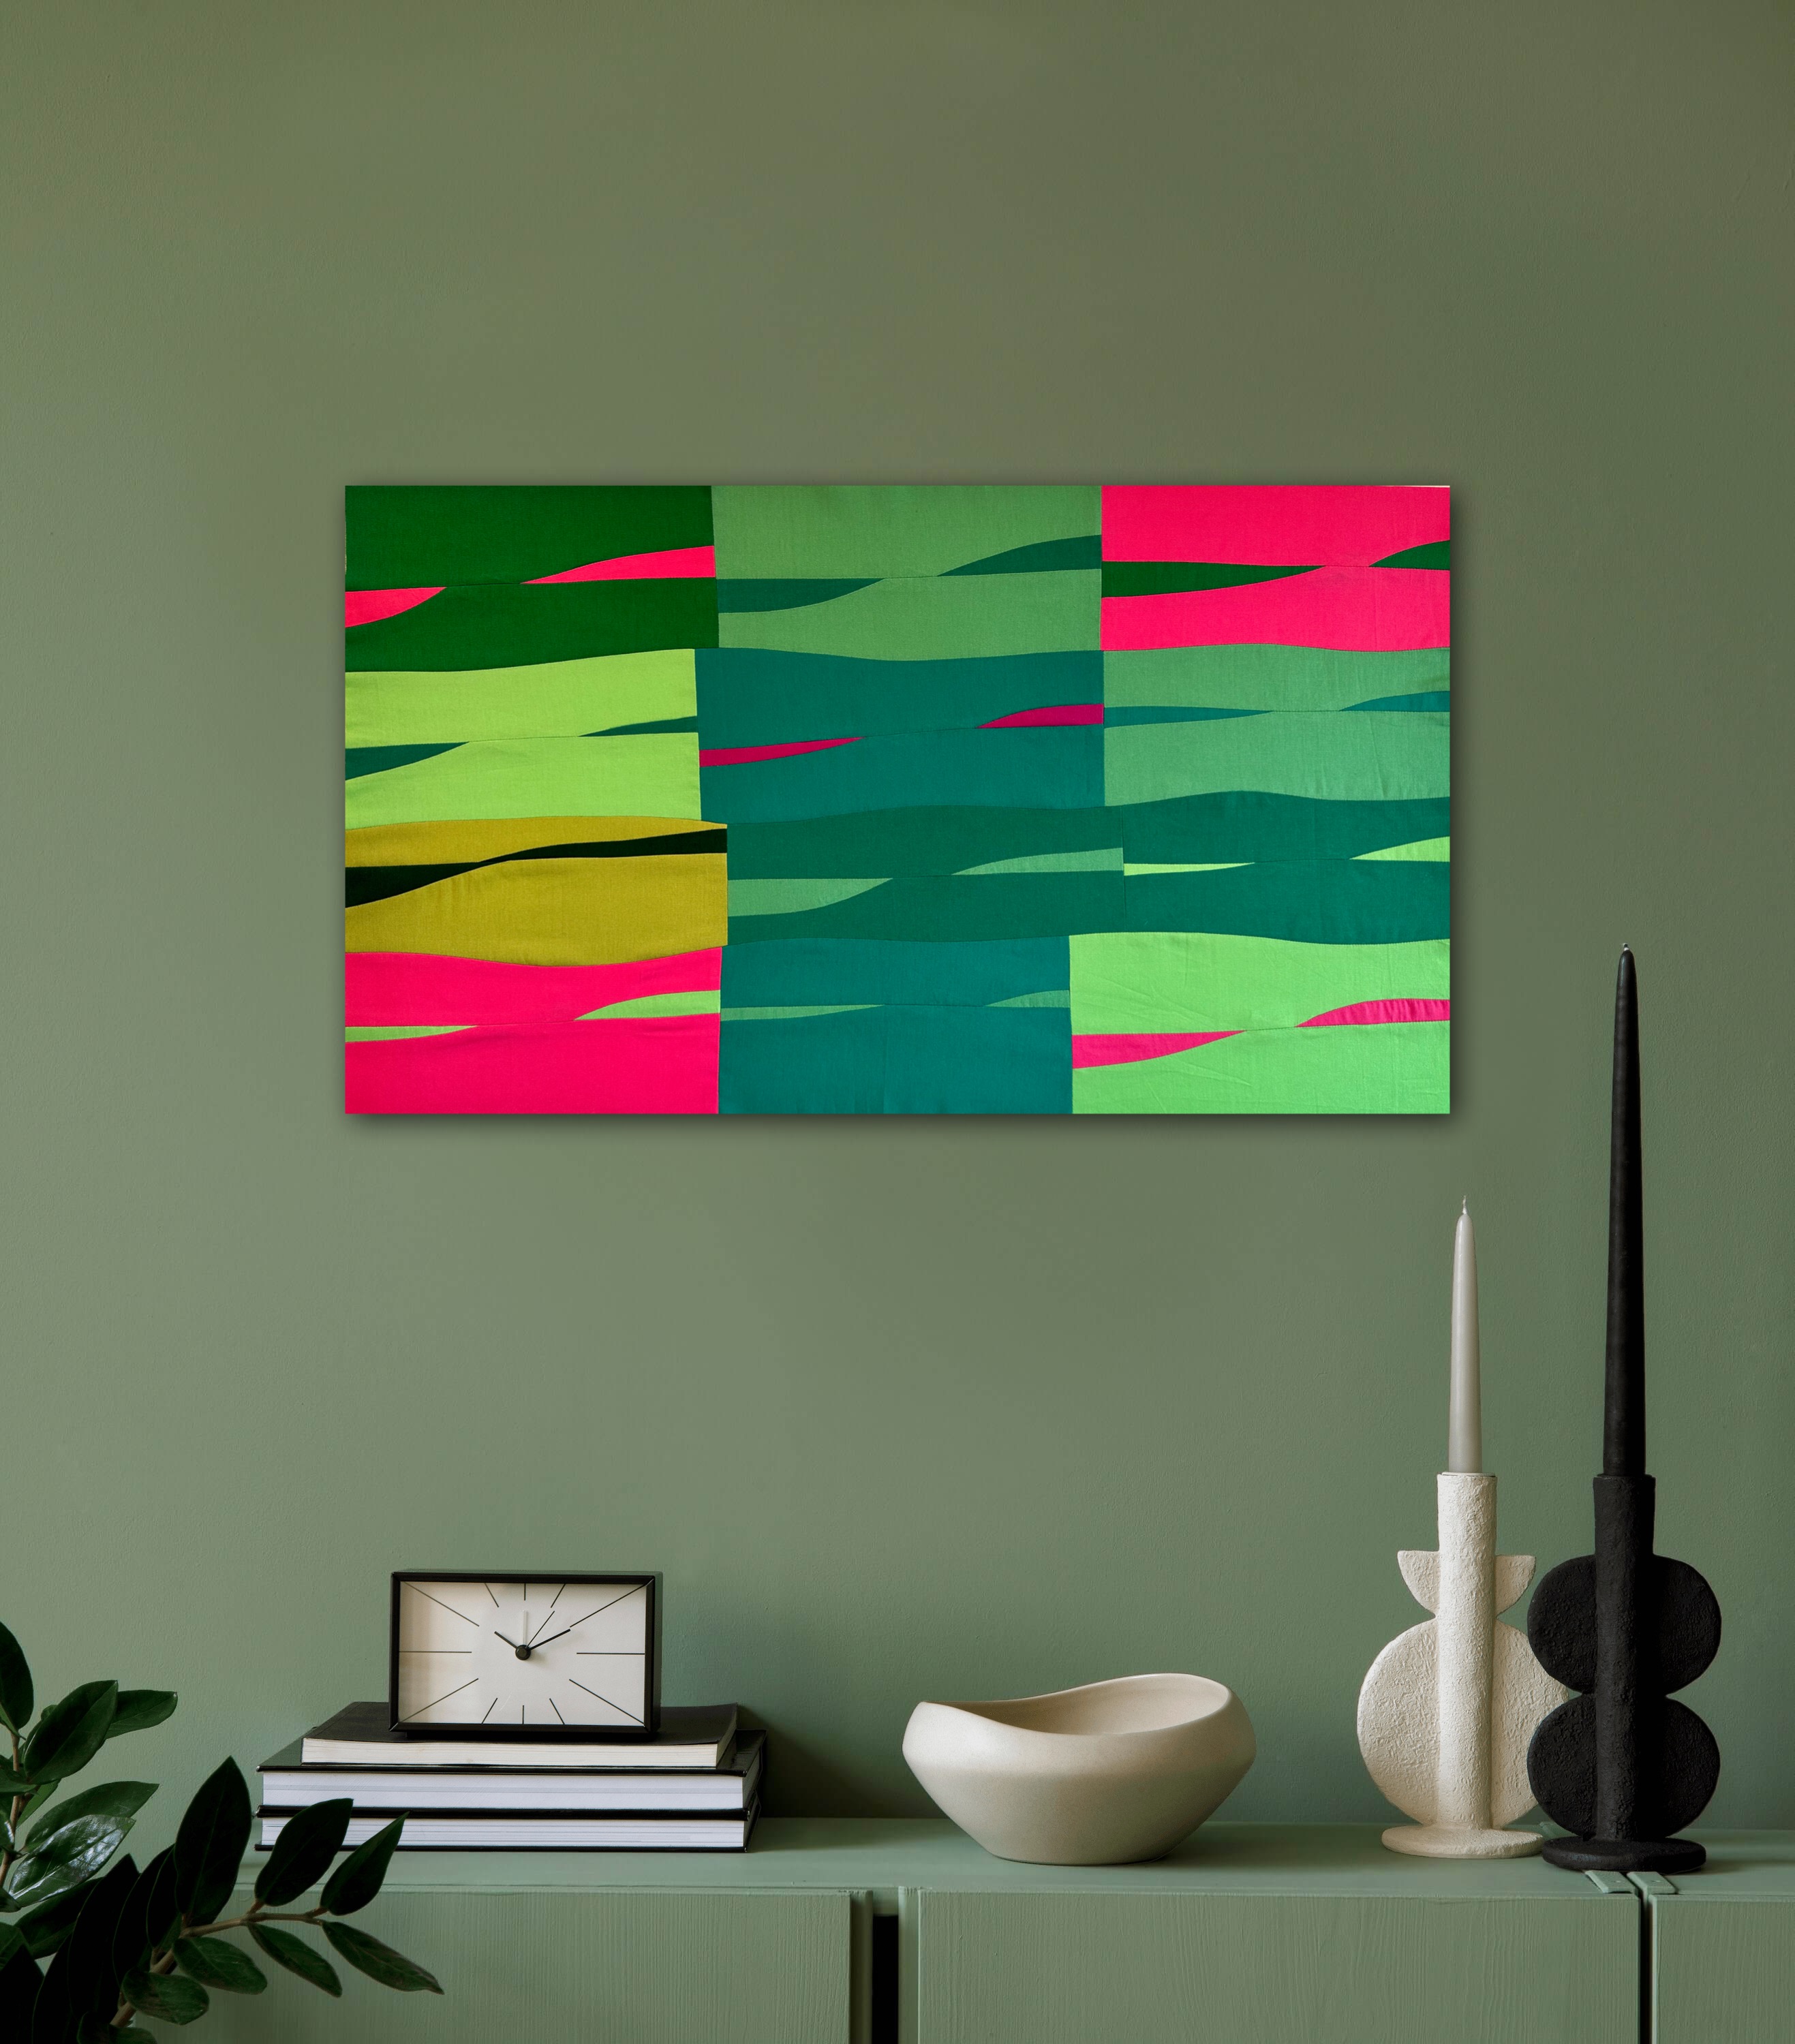
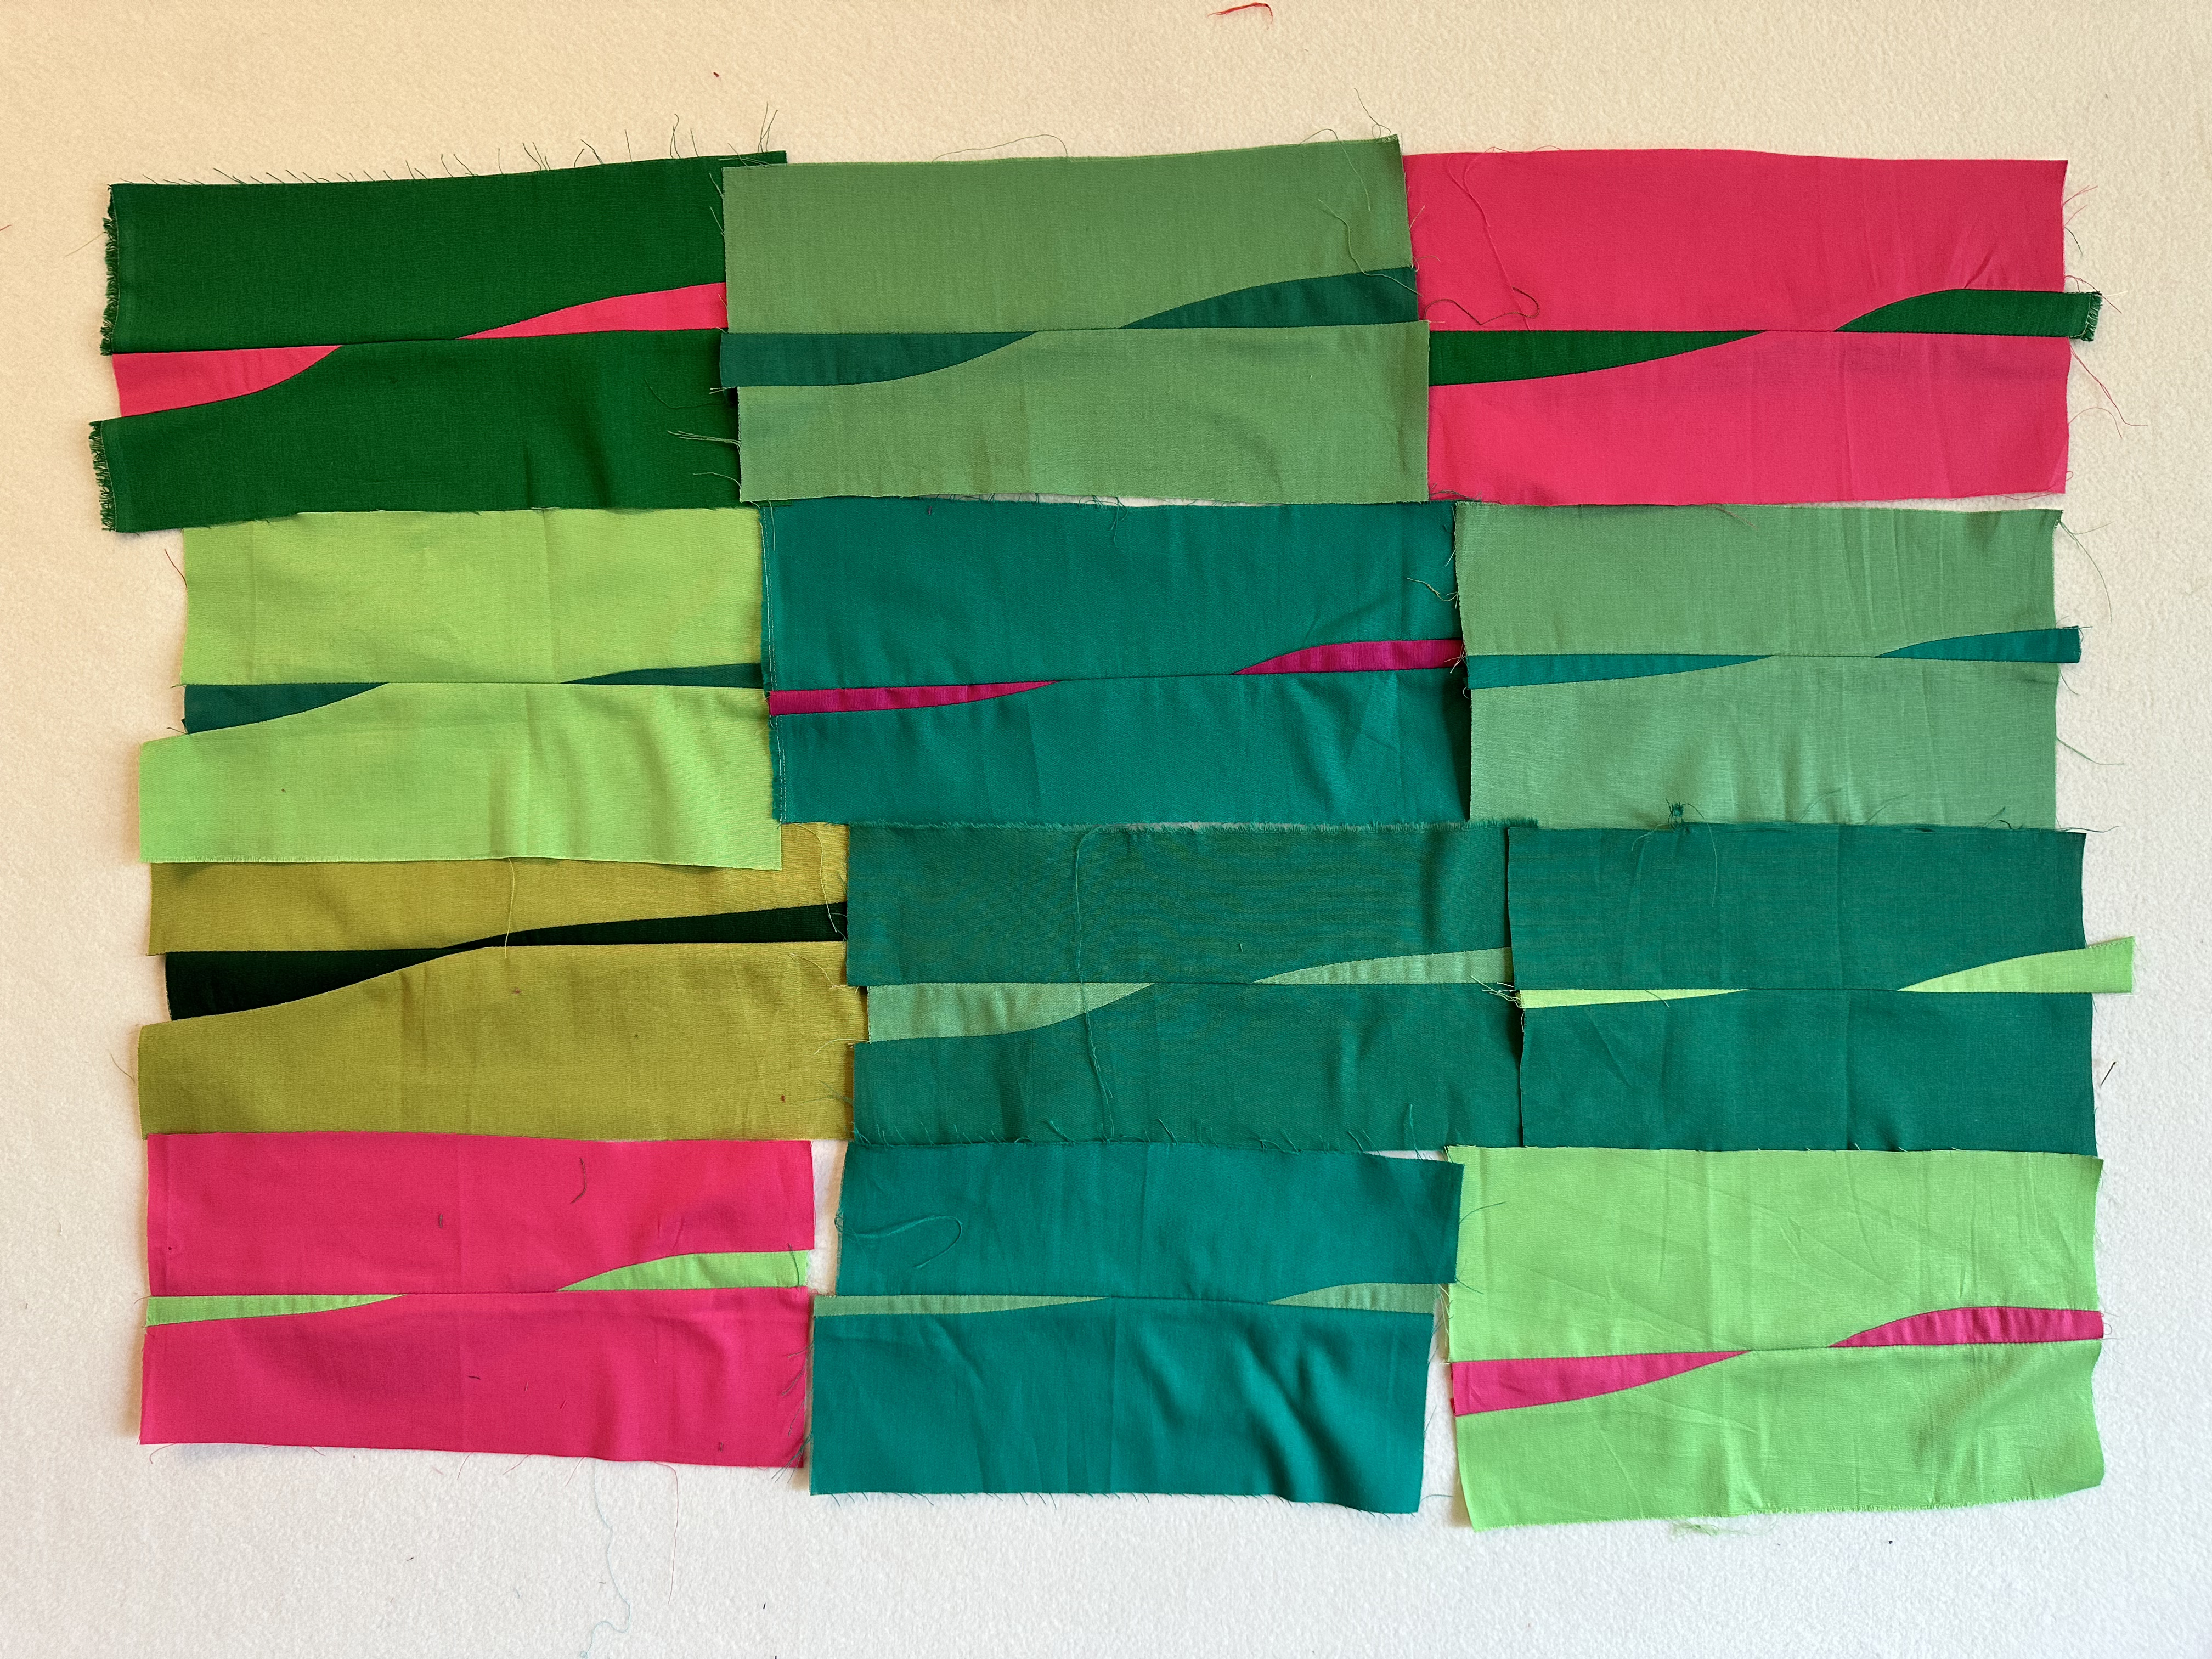
Repeat this steps again with all the pieces of fabrics that you have, always working with a pair of two different colors. Once you have all your 14 block ready, pick 12 and organize them in your design wall, paying attention on how you layout your colors. Sew the blocks in rows with a straight line. 


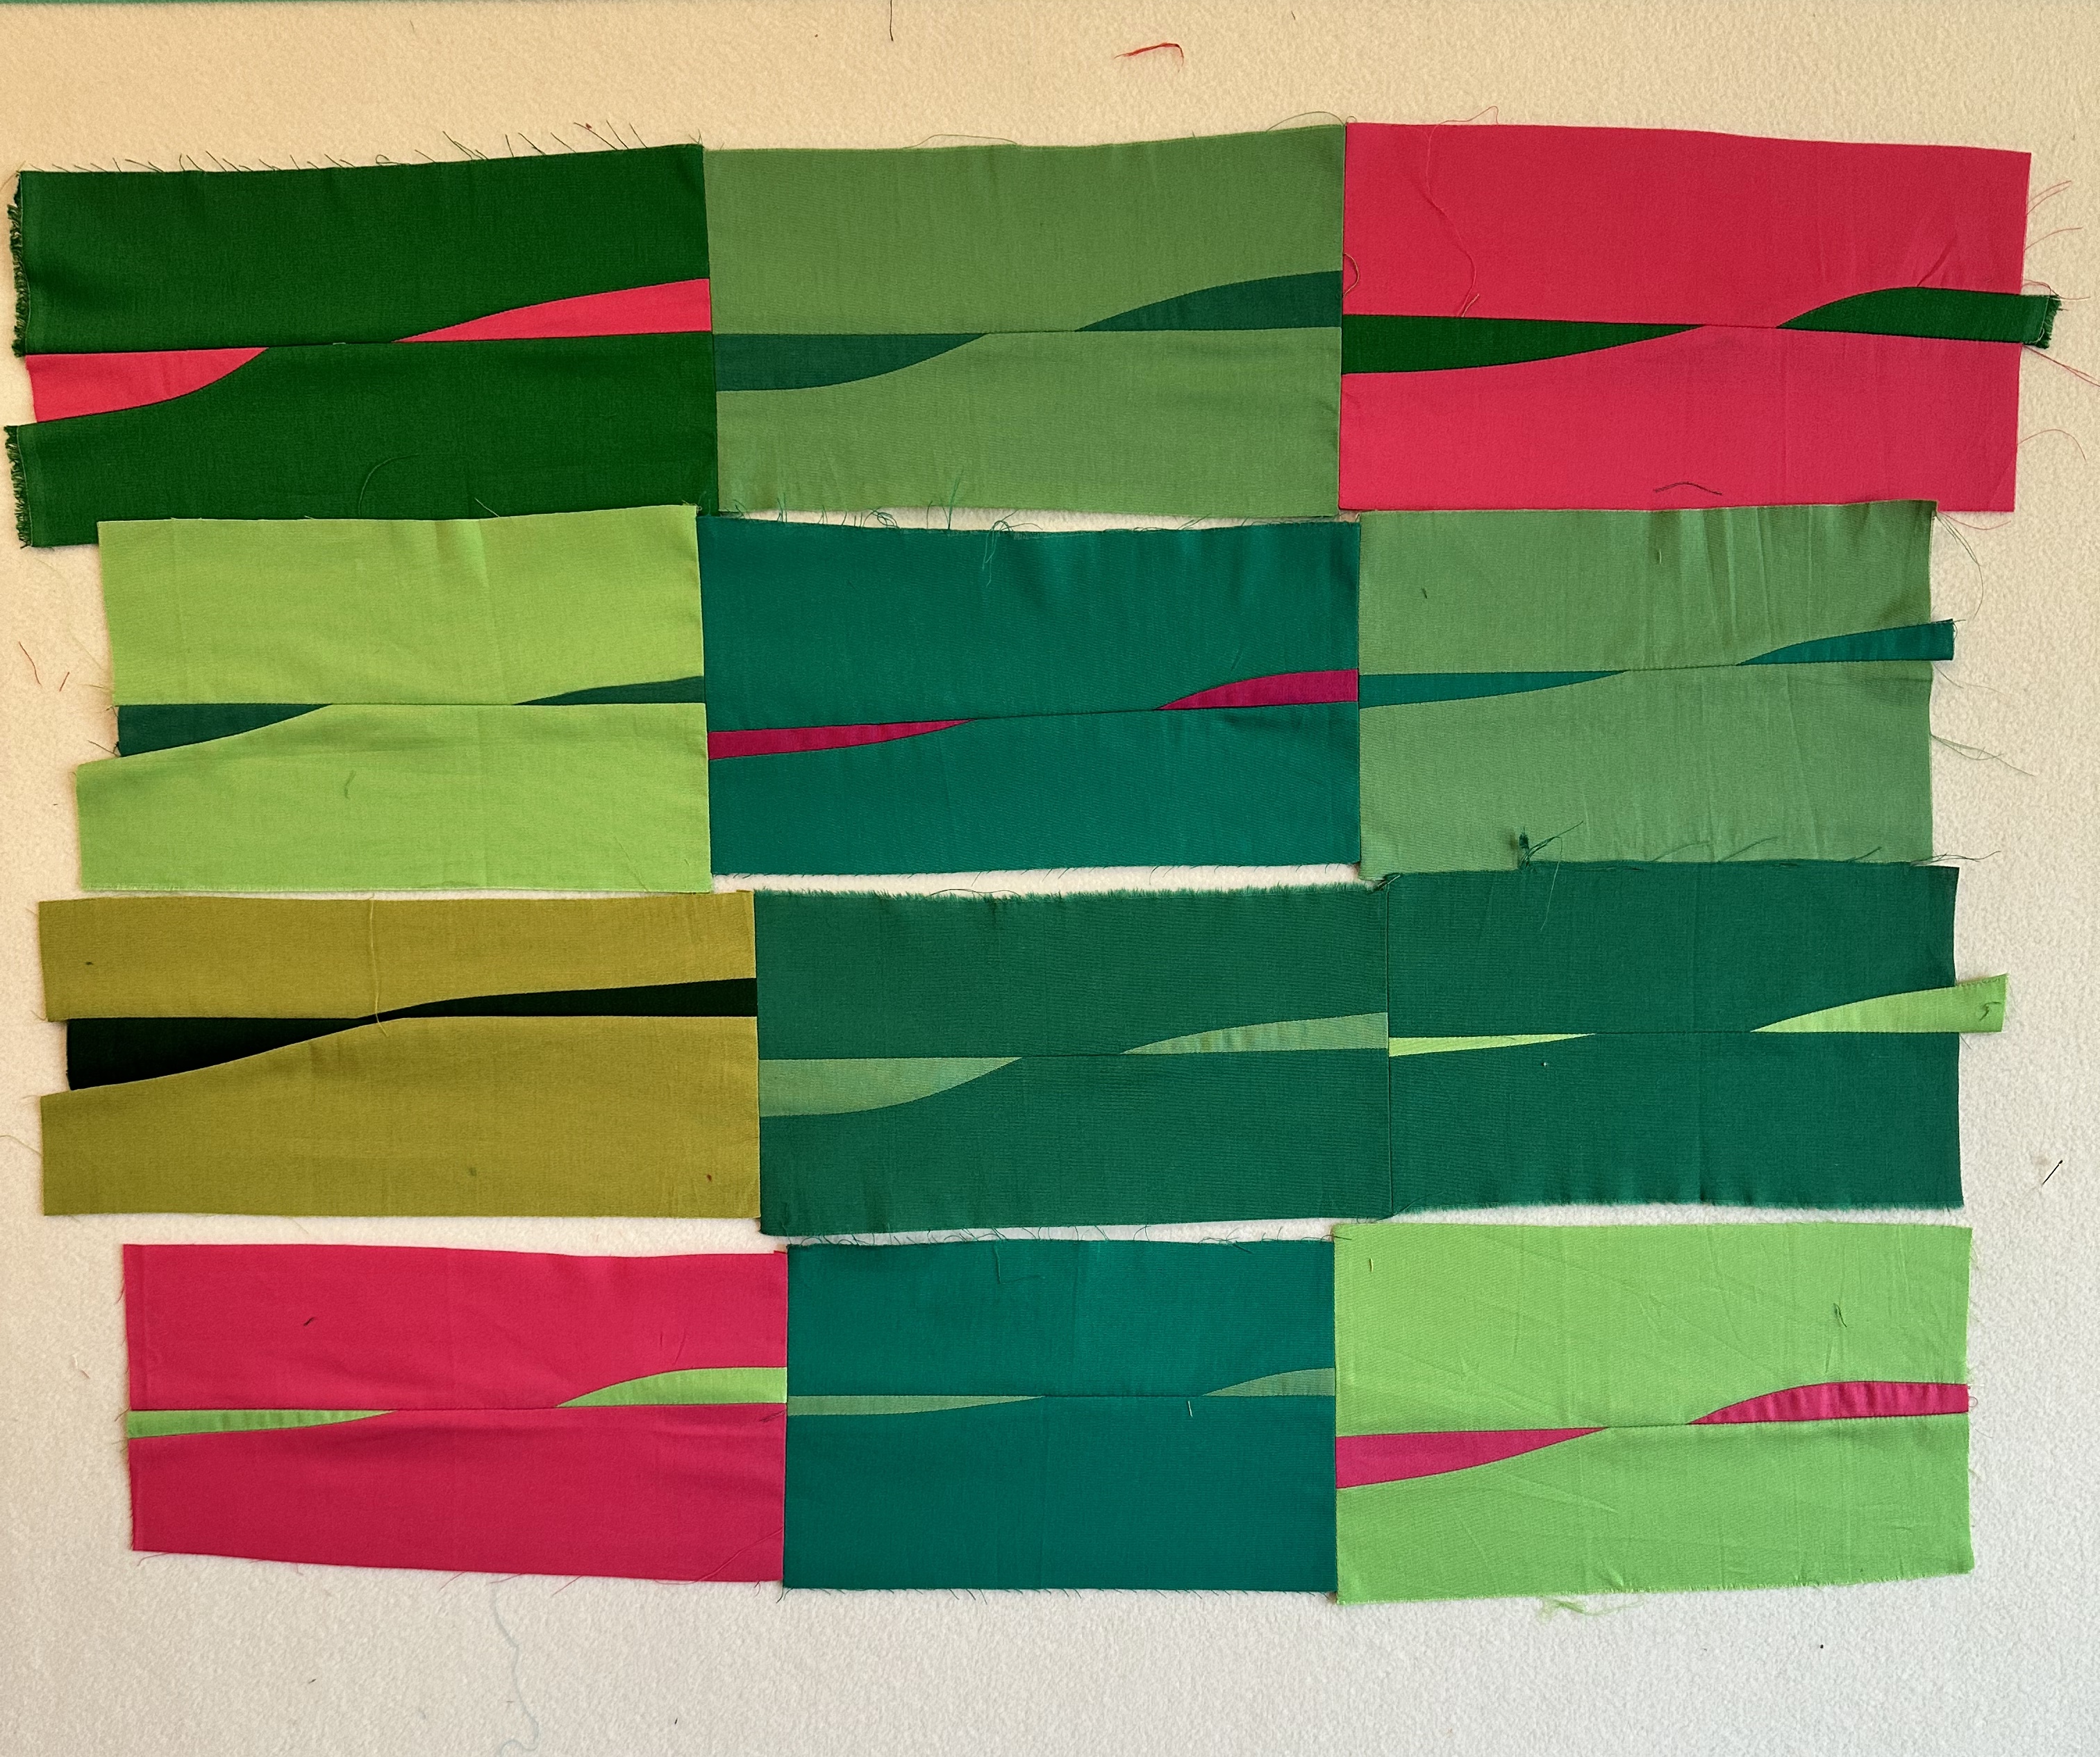
Then sew each row cutting a soft curve, to make that overlap two rows both right side up. Overlap the approximately 1 inch and cut a soft curve within that inch. Remove the fabric that left and sew each row right side togethers. 


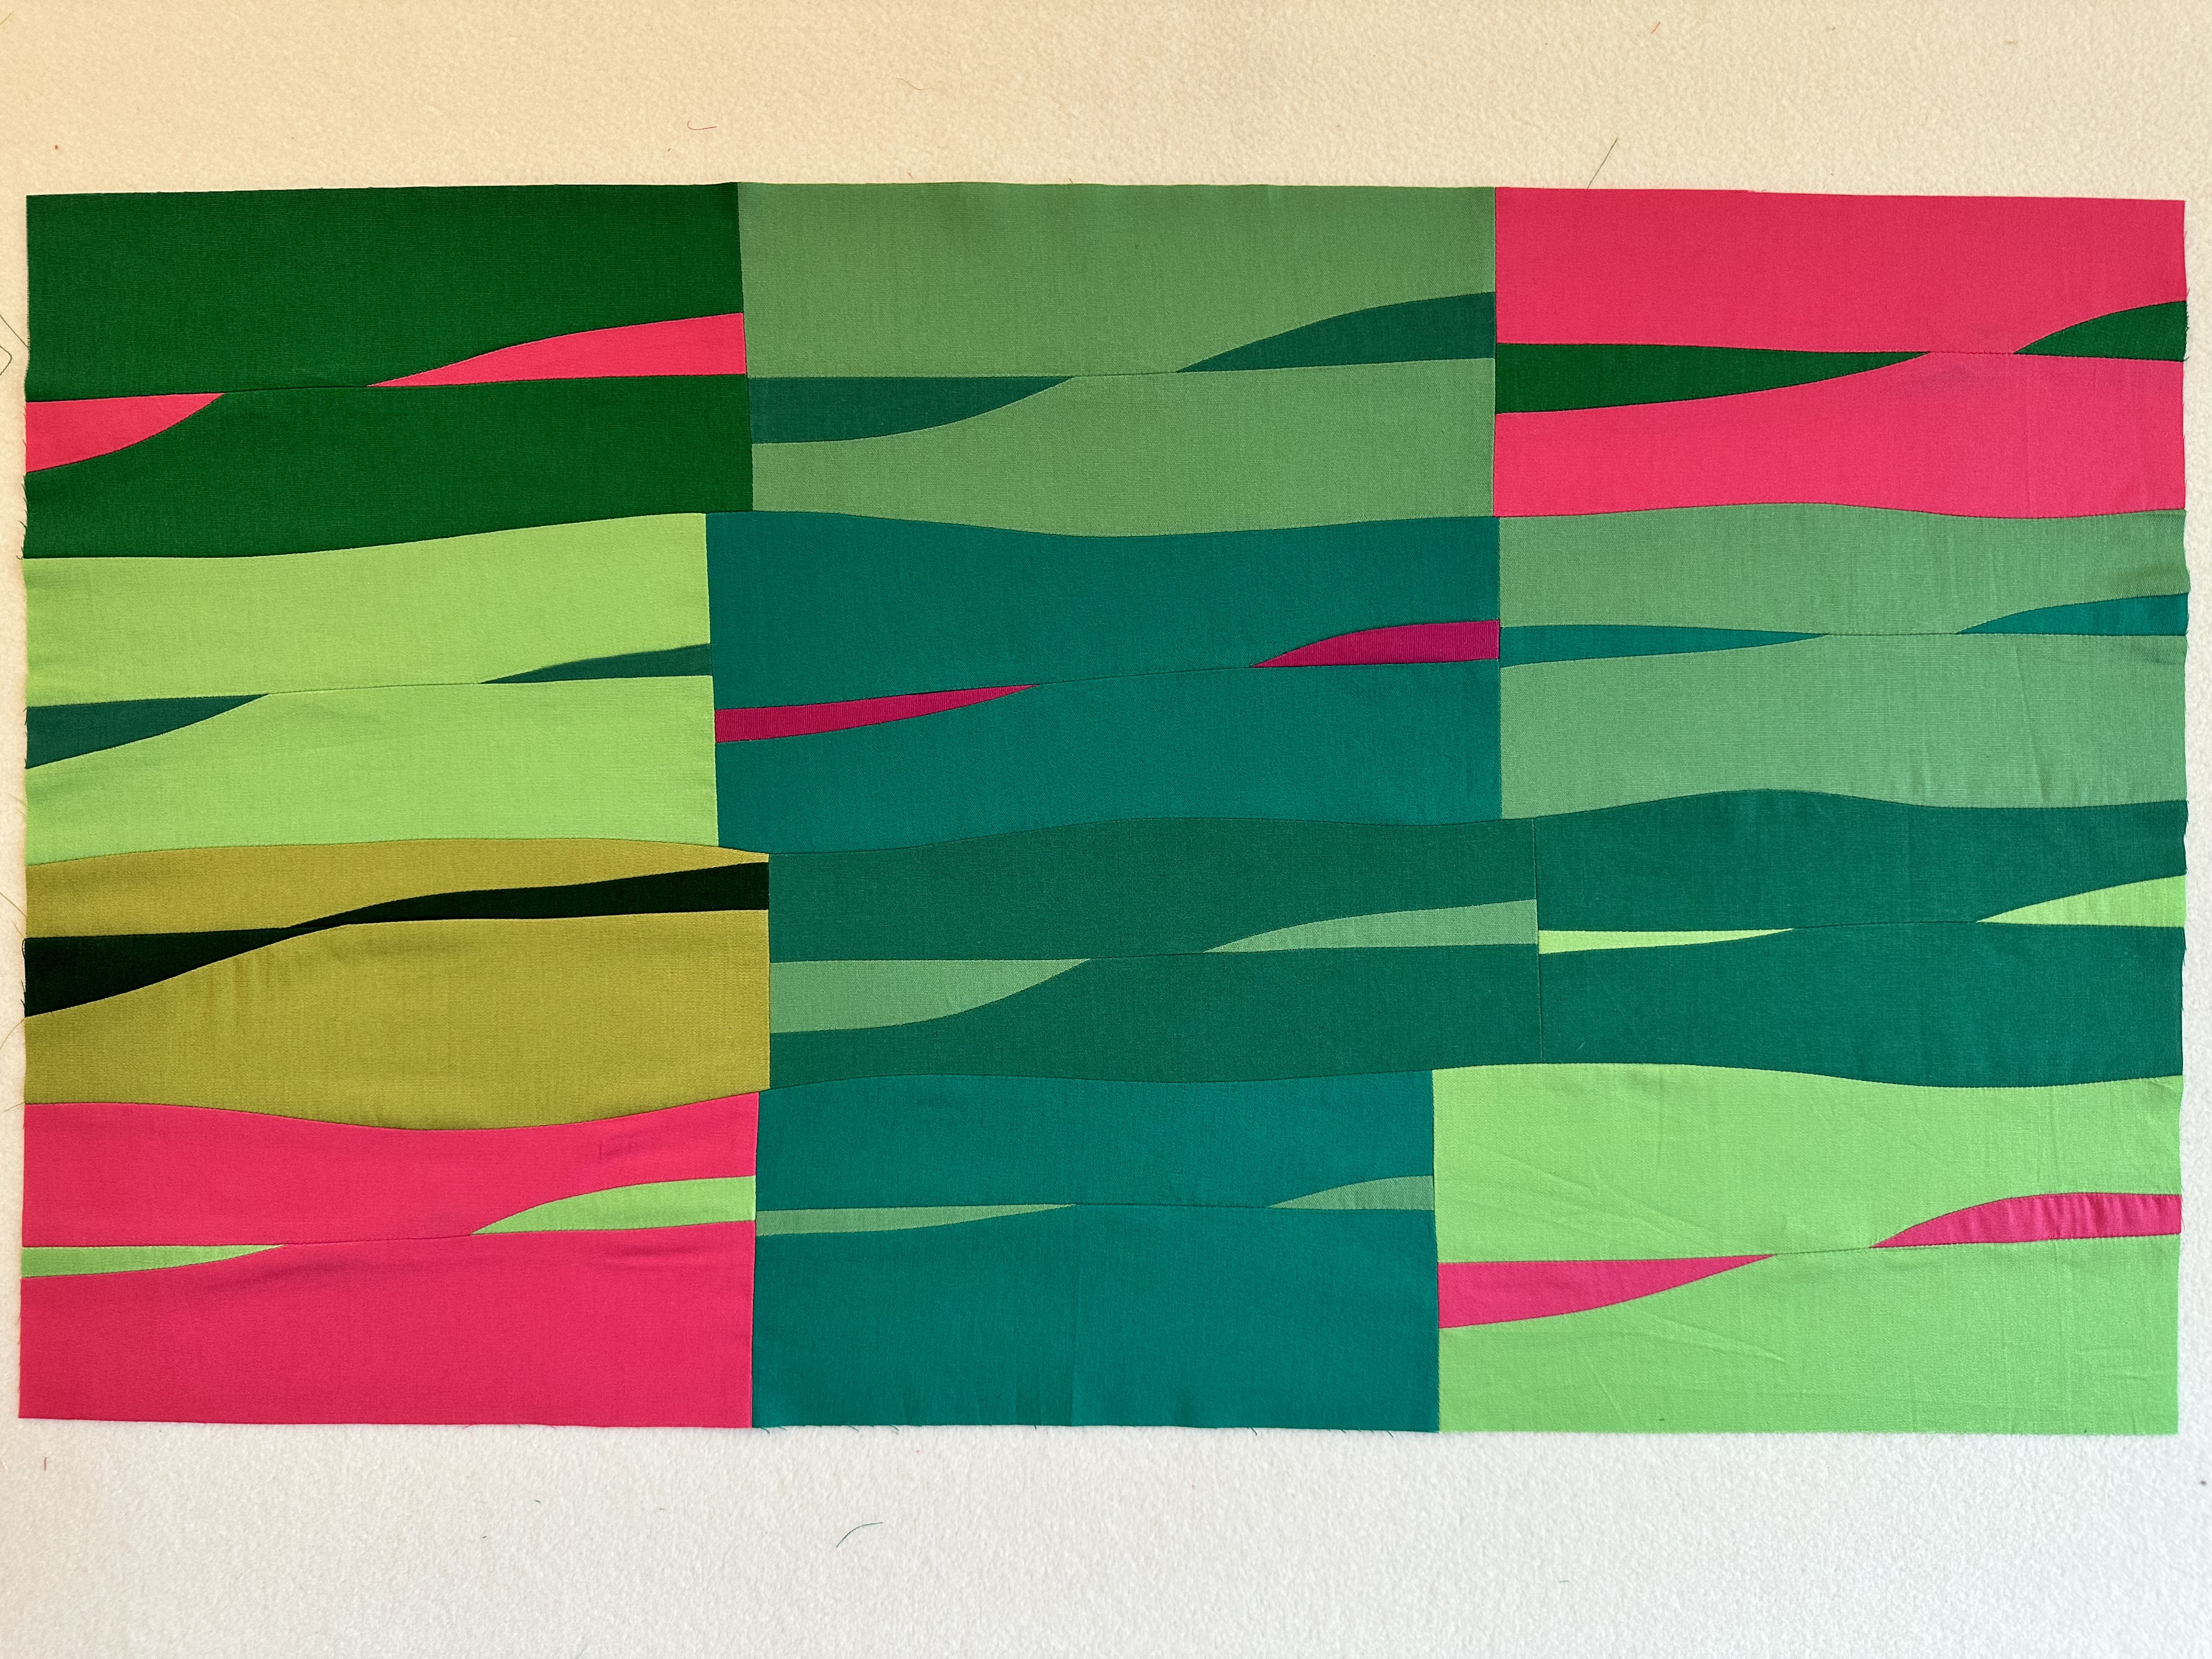
Once you sew your complete top, you can square it up, baste and quilt it. For quilting your mini quilta beautiful design can be sewing gentle curves (look for my tutorial where I teach you this design) Once you finish, bound your mini and put it on your favorite place to add colors and happiness, ENJOY!


Everyone is Talking about Mini Landscapes Quilt
Reviews


Tako
Beautiful
Wednesday, November 23, 2016

cpindzola
Around the Table Dresden Placemats
Saturday, December 17, 2016

I like the concept, but the directions are "sloppy." Nowhere in the supply list does it mention the felt or the batting (how much?). Also, I would never use a high loft batting in a placemat, or a table runner, as I think that it would be too unstable for a glass. The next time I make these, I will cut out the batting (I use flannel) and spray baste it to the wrong side of the Dresden plate before I put the Dresden plate on the felt to cut out. I have not yet washed the finished placemat, and am hoping that the single layer of felt does not curl up, or become distorted after washing/drying.
Txmaid
Fun Great Gift!
Tuesday, February 21, 2017

MargieARK
Teatime Quilted Tablecloth
Friday, February 24, 2017

I made this today but your cutting directions need to be changed. You only need 4 of color 1 and color 3 4.5 squares for the triangles. Also the inner border, you only need 2 cuts as WOF is long enough to cut each in half to fit the sides.
MickelSews
Great Machine
Wednesday, August 30, 2017

I've had this machine for only a week now. I bought it used from a lady who makes her own clothes, but she no longer needed the machine. During the purchase, she noted that she is almost sad that it's better to give it away because of how well the machine performed. (I also bought it along side a computerized machine of another brand.} She demoed the machine for us, showing it worked and gave us everything (including the box it came in!) She took amazing care of this machine. I have used it a few times now, and the directions for threading were easy to follow (albeit my hands are quite large so the lower looper was a pain, but that is no fault to the machine or brand.) And I recommend this machine to anyone who wants to learn to serge and wants a machine that can grow with them. I will happily use this machine time and time again.
rvstan
S9 Review
Sunday, February 25, 2018

I love, love, love my S9! It's sews and embroiders beautifully and it's simplicity of use amazes me. I would recommend this machine for both a beginner and an experienced seamstress. If I would ask anything of Janome it would be to upgrade the programming to run a larger hoop size. I understand that it can't get much wider but there is most definitely room for it to go longer. That is the only limitation of this machine.
pjmnana
PJMNana
Monday, February 26, 2018

I purchased a Memorycraft 15000 a few years ago and it was the best purchase I ever made! This machine can do just about anything you would would ever want! I love the capability of using the Acuedit app to set up my embroidery pattern on my Ipad and then download it to the machine! I love how my embroidery looks upon completion and I love all the good lighting it has to light up your workspace. That way you don’t need to worry about where to set up your machine. It also has plenty of room to do machine embroidery on any size quilts! There are many decorative stitches from which to choose that are outstanding! It’s hard to choose which one to use! There are so many great features it is hard to decide what I love the most. If you want to buy only one machine to last a lifetime, I would recommend this one!
KLWash
S9 Review
Sunday, February 24, 2019

The S9 is amazing. I learned to sew by hand when I was just 5 and in my grandmothers way as she was quilting. I took seeing classes in high school until they would no longer let me sign up. The S9 makes me appreciate my current skills as well as motivate me to want to learn more. This machine is awesome.
SewSueMe2002
Horizon Memory Craft 15000
Thursday, November 19, 2020

My Janome Horizon Memory Craft 15000 is fantastic! I love, love, love this machine! When I came across the Eye for and Eye embroidery design today, I wanted to make it. However, the embroidery file is missing. Nothing downloads when I select the download button. Please help!
Jillfmischo
Treat Bag fun!
Monday, August 16, 2021

I made the Halloween treat bag for my new granddaughter and I’m sure it will last for years. No embroidery machine so I appliquéd the lettering. Need a little more skirt fabric for a better gathered look, and I used thin double-bias tape for the skirt hem, over edge stitch on skirt sides. I’m pleased with my results!
elenaz
Very helpful tutorial
Wednesday, October 25, 2023

I want to say thank you for teaching me this method of applique. I was able to do it with a small letters. This method is the best so far from all of those I've seen and tried.
plonkar
So useful
Thursday, November 30, 2023

I'd like to express my gratitude for teaching me this appliqué method. I successfully applied it with small letters, and, so far, it's the most effective among all the methods I've seen and tried.

DEALERS
The TWO Closest Dealers to you are:
196 Boston Post Road , Orange CT, 06477
203-878-1654
19 PUTNAM AVENUE , PORT CHESTER NY, 10573
914-934-2934
Find Additional Dealers