Welcome to the official Janome.com Blog Page!

  • 9/28/2021

    Photo Sep 21, 11 08 23 AM (2)

    A Tutorial: How to Make a Whole Cloth Quilted Pillow Cover with Envelope Style Back in Sizes 12" square to 24" Square
    Whole-cloth quilted pillows made using your Janome sewing machine is a wonderful and easy way to bring heirloom-quality style into your home, freshen up your decor, and enjoy favorite fabrics year-round, using just a few simple steps! In this tutorial, I'll show you how to use two different built-in stitches on your machine to quilt the pillow fronts and how to finish the pillow with an envelope style back in SIX different sizes. Let's get started!

    1

    Materials List:
    Janome Sewing Machine (Horizon Quilt Maker Memory Craft 15000)
    walking foot for your sewing machine (optional)
    fabric depending on the pillow size (Plaid of My Dreams by Maureen Cracknell for AGF)
    batting (Hobbs Tuscany Supreme 100% Unbleached Cotton) 
    pillow insert or pillow you'd like to cover (Hobbs Pillow Pals)
    neutral thread (Aurifil 50wt 6010, 2692)
    basting spray or basting pins
    scissors or rotary cutter/mat
    hera marker or disappearing fabric marker to premark the quilting lines (optional)
    iron
     
    Size 12" x 12" square: one 12.5" x 12.5" square for main fabric, one 14" x 14" square of batting, two pieces of fabric measuring 11.5" x 12.5" for backing fabrics, two pieces of batting 13" x 14" for backing batting
    Size 14" x 14" square: one 14.5" x 14.5" square for main fabric, one 16" x 16" square of batting, two pieces of fabric measuring 12.5" x 14.5" for backing fabrics, two pieces of batting 14" x 16" for backing batting
    Size 16" x 16" square: one 16.5" x 16.5" square for main fabric, one 18" x 18" square of batting, two pieces of fabric measuring 13.5" x 16.5" for backing fabrics, two pieces of batting 15" x 18" for backing batting
    Size 18" x 18" square: one 18.5" x 18.5" square for main fabric, one 20" x 20" square of batting, two pieces of fabric measuring 14.5" x 18.5" for backing fabrics, two pieces of batting 16" x 20" for backing batting
    Size 20" x 20" square: one 20.5" x 20.5" square for main fabric, one 22" x 22" square of batting, two pieces of fabric measuring 15.5" x 20.5" for backing fabrics, two pieces of batting 17" x 22" for backing batting
    Size 24" x 24" square: one 24.5" x 24.5" square for main fabric, one 26" x 26" square of batting, two pieces of fabric measuring 17.5" x 24.5" for backing fabrics, two pieces of batting 19" x 26" for backing batting

    Whole Cloth Pillow Supplies

    Step 1. Quilting the pillow top pillow: Layer the batting with the pillow front fabric on top facing right side up on a flat surface. Pin or use a spray to baste these two layers together.

    Baste Layers

    The first pillow example is quilted using the built-in straight quilting stitch #1 on my Janome set at a stitch width of 4.5 and stitch length of 4.0.

    Janome Sewing

    Following the plaid pattern of the fabric I created a grid-like quilting design. If using a different fabric to achieve this similar quilting pattern premark the quilting lines using a hera or disappearing ink marker before quilting.

    Quilted Pillow Front

    The second pillow example is quilted using the built-in wavy quilting stitch #8 on my Janome set at a stitch width of 9.0 and stitch length of 4.0. Adding the wavy quilting both horizontally and vertically created a really fun pattern here that really pops!

    Photo Sep 17, 6 26 52 PM

    Once quilting is complete trim away access fabric and batting to the desired pillow size. The first pillow example (beige/white gingham) is trimmed to 14" square for a 14" pillow insert. The second pillow example (black/buffalo plaid) is trimmed to 16" square for a 16" pillow insert.
    Step 2. Quilting Pillow Back Pieces: Just as you did for the pillow front, layer each backing piece of batting with the pillow back piece of fabric on top facing right side up on a flat surface. Pin or use spray to baste these two layers together for both backing pieces. Mark quilting line again if needed and quilt the same as you did for the pillow front.

    pin in place

    To hem, fold over one long edge of the top back piece about 1/4 inch and then again. Pin and sew along the folded edge and outer edge to create a double seam finish. Repeat these steps for the bottom backing piece, as well.

    hem raw edge

    double hem finish

    Step 3. Sew Together Pillow Pieces: Lay the quilted pillow front right side up on a flat surface, then layer the top quilted pillow backing piece with the right side facing the pillow front onto the pillow front, then the bottom backing piece.

    layer pillow back piece onto pillow front

    pillow backing

    Pin or clip all three layers together.

    pin in place

    Sew using a 1/4 inch seam all the way around the pillow attaching all three layers to create the pillow cover, removing pins or clips as you go.

    1/4" seam all the way around

    For extra durability I then use the zig zag stitch on my machine to sew around the entire pillow again staying close to the raw edge to reinforce the seams.

    double secure with zig zag stitch

    For nice pointed pillow corners, I then sew a small diagonal stitch on the outside of each corner and clip away each of the four corners as shown below.

    clip four corners

    Turn the pillow cover right side out and press to make it nice and smooth before adding the pillow insert.

    turn pillow cover out and press

    Carefully stuff the pillow insert inside the pillow cover. making sure to work the corners of the insert into the corners of the pillow cover. Now you're ready to admire and enjoy your handmade quilted pillow!

    insert pillow form and done!

    Photo Sep 21, 11 10 43 AM

    Care and Maintenance: Remove insert and machine wash cover in cold water; gentle cycle. Lay flat to air dry or tumble dry on the lowest heat setting; remove promptly. Use a warm iron as needed to smooth out any wrinkles before reinserted the pillow insert.

    Photo Sep 21, 11 07 23 AM

    I hope you enjoyed this tutorial!
  • 9/17/2021

    For learning how to sew or for a quick sew, coasters are a wonderful choice! They are not a massive commitment of time or materials and will give you practice and a finished project quicker! 

    Janome Maker Natalie Barnes from Beyond the Reef Patterns created a great video to show you how easy it is to make scrappy Quilt As You Go Coasters on the Janome HD9 Professional. This project is for beginners to experts and everyone in between! It uses scraps and is also improv so there are no mistakes!  


    Supply List:

    • Four 5" squares of Insulbrite 
    • Four 6" squares of  background fabric
    • Ruler 
    • Variety of scraps

    Please watch the full video prior to starting project. All seam allowances are 1/4" unless otherwise indicated. Finished project is four  4 1/2" squares.


    After finishing this project, we invite you to share in the Janome Sewing Classroom  Facebook Page, Instagram tagging @janomeamerica and using the #janomemakes tag, or on Pinterest tagging @janomeamerica and the hashtag #janome so that we can repin you! 

  • 9/16/2021

    Cooler nights and diminishing sunlight are gentle reminders that we are transitioning into sweet Autumn. A season of change is also a great time to slow down and learn a new surface design technique, aimed at invigorating your current sewing practice.


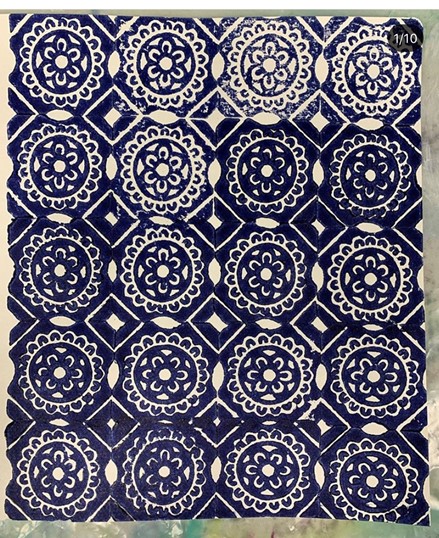
    Welcome to hand block-printing on textiles! The blocks that I like to use are wooden blocks created by Indian Artisans. You can also create Lino blocks like the one pictured above, but you would have to carve them. Sometimes we have the most interesting printing objects around our house; look for objects that have interesting bases, random shapes that bring you joy, and are suited to hold on to ink without damaging the piece. The textile ink that I use is permanent once dried, but always water-based, never oil. Experiment with creating shapes on potatoes (cut in half), printing with broccoli or dry leaves found during walks or in your yard.

    By Janome Artisan Maday from Sustainable Textile Design
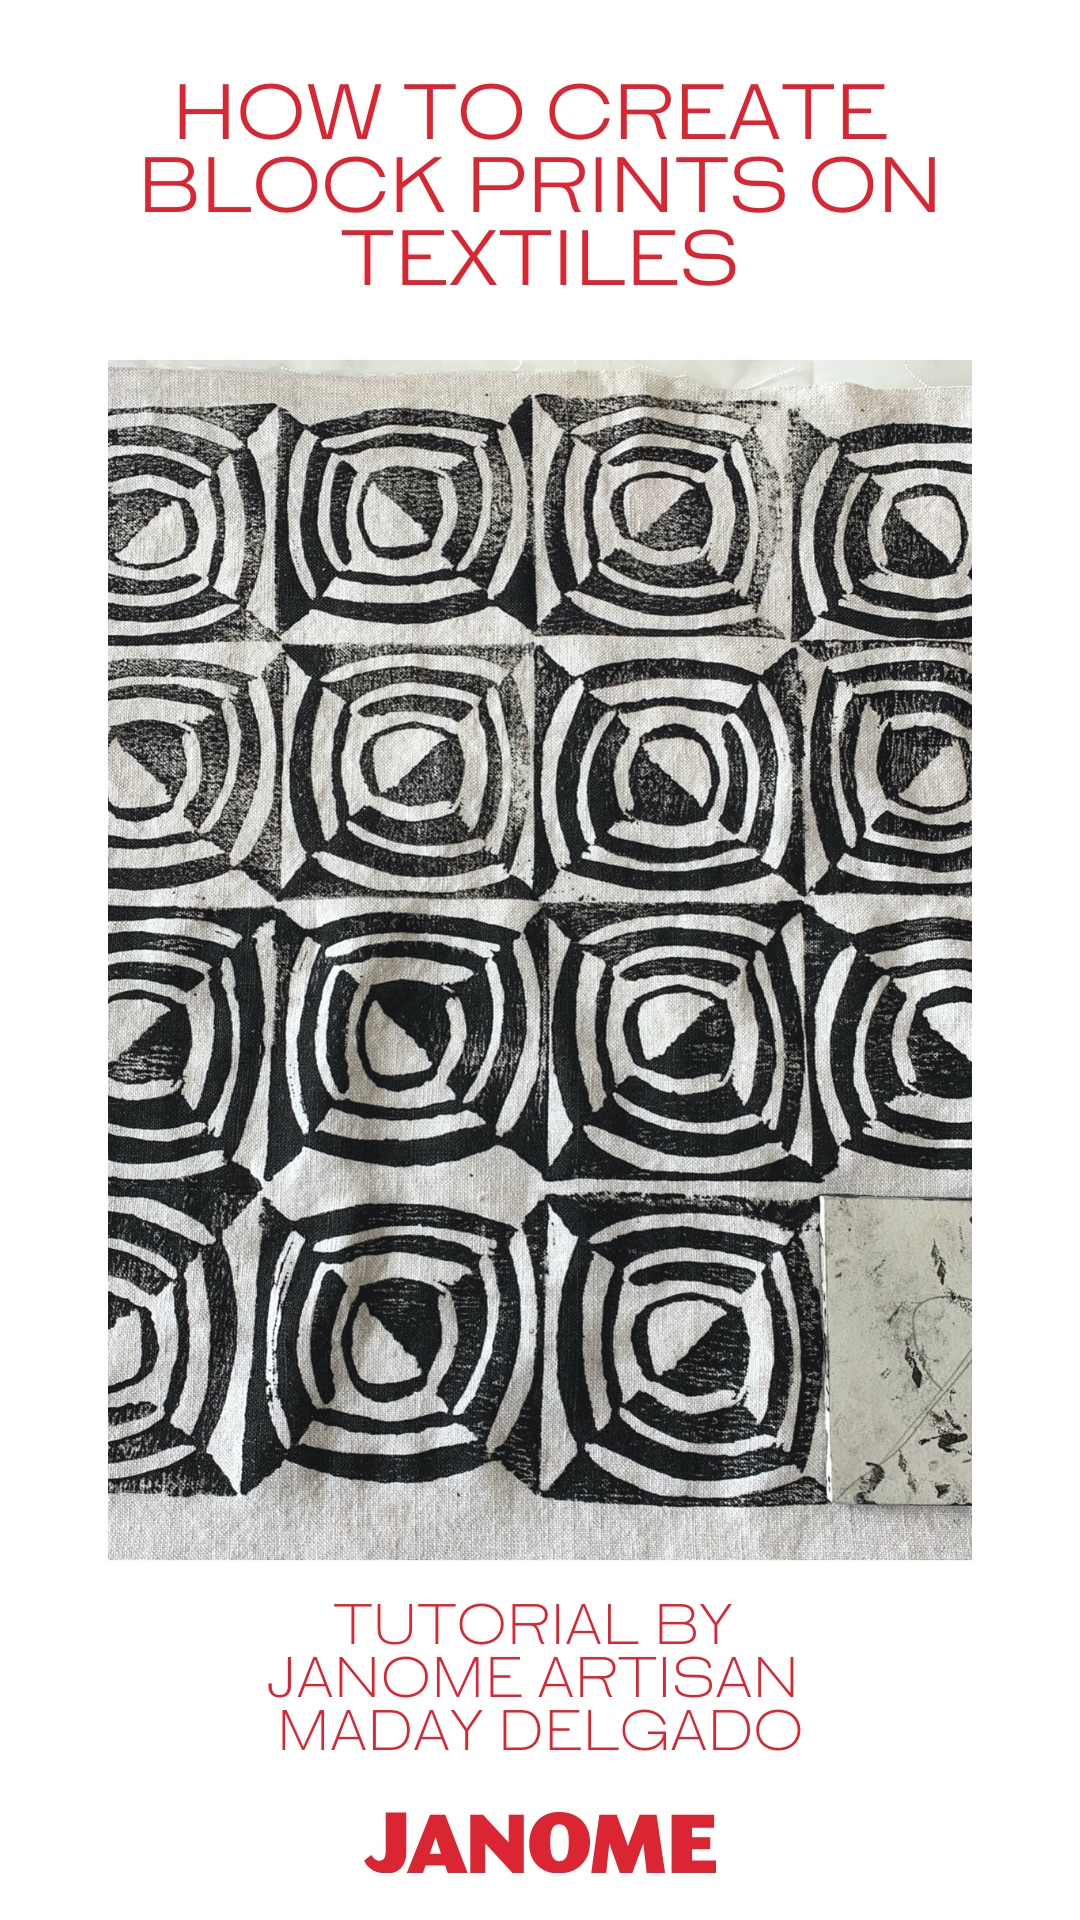


    The possibilities to create marks on textiles are infinite and the whole family can get involved. Print on fabric; sew your printed textiles into every day, machine sewn projects later. Use block-printing as the starting point for applique-ing with your Janome, monogramming, creating geometric shapes or simply, printing on garments to give them a new life.


    Helpful Hints:

    Practice printing on paper first; it will inform how much ink to use before printing on beautiful fabrics. You must apply more ink to blocks when printing on textiles.

    Cover tables to avoid damage and secure textiles using painter’s tape to create smooth printing surfaces. Allow fabrics to fully dry before ironing or sewing.

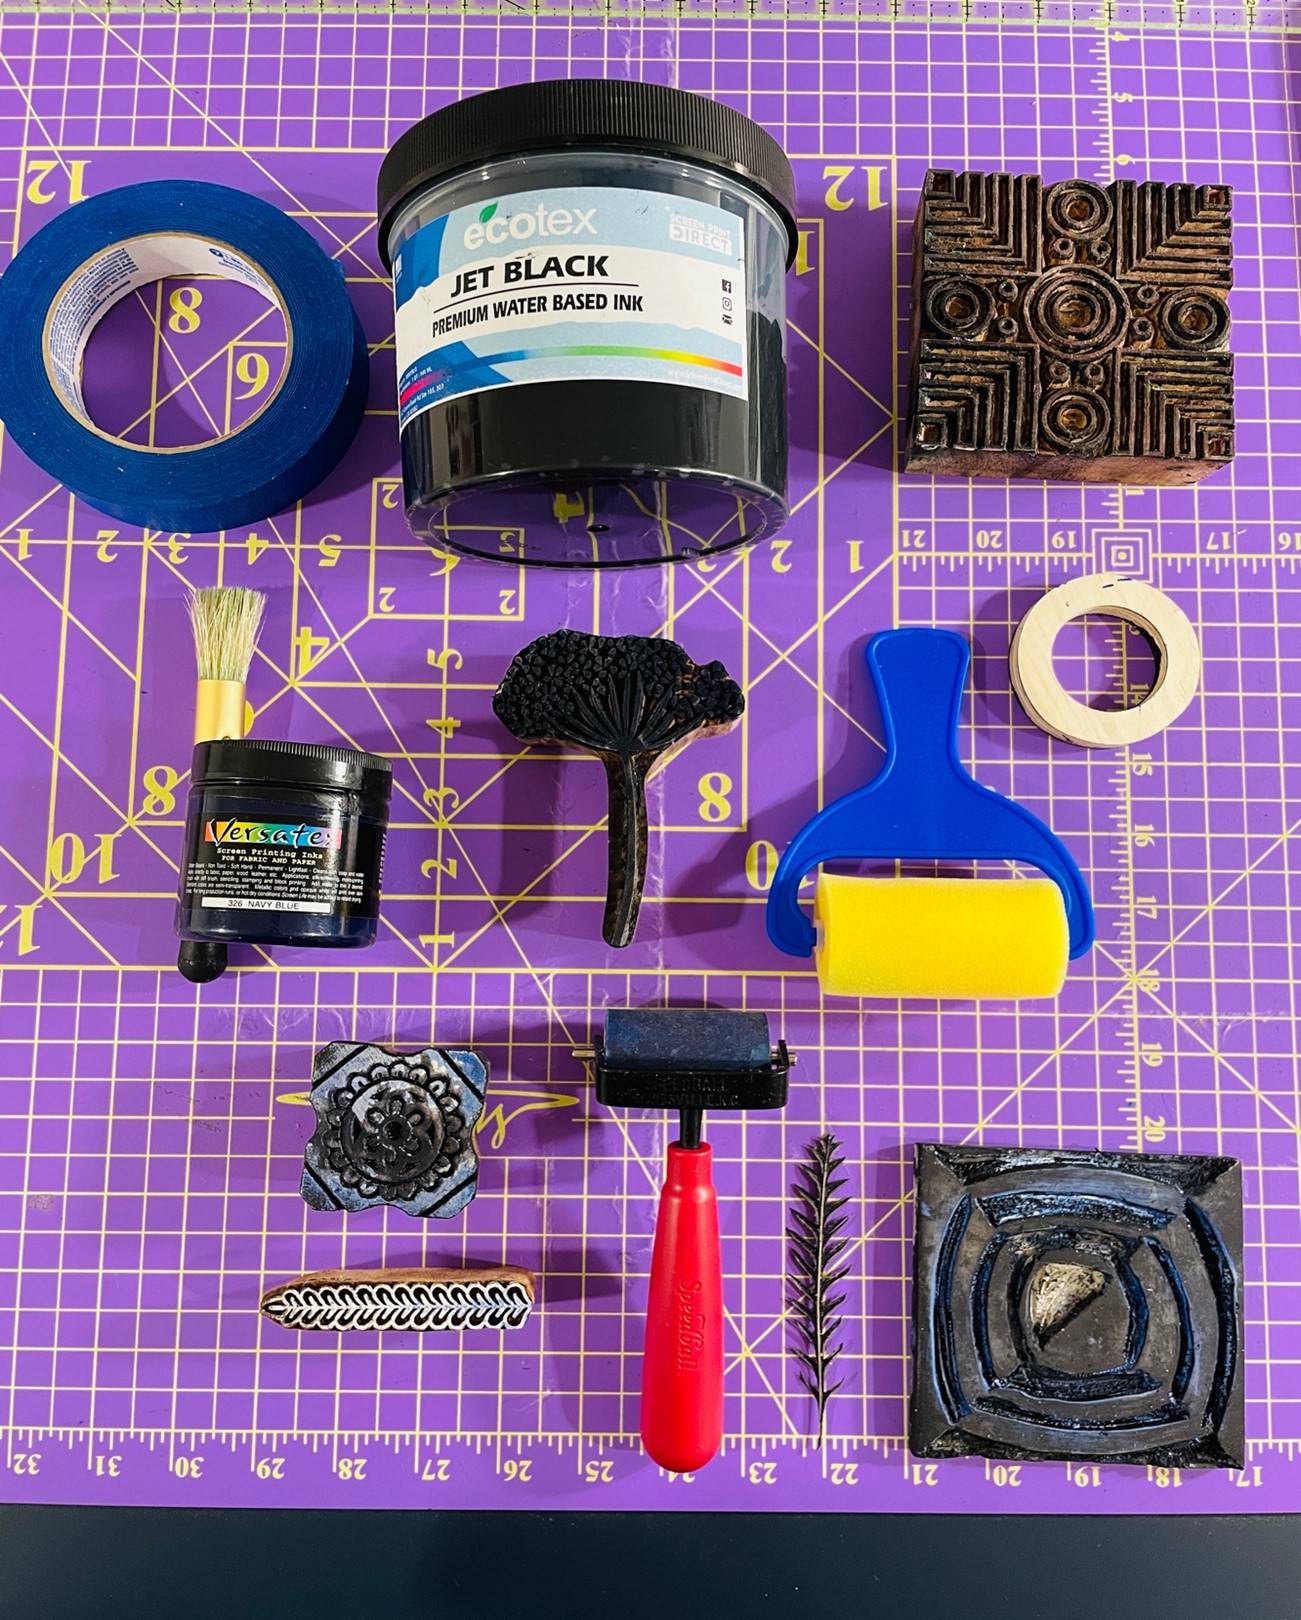
    I have included two brands of textile ink that I use; purchasing versatex which comes in smaller containers is more economical and allows you to explore without breaking the bank!


    Supplies:

    2 Solid cotton or linen fat quarters

    (yellow and light grey) - optional

    Contrasting Cotton thread

    Organ needle size 14

    Wooden blocks for printing

    Strong, dried leaves from garden or flower arrangements (optional)

    3” foam brayer with plastic handle

    Speedball hard brayer (optional)

    Versatex screen printing ink – 326 navy blue (small container)

    Ecotex Jet Black Water-based ink (giant container, optional)

    Painter’s tape

    Paper or plastic to cover printing surfaces

    Small brush (helps displace ink throughout block)

    Cardstock paper

    Paper plate to keep ink during the printing

    Gloves

    Apron

    Machine

    Janome M7 Continental HP foot and plate

    Foot F open toe and zig zag plate


     Prepare surfaces by covering the table with paper or plastic.

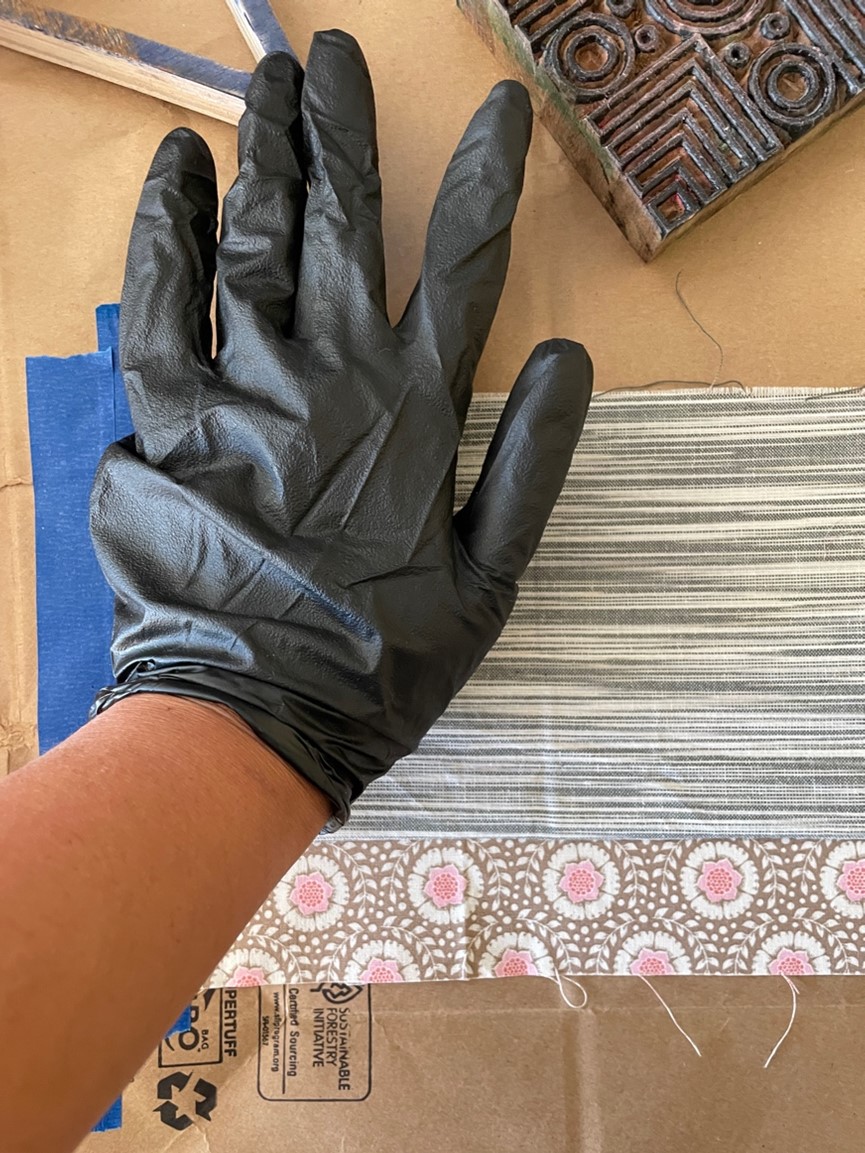
    Use painter’s tape to attach textiles to the table for a smooth printing surface; this makes it easier to lift blocks once the ink has been transferred to the cloth.
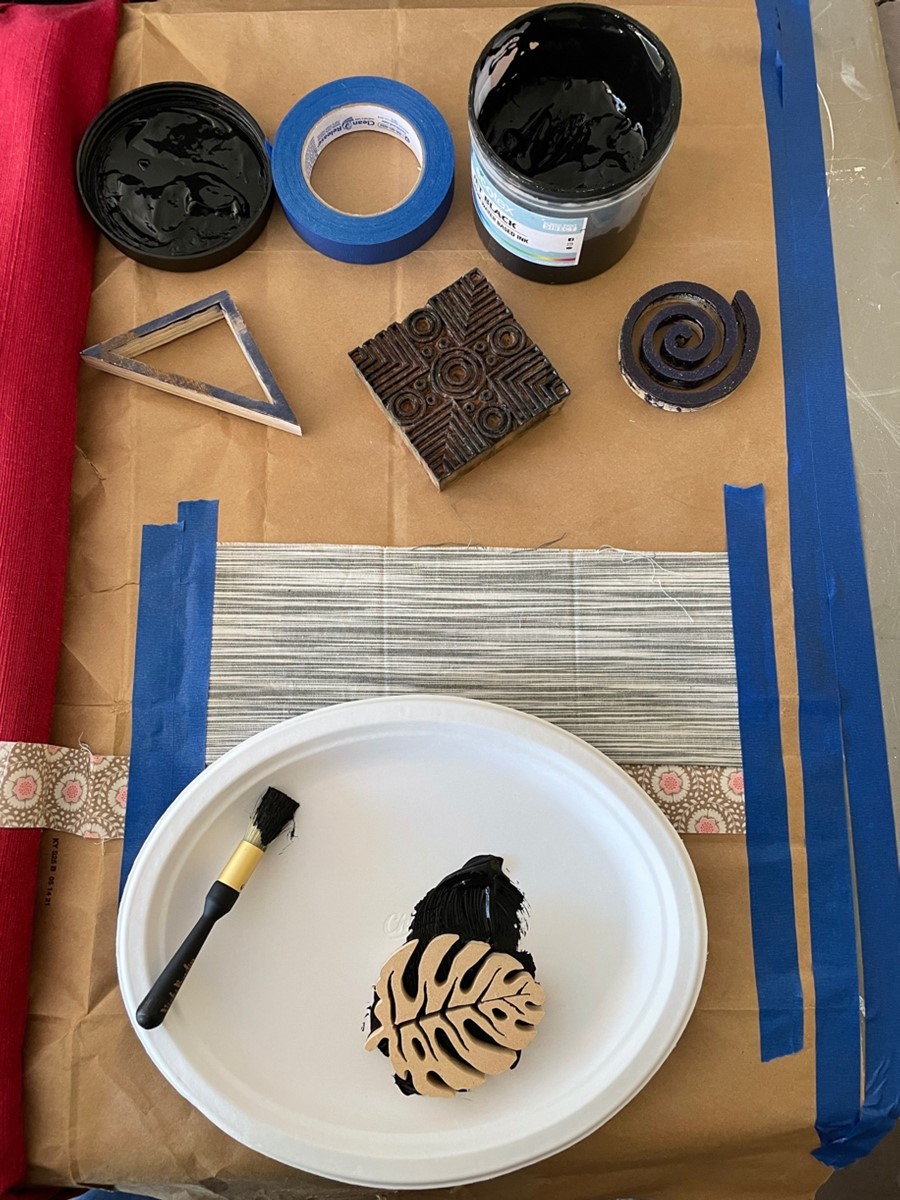
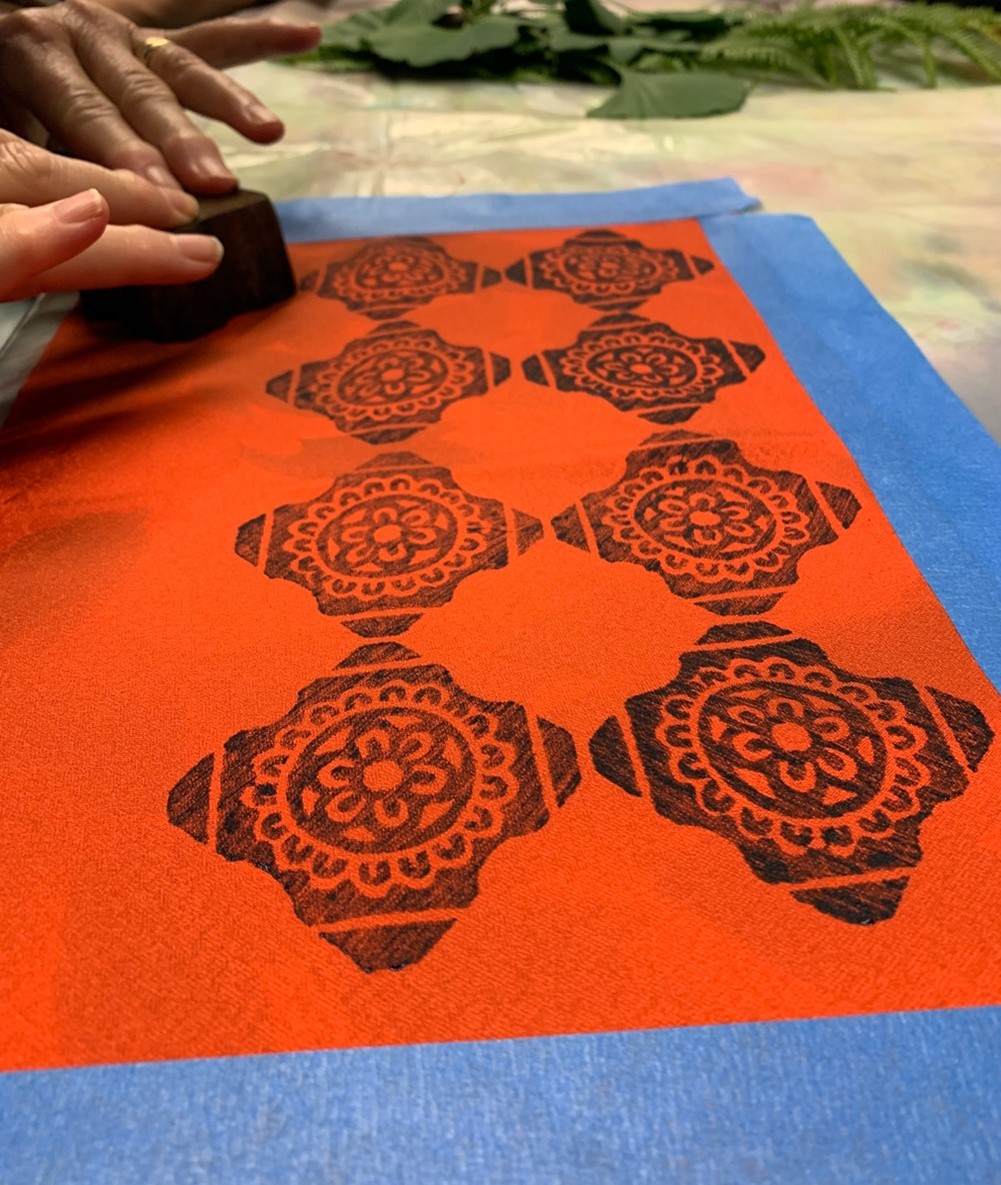


    1. Load a small amount of Ink into a disposable dish or dish used solely for ink. Use a variety of leaves to print if blocks are not readily available.
    2. TIP: Practice printing on cardstock to learn about ink and pressure, for a smooth design print. Once you are satisfied, you are ready to practice on your fat quarters.
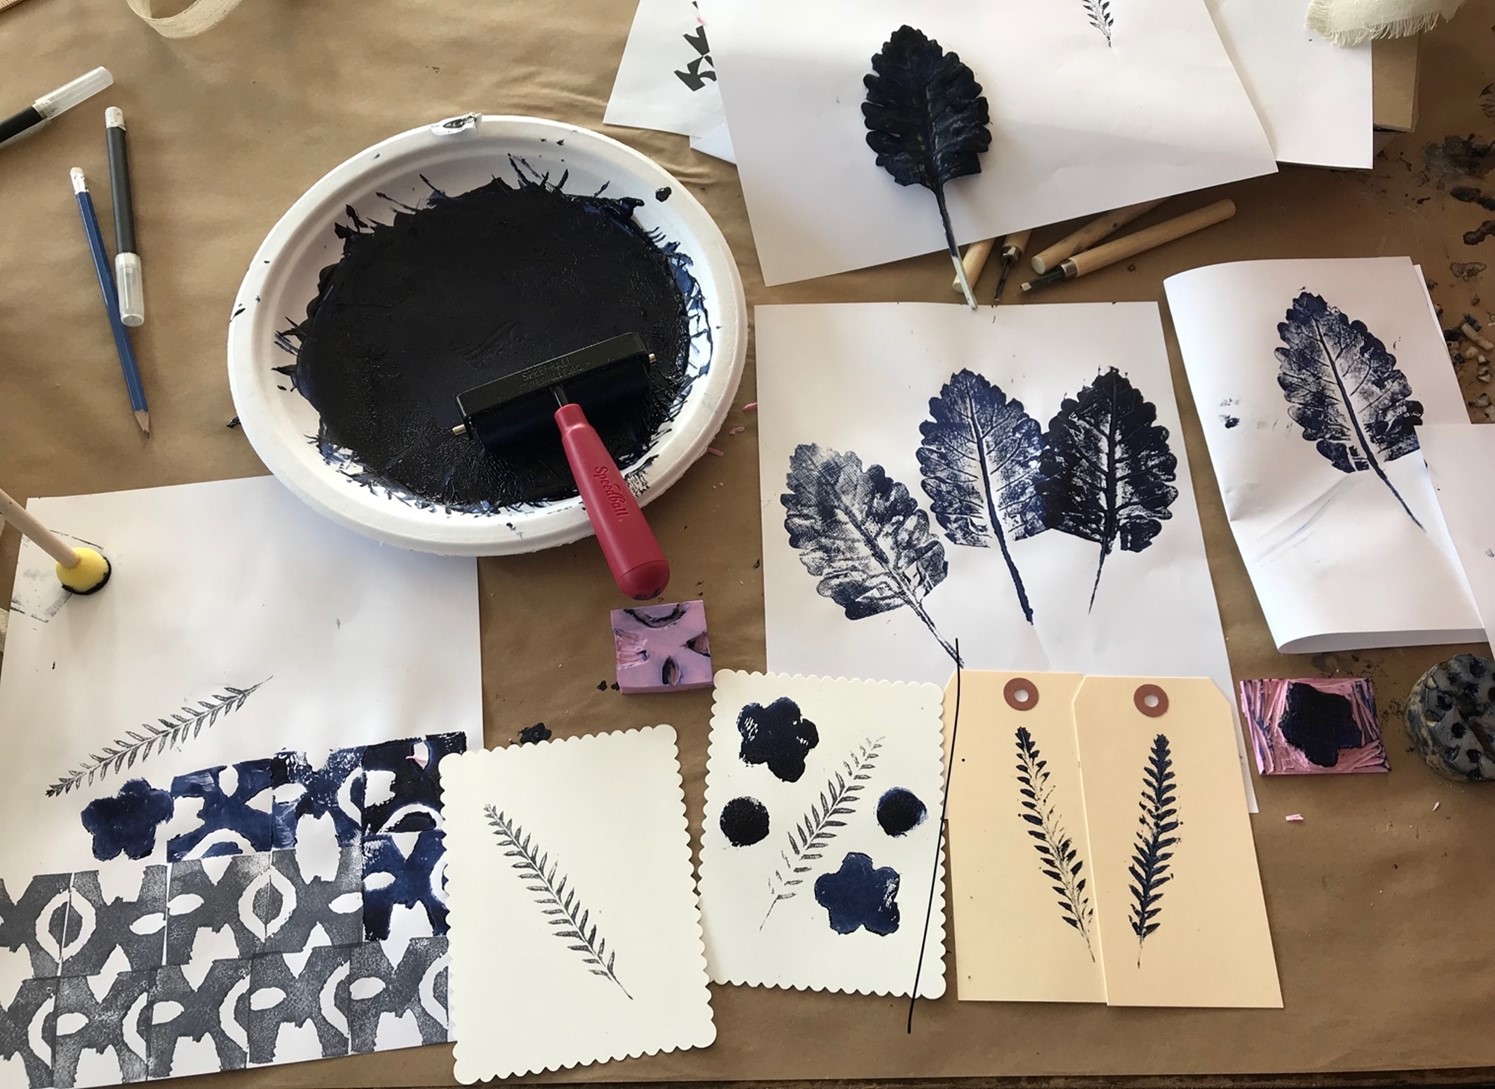
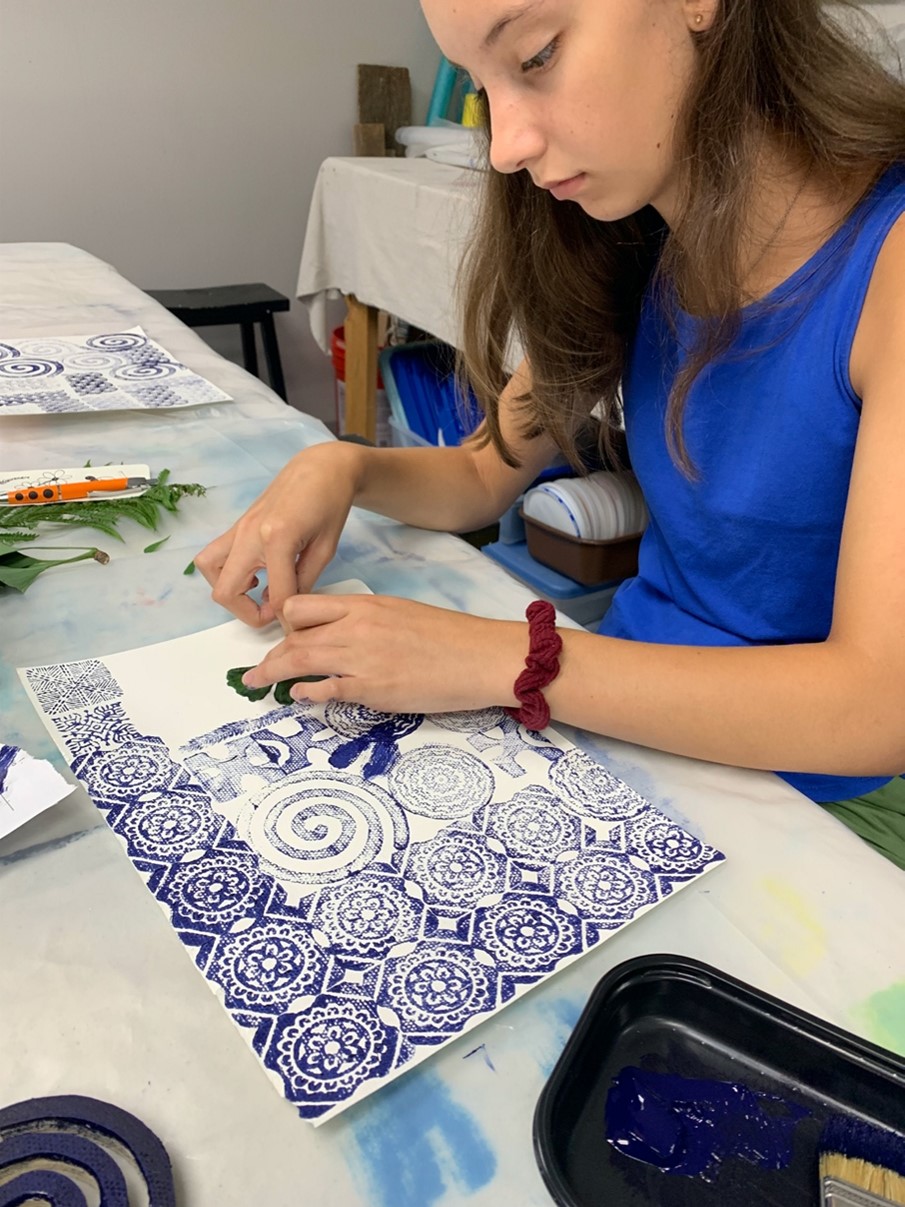


     Using the foam brayer or brush, apply textile ink evenly on a wooden block.
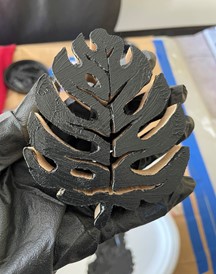
     

    Press block firmly onto cloth to make the imprint. Twenty seconds is a good estimate. Lift straight up to minimize ink spread. Tip: Cut fat quarters into smaller sections to make it easier to print.
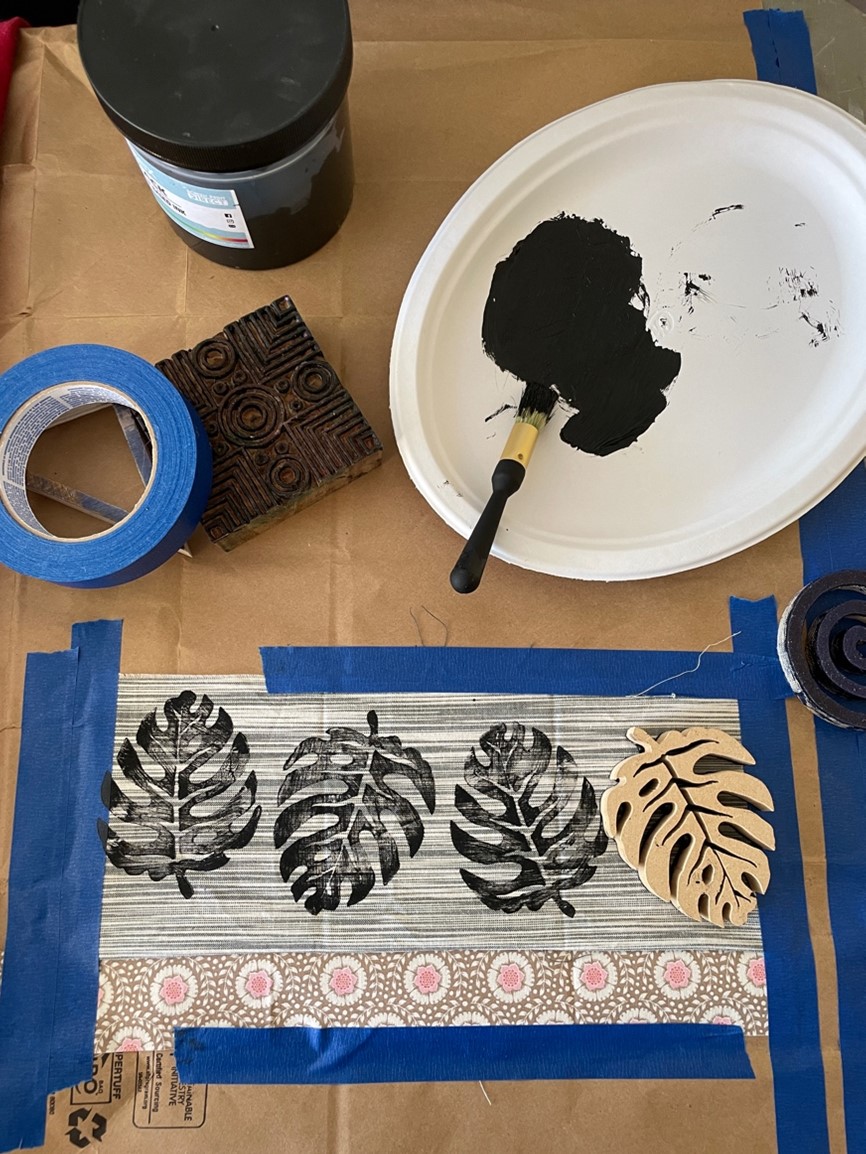


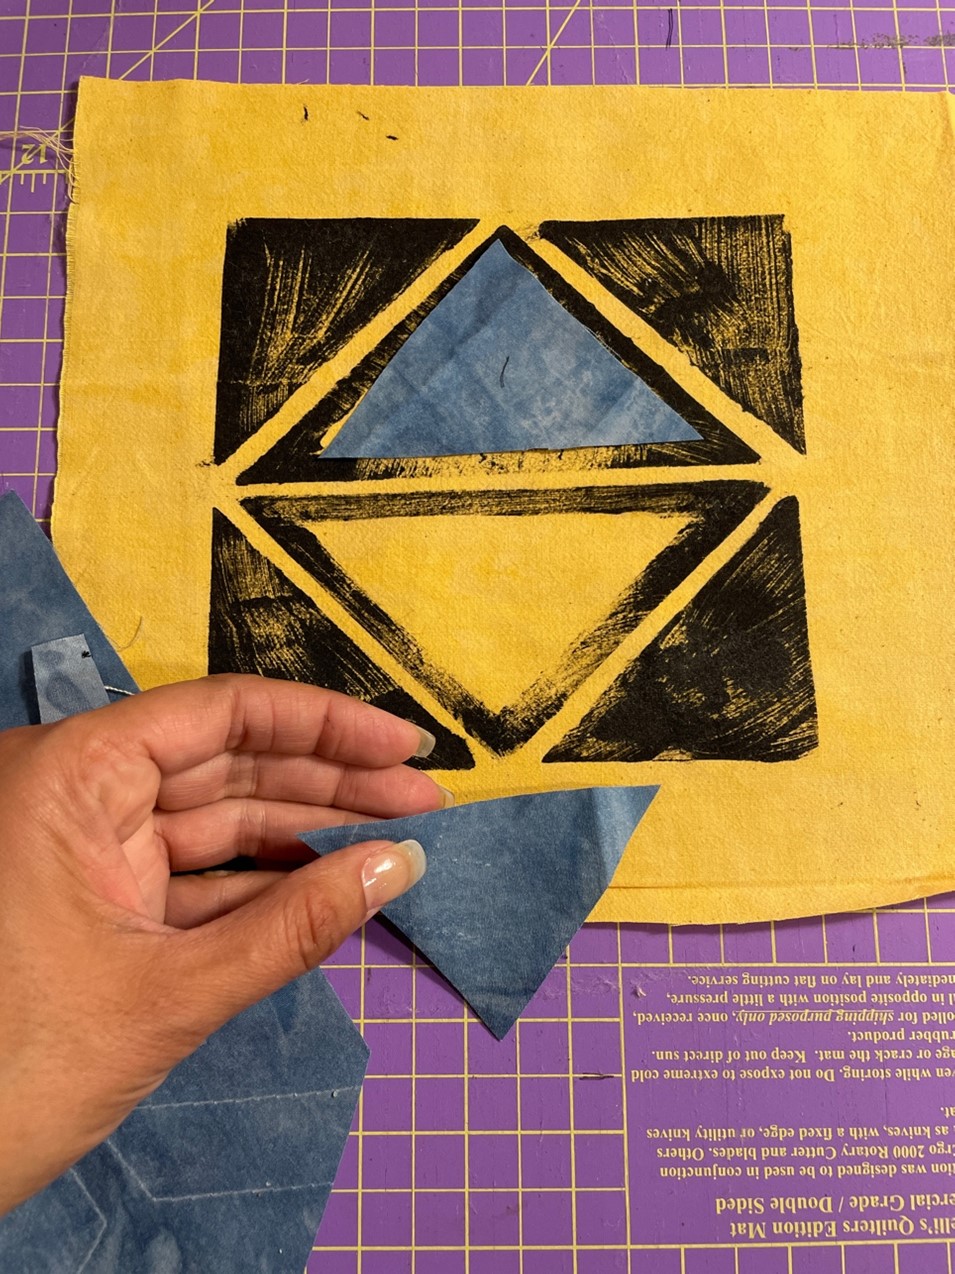
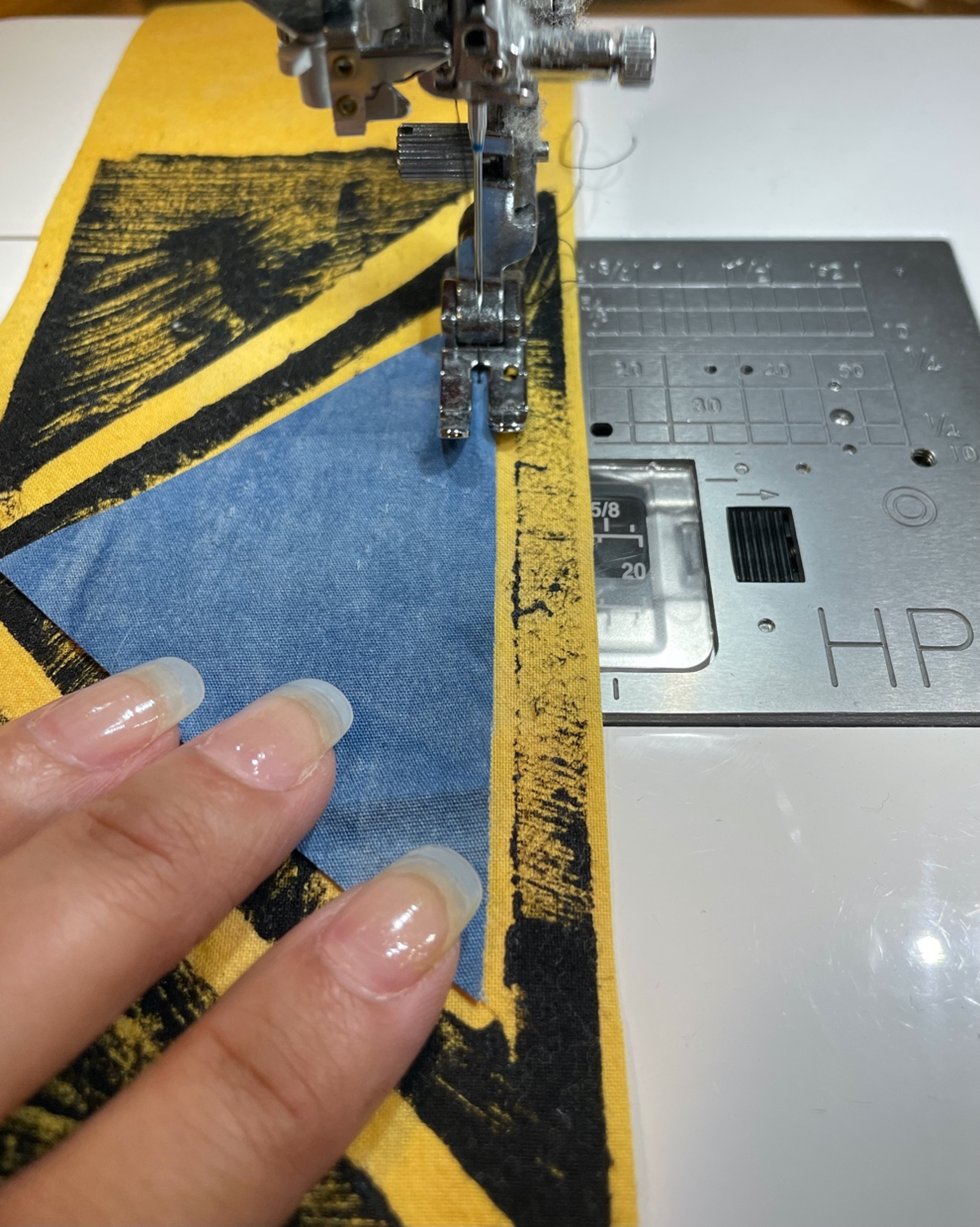
    Tip: Add fabric cutouts and raw edge applique using the hp foot, to the center of the shapes (see step 7 photos below). Apply more ink to blocks for greater design depth and less transparency. You will have to reapply ink every time you wish to print.

    Mix it up by using different block combinations, fabric prints, and/or textile ink colors.
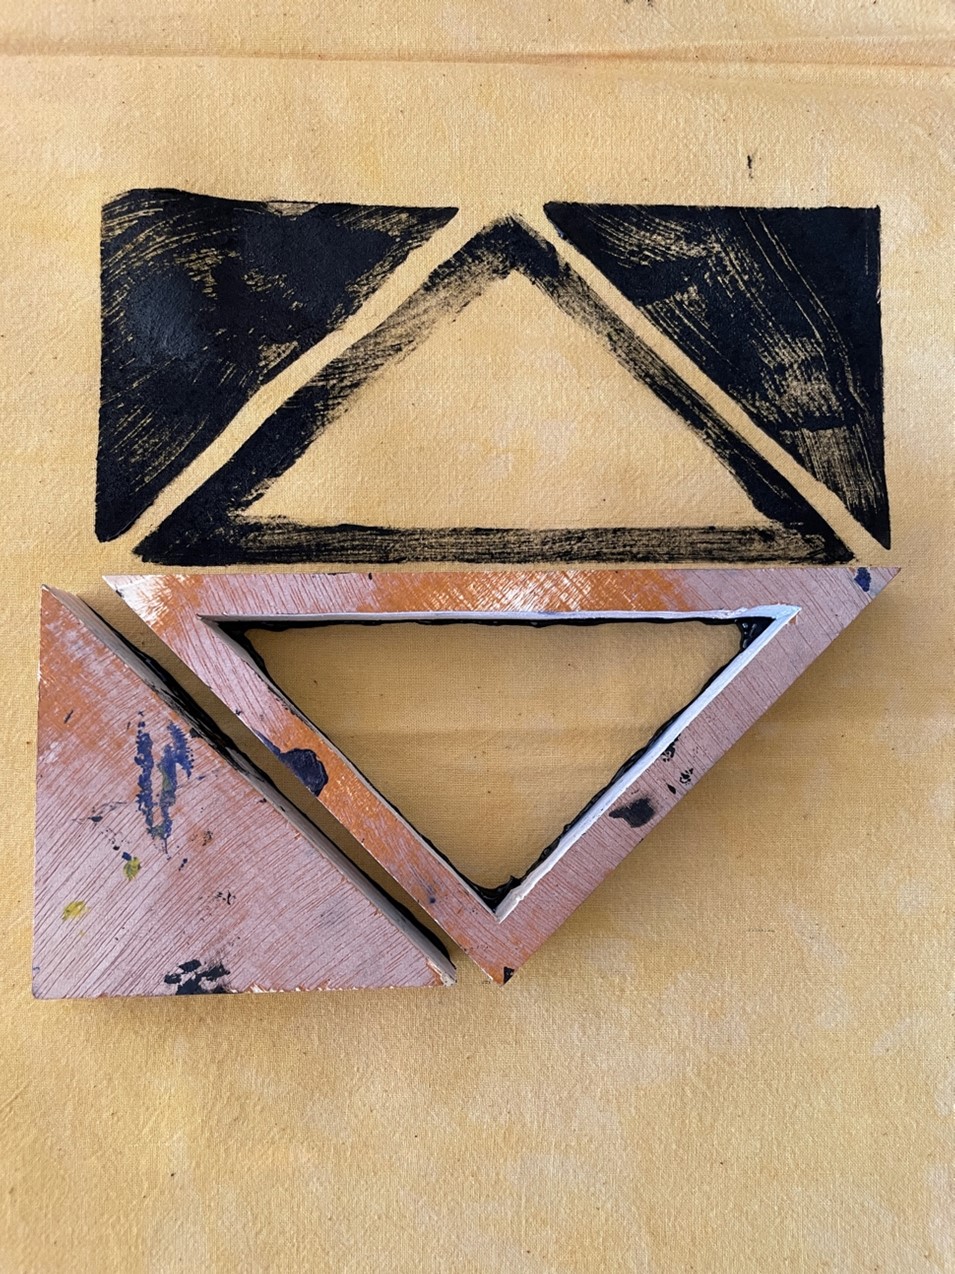


    Use the reinforcement stitch under Utility, to create more texture while stitching rows or adding raw edge applique. 

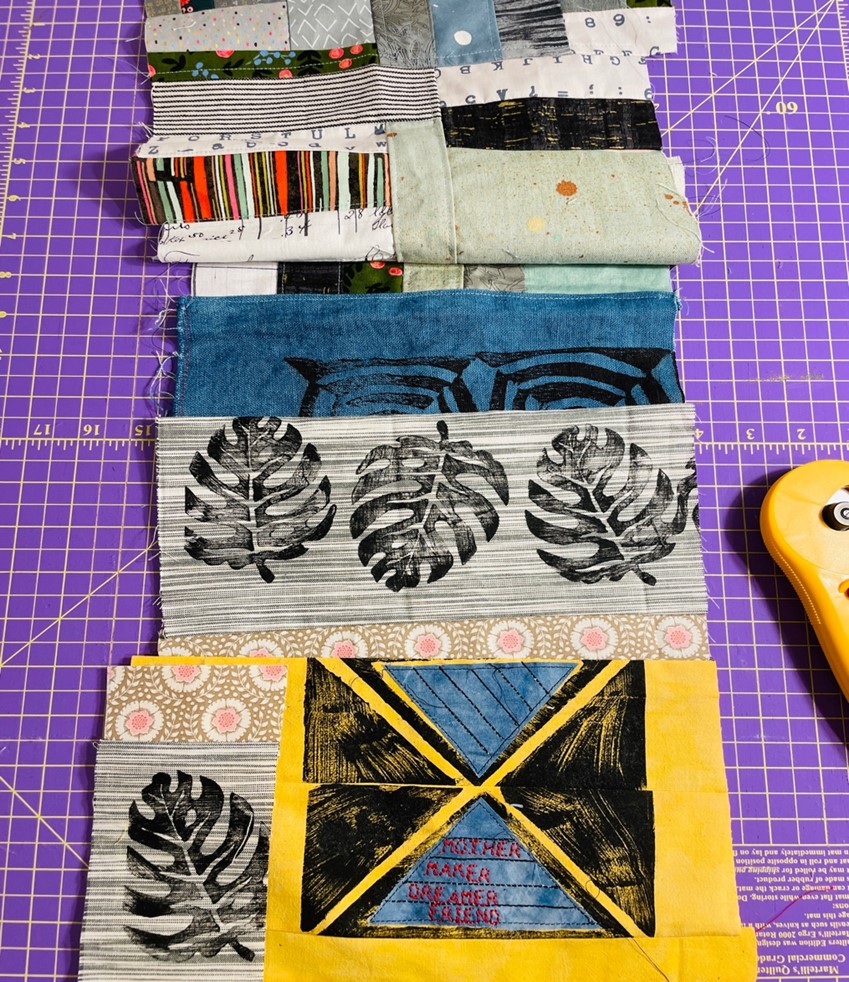
    I cut the printed, yellow block in ½, flipped and sewed it back together for a different look.


    You can follow the same format to create whole quilts or panels for garment making. For my complete scarf tutorial please visit Janome at https://www.janome.com/siteassets/inspire/projects/garment/boro-inspired-scarf/boro-insired-scarf-from-maday-delgato.pdf


    I love the look of upcycled materials or patchwork, that offer surprising combinations and liven up Midwestern winters. Adding block printing to projects, using the ink color you most like, gives you the flexibility to customize everything in our homes and even what we wear. It can also help us create a bridge where younger generations embrace machine sewing that includes playful techniques while honoring traditions.

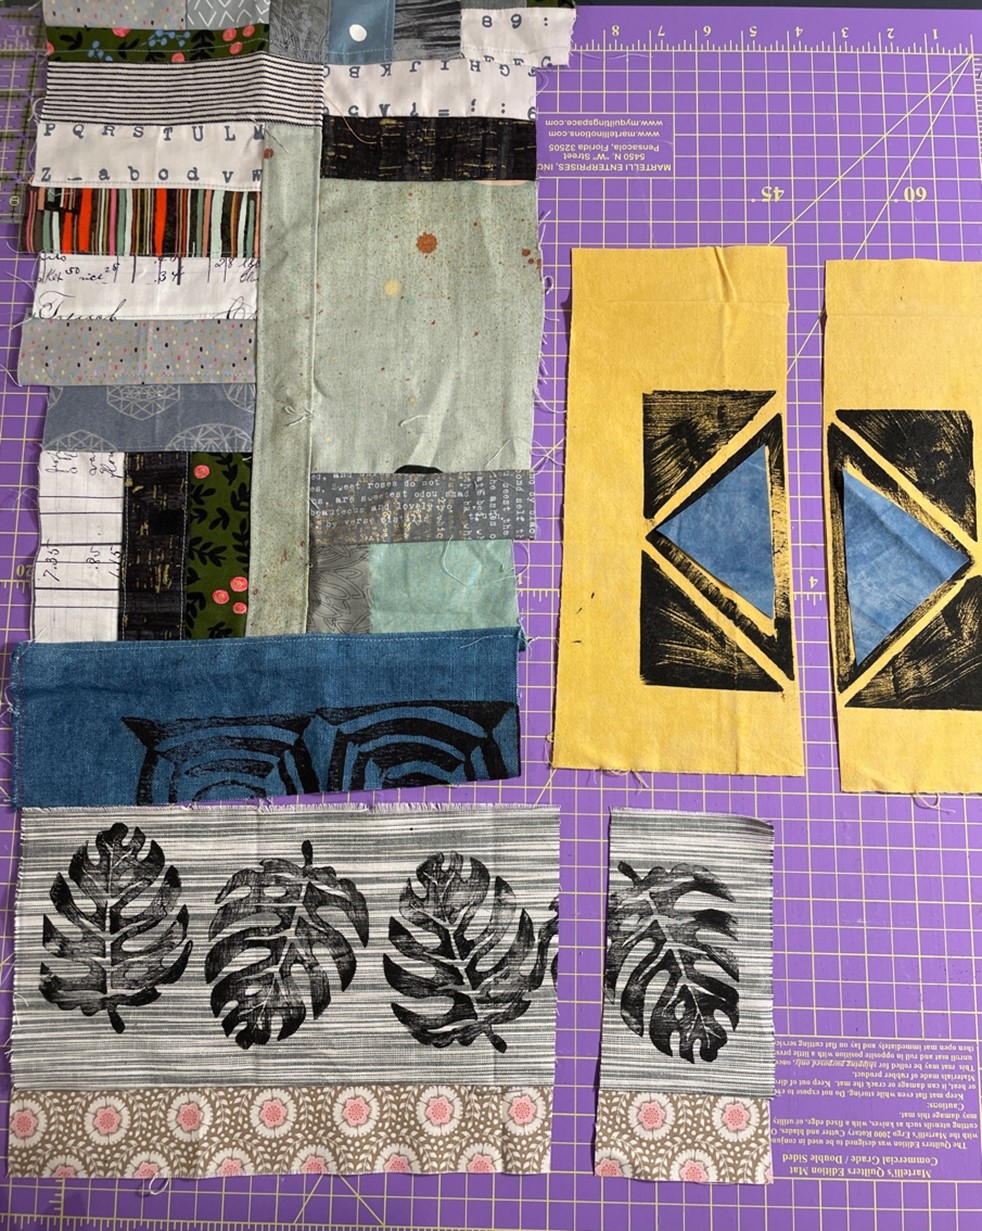
    Below I share a few projects that include block-printed segments.


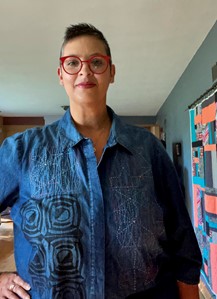
    I block printed on this store-purchased shirt with Ecotex Jet Black Water-based ink.


    The tote below was machine pieced using my Janome M7 Continental. The pattern is the Fika Tote by Noodlehead. I loved including the block printed panel (below), as part of the tote’s exterior pockets.
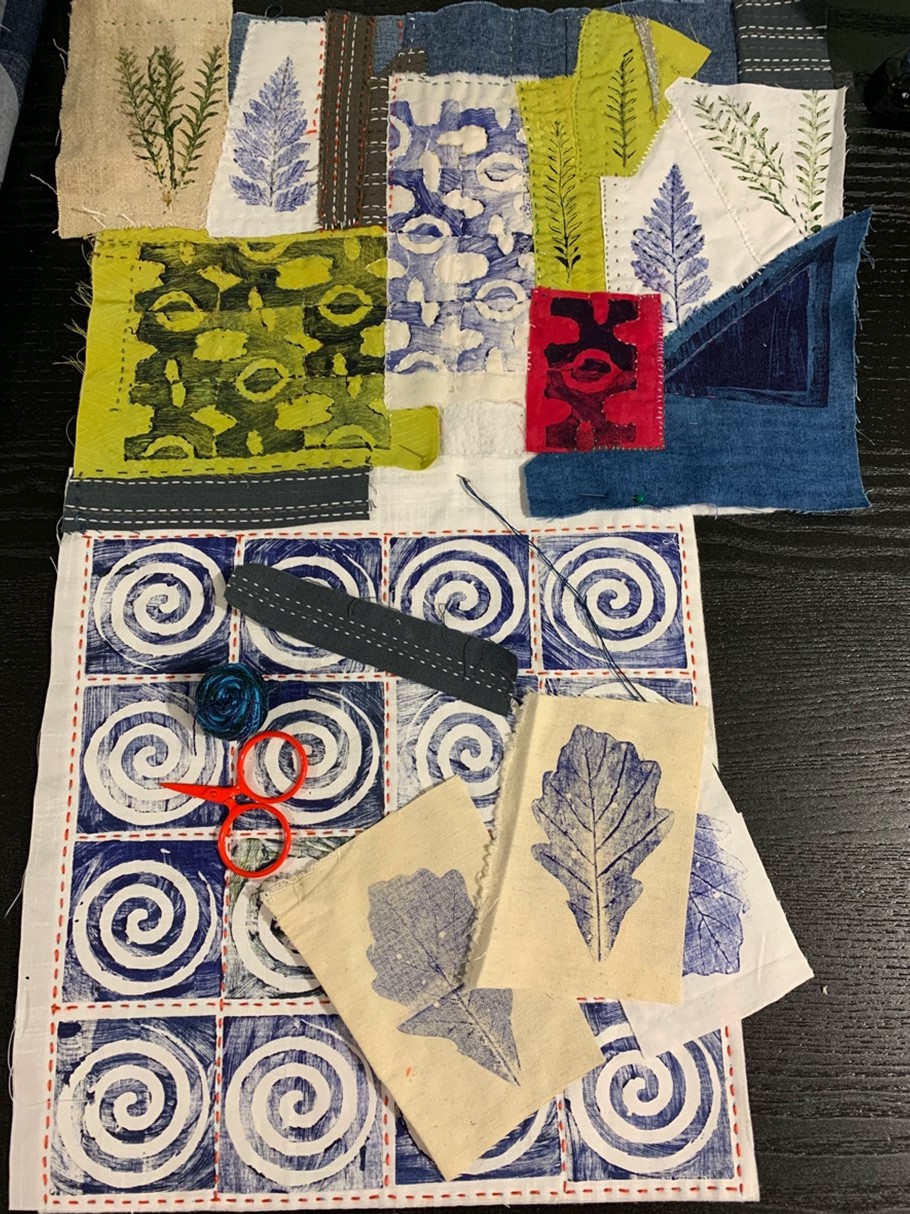
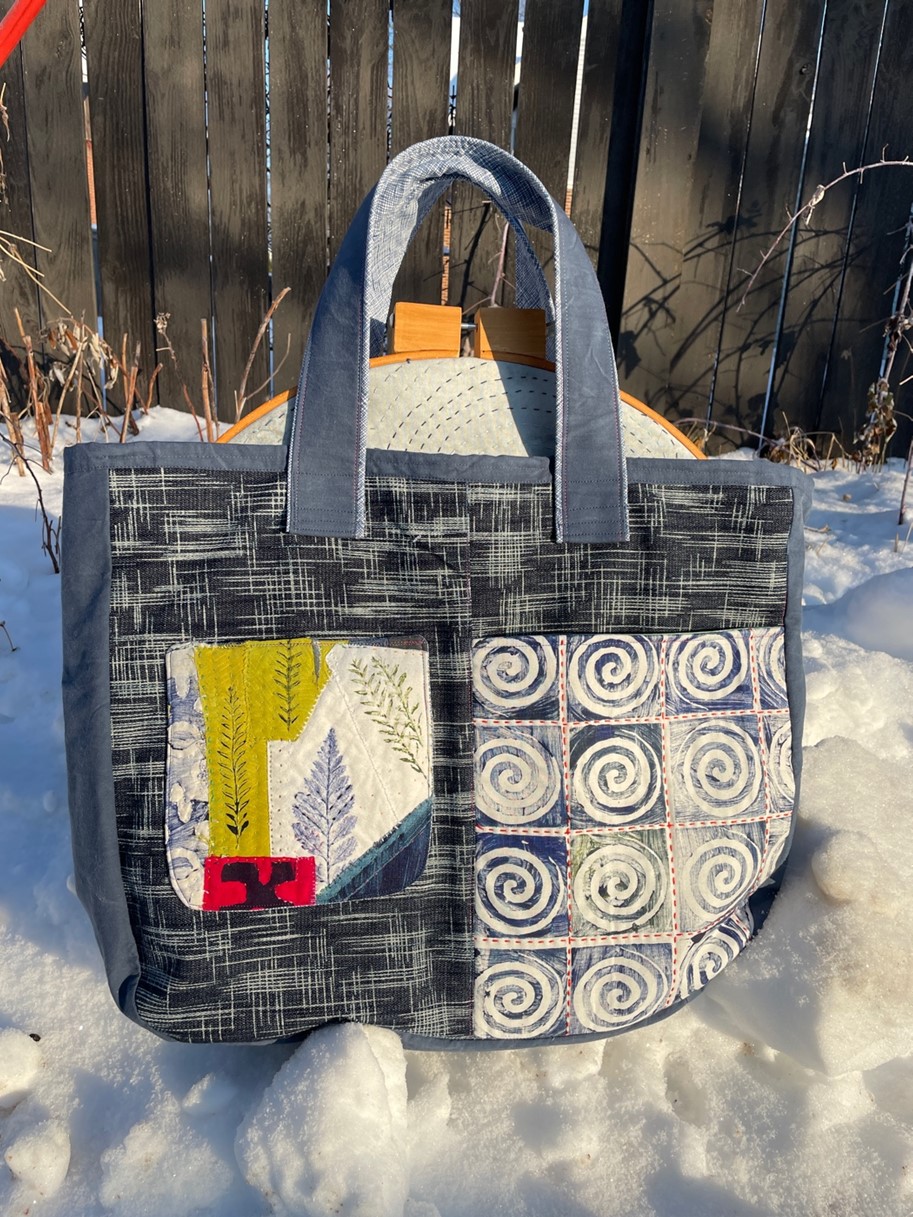


    I hope you make this technique your own and always have fun sewing.


    Happy Autumn!


    Maday

    www.sustainabletextiledesign.com


  • 9/7/2021

    We are delighted to have Janome Canada's National Consumer Education Manager Michael Smith on the blog! Michael is an expert with all things Janome and loves to share his knowledge in Janome machines and attachments in a fun way! 

    If you have questions about which Janome sewing machine will meet all of your needs (and then some), Michael's review will probably answer many of your questions. You can also visit your local Janome Dealer to see firsthand what this machine can offer you! 


    As you know, Janome is all about giving you choices; there’s pretty much a machine for everyone! One reason you may choose to upgrade to a more advanced, computerized machine, like the Janome Continental M7 Professional is to gain some convenient, time-saving features and extra presser feet which speed up production while improving the accuracy of your results.

    Janome Continental M7 Professional

    My partner, Joe, recently shared with me his top 5 favourite features of the Janome Continental M7 Professional, which he used to sew a very special quilt for me as a surprise birthday present. Joe has tackled a few sewing projects before, so isn’t quite a beginner, but this is the first time he sewed an entire project all on his own, without me guiding or helping him. The Janome Continental M7 Professional was all the help he needed!

    Seeing Double Stars – a free pattern from American Patchwork and Quilting. Yes, I’m a BIG Star Wars fan!


    1/4″ Presser Foot with Guide: Janome has many presser feet which help achieve the perfect 1/4 inch seam, which is the hallmark seam allowance used in quilting. See some of the options of Janome 1/4″ presser feet on the Janome HQ You Tube channel. The Janome 1/4 inch presser foot with a guide; the “O” foot comes with the machine and was Joe’s preferred choice to piece the quilt blocks together as he liked having the guide to help improve the accuracy of his seam. He especially loved using it for the many half-square triangles which make up the star points, as he felt that helped him achieve sharp points when he sewed the blocks together.

    Janome 1/4 inch Presser Foot with Guide comes with or is available for most Janome sewing machines.
    Sharp points of Half-Square Triangles are easy to achieve with the 1/4″ presser foot.

    LCD Touch Screen Controls: Along with those 1/4 inch presser feet, there are many ways to achieve an accurate 1/4 inch seam, and a computerized machine like the Janome Continental M7 Professional gives you those choices with just the touch of the screen! Given Joe sewed this quilt on the sly, without my knowledge, he didn’t want to do anything to mess up my machine, so the icons on the large LCD screen did all the machine adjustments for him without any guesswork. It’s great to have a machine do some thinking for us, which minimizes mistakes.

    Adjust stitch width to 91 needle positions; adjust stitch length; select the Auto-Pivot icon to automatically keep the needle in the fabric while lifting the presser foot, for example.

    A large 7 inch LCD touch screen makes adjusting the machine a breeze!

    Or, select the T-shirt icon for the Sewing Applications Menu, which offers a variety of automatic machine adjustments for various sewing functions, like sewing on a button or installing a zipper, and quilting functions, like Ruler Quilting, Free Motion Quilting, and Patchwork. There are sew many adjustments available at your fingertips!

    Janome Sewing Applications Menu built-in to the Continental M7 Professional saves time, and saves possible mistakes by automatically adjusting the machine
    with just the touch of the screen!

    Workspace: No matter what you’re sewing, you need an ample work area to conveniently and efficiently construct your project. The Janome Continental M7 Professional features an impressive 13.5 inches to the right of the needle by 5.5 inches high. Lots of room for a quilt of any size! Joe also appreciated having the large extension table, which comes included with the machine, so he had lots of room to support the quilt as it grew.

    Love, love, love that convenient accessories drawer!

    Convenient Push-Button Controls: Since Joe made this quilt while I was out of the house, time was very precious to him, so he made use of the many convenient, time-saving features of the Janome Continental M7 Professional; features which are also built-in to many electronic Janome sewing machines which any sewist will love! Reverse, Lock-Stitch, Needle Up/Down, Scissors, Auto-Presser Foot Lift, and the Speed Control lever are built-in functions conveniently arranged above the needle area, so they’re within easy reach, and help speed up production.


    Bright Lighting: Another important feature on any machine is bright lighting so we can see exactly what we’re doing. After all, you can’t achieve accurate results if you can’t see where you’re stitching! Joe loves the abundance of bright LED which washes down all over the bed of the Janome Continental M7 Professional; in the throat space and in two places around the needle. You can even adjust the brightness to suit you, so there’s less strain on your eyes. Joe was often sewing later at night, so having an ample supply of crisp LED lighting helped keep his stitching in order and helped reduce strain and fatigue on his body.

    The Instruction Manual shows how to adjust the lighting in the Settings Menu so you get it where and when you need it.
     With no lights on in the room, there’s plenty of bright LED lighting available from the Janome Continental M7 Professional.

    There are definitely more fabulous features of the Janome Continental M7 Professional which Joe has yet to discover, but he’s off to a great start now that’s he’s truly more comfortable with the machine. The overall ease of use; intuitive, feature-rich controls of the machine make it easy to see why!

    I can’t wait to receive my next quilt! (hint, hint, Joe, lol!)

    May the Force be with you in all your sewing endeavors! lol!

    Happy Sewing!


    You can test drive a Janome Continental M7 by visiting your Local Janome Dealer, find your Local Dealer HERE


  • 8/19/2021

    Welcome back to the Rainbow Quilt Block of the Month designed by Janome Maker Carolina Oneto! You are over halfway done with your beautiful quit! Give yourself a pat on the back and get ready to start your next block!


    This month you will learn how to make block seven, the Rolling Stone quilt block.


    From Carolina:


    I sew all the blocks on my Janome 1600P-QC, which I really love, one of the great things about this machine is that the bobbin winder is independent of other mechanisms and the speed control is variable depending on the user’s need. These are only a couple of the features that make sewing and quilting fuss-free.


    Please read through all instructions prior to piecing. Remember that all the blocks will have a finished size of 12” so that means the unfinished size will be 12 1/2”. All seam allowances are 1/4"


    Fabrics:


    White background


    • Five 4 1/2” squares
    • One strip 2 1/2” x 18”


    Light Blue:


    ·Sixteen 2 1/2” squares


    Blue:

    One strip 2 1/2” x 18”


    INSTRUCTION FOR SQUARE IN A SQUARE UNITS


    Mark the wrong side of the LIGHT BLUE 2 1/2″ squares in half once diagonally. Lay marked square right sides together with a white 4 1/2″ square and sew on the marked line. Repeat on the diagonally opposite corner. Repeat on the other corners. Make 4. Unit measures 4 1/2″ unfinished.


    INSTRUCTIONS FOR THE RECTANGLE UNITS


    • Sew the two long strips of fabric, right sides together. Next, cut your sewn strip of fabrics into four equal parts. 4.5”. Press to the dark side.


    FINAL ASSEMBLY:

    • Arrange your blocks in the correct layout
    • Using a quarter-inch seam allowance, sew together in rows. Join all rows, using a quarter-inch seam allowance.
    • Press your completed block and trim down to 12.5″ square (if necessary).


    And that’s all!

    I hope you enjoy this new block! And don’t forget to share it!


    Block One     HERE

    Block Two     HERE

    Block Three  HERE

    Block Four    HERE

    Block Five     HERE

    Block Six      HERE   


    After you make your block, we’d love to see them!

    Janome Sewing Classroom

    Janome America Instagram – Be sure to tag @janomeamerica and use the hashtag #janomemakes and also tag @carolinaoneto!


Prev 1 2 3 4 5 6 7 8 9 10  ... Next 

Tags

#freesewingtutorial 4th of July Applique Block of the Month Bunny Carolina Oneto Christmas Continental M7 Cosplay Cosplay Tutorial Costume Crafting Decorative Stitches DIY DIY Accessories DIY Father's Day Gift DIY skirt Embroidery Everyday Applique Father's Day Fiesta Weave Lunch Mats Fiesta! Four Fabric Quilted Project Bag Free Bag Pattern Free Pattern Free Quilt Pattern Free Sewing Free Sewing Pattern Free Sewing Tutorial free skirt tutorial Free tutorial Fun Projects Garment Sewing Good Tidings Quilt Along Green Goddess Dress Handmade Gifts Heidi Proffety Historical Costume Tutorial Holiday Sewing Home Decor How To How to Machine Bind How to Make a Quilt How to Make a Quilt. Free Quilt Pattern How to Make Panties How to Quilt How to Sew How to sew a top Janome Janome 9450 Janome AirThread2000D Janome Artisan Janome Artistic Digitizer Janome Conitential M7 Janome Continental M7 Janome HD3000 Janome Maker Janome MamoryCraft 15000 Janome MemoryCraft 15000 Janome MemoryCraft 6700p Janome S9 Janome Sewing Machine Janome Skyline S7 Janome Skyline S9 JanomeHD9 Lifestyle Machine Embroidery Maureen Cracknell MDW Melanie Call Memory Craft 15000 Moon Garden QAYG Quilt Block Mother's Day gift Napkins Patriotic Pattern Pillow Pillows Project QAYG Quilt Block Quilt Quilt As You Go Quilt Block Quilt Block Pattern Quilted Project Bag Quilting Quilting How to Quilt Rainbow Block of the Month Rainbow Quilt Block of the Month Rainbow Quilt BOM Reversible Zippered Pillow Rolled Hem Foot Scrappy Star Pillow Sew Sewing Sewing Machine Sewing Project Sewing Tutorial Skyline S9 SkylineS9 Stuffie Summer Sewing Project The Hype Tutorial Valentine's Day
DEALERS
The TWO Closest Dealers to you are:
196 Boston Post Road , Orange CT, 06477
203-878-1654
19 PUTNAM AVENUE , PORT CHESTER NY, 10573
914-934-2934
Find Additional Dealers